| KIT #: | 02083 |
| PRICE: | $3.00 in a bag |
| DECALS: | One option |
| REVIEWER: | Scott Van Aken |
| NOTES: | 1978 tooling |
| HISTORY |
The Merlin Mustang just about didn't happen. Hard to believe, but there was a
great deal of opposition against what turned into arguably the finest US fighter
of WWII. It all started when North American was asked to build P-40s for the
British. They said they could do better and in a very short time, the Allison
powered P-51A was designed and flew. It was a superlative fighter, but its
Allison engine limited it to low level, making it unsuitable for bomber escort.
The RAF was delighted with the plane and it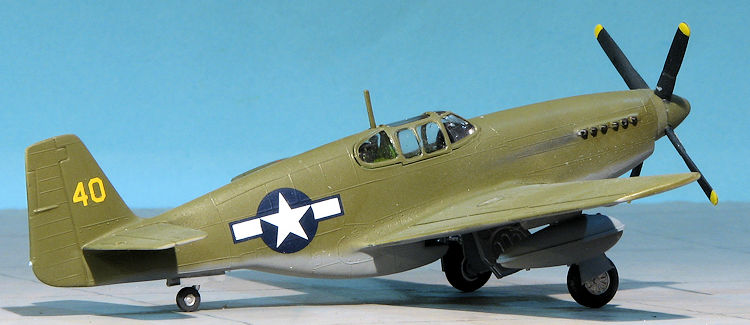 soon was issued to several Army
Co-operation units for tactical recon and for limited fighter bomber operations.
The USAAF eventually bought some and used them as dive bombers or sent them to
the CBI.
soon was issued to several Army
Co-operation units for tactical recon and for limited fighter bomber operations.
The USAAF eventually bought some and used them as dive bombers or sent them to
the CBI.
The British experimented with the Mustang since the airframe was so good, by installing a Merlin engine into it as used by the Spitfire. This transformed the aircraft as now it was not only faster, but able to operate at high altitude. Still, Army brass in the US wanted nothing to do with it as it wasn't 'designed for us' so looked upon as a 'foreign' aircraft. Fortunately, many influential USAAF pilots in the UK had the chance to fly it and eventually their constant pestering and clamoring for the Merlin Mustang resulted in the P-51B. While it meant that the aircraft did not enter service as soon as it could have, once it did in early 1944, the writing was on the wall for the Luftwaffe as now the USAAF had a potent, long range fighter that could stay with the bombers for the entire mission.
| THE KIT |
 Not
exactly a new kit, but then, when this one came out, the only other 1/72 P-51B
on the market was the even older kit by Monogram.
Not
exactly a new kit, but then, when this one came out, the only other 1/72 P-51B
on the market was the even older kit by Monogram.
You basically get two sprues worth of parts along with a separate sprue just for the lower wing and one for the clear bit. The lone thing under wings are a pair of drop tanks. The cockpit is Spartan to the max with only a single piece floor/seat on which you put a pilot figure. No instrument panel, no control stick, no rudder pedals. However, the thick one-piece canopy is such that little will be seen in there anyway.
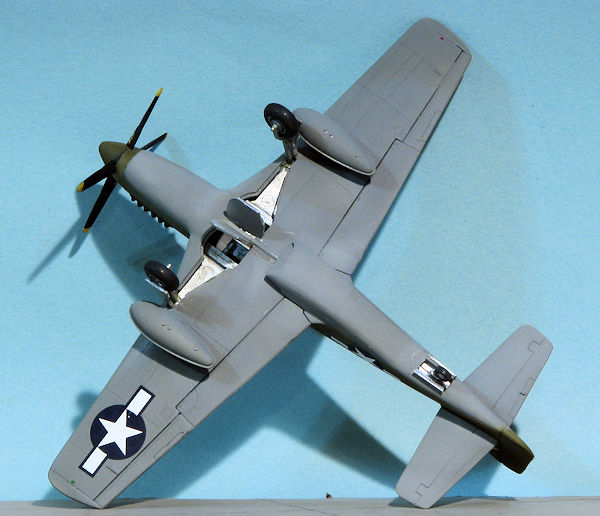
Each fuselage half has half a fin/rudder molded onto it. Also molded in place are the exhaust stacks. The tail planes are each an individual piece that slot into the rear. Wing is a one piece lower section and each of the upper wing halves include the full wing tip and control surfaces. There is no full wheel well and the gear doors are molded together for the 'in flight' crowd. Main wheels seem a bit fat and the main gear struts are a bit thin looking. The tail wheel is molded in with the tail gear leg. In the front, the forward half of the spinner is molded with the prop blades. This attaches to the rear of the hub that you've previously installed so that it will all spin. Though you do get a radio mast, no pesky pitot tube is provided.
 Probably the biggest issue with the kit are the P-51D wings
with the wedge shape near the wing roots. This should be pretty much a straight
shot across. I am not sure where this started, but quite a few kits have this
feature so it is not only Airfix. I can only assume that somewhere along the
line model makers got the idea that the only difference between B/C and D wings
were the number of guns.
Probably the biggest issue with the kit are the P-51D wings
with the wedge shape near the wing roots. This should be pretty much a straight
shot across. I am not sure where this started, but quite a few kits have this
feature so it is not only Airfix. I can only assume that somewhere along the
line model makers got the idea that the only difference between B/C and D wings
were the number of guns.
Instructions are well done with the usual Humbrol numbers for paint information. Markings for 'The Hun Hunter/Texas' in OD over natural metal with white wing and stab bands on the upper surface and black on the underside are provided. The nose and spinner are white. Decals are fairly well done and typical of the time.
| CONSTRUCTION |
I started this one by painting all the interior bits (actually bit) and the inside of the fuselage with Testors US Interior Green. When dry, a seat harness was made from masking tape and the interior trapped between the fuselage halves along with the back of the prop spinner and its prop shaft.
 Some filler work was done on the seams and the wing assembled. Once that was
treated for seam work, it was glued to the lower fuselage. Fit is actually quite
good, though the front wing/fuselage join needed some work and I also took care
of the small seam on the upper wings. Next were the tailplanes, which fit well.
At this point, I decided to go ahead and mask the canopy. Not having to deal
with 'fiddly stuff' like separate oil cooler and coolant intakes along with any
sort of under fuselage radiator exit vents makes kits like this go rather
quickly.
Some filler work was done on the seams and the wing assembled. Once that was
treated for seam work, it was glued to the lower fuselage. Fit is actually quite
good, though the front wing/fuselage join needed some work and I also took care
of the small seam on the upper wings. Next were the tailplanes, which fit well.
At this point, I decided to go ahead and mask the canopy. Not having to deal
with 'fiddly stuff' like separate oil cooler and coolant intakes along with any
sort of under fuselage radiator exit vents makes kits like this go rather
quickly.
With the canopy masked, it was installed. Fit is fairly poor with lots of gaps, I faired in the biggest in the front with clear paint, but left the others alone. I also installed the antenna mast. The prop needs a lot of cleanup, primarily because at the base of each blade is a raised block of plastic behind and to the side. I used a grinder to remove most of this from each blade base and then a file to take care of smoothing things out. Then it was time for some paint.
| COLORS & MARKINGS |
I started looking through my decal stash and found that the majority of P-51B
markings I had were for European based planes, most of which had a Malcolm Hood,
something not included in the Airfix kit. This led me to snag an Aeromaster
sheet, 72-177 for 23 FG Mustangs. In particular, I went for the only
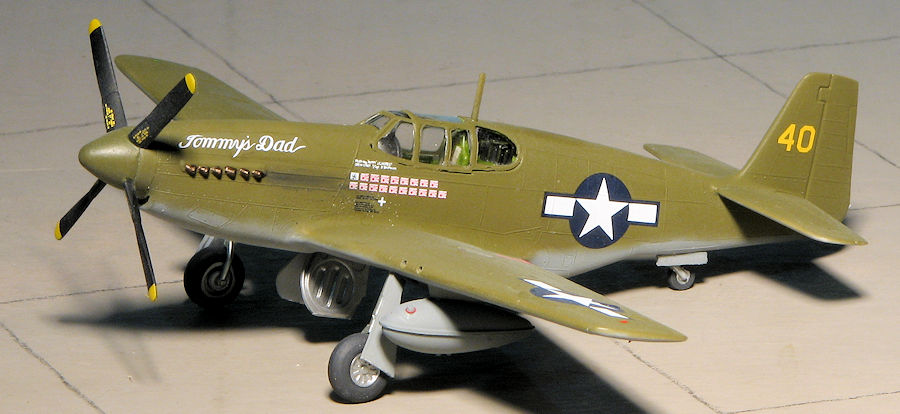
 OD/Neutral
Grey plane on the sheet, that of 'Tommy's Dad' flown by Maj John C. Herbst of
the 74th FS in January 1945. Of the two decal sheets Aeromaster produced in this
scale for the 23rd FG Mustangs, this one has the least 'wow' factor and is
unlikely to be the one chosen by most. Hence I was drawn to it. Like all CBI based Mustangs, it should have a DF
loop antenna, but I figured that since Airfix left off some other 'minor'
details, that I could leave off another.
OD/Neutral
Grey plane on the sheet, that of 'Tommy's Dad' flown by Maj John C. Herbst of
the 74th FS in January 1945. Of the two decal sheets Aeromaster produced in this
scale for the 23rd FG Mustangs, this one has the least 'wow' factor and is
unlikely to be the one chosen by most. Hence I was drawn to it. Like all CBI based Mustangs, it should have a DF
loop antenna, but I figured that since Airfix left off some other 'minor'
details, that I could leave off another.
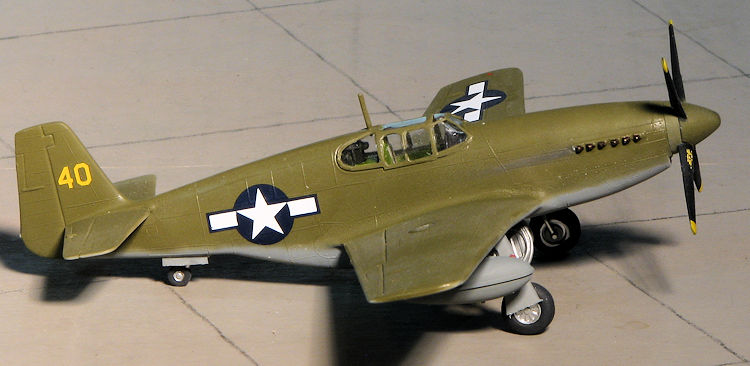
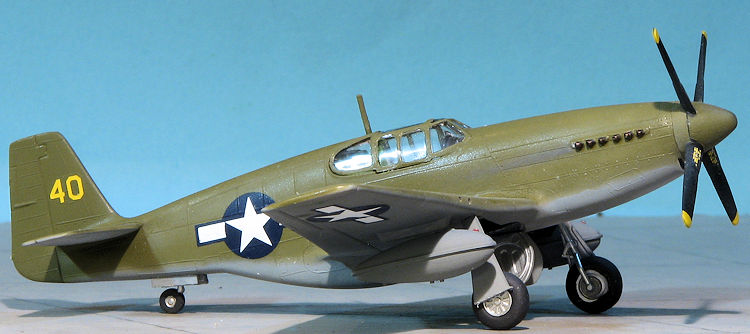
Using Model Master enamels, I painted the underside neutral grey and the upper surfaces an olive drab. Since there was no additional color to the airframe, this makes for a pretty quick paint job. I also prepainted the gear legs and inner gear doors aluminum and the prop black. Later the blades were masked and the spinner painted OD along with the rest of the upper surface of the airframe.
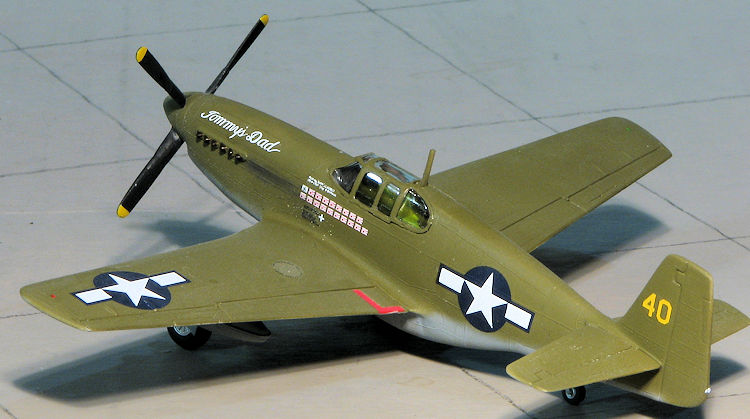
 All this was followed by a couple of gloss coats. I then painted the 'gear
wells' silver and started adding decals. These were printed in 2000 and were
still in great shape. I used just a light swipe of Mr Mark Softer to help them
conform to the raised panel lines. During this the landing gear was installed
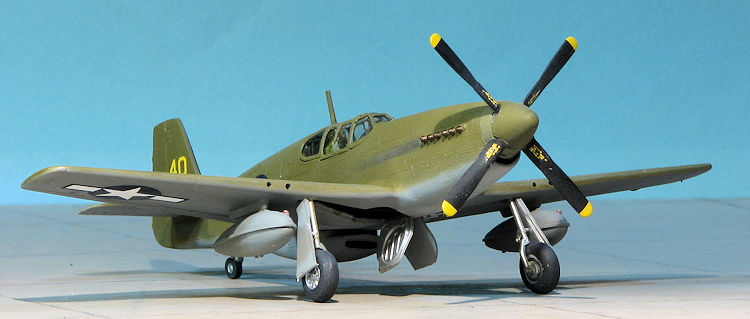
and the exhaust pipes painted using Vallejo's Tinny Tin. I was afraid that the
main gear would not be able to handle a lot, and sure enough, I broke both of
them while attaching the overly thick wheels and doors.
All this was followed by a couple of gloss coats. I then painted the 'gear
wells' silver and started adding decals. These were printed in 2000 and were
still in great shape. I used just a light swipe of Mr Mark Softer to help them
conform to the raised panel lines. During this the landing gear was installed
and the exhaust pipes painted using Vallejo's Tinny Tin. I was afraid that the
main gear would not be able to handle a lot, and sure enough, I broke both of
them while attaching the overly thick wheels and doors.
Once those were on, the model was given a coat of clear matte paint, some exhaust stains added, the nose intake drawn in with a Sharpie and a bit of touch up painting was done. Mustangs used VHF radios so no long wire antenna.
| CONCLUSIONS |
I am sometimes asked why I bother taking the time to
build old kits like this. Surely there are better on the market. There are, but
often times one doesn't really have to obsess over total accuracy to have fun
putting together a kit. Older kits often fit just as well if not better than
some of the newer ones thanks to
 the lack of small parts and inserts to enable
all the variants to be kitted. Sure, they often, as does this one, lack in what
we now consider basic details like shell ejector chutes, radiator exhaust
outlets, pitot tubes and such. However, none of that takes away from the
enjoyment of gluing, painting and finishing the kit. That is the same regardless
of what one is building. Add to it the ability to find these kits at a most
reasonable price and I see no reason not to buy it and build it.
the lack of small parts and inserts to enable
all the variants to be kitted. Sure, they often, as does this one, lack in what
we now consider basic details like shell ejector chutes, radiator exhaust
outlets, pitot tubes and such. However, none of that takes away from the
enjoyment of gluing, painting and finishing the kit. That is the same regardless
of what one is building. Add to it the ability to find these kits at a most
reasonable price and I see no reason not to buy it and build it.
Those seeking a more accurate B/C Mustang will pick up the Revell, Monogram or Academy kit when modeling this scale. Hopefully Airfix will see fit to do a proper retooling of this one in the future. It will be, as is sometimes stated, like printing money.
December 2015
Copyright ModelingMadness.com
Thanks to me for the review kit and Aeromaster decals.
If you would like your product reviewed fairly and fairly quickly, please contact the editor or see other details in the Note to Contributors.