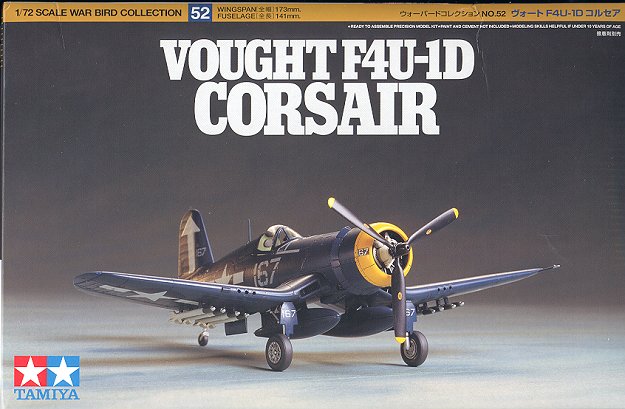
Tamiya 1/72 F4U-1D Corsair
|
KIT # |
60752 |
|
PRICE: |
$22.00 |
|
DECALS: |
Three aircraft |
|
REVIEW : |
|
|
NOTES: |
|
HISTORY & THE KIT |
Follow this link for info on the kit.
|
CONSTRUCTION |
Building this kit is pretty much like every Corsair kit I have
ever done. Guess there are only so many ways of doing it! The big difference
here is in the quality and engineering of the parts. The cockpit is quite
complete and includes a lot of detail. It is a mini-model in of itself. What I
did was to first glue all the cockpit components together. Then when dry,
everything was painted US Interior Green from the Aeromaster line. Then the
various panels were painted flat black and later drybrushed. Then some details
were picked out in a few colors just to add some interest. There is no dial
detail to the instrument panel, so those who really want to do it up can use the
Reheat decals to fill in the blanks.
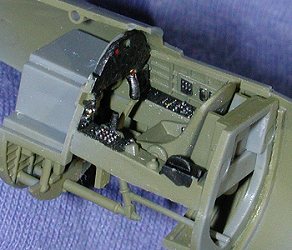 Two views of the cockpit after it has |
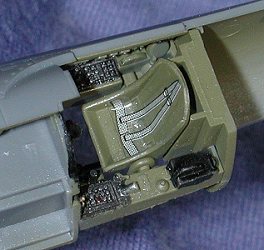 been installed in the fuselage |
Once it was completed, the interior was glued into the right fuselage half (which had already been painted and drybrushed). Then the fuselage halves were glued together. Mine didn't fit seamlessly and I think it may have been a bit warped. There will be need for some filler, I am sure. I also had the tail antenna attachment break off rather easily.
 Next I went to work on the wings. These have a number of holes
in the bottom for tank/bomb racks and the rockets. I personally don't like
rockets so did not open those holes, even if it is a distinguishing feature of
the F4U-1D. There are wheel well inserts that need to be glued into each wing
upper half before gluing the top and bottom wings together. The fit of the wings
was good. The two inserts for the oil coolers fit fairly well with no real
problems. I left off the flap insert until after the wings had been glued
to the fuselage.
Next I went to work on the wings. These have a number of holes
in the bottom for tank/bomb racks and the rockets. I personally don't like
rockets so did not open those holes, even if it is a distinguishing feature of
the F4U-1D. There are wheel well inserts that need to be glued into each wing
upper half before gluing the top and bottom wings together. The fit of the wings
was good. The two inserts for the oil coolers fit fairly well with no real
problems. I left off the flap insert until after the wings had been glued
to the fuselage.
Once the sanding and seam filling had been completed on the wings and fuselage, they were joined together. To me, they fit OK but not great. I will have some puttying to do around the lower joins. The tailplanes were glued in at this time as well. They are keyed to help get them in the right slots. The assembly was then set aside to dry before continuing with construction.
One thing you will notice when building this kit is that the surface detail is a bit too pronounced. This is true on their other kits in this scale as well as in the 1/48 kits. It is almost a Tamiya trademark. Hasegawa kits that mirror Tamiya subjects (like the Bf-109E-4), while not as easy to assemble, have much more realistic detailing, in my opinion.
 Anyway, I now had a complete airframe. Like any decent modeler,
I took it for a test spin, complete with motor noises! Back to more
construction. The flap insert was then installed. Fit was not good. I must have
messed up something along the line. Going back into the cockpit area, the rear
insert was glued in. Again, fit was fair, but not that great and it needed
filler. Perhaps it was just me, but this kit wasn't doing anywhere near as
nicely as the Bf-109E. Next the gunsight was installed, followed by the
windscreen and canopy. The canopy was tacked into place with white glue. These
parts were masked with Tamiya tape. Final airframe bit before painting were the
underwing racks. Fit here was pretty good.
Anyway, I now had a complete airframe. Like any decent modeler,
I took it for a test spin, complete with motor noises! Back to more
construction. The flap insert was then installed. Fit was not good. I must have
messed up something along the line. Going back into the cockpit area, the rear
insert was glued in. Again, fit was fair, but not that great and it needed
filler. Perhaps it was just me, but this kit wasn't doing anywhere near as
nicely as the Bf-109E. Next the gunsight was installed, followed by the
windscreen and canopy. The canopy was tacked into place with white glue. These
parts were masked with Tamiya tape. Final airframe bit before painting were the
underwing racks. Fit here was pretty good.
Things were getting close to being ready to paint, but first, I had to do something about the cowling and cowl flaps. The engine attachment plate was painted flat black and glued onto the front of the cowl flap assembly. I used the open flap part and painted the inside of it with interior green. This assembly was then pushed onto the cowling, then tissue was stuffed into the cowling. All the bits were taken to the paint shop.
|
PAINT & DECALS |
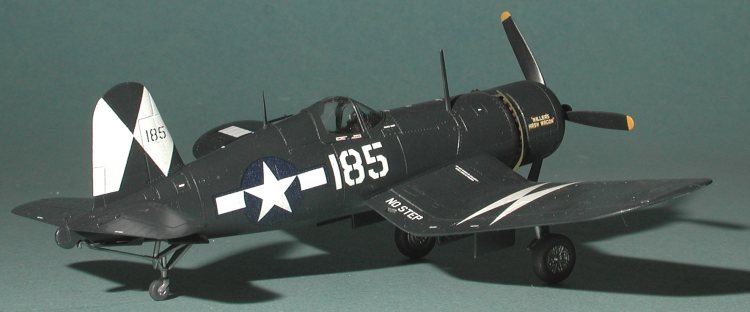
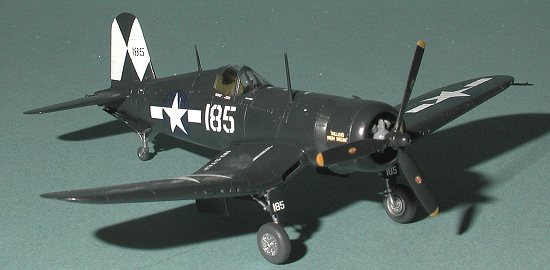
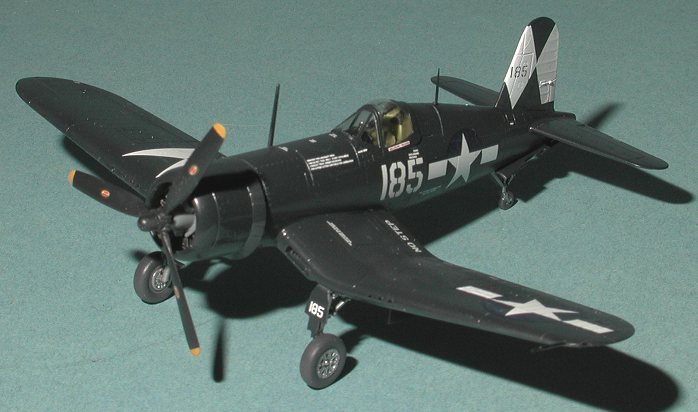
Painting late war USN aircraft is easy. Overall Gloss Sea Blue almost everywhere, including wheel wells and the inside of gear doors. The gear themselves and wheels could be aluminum or sea blue; your choice. To add a bit of contrast, I decided to paint the wheels and gear aluminum.
 But first, all of the remaining bits were given a nice coat of
Sea Blue using the Aeromaster enamel. This took a few days to completely
dry. Then it was time to put on the decals. Naturally, I didn't want
something that was in the kit box. Actually, if it weren't for Superscale and
their older sheets, finding something wouldn't be that easy. For some reason it
seems as if the aftermarket people have blinders on and those blinders seem to
be looking at 1/48. Not that there aren't things done for 1/72, but the ratio is
greatly skewed towards 1/48. Anyway, I used Superscale
72-741 and did the markings for a VF-83 FG-1D off the USS ESSEX in Feb,
1945. That was when most all carriers had a geometric pattern of some sort
assigned to them. Makes for much more interest than tail codes or just numbers.
The decals fit well, as do most Superscale offerings. I decided to use as many
stencils as I could. These are really illegible, but do add interest. I would
highly recommend trimming the decals of excess carrier before using. I have been
spoiled by newer sheets where this isn't needed.
But first, all of the remaining bits were given a nice coat of
Sea Blue using the Aeromaster enamel. This took a few days to completely
dry. Then it was time to put on the decals. Naturally, I didn't want
something that was in the kit box. Actually, if it weren't for Superscale and
their older sheets, finding something wouldn't be that easy. For some reason it
seems as if the aftermarket people have blinders on and those blinders seem to
be looking at 1/48. Not that there aren't things done for 1/72, but the ratio is
greatly skewed towards 1/48. Anyway, I used Superscale
72-741 and did the markings for a VF-83 FG-1D off the USS ESSEX in Feb,
1945. That was when most all carriers had a geometric pattern of some sort
assigned to them. Makes for much more interest than tail codes or just numbers.
The decals fit well, as do most Superscale offerings. I decided to use as many
stencils as I could. These are really illegible, but do add interest. I would
highly recommend trimming the decals of excess carrier before using. I have been
spoiled by newer sheets where this isn't needed.
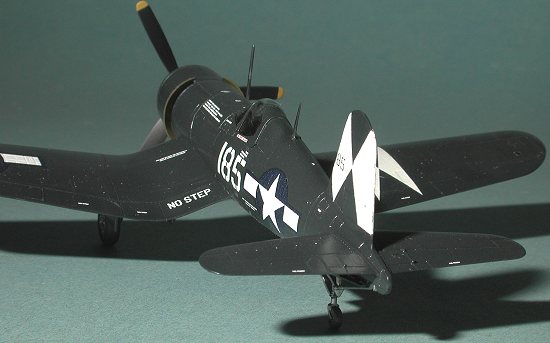 Once the decals were on and dry, the aircraft
was resprayed with gloss clear acrylic to seal them in. It looked way too shiny
so was resprayed once more with a semi-gloss that looks much better. Then the
various lights were painted using clear red, blue, green, and orange as needed.
The final assembly steps included gluing on gear doors and antennas; you know,
stuff that gets easily knocked off. The tail wheel doors were a particular pain
to install. If you can, stick them in before installing the tail gear. Touchup
painting was done as needed, the masking removed and the prop stuck into the
front of the engine. Voila! A nice, late war Corsair.
Once the decals were on and dry, the aircraft
was resprayed with gloss clear acrylic to seal them in. It looked way too shiny
so was resprayed once more with a semi-gloss that looks much better. Then the
various lights were painted using clear red, blue, green, and orange as needed.
The final assembly steps included gluing on gear doors and antennas; you know,
stuff that gets easily knocked off. The tail wheel doors were a particular pain
to install. If you can, stick them in before installing the tail gear. Touchup
painting was done as needed, the masking removed and the prop stuck into the
front of the engine. Voila! A nice, late war Corsair.
|
CONCLUSIONS |
I really expected this kit to fall together as easily as the Bf-109E. It didn't, but that is no reason to think that it isn't a great kit. It just takes a bit more work than you would have thought. Overall, I still give the kit high marks. I'm sure that the decals would have been super as well if I had decided to use them. Is it better than the Hasegawa -1D? Sure it is. The Hase kit is over 15 years old and doesn't have the underwing rockets or the underfuselage bomb/tank racks. The cockpits are no comparison. I can recommend this kit to anyone who doesn't mind spending the bucks on it.
|
REFERENCES |
The two 'Corsair in Action' books by Squadron.
Review copy courtesy of your increasingly impoverished editor.
February, 2001
Copyright Modeling Madness.com. All rights reserved. No reproduction in part or in whole without express permission from the editor.
If you would like your product reviewed fairly and quickly, please contact the editor or see other details in the Note to Contributors.