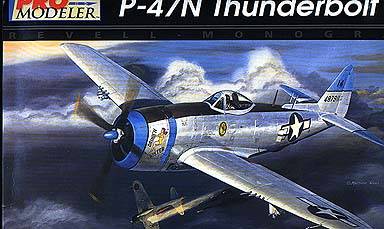
ProModeler 1/48 P-47N Thunderbolt

Price: $14.75
Decals: Two versions; both 318 FG - One with yellow tail and black bands - The other with blue tail and tailplane tips.
Date of Review: 21 April 1998
Review and Photos by: Scott Van Aken

P-47 experts will tell you that the P-47N was expressly designed for the Pacific Theater of WWII. The biggest difference between it and earlier versions was the squared off wing tips and increased fuel tankage provided to allow the Jug to be a long-range escort fighter. The N did not see service until mid 1945 so saw little combat, mostly from the 318 FG operating on Iwo Jima. The N did serve post-war with ANG squadrons, but by 1950 was replaced by the P-51D/H.
ProModeler's kit is typical of Revell-Monogram offerings. It looks super in the box with engraved panel lines, weighted tires and an excellent instruction book and decal sheet. Closer inspection reveals numerous sink marks on the thicker plastic and fuselage as well as ejector pin markings on many of the smaller pieces. The wings were also rather badly formed with a pronounced ripple on both upper wings. Several of the smaller pieces (such as the pitot tube) were attached with very large gates, making removal and cleanup quite a chore. There was also more flash on some of the parts than I would have liked to have seen on a kit this new.
I generally build kits in subassemblies rather than by following the kit instructions step by step and this kit is amenable to that type of building. The instructions are superb and come with photos and helpful hints and coloring suggestions. I do wish all manufacturers made instruction sheets this good. This is part of the reason for the higher cost of Promodeler kits and one I am glad to pay a bit extra for. The cockpit is beautifully detailed and worth your efforts. I added a bit to mine by putting Reheat Instrument decals in the instrument panel for a bit more detailing.
The kit is designed to add the cockpit after the fuselage halves have been joined. A fine idea except there is no positive locator pins or tabs. As a result, after I had mine in place and the wings strongly glued in place, my cockpit came adrift! It was a real chore to get it back in place and basically, I just flooded the area with superglue and poked the cockpit into place with the help of tweezers and paintbrush handles stuck in some of the larger exhaust openings. So beware! Another problem with the fuselage was the fuselage antennas. They are a separate piece that fits in the fuselage like a plug when the halves are put together. There is no way to cleanly remove the gap around this part. I would have preferred separate antennas that would be easier to clean up.

The other area of building problems was the wing/fuselage join. Not good at all and several applications of putty and sanding needed done to get it to fit. Also a troublesome fit was the main landing gear. They are installed in the wing prior to fitting the wing halves together. Mine were both warped and needed to be straightened out as best I could with hot (not boiling) water. In fact, warpage was a problem with the wings as well. Another area of concern in the wings was the installation of the guns. They are a separate piece that fits into the wing leading edge. The idea is to prevent breakage of the guns during construction. However, the fit of these inserts is very poor and almost impossible to clean up if installed as per instructions. I recommend installing the inserts with a backing plate first to allow the inevitable filling and filing. Once the kit is complete, the guns can be separated and installed. The rest of the kit assembled well. The engine is a beauty and simple washes and drybrushing really bring out the detail. For under wing stores, you have a choice of rockets, bombs, or drop tanks. I chose the drop tanks. I had been warned that they were very fiddly to install, but had no real problems with them.
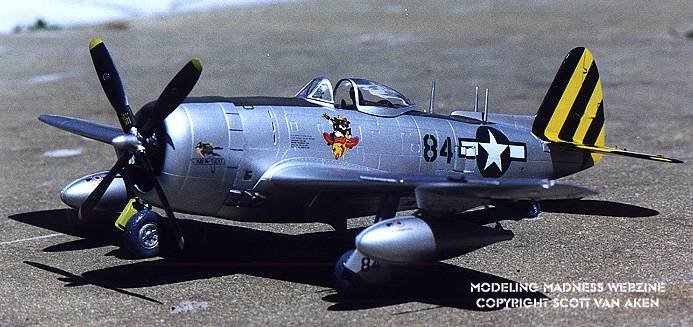
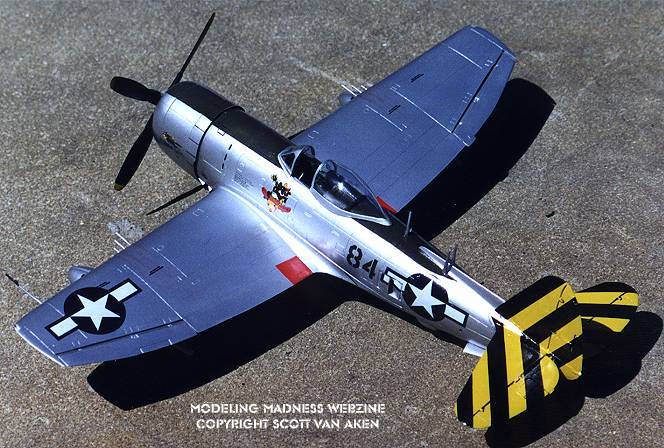
Painting the P-47N requires you to be comfortable with natural metal finishes. There were none that were camouflaged. This for me, meant Testor's Metallizers. First, though, I painted the entire aircraft gloss white. This covers the putty well and prepares the aircraft for the metallizer. The tail was then painted gloss yellow as I wanted to do the 73FS scheme. The fuselage top was then painted olive drab and masked. After that, the rest of the aircraft was painted aluminum. You need to fill the wheel wells and cockpit with tissue to prevent problems with overspray as they are painted zinc chromate yellow.
Once the paint has dried, it is time for decals. I wanted to do a version different from the Scalemaster decals provided in the kit. I bought an Aeromaster sheet that was better detailed. A warning regarding the Aeromaster sheets in that they are not designed for the Promodeler kit, but the Academy one instead. A result of that is the tail stripes in the Aeromaster sheet do not fit, so I used the kit decals for this and the insignia. The kit decals worked well but were brittle and easily broke. Aeromaster's were superb and very sharp.
The end result belies the efforts used in construction. I have not built the Academy kit, but it could not be any more trying than the ProModeler version. While I recommend the kit, the reader must be aware that it does not 'fall together' and will challenge some of your modeling skills.
Copyright ModelingMadness.com. All rights reserved. No reproduction in part or in whole without express permission from the editor.
Back to Reviews Page 2024