Rareplane 1/72 XP-67 'Moonbat'
|
KIT # |
|
|
PRICE: |
$7.00 |
|
DECALS: |
none |
|
REVIEW : |
|
|
NOTES: |
basic vacuform |
|
HISTORY |
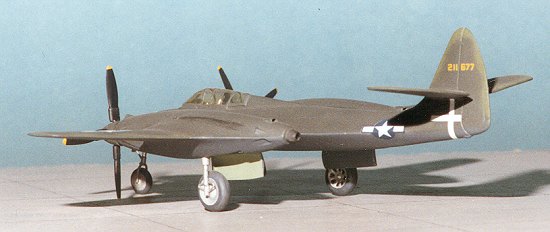
In the early 1940's, the newly formed McDonnell Aircraft
Corporation (which then bought Douglas and became McDonnell/Douglas, and has
since been purchased by Boeing) produced a design for a twin-engined heavy
fighter. This fighter was to have six 37mm cannon, but no armament was ever
installed. It was also to use the new Continental I-1430 turbo supercharged V-12
engines, driving four bladed propellers. The airframe itself was to provide a
great deal of lift and was of the blended fuselage design that is so prevalent
in today's fighters. The first of two prototypes was completed in
December 1943 and taxi tests were conducted at Lambert Field in St. Louis. The
aircraft was then trucked to nearby Scott Field for flight testing. First flight
was on 6 January 1944 and lasted six minutes due to engine problems. The next
two flights were accomplished without difficulty. During the fourth flight,
however, the engines were oversped and the bearings burned out. Upon
return to the factory the cooling ducts were reworked and the tailplanes raised
a foot. Then followed more flight tests before AAF pilots finally got to fly the
plane on 11 May of 1944. During the following flights, several problems were
cured, but engine related ones never were satisfactorily corrected. The biggest
problem was engine overheating which led to a fire in the right nacelle on 6
September 1944. The ensuing fire caused major damage and on 13 Sept, McDonnell
and the USAAF agreed to terminate the contract. The second airframe was never
completed.
|
THE KIT |
Rareplanes offers just a basic vacuform kit. No metal bits, no decals, just two vacuformed sheets and one vac canopy. It didn't even come in a box, just a bag. Besides the vac sheets, a three view of the aircraft with color guide, and a blow up diagram showing where all the parts fit were the only instructions.
|
CONSTRUCTION |
If I recall,
this kit had a floor and two bulkheads for the cockpit. It also had a vac seat.
This seat was replaced by an Aeroclub metal version and the control stick robbed
from the spares box. The interior was painted black to lessen the impact of lack
of detail. I need to mention that this kit was built back in the 80s, so
there really wasn't much available in aftermarket stuff for it. It was old-time
modeling where a full spares box was your primary resource. The
fuselage came in an upper and lower section, mostly because of the design of the
aircraft. If you look at it, doing a left and right half would have been
difficult. The fuselage went out to just beyond the engine nacelles. Small tabs
were glued in one half to help stabilize the kit and the upper and lower
sections were glued together/ Be sure to add nose weight because even a vacuform
can be a tailsitter. Once that was done, the seams were cleaned up and
made presentable. Next the outer wing halves were glued together. I used a piece
of scrap plastic sheet to make a tab for the inner portions of the wing and cut
slots in the fuselage to accept them. After the outer wings were cleaned up,
they were glued to the fuselage section. The tabs really helped make a good,
strong joint. Next, the tailplane and fin halves were glued
and cleaned up. The fin was glued in place, again using a tab and slot
arrangement. The tailplanes were just butt joined, but fit well. Don't forget
the dihedral that needs to be put into the tailplanes or it will look very odd. Once
the airframe is basically together, then one can start on the landing gear. Mine
were made with a combination of telescoping tubing and paper clips. If you wish,
you can use the forms given, but I have never had any luck with them. The wheels
were used, however, and don't look too bad. Then the canopy was cut out and
glued in place. Naturally I cut mine too small and with no spare, I had to make
the best of it. It was then masked and the aircraft taken to the paint shop.
 The first step is to cut out the vac parts. That is done by
scoring around the parts and simply snapping them off the sheet. At this time,
any openings that need to be made are done.
The first step is to cut out the vac parts. That is done by
scoring around the parts and simply snapping them off the sheet. At this time,
any openings that need to be made are done.
|
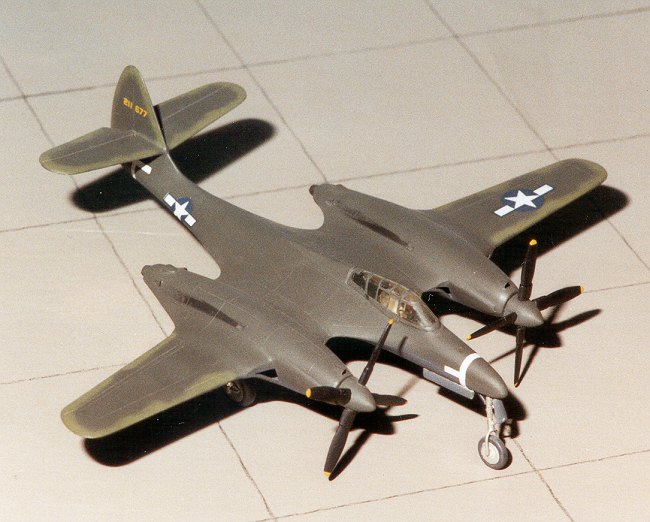
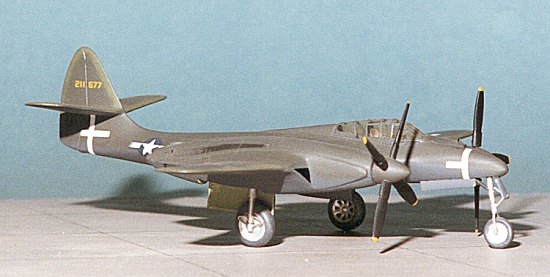
PAINT & DECALS |
Back in this time period, I was pretty heavily into Gunze
acrylic paints. I still like them, but like the Aeromaster ones better. Anyway,
this one was a pretty simple color scheme of OD over Neutral Grey. First the underside
colors were done and when dry masked off. Then the upper surface OD was painted
on. Next the edges of the wings and tailplanes were painted in a foliage green
color. The aircraft was then sprayed with gloss clear to be ready for the
decals.
Decals were scrounged from several sources and the spares box.
Making the serial number was most tedious, but there really isn't any
alternative. The white camera marks are just white decal stripes.
|
CONSTRUCTION |
 Next was the
problem with propellers. I could have filled the kit ones with putty and shaped
them, but I'm lazy. I robbed the props from an old Airfix P-61 and stuck them in
the spinner. The spinner was then filled with super glue to make it hard. Tubing
was inserted for a prop shaft before the superglue dried all the way. They were
then painted and glued to the engine nacelles. The only other bits to put on
were the gear doors. These had been painted with the rest of the aircraft. The
wheel wells were painted in chromate green as were the inside of the gear doors.
A bit of touchup, the masking was removed from the canopy and I had a Moonbat!
Next was the
problem with propellers. I could have filled the kit ones with putty and shaped
them, but I'm lazy. I robbed the props from an old Airfix P-61 and stuck them in
the spinner. The spinner was then filled with super glue to make it hard. Tubing
was inserted for a prop shaft before the superglue dried all the way. They were
then painted and glued to the engine nacelles. The only other bits to put on
were the gear doors. These had been painted with the rest of the aircraft. The
wheel wells were painted in chromate green as were the inside of the gear doors.
A bit of touchup, the masking was removed from the canopy and I had a Moonbat!
|
CONCLUSIONS |
This kit was one of the first complete vacuform kits I had ever
built. Frankly, I wasn't a difficult job and the kit is still one of my
favourites. I know that modelers nowadays don't build many vacs and those that
are on the market are more of a multimedia kit than anything else. However,
there are still some subjects not done in any other venue. They are really no
more difficult to do than any limited run kit. REFERENCES McDonnell Douglas Aircraft since 1920: vol 2, by Rene
Francillon, 1990 Review copy courtesy of me and my wallet! Copyright ModelingMadness.com. All rights reserved. No reproduction in part or in whole without express permission from the editor. If you would like your product reviewed fairly and quickly, pleasecontact the editor or see other details in the Note to
Contributors.
Back to Reviews Page 2024