|
KIT: |
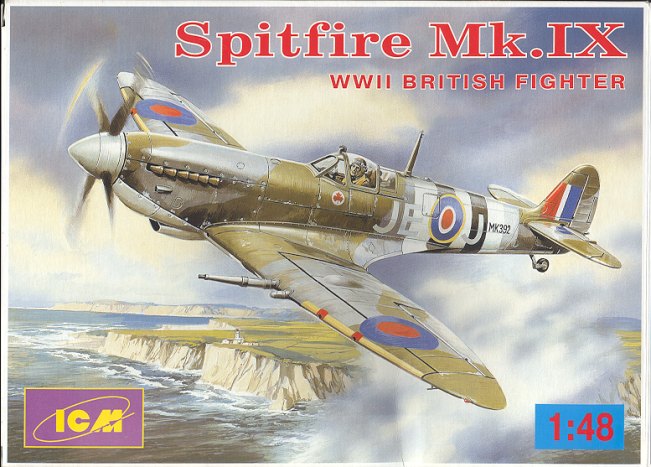
ICM 1/48 Spitfire IX |
|
KIT # |
48061 |
|
PRICE: |
$19.95 |
|
DECALS: |
Many aircraft |
|
REVIEW & |
|
|
NOTES: |

|
HISTORY
& |
Wanna read a short history and see what is in the box ? Go here.
|
CONSTRUCTION |
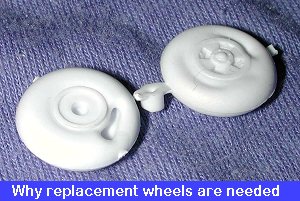 I had heard about
how poor the quality control was on this kit prior to starting. Taking a good
close look, I was quite pleased that there were a number of aftermarket bits for
this one. In fact, were it not for the Ultracast resin bits that I had
been sent to review, this kit would never have gotten started. There is not a
large part that doesn't have sink marks on it. Some of them are really bad, such
as on the wheels illustrated to the right. There was also quite a bit of flash
on a few parts. Hopefully ICM has gotten these problems under control. I don't
recall the Yaks having this big a problem.
OK, so now on to the construction part. I started with the interior and the engine. The major components of the interior were glued together. In place of the kit seat, I used Ultracast 48068 as it is just a nicer molding and includes the harness. The kit seat adjustment lever was glued to the side of the Ultracast seat.
 At this time, I also glued together the basic engine. I have no
plans on displaying the engine, but wanted something to stick the prop and
exhausts onto. It is great that ICM provides a complete Merlin and it is quite
well detailed. I have seen this kit built with the engine properly painted and
wired and it is a thing of beauty. ICM should be congratulated for including
these items. The engine mounts fit well to the firewall, though the lower one
has a lot of flash on it and won't be fun to clean up. The largest of the sink
marks on the wings and fuselage were filled with my old standby 3M Acryl-Blue
Glazing Putty. The interior and other bits were then painted with Testors RAF
Interior Green enamel. This included the engine assembly. They were then
washed using Rustall black wash. This materiel is water based so won't harm even
acrylic paint when it is fully cured. It is also relatively thin so it may take
a few applications to get the effect you want.
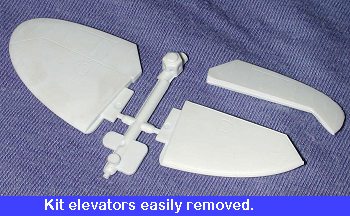 Meanwhile, I had
decided to use Ultracast 48062
replacement elevators for the late Spit IX. That meant removing the kit ones.
Now this is not something that I do very often so am not really that good at it,
but I figured, why not! I started by lightly scribing along the hinge line with
my Xacto. Thanks to the soft plastic, no sawing was done. Just three or four
heavy scribes on each side allowed me to flex the part until it came away. I would suggest scribing/sawing on one side for a bit and then switching
to the other side to prevent accidentally cutting things at the wrong angle.
This is experience speaking! Anyway, removing the elevators wasn't that tough a
job and you could even use the kit ones if you wanted, however, I had these
great aftermarket ones so will use them.
Once the fuselage had all the bits and pieces installed, painted and washed, the engine block and firewall assembly was glue in and left to dry. Then the fuselage halves were glued together. This kit has the interior installed from the underside, which is a great help in construction as you don't have to worry about it getting in the way. There is a smaller brace in the back that I almost forgot to glue in place, so make sure that you don't miss it. The fit of the fuselage halves around the engine assembly is very tight. I used clamps to hold the halves together while they dried. The only reason I went through the trouble of installing the engine is that I wanted something to stick the prop onto when done. I have no intention of displaying the plane with all the covers off, though you can easily do that as there are extra engine side covers in the kit.
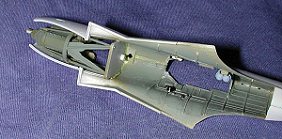 Underside of fuselage |
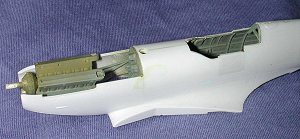 Upper side showing engine block |
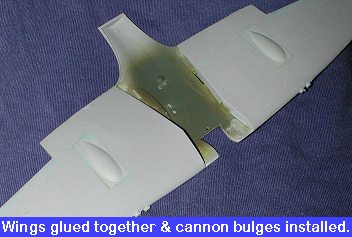 Next, the wings
were glued together. You have the option of installing the guns (actually a
couple of variants of the guns) in the wings and having the gun bay access
covers open to see your handiwork. There are two types of wing bulges depending
on if you have drum or belt feed guns installed. The larger bulges are for the
drum fed cannon and were used on early Mk.IXs. Since I am doing an early
version, These wing bulges were glued into the upper wing. Fit is fair and I did
have to use the ever popular filler on the joins.
While all this was curing, work was continued on the interior. A
few parts that were not attached during the initial construction and painting
were removed from the sprues and glued in place. It seems that every part of any
thickness at all has sink marks in it. This does nothing but take away from the
pleasure of building this kit. While I understand that the poor quality control
issue has been taken care of, the fact is that there are many, many kits out
there (like this one) 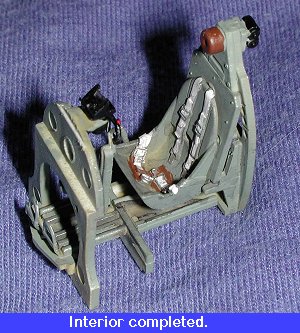 that are just a nightmare because of all the sink marks.
To ICM's credit, they are offering to replace any parts that have been poorly
molded. I did not take advantage of that offer on this kit because: a) I wanted
to see how much the poor parts impacted the kit and if they could be overcome,
b) I'm a masochist and revel in this stuff, and c) I'm fortunate enough to have
many aftermarket parts that will take care of some of the problems.
With the interior complete and the fuselage relatively whole, the interior was glued in place (actually, it sort of snaps in, but additional gluing is recommended). Then the wing was glued to the bottom. Fit here wasn't the greatest and when dry, it took several applications of filler to get rid of the gaps. Then the wing tips were glued on. Like almost every other relatively thick part on this kit, it had sink marks on it that needed filled. Several applications were required and detail in the area was lost during the process.
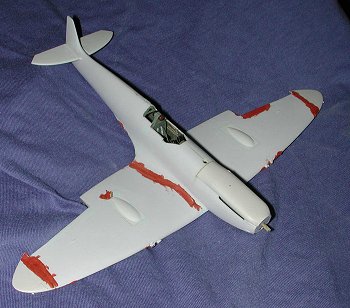
 After letting
this all dry, I realized that I had made a goof (no surprise here). I wanted the
longer carb intake with air filter on it, and had put on the wrong piece under
the engine. Well, that means that I can't use the decal scheme I had planned on
so bit the bullet and installed the smaller intake. I filled in the sink marks
and smoothed them out.
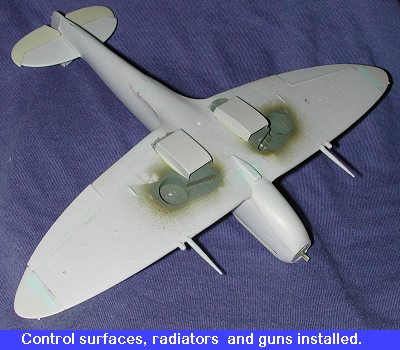
At this time the control surfaces were installed. These fit quite well and though they had some sink marks on the thickest parts of the rudder and ailerons, they didn't seem to be so bad so I left them. The elevators were then glued in placed. All the controls surfaces were set at a slight angle from neutral to add some interest to the kit.
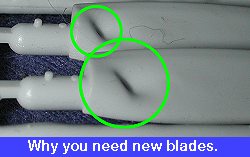 Next, I
started to clean up a few other bits and pieces. The prop spinner had sink marks
that needed filled so that was rather easily accomplished. I then took a look at
the blades and just tossed them out. Thankfully I have the super Ultracast 48061 replacements. These were
easily removed from their backing in preparation for painting. I then went to
the landing gear. Man, I almost gave up on the whole thing. These
  small parts have 3-4 sink marks per
piece! Filling them would be too time consuming so I just left them alone. A
less dedicated modeler would have tossed this kit a long time ago, but I
was determined to finish it. Test fitting the canopy (after removing some
flash), showed that the interior roll-over brace needed to be sanded down a bit
to allow it to fit proper. That was done and the paint touched up. Then the
canopy was glued in place and masked. Fit was quite good. The wheel wells were
stuffed with tissue and it was time to head for the paint shop.
|
PAINT & DECALS |
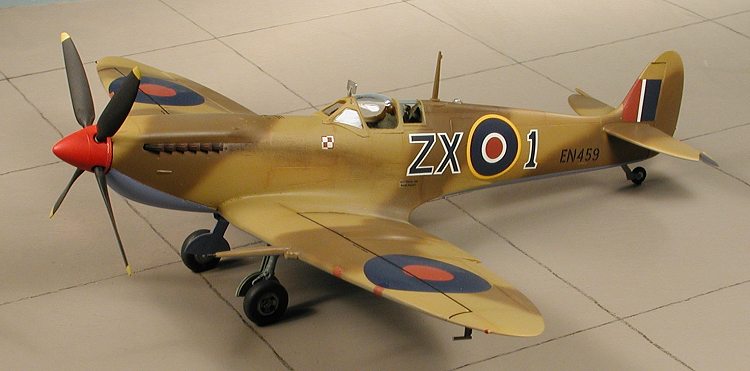
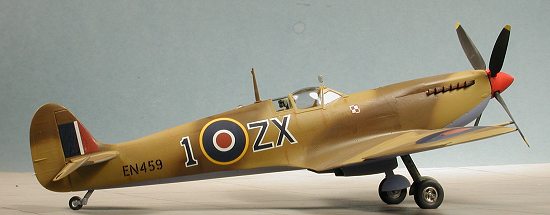
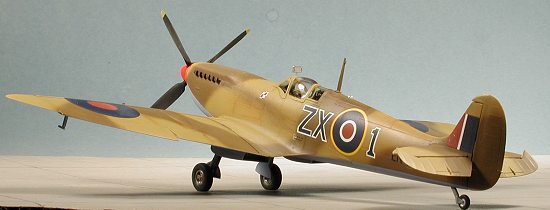 I had decided to do this one in a desert scheme as flown by the
Polish Fighting Team in Tunisia during early 1943. (Yeah, another Polish
desert spit!) They were the first Spit IXs
in the theater and from the picture I have seen of these aircraft (page 59 of
the Polish Aces book), they were not fitted with the longer carb intake.
With that info in hand, the underside of the plane was painted Azure using that
color from the now sadly defunct Aeromaster paint line. That was then masked
when dry and the upper color of Mid-Stone was next applied to all the upper
surfaces. The Dark Earth was then painted freehand in the pattern that was
typical of the Spit. There was the usual back and forth to take care of
some glitches as always happens when one paints. Then it was taken back to
the workshop to have a few pieces glue on.
With a relatively completely painted plane, the landing gear were glued onto the plane. I made no attempt to fill the sink holes. The oleo scissors are separate which facilitates the attachment of Bare Metal Foil to the oleos themselves. Once the scissors were glued in place, they were painted and the gear legs glued into place. Same with the tail wheel. It now could stand on its own so was returned to the paint shop for a coat of clear acrylic gloss (Future).
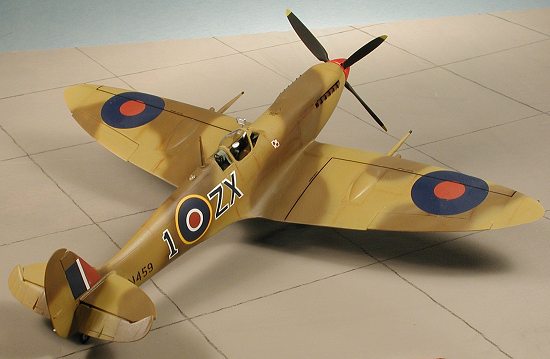 I used
Aeromaster sheet 48-465 for this aircraft as
it had the Mk IX of Lt Horbaczewski
of 'Skalski's Circus'. Lt Horbaczewski was an exceptional fighter pilot
and rose to command 315 Sq with the rank of Squadron
Leader. He met his death in August of 1944 in a battle with Fw-190s. He managed
to down three of them, bringing his confirmed kill score to 161/2; fourth in the
ranking of Polish WW2 aces.
The Aeromaster decals are just superb and reacted well with the Solvaset I used. Deciding not to waste the good stencil decals on this kit, I used the ICM ones. They worked fairly well but have a lot of carrier that needs to be trimmed. Some of them also silvered despite all precautions. There was a bit of a delay in finishing the kit as the two colors of code provided for this plane were both wrong and I sent away to Aeromaster to get the correct ones. After waiting what seemed like months (it was only about 3 and a half weeks), with no update sheet in sight, I went ahead and used the too-dark blue codes. ("Sir, this is the Color Police, put down the decals and step away from the model").
With the decals in place, the kit was given a matte coat to seal them in. I have used Future and Tamiya Flat Base for years and swear by it (not at it!). The masking was removed and then the fishtail exhausts (Ultracast # 48060), the replacement resin wheels (Ultracast # 48065), gear doors, underwing pitot tube, prop and small clear landing and upper anti-collision light were glued in place. The final step was to add exhaust staining and some final paint touchups and the model was complete.
For those of you who think that I forgot the radio antenna longwire, the Spit IX didn't use a long wire. A VHF radio set was developed that used a short wire antenna. As you know, the Mk IX was based on the Mk V fuselage and many Mk V airframes that had been damaged or crashed were converted. This means that you will see both the old style antenna mast and a newer one. In the old mast the radio wire was inserted in the antenna mast so is not visible.
|
CONCLUSIONS |
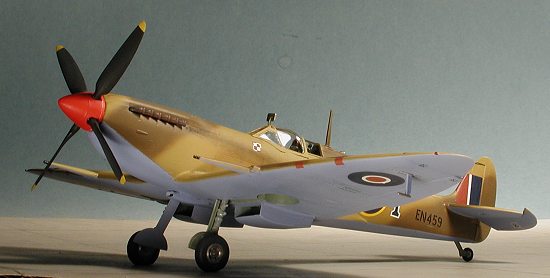 It is really a shame that ICM dropped the ball on the quality
control of this kit. After a major SNAFU like this, it will take a while to get
back customer confidence. They could have sold the heck out of these kits had
they been well made. However, Hasegawa's Spit IX has just been released and many
Spit fans will flock to this kit, despite the much broader usefulness of the ICM
kit (Hasegawa's is an odd bird that has mixture of features that limits what
planes you can actually model. See Tom Cleavers preview for more info.).
Folks are also probably wondering why I bothered with this kit when the newer Hasegawa kit was known to be just around the corner. Well, I had already bought the kit, I had a nice selection of resin bits to replace several of the worst of the ICM bits, and you can do any version of the Mk.IX from the very earliest to the very last one off the assembly line without having to wait months for Hasegawa to get around to doing that specific variant.
It does make into a nice Spit, but you do have to put a lot of work into it that you won't with the Hase kit. For that reason, I'll only recommend it if you are willing to undertake the considerable effort to bring it up to par. You will be rewarded, however, with a very nice model.
|
REFERENCES |
Polish Aces of WWII, by Gretzyngier and Matusiak, Osprey, 1998
June 2001
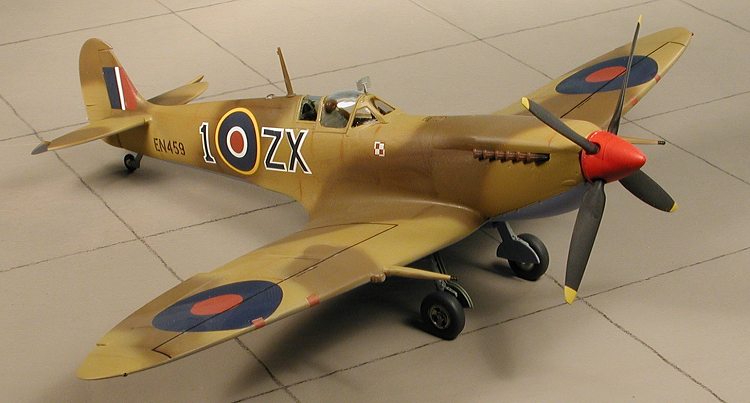
Review kit courtesy of me and my wallet! Thanks to Ultracast for the resin parts.
If you would like your product reviewed fairly and quickly by a site that averages over 3000 visits a day, please contact me or see other details in the Note to Contributors.