| KIT #: | 72103 |
| PRICE: | $25.00 'used' |
| DECALS: | Several options |
| REVIEWER: | Scott Van Aken |
| NOTES: | Short run kit with photo etch & resin parts. 2016 tooling |
| HISTORY |
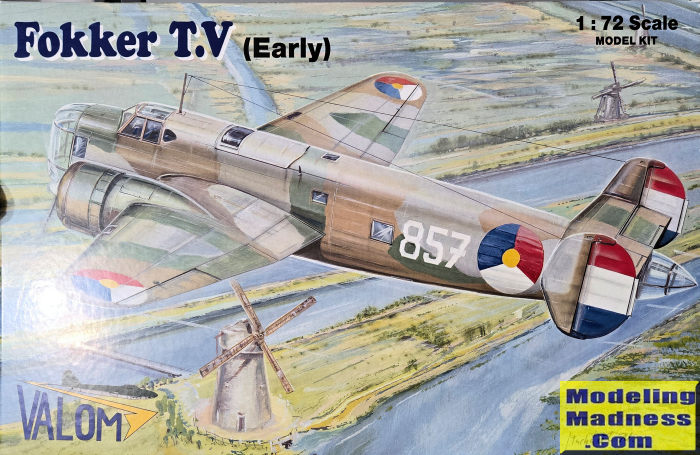
In the early 1930s, the Luchtvaartafdeling (i.e. the Netherlands Army Air Force) became interested in the luchtkruiser (aerial cruiser) concept multipurpose aircraft, which was to have a primary role of intercepting and destroying enemy bomber formations, with a secondary role as a long-range bomber, with Colonel P.W. Best, commander of the Luchtvaartafdeling stating on 28 March 1935 that aircraft of the luchtkruiser should be purchased in as large numbers as possible, proposing to cancel procurement of the Fokker D.XXI fighter to release funds.
To meet this requirement, Fokker developed the T.V, a five-seat, twin-engined monoplane. It featured a wooden wing, while the slab-sided fuselage was of mixed construction, with a wooden monocoque centre fuselage, a fabric covered steel tube rear fuselage and a duralumin forward fuselage. While this construction method was typical for Fokker aircraft, it was obsolete compared with contemporary aircraft of its size, which were normally of all-metal construction. It was fitted with a 20 mm autocannon in the nose to meet the bomber destroyer part of the requirement, and four defensive Browning machine guns, one each in dorsal, ventral and tail positions, with one capable of being switched between two waist positions. It had a bomb-bay under the centre fuselage capable of carrying up to 1,000 kg (2,200 lb) of bombs.
A contract was signed for 16 T.Vs on 7 December 1936, with the first aircraft (not a prototype as such) flying on 16 October 1937 from Schiphol airfield.
| THE KIT |
Valom is known for offering kits of aircraft not provided by other kit makers. While there has been a T.V in this scale before, it was basically a vac kit with metal parts and as such, not something that most modelers would want to tackle.
 This kit is
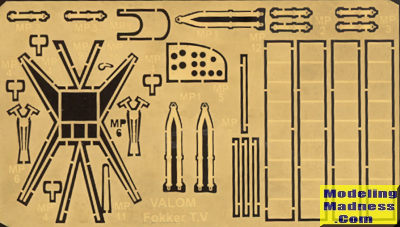
in line with their other short run kits in that it uses resin for the engines,
upper main gear wells, ammunition storage and prop hubs with photo etch for seat
harnesses, instrument panel, nose gun mount, cowl flaps, tail gear mud flap and
some other small items. An acetate sheet provides main instrument faces.
This kit is
in line with their other short run kits in that it uses resin for the engines,
upper main gear wells, ammunition storage and prop hubs with photo etch for seat
harnesses, instrument panel, nose gun mount, cowl flaps, tail gear mud flap and
some other small items. An acetate sheet provides main instrument faces.
The kit itself is quite normal when compared to others. One builds up the instrument panel then seats. The various interior parts are then built and the previous seats are then attached. Interior floors are all slabs that are butt joined together. With the seats installed, the controls and the rear gun are installed.
One then goes to the inside of the fuselage halves and installs all the windows and some interior parts before gluing in the interior. During this stage, the tail gear is built up and attached. Then the fuselage halves go together followed by the horizontal stab and the tail fins. Work then moves to the nose and the nose gun mount is bent and installed. One has to drill a hole in the front transparency for the gun barrel. The rest of the transparencies are then attached.
Constructins moves to the engine nacelles with the attachment of the landing gear and the rest of the gear well. Several detail drawings are provided to assist with getting this area built. Engines and cowlings are next. The engine cowlings are left and right halves so it will be important to properly deal with the seam that is on the upper and lower lip. Cowl flaps will need to be bent to shape so they can conform properly to the cowling. Each prop is a resin hub with plastic blades. The blades attach to shallow depressions in the hub.
Upper and lower wing halves are then joined and the
main gear nacelles and engines are joined, along with the props. The radio mast
has to be made from stretched sprue and then attached. It would be wise to
prepaint the fuselage sections before doing any construction, otherwise it will
be difficult to have intact side guns.
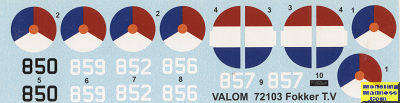
Instructions are well done and there are two very similar camouflage schemes in brown, dark green and grey-green. The only differences are the aircraft number in white. The black number is not shown as being used. The decals are nicely printed and should work well. This is the 'early' boxing with a later boxing having the same plastic, but the orange triangle insignia.
| CONCLUSIONS |
If you are looking for something a bit different and are up to the challenges of a short run kit, this one should fill the bill quite nicely.
| REFERENCES |
https://en.wikipedia.org/wiki/Fokker_T.V
February 2026
Copyright ModelingMadness.com. All rights reserved. No reproduction in part or in whole without express permission from the editor.
If you would like your product reviewed fairly and fairly quickly, please contact the editor or see other details in the Note to Contributors.