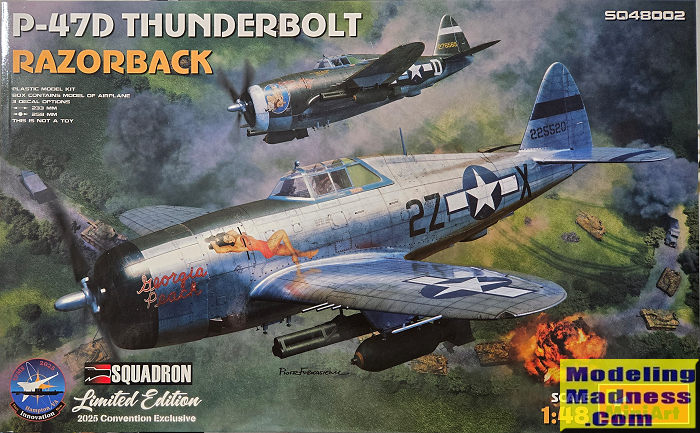
MiniArt/Squadron 1/48 P-47D Thunderbolt
| KIT #: | SQ48002 |
| PRICE: | $45.00 |
| DECALS: | Three options |
| REVIEWER: | Scott Van Aken |
| NOTES: | 2025 IPMS/USA Nationals special |
| HISTORY |
The 510th was initially activated in 1943, flying the A-24 and the P-39, before moving on to its wartime mount, the P-47D as part of the 405th FG. This group was assigned to the 2nd TAF, so the squadron spent the war in ground attack missions, meaning it got few air to air victories. It was disbanded until Korea when it was reactivated on the F-84F. Deactivated again, it was reactivated on the F-100, which it took to Vietnam until disbanded again in the late 1960s. A decade later, it was reactivated on the A-10 and flew this out of the UK. Disbanded in the late 1990s, it was quickly reactivated on the F-16, flying out of Aviano and it is still there.
| THE KIT |
 This
is a limited edition boxing for the IPMS/USA National convention. It is your
standard MiniArt 1/48 Razorback P-47D with a different decal sheet. No p.e. and
no resin. The kit offers a selection of options that make a kit like this
appealing and I'll cover those during the preview.
This
is a limited edition boxing for the IPMS/USA National convention. It is your
standard MiniArt 1/48 Razorback P-47D with a different decal sheet. No p.e. and
no resin. The kit offers a selection of options that make a kit like this
appealing and I'll cover those during the preview.
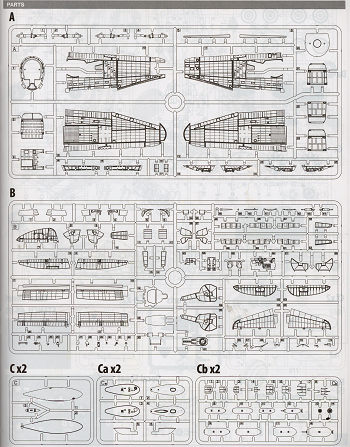
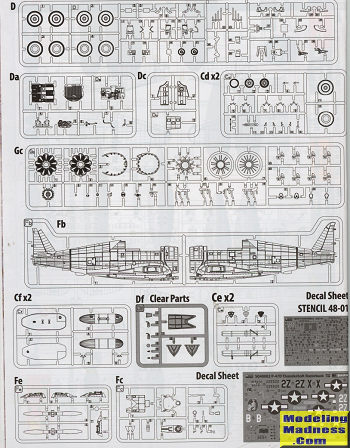
One starts with a very detailed cockpit. The seat has molded in harness detail, which most will like. The raised panel detail has decals that are to be used and there are some placard decals as well. As is the norm with newer kits, the cockpit builds into a cage that will later be installed in the fuselage halves.
Instructions then move on to the tail gear. Here is the first option as you can do it with or without the canvas gear cover. Back at the fuselage halves, there are a number of inserts that need to be installed. The upper fuselage forward of the cockpit is a separate piece onto which one installs several parts of the gun sight and an armored glass portion. This is attached after the fuselage halves have been joined.
Building the engine is next and there are different magneto options depending on which decal option you are building. The intake that goes in the lower cowling is made up of seven pieces. On the fuselage you have the option of open or closed turbocharger doors. The cowling itself is four pieces and you can do open or closed cowl flaps though there is nothing to see if you choose the open option. The kit can be built with gear up and you have extra door parts if you choose that option.
The instructions would have to install the tail gear and doors now, but it looks like you can leave those off until after painting. Now construction turns to building the main gear wells. This is very parts intensive with each side having thirteen parts. Guns will need to be installed at this time as well. You are provided separate flaps and ailerons, but there is no flap lowered option. The lower wing section has two large inserts that need to be installed. Before closing the wings, holes for either the pylons or rocket launcher need to be opened. There are clear lenses for the formation lights and I recommend installing those after painting.
An interesting option is for having the main gear under heavy load or not. This applies to the main gear struts as well as the two piece tires/wheels. You are also provided two styles of tires and wheels with or without covers. After all this, the wings and the horizontal stabilizers are installed.
We then come to the final assembly. This is the windscreen and canopy, the
latter of which can be posed open. The prop is in two-blade sections like on
Tamiya kits. The prop included is the skinny blade Curtiss-Electric version.
Pylons are then built up. You have a choice of several styles of drop tank as
well as smoke-generator tanks. You also have four different styles and sizes of
bombs from which to choose.
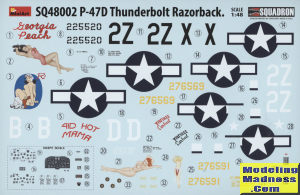
Instructions are well done and provide markings for three planes. All are from the 510th FS/405th FG with two of them shown on the box art. One is unpainted metal while the other two are OD over Neutral Grey. All have blue canopy surround and any wing/tail stripes will need to be painted. All of them have girlie nose art. Decals themselves are well printed by Cartograf. For dash numbers you have a -15, -20, and -21 so if you are wanting to use aftermarket decals, you'll need to ensure that those match up.
| CONCLUSIONS |
By all accounts, this is the best P-47 in this scale so far. I wouldn't go tossing your other ones as they are all still very nice, but if you want the latest and greatest, this is it.
| REFERENCES |
https://en.wikipedia.org/wiki/510th_Fighter_Squadron
September 2025 Copyright ModelingMadness.com. All rights reserved. No
reproduction in part or in whole without express permission. If you would like your product reviewed fairly and fairly quickly, please
contact the editor or see other details in the
Note to
Contributors.