Airfix 1/72 Spitfire Vc
| KIT #: | A02108 |
| PRICE: | $17.00 delivered |
| DECALS: | Two options |
| REVIEWER: | Scott Van Aken |
| NOTES: | 2020 release |
| HISTORY |
The "C-type" wing, or "Universal wing" was a more heavily modified wing, redesigned to reduce labour and manufacturing time, as well as to allow different armament configuration options to be fitted in a single, universal wing structure which could accommodate several different armament layouts without serious structural modification or alteration (a similar kind of wing was developed for the Hawker Hurricane, allowing anything from 8 to 10 .303 Brownings, to four 20mm Hispanos, to twin anti-tank 40mm Vickers "S" guns and a pair of .303's to be fitted into the same wing). Without modification, the "universal" wing could accept "A", "B", "C" or "E-type" armament configuration, although the "E" type wasn't used until later marks of Spitfire. The "B" type, 2-cannon, 4-Browning layout was by far the most commonly seen on "C" wing Spitfires, until the Mk IX and the "E" wing. Differences in the "C" wings include a second cannon-bay added directly alongside the first, and the #3 Browning gun being moved slightly outboard from ribs 13 to 14, making the two outer machine guns closer together than in the older "B" type wing.
 Although officially any aircraft with a universal wing is a "C"
variant regardless of their armament configuration (excepting "E"
types), in later popular (and incorrect) usage, "C" variants with the
same armament as the "B" type are often called "B" variants, even though
it's technically a "C", and structurally it is different than the older
"B" wing Spitfire. The new wing now had two inner gun bays able to
accommodate cannon, although one bay was usually left empty. The outer
two .303 machine guns were also moved closer together than in "A" or "B"
type wings, which is one of the primary visual aids to distinguishing an
original "B" type from later universal wing "B types", along with the
second pair of cannon ports, which are visible even though typically no
weapons are fitted in the second cannon bay. In this case, the empty
port is usually closed off with a rubber plug. The cannon mounts were
also moved further back in the wing, so the barrel fairings of the
cannon are shorter than on an original "B" Spitfire.
Although officially any aircraft with a universal wing is a "C"
variant regardless of their armament configuration (excepting "E"
types), in later popular (and incorrect) usage, "C" variants with the
same armament as the "B" type are often called "B" variants, even though
it's technically a "C", and structurally it is different than the older
"B" wing Spitfire. The new wing now had two inner gun bays able to
accommodate cannon, although one bay was usually left empty. The outer
two .303 machine guns were also moved closer together than in "A" or "B"
type wings, which is one of the primary visual aids to distinguishing an
original "B" type from later universal wing "B types", along with the
second pair of cannon ports, which are visible even though typically no
weapons are fitted in the second cannon bay. In this case, the empty
port is usually closed off with a rubber plug. The cannon mounts were
also moved further back in the wing, so the barrel fairings of the
cannon are shorter than on an original "B" Spitfire.
Few, if any, "C" Spitfires were built with the eight .303 Browning "A" armament configuration, which was viewed as obsolete by the time the Mk V went into combat. The "C" type wing was the first which could accommodate an all-cannon armament of four 20mm Hispanos; thus the "C" designation is popularly reserved for four-cannon Spitfires (i.e. Mk Vc). The "C" type armament was also rarely used (although not as rare as the "A" armament), due to the extra weight of the added cannon eroding performance and handling. Many Spitfires originally fitted with the "C" armament had the extra cannon removed in the field to save weight. In theory, a "Universal" wing Spitfire could carry an armament of four 20mm cannon and four .303 Brownings, but this would be heavily loading the aircraft indeed, and thus was never used. (An "E" type wing, usually seen in Mk IX and later versions, was similar to the "C" armament, but used a pair of American .50 caliber Browning AN/M2 heavy machine guns in place of the inner pair of Hispanos, giving an armament of two Hispanos and two .50cal Brownings.)
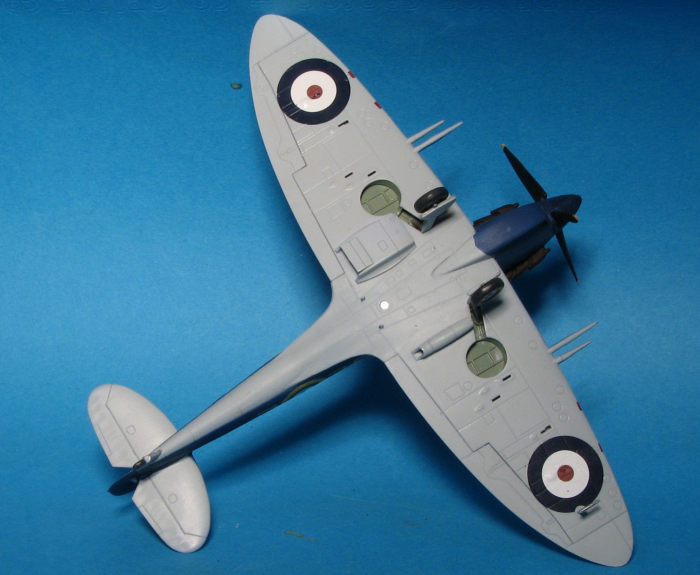
The Universal wing also took into account the fact that the Hispano cannon had been converted to belt-feed, a move which allowed each cannon to carry double the ammunition load, or 120 rpg in ammunition trays instead of 60 rpg as in the original drum-fed cannon of the Mk Vb. This also eliminated the need for under- and over-wing blisters to accommodate the large-diameter ammunition drum, instead only requiring a small blister to cover the electrical "Chattellerault" feed mechanism. The undercarriage mountings were redesigned and the undercarriage doors were bowed in cross section allowing the legs to sit lower in the wells, eliminating the upper-wing blisters over the wheel wells and landing gear pivot points. The stronger undercarriage legs were angled 2 inches (5.08 cm) forward when extended, making the Spitfire more stable on the ground and reducing the likelihood of the aircraft tipping onto its nose. In addition the retractable landing lights were no longer fitted. Structural hard-points were added outboard of the wheel-wells, allowing racks to be fitted under each wing which were capable of carrying one 250 lb (113 kg) bomb each.
| THE KIT |
 Wings have separate pieces for the gear wells that fit into the lower halve.
Holes will need to be opened if you wish to use the large fuselage slipper
tank. Once the wings are assembled, it along with the horizontal stabs and
rudder are attached to the fuselage. Next, the large sand filter is
assembled and attached. You are provided the option for two wing cannon per
side or just the single version. The markings options allow for one of each.
Underwing radiators are next and you can pose the lare radiator exhaust door
open if you wish.
Wings have separate pieces for the gear wells that fit into the lower halve.
Holes will need to be opened if you wish to use the large fuselage slipper
tank. Once the wings are assembled, it along with the horizontal stabs and
rudder are attached to the fuselage. Next, the large sand filter is
assembled and attached. You are provided the option for two wing cannon per
side or just the single version. The markings options allow for one of each.
Underwing radiators are next and you can pose the lare radiator exhaust door
open if you wish. | CONSTRUCTION |
 I somewhat broke with tradition on this one and followed the
kit's instructions, primarily as I'd not built the recent tool Spitfire and
building up the interior looked fairly complex. It turned out that it was. First
step was to sand on the cockpit opening as I wanted to use the closed canopy
option. Then I got down to actual construction. Basically one installs all the
interior framework and subassemblies into one half of a 'cage', then attaches
the other side of this construct to complete the cage. Then this is installed in
one fuselage half, this fitting in the lower half of each fuselage side. I found
attaching the floor subassembly with the seat to be the most fiddly and highly
recommend attaching all the framework pieces at the same time then closing the
cage while the cement is still tacky. This will prevent any alignment issues as
on my kit, the various frames are just a bit off center due to attaching all of
them to one half and letting them dry first.
I somewhat broke with tradition on this one and followed the
kit's instructions, primarily as I'd not built the recent tool Spitfire and
building up the interior looked fairly complex. It turned out that it was. First
step was to sand on the cockpit opening as I wanted to use the closed canopy
option. Then I got down to actual construction. Basically one installs all the
interior framework and subassemblies into one half of a 'cage', then attaches
the other side of this construct to complete the cage. Then this is installed in
one fuselage half, this fitting in the lower half of each fuselage side. I found
attaching the floor subassembly with the seat to be the most fiddly and highly
recommend attaching all the framework pieces at the same time then closing the
cage while the cement is still tacky. This will prevent any alignment issues as
on my kit, the various frames are just a bit off center due to attaching all of
them to one half and letting them dry first.
With that done, the prop hub piece was attached and the
fuselage halves joined together. Fit is actually very good and on the
fuselage, simply sanding took care of any seam work. This is as much thanks
to Airfix's fairly soft plastic as anything. The main gear wells were
attached to the lower wing and the upper
 halves were added. Again, a good
fit requiring only sanding. Next the wing and tailplanes along with the
rudder were glued to the fuselage. Here was the first fit issue as the
cockpit cage interfered with the wing fitting snugly. Some sanding work on
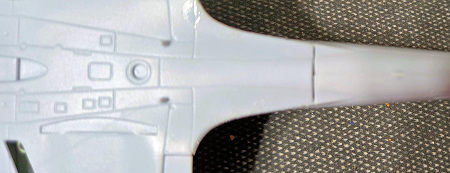
the bottom of that item gave me the room needed. Next, there is a gap in the
aft lower wing/fuselage join. I also had to clamp the wing to get the rear
portion to conform to the fuselage.
halves were added. Again, a good
fit requiring only sanding. Next the wing and tailplanes along with the
rudder were glued to the fuselage. Here was the first fit issue as the
cockpit cage interfered with the wing fitting snugly. Some sanding work on
the bottom of that item gave me the room needed. Next, there is a gap in the
aft lower wing/fuselage join. I also had to clamp the wing to get the rear
portion to conform to the fuselage.
With that filled and sanded, I assembled and attached the sand filter. This also did not fit very well, being a little narrower than the area to which it had to fit. I also had to clamp the rear portion to get it to conform while the glue dried. I then masked the canopy and installed it along with the outer gun barrels. The wheel wells were then filled with Silly Putty and it was off to the paint shop.
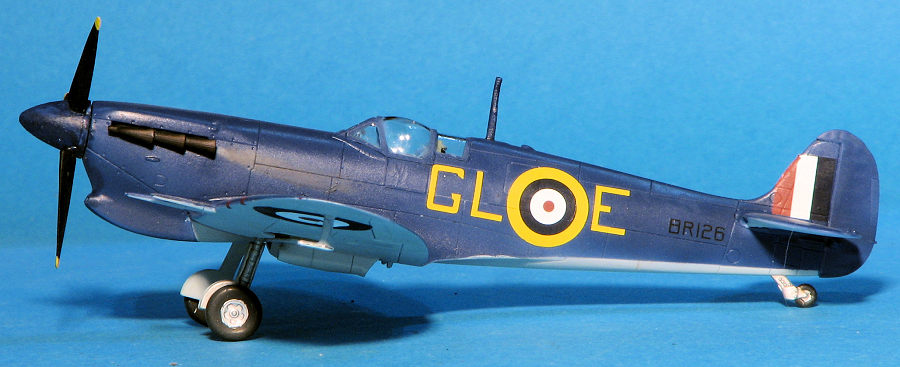
| COLORS & MARKINGS |
As often happens, I bought this kit because of a decal sheet.
In this case it was the new Euro Decals sheet on Malta Spitfires. The majority
of the aircraft on the sheet had somewhat non-standard paint schemes. By that, I
mean that most of us don't have the colors in our standard paint rack. For the
one I wanted to do, it was Sky Blue on the underside and Dark Mediterranean Blue
on the upper surface. I didn't have those colors, but a brand out of Ukraine,
Arcus, does. The kit went into the box while awaiting the paint. About two weeks
later it showed up. These are enamels and were thinned with Testors enamel
thinner. Fi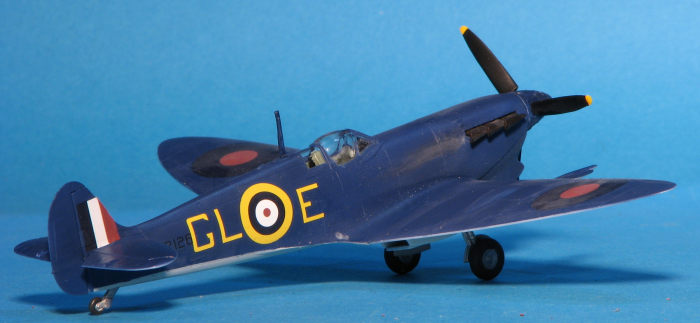 rst the Sky Blue was painted on and after a couple of days, the
underside was masked and the Dark Mediterranean Blue was painted on. After a few
more days of curing and I installed the landing gear.
rst the Sky Blue was painted on and after a couple of days, the
underside was masked and the Dark Mediterranean Blue was painted on. After a few
more days of curing and I installed the landing gear.
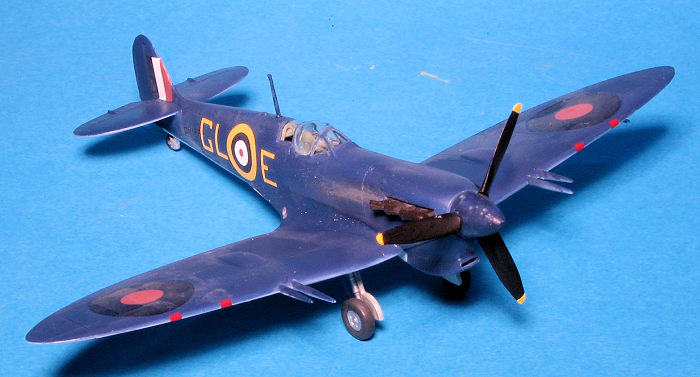
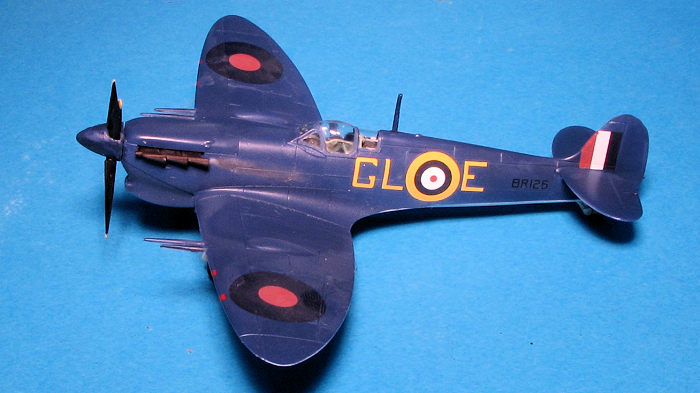
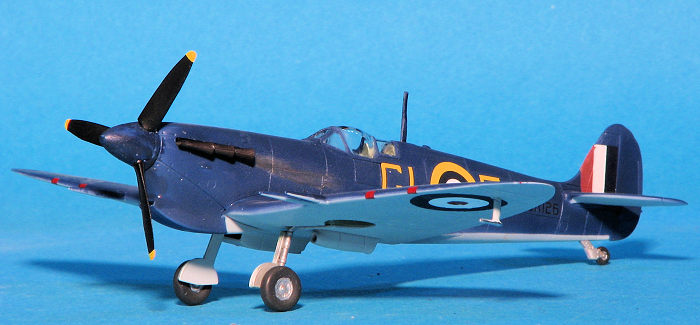
Then a clear coat was brushed on and I applied the decals. The Euro Decals are thin and opaque. I had no issues with them and used MicroSol, my weakest setting solution, on them. With that done, the wheels and main gear doors were attached. I also attached the prop and exhaust. I had lost the radio mast so cobbled one out of sprue and glued it in place. A bit of touch up painting was done, followed by a coat of clear matte to seal everything in. Masking was removed and a bit of pastel exhaust work finished it off.
| CONCLUSIONS |
 As usual, this purchase was motivated by a decal
sheet, as often happens with me. The kit went together quite well with the only
non-self-made glitch being the aft wing/fuselage gap. I was surprised that there
was no clear lens for the fuselage landing light, but it isn't a big deal and
easy enough to duplicate. I've found that most 1/72 Spitfires are pretty easy to
build and this one is no exception. Probably the best one on the market and
Airfix does a number of variants so finding one won't be much of an issue.
Looking at the finished model, it appears I installed the prop backwards. Well,
a bit late to do anything about it now.
As usual, this purchase was motivated by a decal
sheet, as often happens with me. The kit went together quite well with the only
non-self-made glitch being the aft wing/fuselage gap. I was surprised that there
was no clear lens for the fuselage landing light, but it isn't a big deal and
easy enough to duplicate. I've found that most 1/72 Spitfires are pretty easy to
build and this one is no exception. Probably the best one on the market and
Airfix does a number of variants so finding one won't be much of an issue.
Looking at the finished model, it appears I installed the prop backwards. Well,
a bit late to do anything about it now.
| REFERENCES |
https://en.wikipedia.org/wiki/Supermarine_Spitfire_(early_Merlin-powered_variants)
Copyright ModelingMadness.com. All rights reserved. No
reproduction in part or in whole without express permission from the editor. 28 June 2024
If you would like your product reviewed fairly and fairly quickly, please contact the editor or see other details in the Note to Contributors.