Eduard 1/48 Spitfire IIa
| KIT #: | 82153 |
| PRICE: | ~$50.00 SRP |
| DECALS: | Five options |
| REVIEWER: | Scott Van Aken |
| NOTES: | Profipack |
| HISTORY |
In the summer of 1939 an early Mk I K9788 was fitted with a new version of the Merlin, the XII. With the success of the trial it was decided to use this version of the Merlin in the Mk II which, it was decided, would be the first version to be produced exclusively by the huge new Lord Nuffield shadow factory at Castle Bromwich.
 Chief among the changes was the upgraded 1,175 horsepower (876 kW) Merlin XII
engine. This engine included a Coffman engine starter, instead of the electric
system of earlier and some later versions of the Merlin, and it required a small
"teardrop" blister on the forward starboard cowling. The Merlin XII was cooled
by a 70% to 30% water glycol mix, rather than pure glycol used for earlier
Merlin versions.
Chief among the changes was the upgraded 1,175 horsepower (876 kW) Merlin XII
engine. This engine included a Coffman engine starter, instead of the electric
system of earlier and some later versions of the Merlin, and it required a small
"teardrop" blister on the forward starboard cowling. The Merlin XII was cooled
by a 70% to 30% water glycol mix, rather than pure glycol used for earlier
Merlin versions.
In early 1940 Spitfire Is of 54 and 66 Squadrons were fitted with Rotol manufactured wide-bladed propellers of 10 ft 9 in (3.27 m) diameter, which were recognisable by a bigger, more rounded spinner: the decision was made that the new propeller would also be used exclusively by the Mk II. This engine/propeller combination increased top speed over the late Mk I by about 6–7 mph below 17,000 feet (5,200 m), and improved climb rate. Due to all of the weight increases maximum speed performance was still lower than that of early Mk Is, but combat capability was far better. The Mk II was produced in IIa eight-gun and IIb cannon armed versions. Deliveries were very rapid, and they quickly replaced all remaining Mk Is in service, which were then sent to Operational Training Units. The RAF had re-equipped with the new version by April 1941. The Rotol propeller units were later supplemented by de Havilland constant-speed units similar to those fitted to Mk Is.
A total of 921 Mk.IIs were built, all at Castle Bromwich.
| THE KIT |
The kit has a very nicely appointed interior and
since this is a Profipack kit, there are a number of photoetch pieces to replace
or enhance plastic bit. Some folks will use all of these while others will
concentrate on the larger bits. I find that some parts to be replaced by p.e.
are actually more prototypical when left in plastic, such as the connecting tube
between the two oxygen bottles.
 Others, such as the armor plating are more scale
in p.e. and in some cases you have to use p.e. as there is no plastic
equivalent. One note is that for this variant, the seats were in bakelite so
will be left in a russet color.
Others, such as the armor plating are more scale
in p.e. and in some cases you have to use p.e. as there is no plastic
equivalent. One note is that for this variant, the seats were in bakelite so
will be left in a russet color.
Before installing the cockpit
assembly, the modeler will need to decide between open or closed canopy. For
closed, some cutting is needed on the fuselage
All the flight surfaces have
separate controls and the wing has separate tips to accommodate later clipped
wing Spits.
 Main wheels have separate
hubs to make it easy to paint the tires. The gear is well done and one can leave
these off along with the tail gear until after painting. There is a separate
cockpit access door and this may
be posed open or closed with separate parts for each option. Eduard provides
canopy masks to help you with painting the clear bits. You are also provided
with different props and spinners depending on which markings option you are
using. It appears one prop is a Rotol and the other a deHavilland. While these
planes had VHF radios with no long wire antenna, they did have the IFF antennas
if you wish to add those.
Main wheels have separate
hubs to make it easy to paint the tires. The gear is well done and one can leave
these off along with the tail gear until after painting. There is a separate
cockpit access door and this may
be posed open or closed with separate parts for each option. Eduard provides
canopy masks to help you with painting the clear bits. You are also provided
with different props and spinners depending on which markings option you are
using. It appears one prop is a Rotol and the other a deHavilland. While these
planes had VHF radios with no long wire antenna, they did have the IFF antennas
if you wish to add those.
Instructions are standard
Eduard booklet in color. There are five options in a variety of camouflage
schemes for planes from 609 Squadron, 315 Squadron, 452 Squadron, 312 Squadron,
and 340 Squadron. All are from the 1941/42 time frame. Decals are very nicely
printed and you are provided a complete stencil suite. The decals do not appear
to be the new 'stick and peel' type which I am growing to detest.
| CONSTRUCTION |
 I tried to use as much of the p.e. as I could, though I wasn't always
successful. In several cased during cockpit construction, I found that later
down the page was something I should have added earlier. Airfix seems to
have no issues providing easy to follow instructions and I think it would
help if Eduard did the same. As a note, I used AK Interactive's RC 293 RAF
Cockpit Grey-Green paint for much of the interior.
I tried to use as much of the p.e. as I could, though I wasn't always
successful. In several cased during cockpit construction, I found that later
down the page was something I should have added earlier. Airfix seems to
have no issues providing easy to follow instructions and I think it would
help if Eduard did the same. As a note, I used AK Interactive's RC 293 RAF
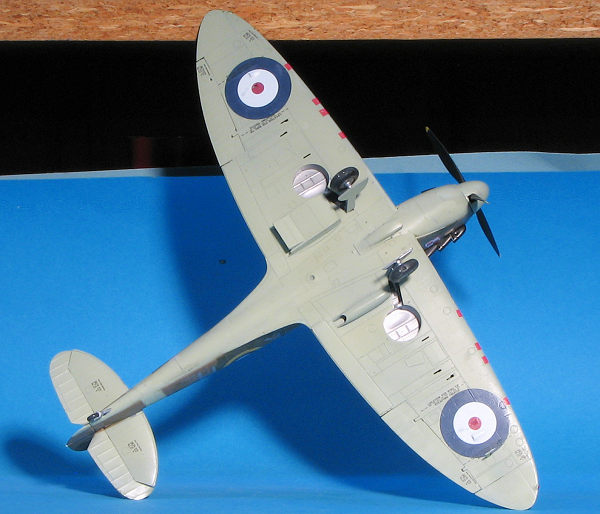
Cockpit Grey-Green paint for much of the interior. 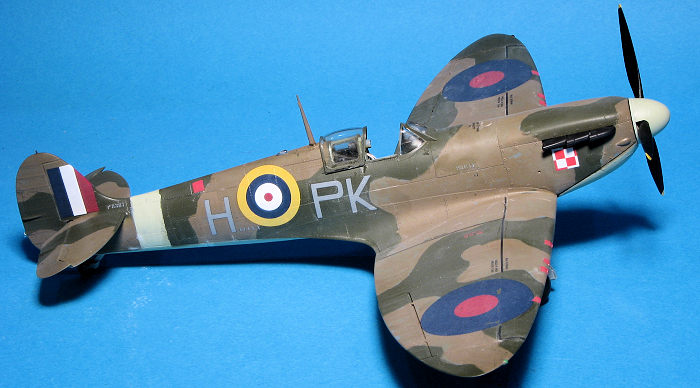 As that was occurring, the wings were dealt with. One has to open some holes
near the wing tip for a vent to later be installed. Eduard provides an
etched mounting plate for this, but looking at the few photos I found of
this area, this plate does not seem to actually be there. The wheel wells
were then installed. There is a short spar piece onto which some of the six
well pieces per side are attached. With that done, the wells are painted
silver and the individual gun barrels are glued in place. Then the upper
wings are glued in place.
As that was occurring, the wings were dealt with. One has to open some holes
near the wing tip for a vent to later be installed. Eduard provides an
etched mounting plate for this, but looking at the few photos I found of
this area, this plate does not seem to actually be there. The wheel wells
were then installed. There is a short spar piece onto which some of the six
well pieces per side are attached. With that done, the wells are painted
silver and the individual gun barrels are glued in place. Then the upper
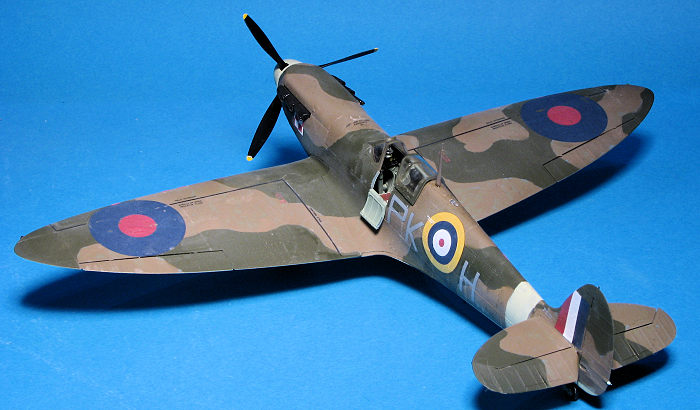
wings are glued in place.| COLORS & MARKINGS |
For this one, I used Hataka lacquer paints. I've had good service from them and like how smoothly they flow on. I had a set of Top Notch camouflage masks so after painting and masking the underside (along with the fuselage band and prop spinner) in sky, I painted the upper surface dark earth and masked it. The set I used was for a Spitfire IX, but the pattern was the same. I then painted on the dark green. Unfortunately, when I removed the masks, it pulled up the paint. This took me by surprise as I'd used these masks with Hataka paint before with no issue. One thing I did notice was that the surface under the mask where the paint wasn't pulled up was sticky. This leads me to believe that as the masks had gotten older, they had become more sticky so I've tossed the others that I have to keep this from recurring. As a note, those areas that had Tamiya tape on them did not pull up so the issue was the masks.
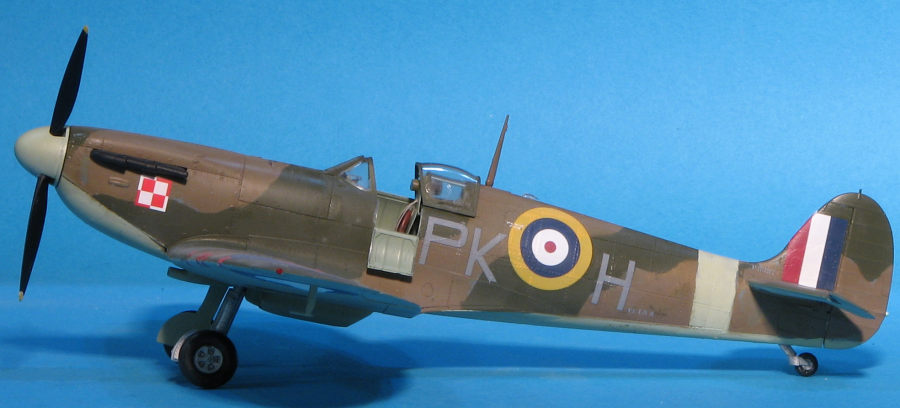
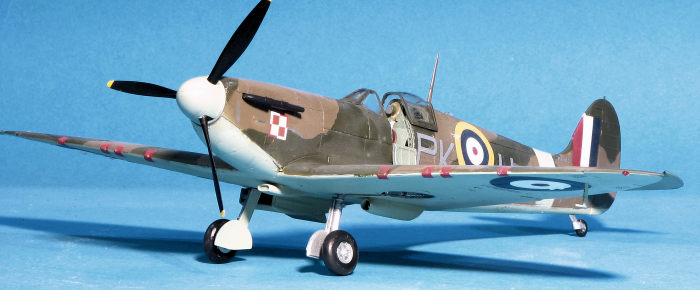
 Once the kit was painted and on its legs, I applied the decals. I did the
markings for 315 Squadron at Northolt in 1941. The decals are very thin and I
had at couple of small ones fold on me. I also found that the underwing ones
needed multiple applications of Mr.Mark Softer in order to conform over the
vents that are there. I also discovered that the fuselage codes (which I guess
are supposed to be sky or some light grey), nearly blend in with the camouflage.
Not at all the stand out shade shown in the instructions. Otherwise, they work
well. (Oh yes, I also discovered too late, that I got the Polish insignia wrong.
It should be white in the upper right. It was only after the fall of the Soviet
Union the the insignia switched. However, I had a slightly oversize one in the
stash so was saved).
Once the kit was painted and on its legs, I applied the decals. I did the
markings for 315 Squadron at Northolt in 1941. The decals are very thin and I
had at couple of small ones fold on me. I also found that the underwing ones
needed multiple applications of Mr.Mark Softer in order to conform over the
vents that are there. I also discovered that the fuselage codes (which I guess
are supposed to be sky or some light grey), nearly blend in with the camouflage.
Not at all the stand out shade shown in the instructions. Otherwise, they work
well. (Oh yes, I also discovered too late, that I got the Polish insignia wrong.
It should be white in the upper right. It was only after the fall of the Soviet
Union the the insignia switched. However, I had a slightly oversize one in the
stash so was saved).
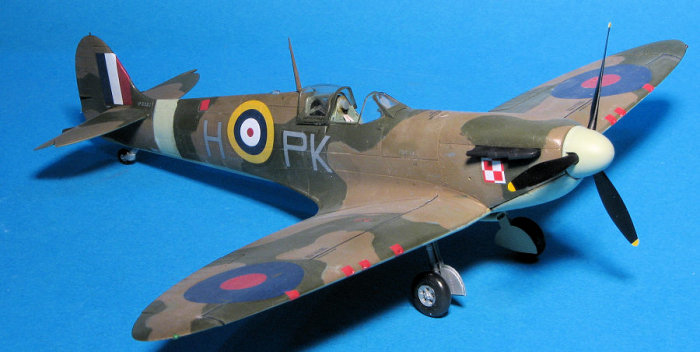
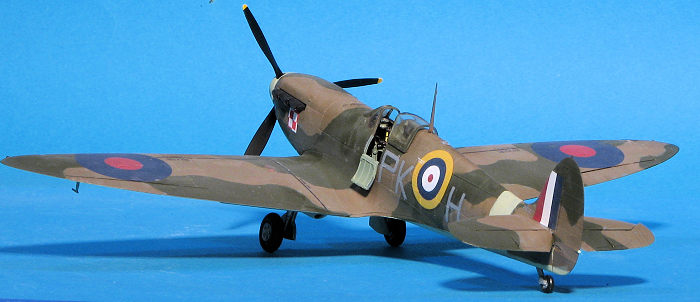
With the decals in place and the airframe given a matte clear coat, I attached the final pieces. First was the open door followed by the canopy. Then the clear upper light and radio mast were installed. Then the main gear doors and a set of BarracudaCast wheels (BR48445). The lower wing pitot was glued on followed by the exhaust. These were a pain to get in place and I had to sand down the attachment points to get them in place. Finally the prop was installed and that was it.
| CONCLUSIONS |
I expected it to be a fussy build and in many areas it was. However, it generally fit quite well and the end result is pleasing. One certainly cannot fault Eduard for a lack of accuracy. I have a couple of other Eduard Spits, but I won't be rushing to build them. For those of you who don't like fiddling with small pieces and think that having 6 pieces for a gear well is too many, there are other brands (Airfix or Tamiya), that will do quite nicely for an early Spitfire.
| REFERENCES |
https://en.wikipedia.org/wiki/Supermarine_Spitfire_(early_Merlin-powered_variants)#Mk_II_(Type_329)
29 July 2022
Copyright ModelingMadness.com. All rights reserved. No reproduction in part or in whole without express permission from the editor.
Thanks to Eduard via Tom Cleaver for the kit.
If you would like your product reviewed fairly and fairly quickly, please contact the editor or see other details in the Note to Contributors.