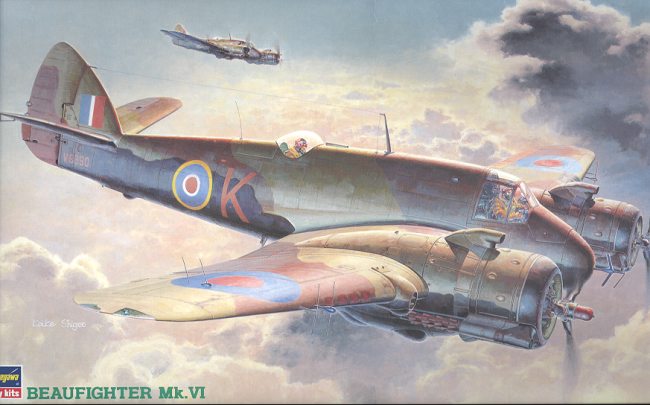
Hasegawa 1/72 Beaufighter Mk. VI
|
KIT # |
CP 13 (51213 |
|
PRICE: |
$29.98 |
|
DECALS: |
Two aircraft |
|
REVIEW : |
|
|
NOTES: |
|
HISTORY |
Before and during WW2, the Bristol aircraft company in England was well known for it's twin-engined light-medium bomber aircraft. It all started with the Blenheim in the late 1930s. When that airframe was obviously too slow and lightly defended to be effective, the company took the basic wings and tailpanes of the aircraft, and developed the Beaufort. This aircraft was more successful as a torpedo and light-medium bomber. However it wasn't right yet. A further development of the Beaufort, still using the basic wings and tail of the Blenheim, was developed even further into the subject of this kit, the Beaufighter. The final development of the type was the much changed Brigand that was known for it's lack of success more than anything else
 All of these improvements and changing fuselages were
accompanied by more and more powerful radial engines. It wasn't until the
Brigand that the wings and tailplane were altered. The Beaufighter itself was
able to see some use as a night fighter around the time of the Battle of
Britain. It was with Coastal Command that the Beaufighter really came into its
own. As a replacement to the older and slower Beaufort, the faster Beaufighter
was able to carry an array of weapons in addition to its 4 20mm and 6 .303 guns.
The most used were underwing rockets and the TF.X was a very capable torpedo
bomber.
All of these improvements and changing fuselages were
accompanied by more and more powerful radial engines. It wasn't until the
Brigand that the wings and tailplane were altered. The Beaufighter itself was
able to see some use as a night fighter around the time of the Battle of
Britain. It was with Coastal Command that the Beaufighter really came into its
own. As a replacement to the older and slower Beaufort, the faster Beaufighter
was able to carry an array of weapons in addition to its 4 20mm and 6 .303 guns.
The most used were underwing rockets and the TF.X was a very capable torpedo
bomber.
The Mk.VI was also had a night fighting variant that was relatively successful. The kit allows one to built either the night fighter or standard Coastal Command version. The latter version had the benefit of a rear gunner not found in the night fighter.
|
THE KIT |
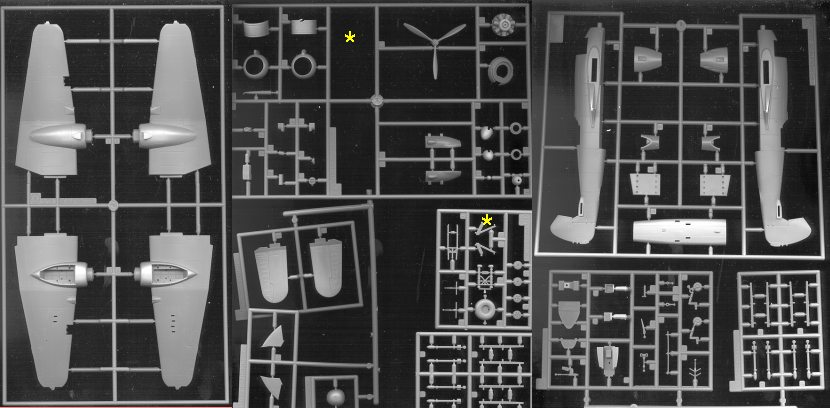
Though the Beaufighter has been out for a number of years, it just hasn't gotten the press that other Hasegawa kits have. In fact, I have not seen this kit at any shows. For some reason, the 1/72 version just isn't that popular. Of course, it could also be that not many people are willing to fork out the bucks for it for it isn't cheap. However, you do get quite a lot for your money. 10 sprues worth of plastic is nothing to sneeze at!
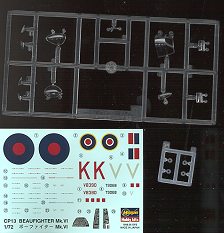 Those of you who are quick
will say "but there are only 7 sprues shown!" That is true, however
those with the little yellow stars have duplicates of them not shown. There is
also the clear sprue shown to the right.
Those of you who are quick
will say "but there are only 7 sprues shown!" That is true, however
those with the little yellow stars have duplicates of them not shown. There is
also the clear sprue shown to the right.
The kit is the usual excellent molding one has come to expect from Hasegawa. It also has those neat little plastic washers for the props. Options include either the night fighter or coastal command version. The night fighter has the extra antenna and no rear gunner, while the coastal command version has a rear gunner, no radar antenna, an extra suite of antennas under a clear dome just aft of the cockpit, and four rockets under each wing.
Some of the highlights of the kit are a full cockpit with decals for the instruments and no seat belts on the seats. The wheels are one piece and are flattened on the bottom. Full wheel wells, with some detail, but no hoses or boxes in there. You can spruce that up later, if you wish.
 Decals are for two aircraft, both in the Mediterranean Theatre and with upper
colors of dark earth and middlestone. The night fighter is with 89 Squadron in
North Africa during 1942/43. It has a black underside as befits the type. The
Coastal Command version is with 272 Squadron on Malta in the dark days of 1942.
The underside color is given as a mix of paints, but is probably Azure Blue.
There is a rather famous color photo of a Beaufighter at Malta, and I would bet
that this is that aircraft. If you have any current books on the Beaufighter,
you should be able to find that photo. Unit markings are limited to just an
aircraft number, so the decal sheet isn't very big. Undoubtedly you can find an
aftermarket sheet if you want something different.
Decals are for two aircraft, both in the Mediterranean Theatre and with upper
colors of dark earth and middlestone. The night fighter is with 89 Squadron in
North Africa during 1942/43. It has a black underside as befits the type. The
Coastal Command version is with 272 Squadron on Malta in the dark days of 1942.
The underside color is given as a mix of paints, but is probably Azure Blue.
There is a rather famous color photo of a Beaufighter at Malta, and I would bet
that this is that aircraft. If you have any current books on the Beaufighter,
you should be able to find that photo. Unit markings are limited to just an
aircraft number, so the decal sheet isn't very big. Undoubtedly you can find an
aftermarket sheet if you want something different.
The Hasegawa instructions are all you would expect with clear steps showing the different parts to add to which type. This difference start in the first step so you need to know which version you want to build right away.
|
CONSTRUCTION |
Starting with the interior (how original), one notices how little there actually is to it. Basically there are two parts to it. The aft cockpit has either the radar operator for the VIf or the rear gunner for the VIc. Depending on which version you choose, the rear seat faces fore or aft! The front compartment consists of a small tub, instrument panel, control wheel and seat. The seat looks quite like a lounge chair with nice rolled pleats in it! Anyway, the interior bits and fuselage insides were painted RAF interior green from the Aeromaster line. The seat and instrument panel were painted flat black. There are decals for the side consoles and instrument panel and these are adequate for the scale.
 I am doing the night fighter version so had to open up a single
hole in the upper fuselage for the radio mast. The rear cockpit fit very well as
does the central bulkhead, which were glued in place. The forward cockpit fits
quite snugly and there was no need to glue it at all. The last interior bit to
glue in was the gunsight. Once in place the fuselage halves were glued together.
When dry, the tail insert was glued in (fit is OK, but not perfect), the aft
cockpit combing (the one for the night-fighter), and the nose cap were glued in
place. I managed to get the nose cap installed a bit off kilter. However,
but sanding off the aperture for the gun camera (not used in the night figher
version), all was made to look ok.
I am doing the night fighter version so had to open up a single
hole in the upper fuselage for the radio mast. The rear cockpit fit very well as
does the central bulkhead, which were glued in place. The forward cockpit fits
quite snugly and there was no need to glue it at all. The last interior bit to
glue in was the gunsight. Once in place the fuselage halves were glued together.
When dry, the tail insert was glued in (fit is OK, but not perfect), the aft
cockpit combing (the one for the night-fighter), and the nose cap were glued in
place. I managed to get the nose cap installed a bit off kilter. However,
but sanding off the aperture for the gun camera (not used in the night figher
version), all was made to look ok.
Moving to the underside of the fuselage, the two inserts were glued in place with minimal fuss. Just looking at all the different inserts and stuff shows that Hasegawa had planned to do a number of different variants when it designed this kit.
Now that the fuselage was drying, attention was turned to the wings. The Beaufighter has six wing guns and there are openings for it in the wing leading edges. However, nowhere in the instructions is there any mention of opening these up. Same goes for the holes for the radar antenna. Needless to say, these holes were opened up as it would have been difficult to do so later when the wings were glued together. Once that was done, the wings were glued. I noticed some sink marks along side the engine nacelles so these were filled and later smoothed out.
 After sanding the filler that was needed on the fuselage, the
wings were glued in place. The fit here is quite good, however the panel lines
for the flaps don't match from the wing to the lower fuselage section. Not a
problem as filler fixes all. I also filled in some sink marks on the upper
fuselage wing root area and where the wing fits in the back. I then installed
the wing intakes near the engines. They also needed a bit of filler. The
tailplanes were then glued in place. These fit perfectly with no filler needed
at all.
After sanding the filler that was needed on the fuselage, the
wings were glued in place. The fit here is quite good, however the panel lines
for the flaps don't match from the wing to the lower fuselage section. Not a
problem as filler fixes all. I also filled in some sink marks on the upper
fuselage wing root area and where the wing fits in the back. I then installed
the wing intakes near the engines. They also needed a bit of filler. The
tailplanes were then glued in place. These fit perfectly with no filler needed
at all.
The engines were the dealt with next. These are very nicely molded and look great once painted steel and given a black wash. The engine front, which is black, holds the little plastic insert for the prop. The cowl flaps were glued to the nacelle and then the engine glued to the stub in front of it. The cowling halves are then glued together and painted black on the inside. These are then glued to the nacelle. If you have done everything right, the little bumps on the cowling will be right in the center of each engine cylinder!
Next you have to make a decision. The kit gives two types of exhaust ring and two types of carb intake. You need to look at your references to determine which to use if you aren't building one of the kit aircraft. I'm doing a US night fighter. My references indicate the standard night fighter exhaust ring, but the longer carb intakes. Once those were installed, the canopy was masked and pressed into place. Then the wheel wells, aft cockpit, and engines were masked with damp tissue and it was off to the paint shop.
|
PAINT & DECALS |
The first part that I painted was the exhaust. This section is really the front ring of the cowling. It was painted with Testors Metallizer Burnt Iron as was the short exhaust section behind it. There is an additional section on the sprues that was painted as well. This is supposed to be the 'hedgehog' flame damper exhaust, but it is lacking all the little triangular bits that jut out from the pipe. How Hasegawa missed this is totally beyond me and it really does not look good at all. Even though I used the kit parts to finish the model, I fear that I'll have to await an aftermarket part to do this section right.
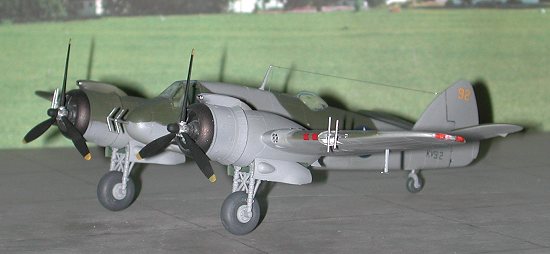
 When that was dry, the
area was masked off and the entire airframe was painted with Aeromaster Medium
Sea Grey (MSG). All the US night fighting Beaufighters were painted in this
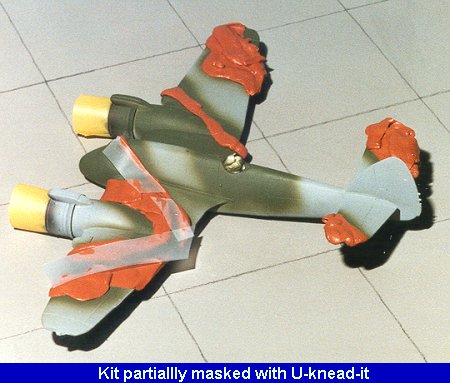
color. The landing gear and wheel hubs were also painted MSG. When that dried, I
used U-Knead-It masking putty to mark off the areas to be painted dark
green (also an Aeromaster enamel). This took me several days of back and forth
painting between the MSG and green as I had lots of trouble with overspray. I
chalk this all up to my lack of experience using a masking putty. I have come to
the conclusion that the stuff is great where you do basically a straight line.
It is when you get a lot of curves and bends that it becomes more difficult to
use. However the results on a 1/72 kit are much better than I could have done
freehand. (Late note: I have also found out that this particular putty turns
into a gooey mess within about a year so cannot recommend it.)
When that was dry, the
area was masked off and the entire airframe was painted with Aeromaster Medium
Sea Grey (MSG). All the US night fighting Beaufighters were painted in this
color. The landing gear and wheel hubs were also painted MSG. When that dried, I
used U-Knead-It masking putty to mark off the areas to be painted dark
green (also an Aeromaster enamel). This took me several days of back and forth
painting between the MSG and green as I had lots of trouble with overspray. I
chalk this all up to my lack of experience using a masking putty. I have come to
the conclusion that the stuff is great where you do basically a straight line.
It is when you get a lot of curves and bends that it becomes more difficult to
use. However the results on a 1/72 kit are much better than I could have done
freehand. (Late note: I have also found out that this particular putty turns
into a gooey mess within about a year so cannot recommend it.)
Once the kit was painted, the landing gear were glued in place, the overspray in the wheel wells was touched up and the kit given an overall coat of gloss acrylic clear in preparation for the decals.
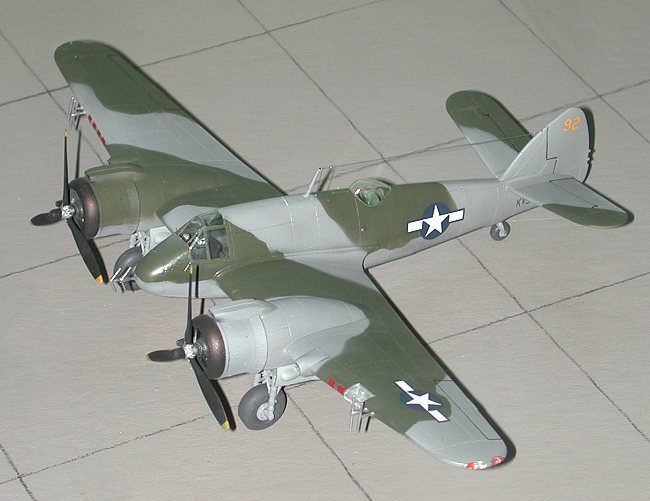
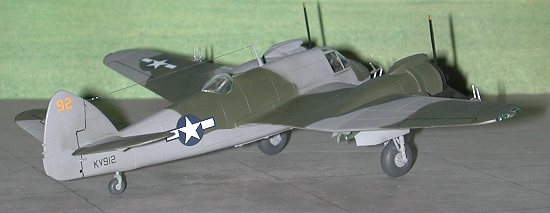
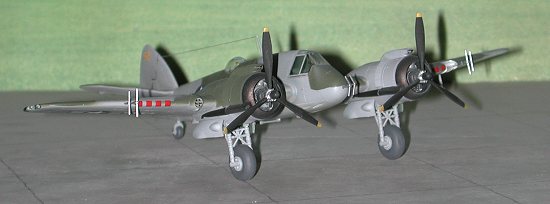
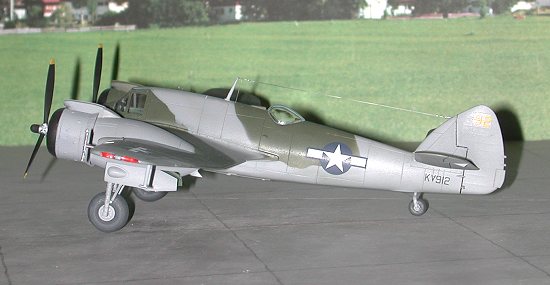
The decals themselves are from Aeromaster sheet 72-150 "Whispering Death part 1'. I chose the USAAF version from the 416th FS that operated in the the Italian Campaign in late 1944. Most of these aircraft had the longer nose containing the new centimetric radar, however, research has determined that there were a number of them that had the older system with external aerials. Regardless of which system used, these aircraft did not have much success as pickings were pretty slim. Anyway, they are basically four insignia, two serials and an individual aircraft number. I used Solvaset to ensure that there was no silvering and the decals reacted well to this solution. Not much, but enough. Once the decals were applied, the kit was given the usual matte coat to seal them in.
|
CONSTRUCTION CONTINUES |
The landing light area was then painted aluminum as were the
radar antennas. When dry, the antennas were glued in place. Final bits were
the clear ones. The wing tip lights were glued in place after the area behind
them was painted red or green. These lights are handed so don't get them
switched or they will look horrible. The landing light cover fit without any
cement needed. 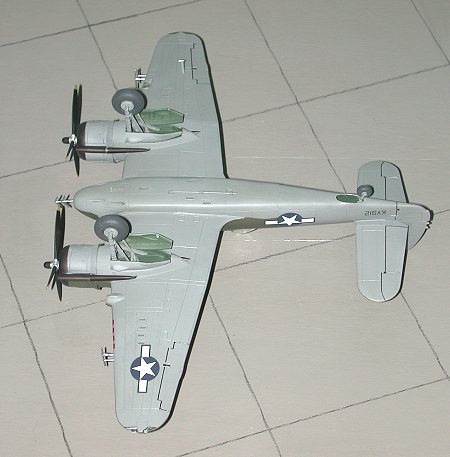 At this time, I started adding in some of the more important
parts. This included the landing gear. The main gear is a rather complex looking
assembly, but it fits together very well and is extremely sturdy when finished.
I do like the separate wheel hubs as it makes tire painting a snap. The tail
wheel was also glued in at this time. I then installed those fruitcake-looking
exhaust extensions. Gawd, are they horrid! Next the gear doors were glued in
place, they fit into slots in the wheel wells and the fit here is quite good as
well.
At this time, I started adding in some of the more important
parts. This included the landing gear. The main gear is a rather complex looking
assembly, but it fits together very well and is extremely sturdy when finished.
I do like the separate wheel hubs as it makes tire painting a snap. The tail
wheel was also glued in at this time. I then installed those fruitcake-looking
exhaust extensions. Gawd, are they horrid! Next the gear doors were glued in
place, they fit into slots in the wheel wells and the fit here is quite good as
well.
|
CONCLUSIONS |
Why I haven't seen more of this kit is beyond me. It really is a beauty and builds quite well with minimal fuss. It beats the heck out of the Frog and Airfix Beaufighter. If the price is scary, it can be found at less than half price on various auction sites. Do yourself a favor; get one and build it!!
|
REFERENCES |
Beaufighter in Action # Squadron/Signal,
Beaufighter at War, Chaz Bowyer, Ian Allen, 1976, £4.95
Aircraft of the RAF since 1918, Owen Thetford, Putnam, 1979
September, 2000
Copyright Modelingmadness.com. All rights reserved.
If you would like your product reviewed fairly and quickly, please contact the editor or see other details in the Note to Contributors.
Back to Reviews Page 2020