RS Models 1/72 Airspeed Envoy
| KIT #: | 92098 |
| PRICE: | $25.17 on sale ($39.95 SRP) |
| DECALS: | Four options |
| REVIEWER: | Scott Van Aken |
| NOTES: | Short run with photo etch and resin parts |
| HISTORY |
The first production Envoy I, G-ACVH, flew in October 1934 and was used as a company demonstrator. The second, also a Series I but fitted with Wolseley Aries III radial engines, was delivered to Lord Nuffield. This aircraft was due to fly in the MacRobertson Air Race from England to Australia in 1934 but the aircraft was damaged and withdrawn from the race. Another aircraft, a specially modified version with long-range tanks (the AS 8 Viceroy) got as far as Athens before leaving the race due to damage. One Envoy took part in the Schlesinger Race to Johannesburg, but crashed, killing two of a crew.
Orders soon came from the whole Commonwealth. Two aircraft went to the Ansett Airlines in Australia. North Eastern Airways and Olley Air Service in the UK also used the AS.6. In Czechoslovakia, the CSA ordered four AS.6 Envoy JC in 1937.
 In May 1937, the British King George VI traded the de
Havilland Dragon Rapide of the King's Flight for an Airspeed AS.6J Envoy III.
The AS.6's good stability and flaps, as well as its low landing speed (less than
100 km/h) was decisive. The aircraft received the registration G-AEXX and was
painted in distinctive red and blue colours.
In May 1937, the British King George VI traded the de
Havilland Dragon Rapide of the King's Flight for an Airspeed AS.6J Envoy III.
The AS.6's good stability and flaps, as well as its low landing speed (less than
100 km/h) was decisive. The aircraft received the registration G-AEXX and was
painted in distinctive red and blue colours.
The Airspeed AS.6 Envoy also entered the Air Forces of different countries. The British Royal Air Force used a few AS.6 in a military configuration. The aircraft was used in the Air Forces of Spain, Japan, South Africa, Finland and China and some others. Seven machines were ordered for joint use by the South African Air Force and South African Airways, with three being delivered in military form and four delivered to South African Airways, where they were used on the air route between Johannesburg - Bloemfontein - Port Elizabeth on 12 October 1936. Each of these seven aircraft could be transformed by a work crew of four within four hours from the transport version into a light bomber or reconnaissance aircraft. In this configuration the crew consisted of four; pilot, navigator, radio operator and gunner.
 In October 1936, the British Air Ministry ordered 136
Envoys for crew training. These further developed aircraft were given a new
company designation as the AS.10 and entered RAF service as the Airspeed Oxford.
In October 1936, the British Air Ministry ordered 136
Envoys for crew training. These further developed aircraft were given a new
company designation as the AS.10 and entered RAF service as the Airspeed Oxford.
During the Spanish Civil War, ten AS.6 Envoys were obtained by the Spanish Republicans, with the Nationalist side using two, including one that defected from the Republicans, as transport, reconnaissance aircraft or light bombers.
During the Second World War, the German Luftwaffe captured some machines and used them as trainer aircraft. The Luftwaffe gave one aircraft to Finland on 22 January 1942, as reparation for the accidental shooting down of a Finnish de Havilland Dragon Rapide. This aircraft was used between 1942 and 1943. Likewise, one aircraft was used between 1941 to 1943 by the Slovaks.
| THE KIT |
This one from RS Models is a standard multi-media short run kit. You all know about the usual in terms of how nice the external detailing is and the need to clean up the big bits and test fit everything so I'll go right on to the features. First off, this one has a relatively extensive clear suite for a short run kit that includes a nicely molded but somewhat distorted cockpit transparency and a pair of cabin windows. This latter bit is a tad different than you might expect in that the cabin windows also include that part of the outer fuselage. You place these onto the fuselage and then attach the upper fuselage atop it. While it eliminates a clear strip on the inner fuselage, it makes it difficult to tackle any seams you may have as there is very little 'fuselage' around each window.
 Backing up a
bit, the cockpit has a single seat (no copilot on these) with an etched harness
as well as an etched instrument panel and rudder pedals. Instruments are on an
acetate sheet that fits behind the instrument panel. The seat sits right in the
middle of the opening to the cabin which makes me wonder how the pilot got into
it. There is also a control wheel and what looks like a landing gear lever and
flap lever on the pilot's right. Both of these and the base into which they fit
are p.e. The cabin has a pair of rear walls and seven airline style seats.
Backing up a
bit, the cockpit has a single seat (no copilot on these) with an etched harness
as well as an etched instrument panel and rudder pedals. Instruments are on an
acetate sheet that fits behind the instrument panel. The seat sits right in the
middle of the opening to the cabin which makes me wonder how the pilot got into
it. There is also a control wheel and what looks like a landing gear lever and
flap lever on the pilot's right. Both of these and the base into which they fit
are p.e. The cabin has a pair of rear walls and seven airline style seats.
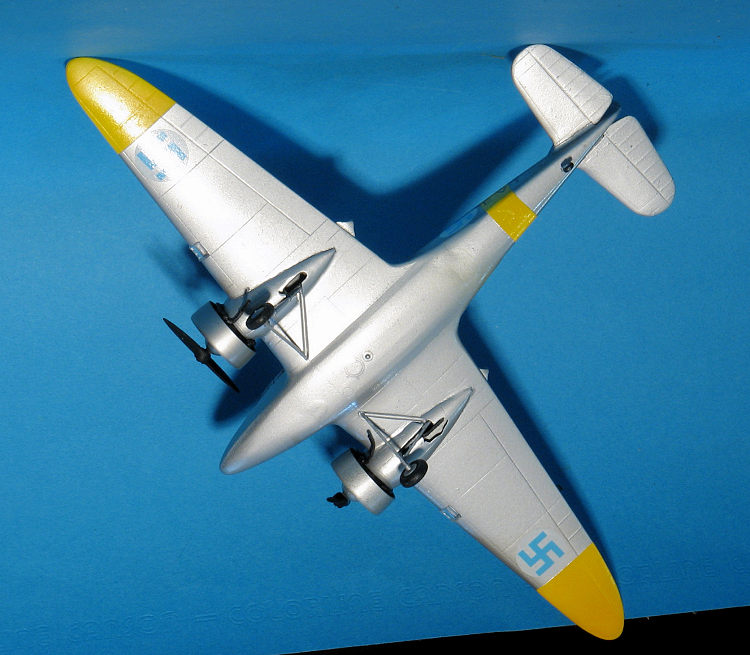
Back at the rest of the airframe, you have a single lower with with two upper wing halves; pretty standard stuff. The kit has a number of lower engine nacelles, but since this is the Castor engine powered plane, apparently only one set applies. The upper engine nacelle is resin as are the engines. In fact, this is one of the deals where you get a crankcase and have to attach each of the individual cylinders. The rocker arm pushrods are photo etch and the exhaust collector is resin. A resin engine ring and crankcase cover are supplied. The latter may be optional with some markings options, but again, none is specified.
Each of the main landing gear assemblies looks rather complex and consists of four pieces per side. Detail drawings are supplied. Each kit has four sets of prop blades. Two sets are different pitch from the other two and in this case, the instructions are specific on which markings option uses which blades.
Instructions are well drawn and provide generic color information. As these are basically airliners, there are no weapons options. Four markings options are provided with the painting and markings guide on the back of the box. One is an actual airliner with the CSA in 1938 with a blue fuselage and tailplane along with the leading edges of the wings and engine nacelles. The rest of the wings are in silver. One option is Finnish with yellow fuselage band and lower wing tips. This appears to be in silver as does the Luftwaffe option (which is listed as 1940-42, but has Eastern Front ID markings). Also in Eastern Front markings is a Croatian plane from 1943. This one appears to be in overall RLM 02. Decals are well printed and are very thin.
| CONSTRUCTION |
 It is with a bit of trepidation that I start a multimedia short run kit like
this, especially one with a fair amount of photo etch and resin. These are
the sorts of kits that seem to end up on the shelf of doom more than any
other type. But I like the look of the plane and having recently finished a
non-multimedia twin without any trauma, I thought I'd give this one a go.
It is with a bit of trepidation that I start a multimedia short run kit like
this, especially one with a fair amount of photo etch and resin. These are
the sorts of kits that seem to end up on the shelf of doom more than any
other type. But I like the look of the plane and having recently finished a
non-multimedia twin without any trauma, I thought I'd give this one a go.
 Eventually I got all the pieces in place and attached the roof. I was not
surprised to find the need for filler and that was particularly true for the
rear section of the roof. With that done, the tailplanes were attached.
There are shallow receptacles for equally shallow tabs, but I simply sanded
down the tabs and did a butt join. Then I assembled the wings and when dry
started the process of sanding down both the wings and areas of the fuselage
to get a decent fit. In addition to the wing roots, I found that sanding
down the front of the lower wing piece was the best way to get the wing and
fuselage root areas to match up.
Eventually I got all the pieces in place and attached the roof. I was not
surprised to find the need for filler and that was particularly true for the
rear section of the roof. With that done, the tailplanes were attached.
There are shallow receptacles for equally shallow tabs, but I simply sanded
down the tabs and did a butt join. Then I assembled the wings and when dry
started the process of sanding down both the wings and areas of the fuselage
to get a decent fit. In addition to the wing roots, I found that sanding
down the front of the lower wing piece was the best way to get the wing and
fuselage root areas to match up. | COLORS & MARKINGS |
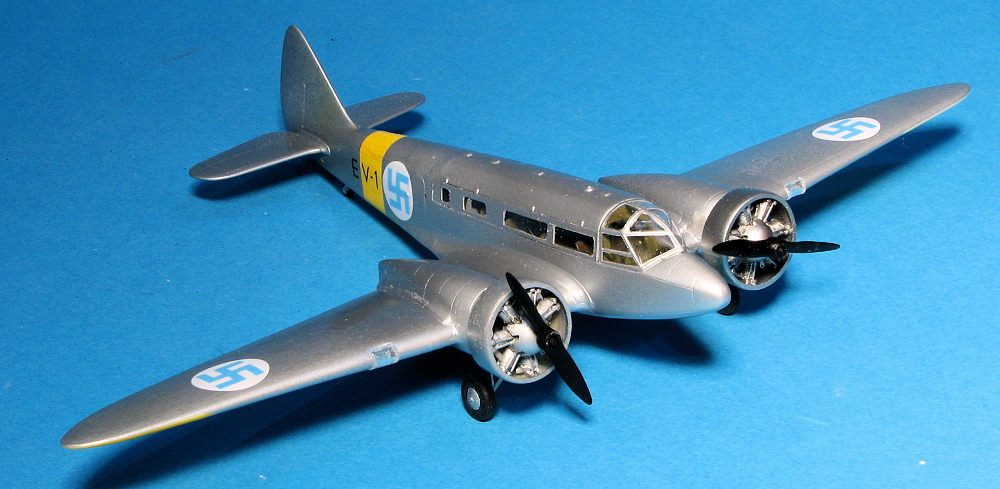
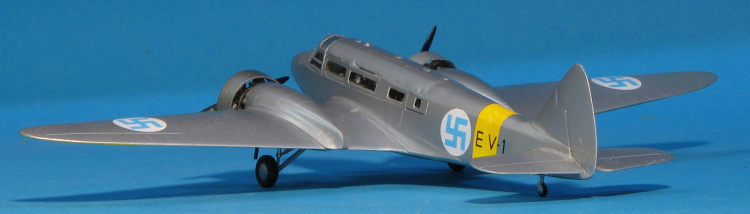
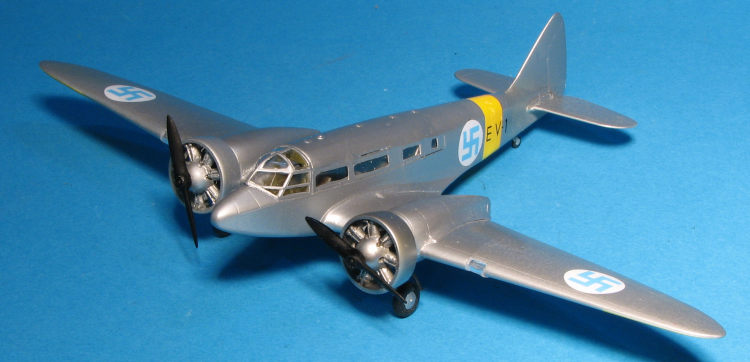
 Of the four options, I was still somewhat undecided on exactly which ones I
wanted to do, but did narrow it down to one of the two overall silver
options. These had yellow lower wingtips and a yellow band around the
fuselage which I had to paint so sprayed those areas white then yellow.
I chose the Finnish markings for this one and the eight decals went on
without any issue. They are also nice and thin but not so thin that they
easily fold onto themselves.
Of the four options, I was still somewhat undecided on exactly which ones I
wanted to do, but did narrow it down to one of the two overall silver
options. These had yellow lower wingtips and a yellow band around the
fuselage which I had to paint so sprayed those areas white then yellow.
I chose the Finnish markings for this one and the eight decals went on
without any issue. They are also nice and thin but not so thin that they
easily fold onto themselves. | CONCLUSIONS |
I like short run kits. I like that they are something different and that they can be a challenge. I don't like that my skills are not up to having them look as good as a standard injected kit when I'm done. But since few people will see them outside of MM, I can live with that. Recommended for experienced modelers only.
| REFERENCES |
http://en.wikipedia.org/wiki/Airspeed_Envoy
6 September 2019
Copyright ModeingMadness.com. All rights reserved.
Thanks to your editor for finding this one on sale.
If you would like your product reviewed fairly and fairly quickly, please contact the editor or see other details in the Note to Contributors.