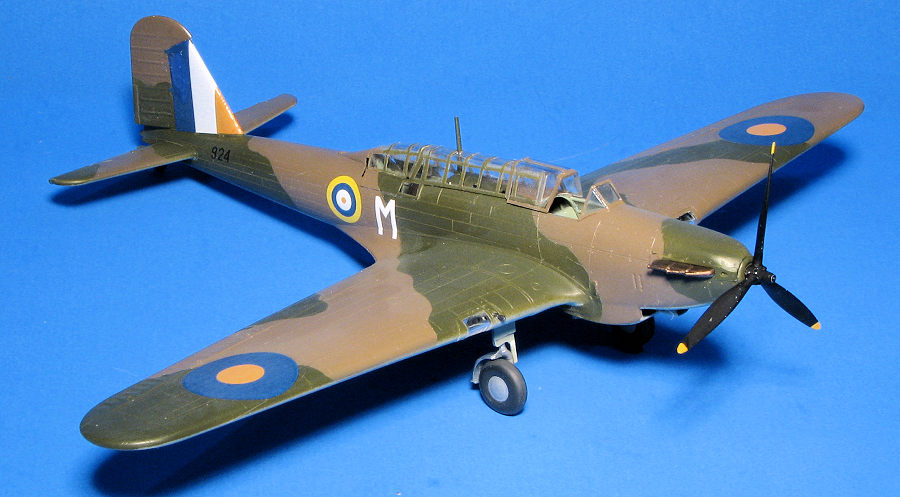
Azur FRROM 1/72 Fairey Battle 'AASF'
| KIT #: | FR0048 |
| PRICE: | $ |
| DECALS: | Three options |
| REVIEWER: | Scott Van Aken |
| NOTES: | 2024 tooling |

| HISTORY |
 The Fairey Battle is a British single-engine light
bomber that was designed and manufactured by the Fairey
Aviation Company. It was developed during the mid-1930s for
the Royal
Air Force (RAF) as a monoplane successor
to the Hawker
Hart and Hind biplanes.
The Battle was powered by the same high-performance Rolls-Royce
Merlin piston engine that powered various contemporary
British fighters such
as the Hawker
Hurricane and Supermarine
Spitfire. As the Battle, with its three-man crew and bomb
load, was much heavier than the fighters, it was therefore much slower. Though a
great improvement over the aircraft that preceded it, its relatively slow speed,
limited range and inadequate defensive armament of only two .303 (7.7 mm)
machine guns left it highly vulnerable to enemy fighters and anti-aircraft fire.
The Fairey Battle was used on operations early in the Second World War. During the "Phoney War" the type achieved the distinction of scoring the first aerial victory of an RAF aircraft in the conflict. In May 1940, the Battles of the Advanced Air Striking Force suffered many losses, frequently in excess of 50 per cent of aircraft sorties per mission. By the end of 1940 the type had been withdrawn from front-line service and relegated to training units overseas. As an aircraft that had been considered to hold great promise in the pre-war era, the Battle proved to be one of the most disappointing aircraft in RAF service.
| THE KIT |
Those of us who have been in the hobby for a while will know that this is not the only 1/72 Battle to be released. The first was by Airfix and was issued in 1968 with the most recent re-issue in 2010. Later, in 2000, MPM added it to their short run offerings. This is a brand new tooling released just in time for the holidays.
You'd expect this one to be the best of the lot and from the look of what's in the box it is. There are quite a few small pieces for the cockpit side walls and you are provided with a full cockpit and gunner's position. A neat feature is that the rear gun can be modeled in the open or stowed position. There are a lot of small subassemblies that will need to be properly placed in a fuselage half before closing it.
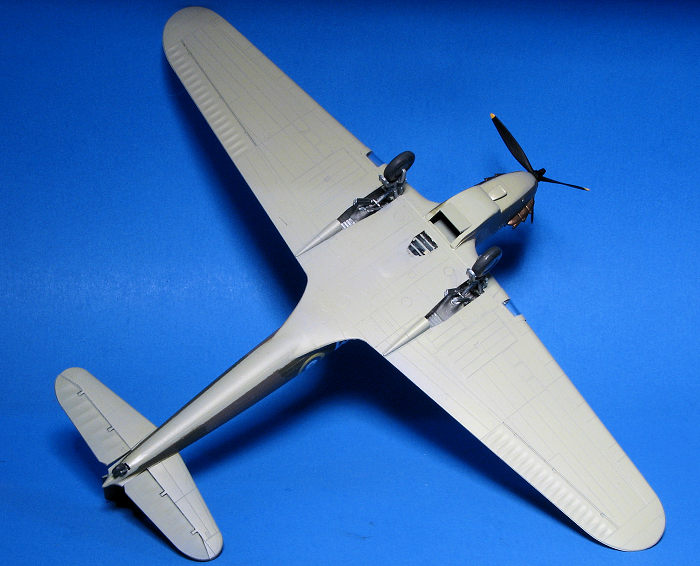 Depending on the version you are building, there are different exhaust
and exhaust mounting inserts to be used. Note that the way the kit is designed,
you will need to install all the landing gear when you close up the fuselage and
the wings. This will enhance the opportunity to break them, this is especially
true of the tail gear which is quite scale. Before closing up the wings, there
is a center section to be attached to the lower wings and the landing light
housings will need to be built up. The landing light covers include a small
section of wing leading edge on either side so will have to be installed prior
to painting.
The rest of the main gear is somewhat complex so it is wise to double check the initial building to ensure that all fits without issue. The lower cowling is a separate piece as this is different on some of the different boxings. Elevators and rudder are separate which is nice as perhaps they can be posed in something other than the neutral position. Ailerons and flaps are molded in place. The greenhouse has a separate canopy and gunner's section. Not sure if the canopy can be displayed open, but you can do that for the rear gunner. The last steps are installing the main gear wheels, mud guards, and gear doors.
Instructions are well done and use color. Some of the steps are a bit vague, but you can figure things out by checking later construction steps. Markings are for three planes. The box art plane is in dark green, dark earth and black from 226 Squadron in May 1940. Next is an Australian version with the Air Gunnery School in dark earth, foliage green, and sky blue in 1942-44. Finally, a South African aircraft with 11 Squadron SAAF in Ethiopia during April 1941. Decals are nicely done and should work just fine.
| CONSTRUCTION |
Many years ago I built the Airfix Battle and did it in Greek markings. It was a usual build for the day and though it turned out just fine, was not a memorable build. This is a kit I've been wanting to build ever since I heard of its coming so when it arrived, I started right into it.
This meant following the instructions and that meant building a bunch of
subassemblies. Some of the parts have small pin and socket alignment, which is
useful. I notice that some of these semi-short run companies have realized that
large pins and sockets can cause sink areas so have gone minimalist in that
regard. Some o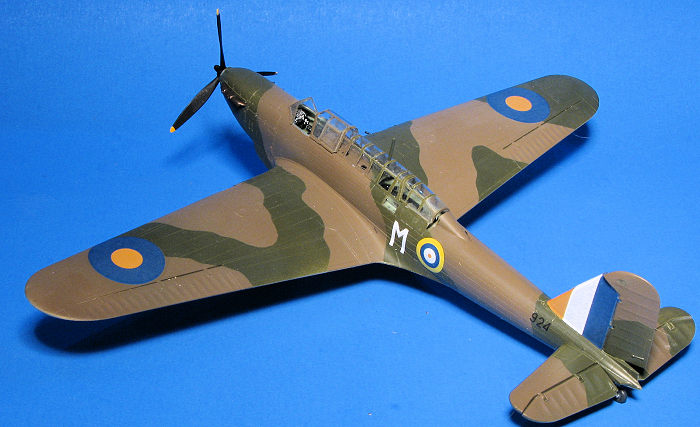 f the pieces are quite small and my aged hands had difficulty
getting them in place. I also had some difficulty getting a few items to stick
together as the attachment points are quite small. I solved that issue by
getting the bits to stick, then using super glue to ensure they didn't fall off.
One of the early areas that gave me issues is the sub-assembly built up in step 3. This consists of some side frames with a cross piece. I simply could not get the bits to stick to each other. I solved this by installing the side frames into each fuselage halve, then before closing the fuselage halves, I had the opportunity to trim the cross piece so it would fit and installed it from the underside. I also had to trim part C24 to get it to fit onto Step 6. In order to facilitate painting, I modeled step 7 into the travel position so I wouldn't have an open gunner's position to sweat when it came time for painting.
I then assembled the main gear wells. This kit has to have the main and tail gear installed before closing the fuselage or wings. I also built up the landing light housing minus the light, which will be installed prior to attaching the covers. With that accomplished, the wings were glued shut then attached to the completed and sanded fuselage. Fit is actually very good. Tailplanes were then glued in place and the elevators, as well as the rudder were glued in place slightly deflected. Gear wells were painted and when dry, filled with Silly Putty. I tacked on the transparencies once the tedious job of masking them was finishes.
| COLORS & MARKINGS |
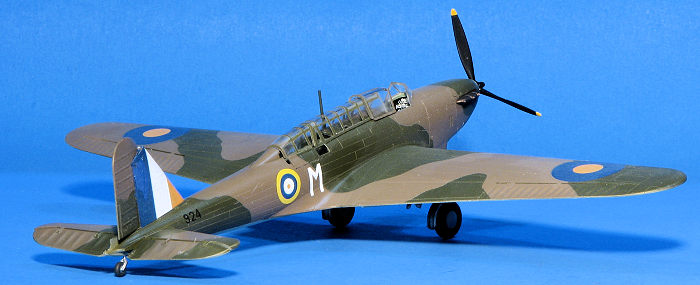 For
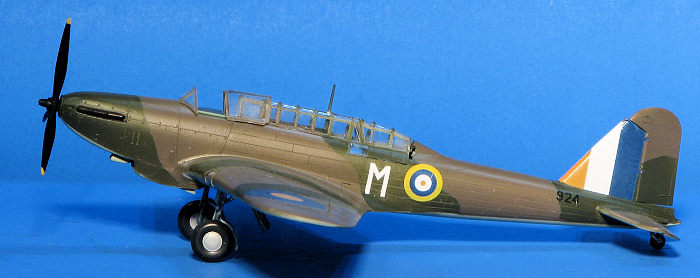
this build, I chose the SAAF option of a plane that operated in East Africa
against the Italians in 1941. I used Hataka paint for this, first spraying on a
coat of primer to spot any seams that needed additional work. The shades used
were sky, dark earth, and dark green. I did the underside first and then painted
the upper surface dark green after masking off the underside shade. I used paper
tape to mask off the dark green before applying the dark earth. Once the paint
was dry, I removed the tape and the transparencies. The area under the
greenhouse was brush painted with the required upper surface shades then the
transparencies were more permanently attached save for the canopy which I
eventually posed open.
The kit decals are very thin and I had some issues with them tearing as I tried to move them into position. I also discovered that the tail stripe decals are a bit too tall and a bit too short in length for the kit. The former was fixed by trimming with a scalpel and the latter by cutting up bits of the insignia I wasn't using. A semi-matte clear was then sprayed over the airframe.
The rest of the build consisted of attaching the prop, the machine gun, the rest of the landing gear bits including the wheels, attaching the appropriate exhaust, and removing the masking from the clear parts.
| CONCLUSIONS |
I guess you could call this a high end short run kit. It fits a lot better than their earlier efforts and while a masking set would have been a huge help, I'm sure one will be released in the near future. Personally, I'd like to see masks included with the kit. I'd be more than willing to pay extra for them. The kit went together in a bit over two weeks from start to finish, which for me is very quick. It certainly is a huge improvement over the Airfix and MPM Battle kits, making it one I highly recommend.
| REFERENCES |
https://en.wikipedia.org/wiki/Fairey_Battle
10 January 2025
Thanks to Azur/FRROM for the review kit. You can find this one at multiple on-line sites or your local hobby shop.
Copyright ModelingMadness.com. All rights reserved. No reproduction in part or in whole without express permission from the editor.
If you would like your product reviewed fairly and fairly quickly, please contact the editor or see other details in the Note to Contributors.