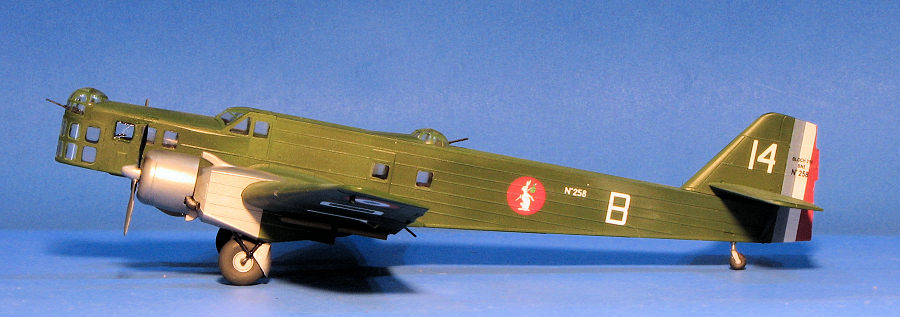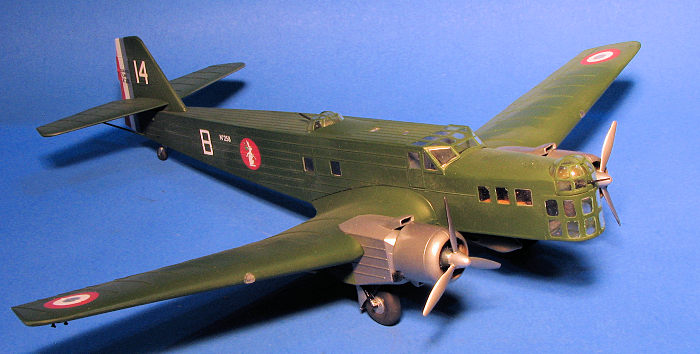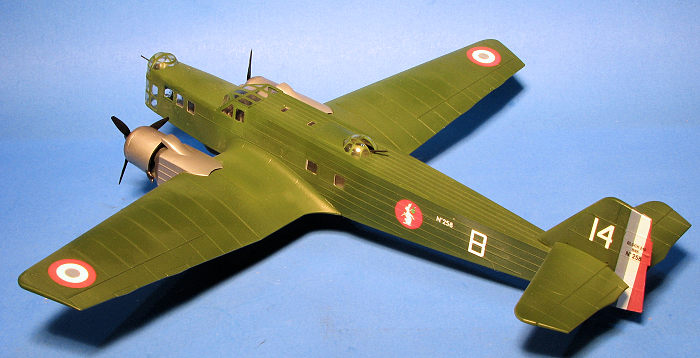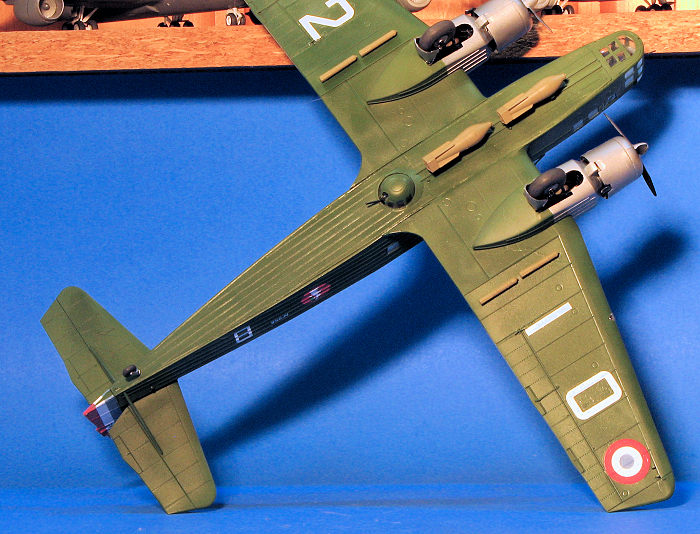
Azur/FRROM 1/72 Bloch MB.210
| KIT #: | FR0055 |
| PRICE: | $ |
| DECALS: | Three options |
| REVIEWER: | Scott Van Aken |
| NOTES: | 2024 tooling |

| HISTORY |
 The Bloch MB.210 and MB.211 were the successors of the
French Bloch MB.200 bomber developed by Société
des Avions Marcel Bloch in the 1930s and differed
primarily in being low wing monoplanes rather than high wing monoplanes.
In September 1939, the Bloch MB.210 equipped 12 bomber units of the Armée de l'Air. At the time of Nazi Germany's attack on France in spring 1940, these squadrons were in the middle of a restructuring aimed at removing outdated aircraft from the front line. Up to the armistice on 25 June of the same year, the MB.210 was used still for nighttime bombing missions and shifted then to North Africa.
| THE KIT |
Back in 1967, Heller released a Bloch MB.210 as part of its program of providing kits of French WWII aircraft. I went through a Heller phase and the 210 was one of the kits that I built in the late 1970s. I was surprised when I read that Azur/FRROM would be producing a new tool kit of this aircraft, but am glad they have. Though not a difficult build, the Heller kit is fairly crude by modern standards.
As I'm sure you are aware, Azur/FRROM is part of the overall CMR group of companies that includes MPM and Special Hobby so this kit could technically be considered a short run kit, but it is more mainstream than their earlier releases. There are areas where the kit has pin and socket join surfaces, with those features being fairly tiny. This is a wise move as it prevents any issues of sink areas opposite these features.
 The kit does include a photo etch fret that encompasses the bomb fins, flight
control actuating arms, and some interior levers. There is also a small bag that
contains two 3D printed exhaust. The kit does incorporate some options. One is a
different nose bomb aimer's doors that can be posed open or closed. The other
are the engines. One option has a clean cowling with collector exhaust (this one
uses the 3D exhaust tips), while the other has an ejector exhaust with a lower
carb intake scoop.
The interior detail is extensive with a well appointed bombardier's position, pilot position, and radio room. Just from the look of things, it seems there will be some 'modeling for God' as it would be difficult to see some of this detail. The boxy fuselage will make assembly quite straight-forward when it comes to attaching the four fuselage sections together.
The bomber has extensive glazing so quite a bit of time will be used masking all the various transparencies. With a kit this new, it will be a while before anyone produces a masking set for it. The kit provides a sturdy spar to help with wing alignment. Undercarriage is well done and suitably sturdy looking. All the ordnance is carried externally with centerline and wing racks to hold a variety of bomb sizes.
Instructions are well done with three markings options. All the options are an overall khaki green with aluminum engine cowlings and forward nacelles. Note that the props are bare metal with black backsides. The box art plane with GB I/19 in July 1938. Next is a GB II/23 at Toulouse in 1939, while the third option is a GB II/19 plane at Bordeaux in 1937. The decals are well done and appear fairly thin.
| CONSTRUCTION |
 It was with
some trepidation that I started on this one. Mainly due to the large number of
windows and my lack of ready to use masks. The inclusion of p.e. also didn't
help as this material and I do not play well together.
Regardless, the first thing I did was to prepaint all of the interior bits a shade of medium grey. Then the assembly started. There are a lot of parts that go into the interior and when done, you will not see most of them. Generally, fit is good, but it is always wise to test fit parts prior to adding glue. An area where I had some issues was getting all the fuselage parts properly attached without gaps. This is one area I did not test fit during construction and were I to build another, I'd check the fit of the fuselage sides and bottom every time I added something to the interior.
Many of the single windows fit from the inside so it is imperative that they are properly glued in place. Apparently one in the forward section had a weak join as much later I managed to knock it into the interior and frankly, when the fuselage is together, it is impossible to replace. Wings, tailplanes and fin/rudder, all fit quite well.
The engines and nacelles take a bit of effort, mostly as one has to build the landing gear during nacelle construction. A plus is that once it is all done, it doesn't have to be attached to the wing and in fact, is such a tight fit and even glue was not necessary. I saved attaching the engines/cowling until the very end to ensure proper alignment. Speaking of engines, the prop shaft is shallow and thinner than the opening into which it fits so care needs to be taken for this.
 As mentioned,
I had no ready to go masks for this so masking the clear bits was tedious. The
turrets were especially challenging. All those large parts were masked prior to
attaching to the airframe. While I managed to keep the guns on the upper and
lower turret intact throughout the build, The same could not be said of the one
in the nose. Fortunately, I was able to pull off the nose turret, drill out the
gun, and insert a pin for the barrel.
All the planes are an overall dark green according to the instructions or a khaki if one believes the box art. I sprayed a part of the wing with Hataka French Olive but it was far too bright. In the end I used Testors FS 34102 and that looked a lot better. The forward part of the engine nacelles and the cowling were painted Alclad II duralumin. I had no issues with the decals, though I found the rudder stripes to be a bit too short to cover the bottom of the rudder. I chose the markings for GB II/23 based at Toulouse in 1939 as I figured most who build the kit will go for the box art scheme.
| CONCLUSIONS |
 This one did
take quite a while, mostly due to the number of parts and all the masking that
had to be done by hand. I'm sure that Special Hobby has a mask set for this by
now and I highly recommend it. The p.e. control surface actuating bits were
basically left off as my attempts to attach them all just ended up a real mess.
I'm not good at these things and would rather see them either molded in place or
provided in plastic. Overall, it turned out well enough and is a real
improvement over the ancient Heller kit.
| REFERENCES |
https://en.wikipedia.org/wiki/Bloch_MB.210
28 March 2025
Thanks to Azur/FRROM for the review kit. Copyright ModelingMadness.com.
All rights reserved. No reproduction in part or in whole without express
permission from the editor. If you would like your product reviewed fairly and fairly quickly, please
contact the editor or see other details in the
Note to
Contributors. Back to the Main Page
Back to the Review
Index Page
Back to the Previews Index Page