|
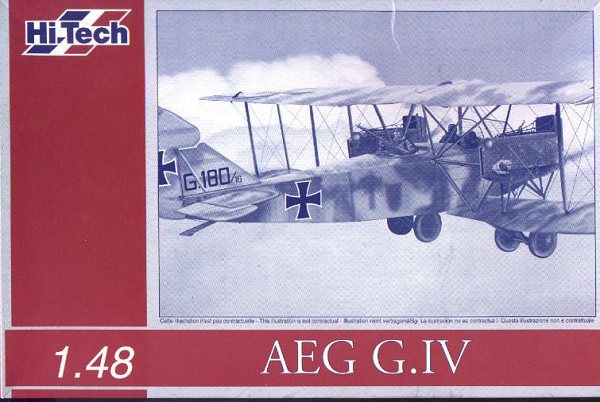
KIT: |
Hi Tech 1/48 AEG IV |
|
KIT # |
48-010 |
|
PRICE: |
$59.95 MSRP |
|
DECALS: |
Four aircraft |
|
REVIEW & |
|
|
NOTES: |
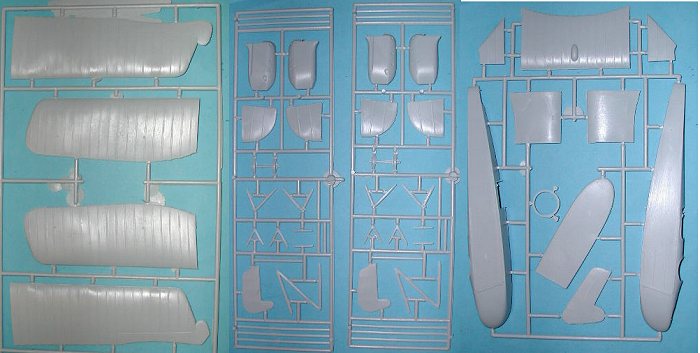
Short run with etched fret, resin and metal bits |
I can’t remember when a kit was so eagerly anticipated by the World War 1 modeling community. Finally, an injection molded first war German bomber. For years all we had in 1/48 for a bomber were old Aurora kits, or very expensive limited edition resin kits, or vacs. Ok, you can build an Aurora but the collectors will probably hunt down and cause you great bodily harm. But finally, our prayers have been answered…..an injection molded 1/48 WW1 bomber. Well pardner…..hold on a minute. Let’s take a close look at this little doggie!
A couple of years ago I had the opportunity to build my first vac kit and it just happened to be the Sierra Scale 1/48 AEG IV. I vividly remember my first impressions when I opened the box and got by the hard fact that I had to sand a hole bunch of parts out of these big plastic sheets. When I examined the vac’d parts I remember thinking “Well….I can replace these struts, engine mountings, landing gear, etc. When I opened up the HiTech AEG, I had strange sense of déjà vu.
As with all kits there is usually something good to say and something not so good to say. This kit is no different. I’ll have HiTech put it into perspective with their own disclaimer that is found on page 1 of the instruction sheet.
“It is well evident that you have not between hands a model of at ‘ACCUTAMYGAWA’, out investments, technologies, and structures are not comparable so for tools that boxes them, instruction notices, etc… With regard to our prices, they are in the decent proportion of our investments and our quantities of sale. On the other hand, we probably will be the only one for quite and while offering a model kit of this plane.”
Please don’t blame me for this horrid grammar, I actually graduated from the eighth grade! If you actually take the time to decipher this gibberish , and examine the kit in detail, they are giving you the absolute unabashed truth. Perhaps if I spoke fluent French, but then again an eighth-grade education only goes so far.
First Impressions.
Ok.. we have
been forewarned. The first items that caught my eyes were the plastic on the
sprue. It is gray molded plastic, kind of a softer plastic. The parts are
heavy. The surface isn’t exactly smooth but kind of grainy. The fuselage is
ok, without a lot of detail because the real thing didn’t have very much detail
anyway. The datafile shows some underside fabric lacing but that can be added
using something from Archer’s Dry Transfers. The wings are thick and slightly
warped. Since this kit has started shipping there has been a lot of on-line
discussion about seriously warped wings. My wings aren’t as bad as I had heard
and the warping can be fixed using hot water or a heat gun. The wing ribs are a
bit thick but if you don’t want to be a perfectionist then you can live with
it. 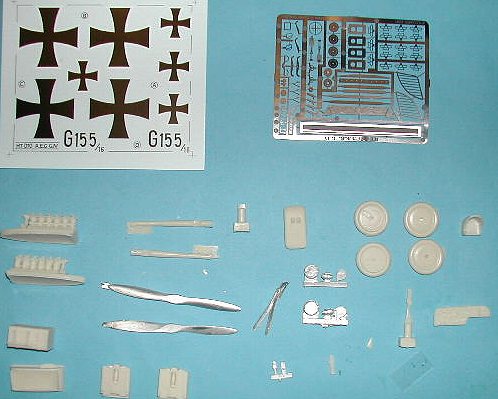
The kit contains a very nice set of photoetch details and a bag full of fairly nicely cast resin and white metal parts for the engine, props, wheels, and interior details. One small set of decals are included for markings for one aircraft HiTech states that the markings are “plausible” for an AEG of WW1. Excellent aftermarket decals for the AEG are readily available from Americal Gryphon.
The photoetch details look darn good. If you can figure out the instructions and decide on how the cockpit detail goes in, you can get a good looking cockpit. The bomb racks under the fuselage and on the wings are photoetch and should yield good results. No bombs are included but can be found in after market. Try Copper State Models for WW1 German bombs.
Given my quote of the HiTech disclaimer from the instructions you can get a pretty good idea of what kind of assembly instructions to expect. Not good! Eight pages of instructions contain a combination of exploded assembly diagrams and some very grainy annotated “photo like” views of an AEG for detail. Parts are labeled in the instruction sheet, but hold on here. The only parts labeled in the kit itself are the photoetch parts. The white metal, plastic, and resin parts are left for you to decipher as to what they can possibly be. I got a pretty good idea of which part was which after about 20 minutes of study. How much effort does it possibly take for a manufacturer to at least identify the parts for the builder? Even early Eduard efforts took this small courtesy step most of the time, and I for one readily appreciated it. It helps to make the puzzle plausible before one starts to get discouraged.
Candice’s Take!
Ok friends, here’s my take on this puppy.
1) Don’t even try to build this baby without having the Windsock Datafile #51 in your possession. Study it, compare it with the instructions, preplan each step, then go for it.
2) The plastic parts provided on the sprue for the various engine mount struts and other strut members seems a bit thick. Don’t be afraid to abandon the provided parts and replace them with evergreen or bamboo.
3) Get on line and contact some people who can answer some questions on the AEG IV. You are probably going to need some advice.
4) One original AEG exists in at the Canadian War Museum in Ottawa. If you live in Ottawa you have the best reference available. The rest of us just have to deal with what we have.
If you really, really, really, really, just must have a 1/48 WW1 German bomber, and absolutely will not under any circumstances even approach a vac model ,then this is the kit for you. Funny how I mentioned déjà vu at the start of this review. This is exactly how I felt when I decided to build the Sierra Scale Vac AEG IV. To be very honest, after you get the vac parts cut our from those big plastic sheets you almost have the same amount of work to expect from this kit. The only real winner I can see in this kit is the photoetch. Besides that ??
(The editor and others who have suffered through and actually completed a Hi-Tech kit can only hope that Candice has either a good shrink or someone/thing to use as a punching bag when the frustration level gets too high. How Squadron managed to pick this pooch as 'kit of the year' is way beyond this editor's understanding. Can you say 'pay off'? Sure you can.) :o)
If you would like your product reviewed fairly and quickly by a site that has over 100,000 visitors a month, please contact me or see other details in the Note to Contributors.