| KIT #: | 32011 |
| PRICE: | $79.00 including shipping |
| DECALS: | Five options |
| REVIEWER: | Tom Cleaver |
| NOTES: | 'Fokker Built' boxing |
| HISTORY |
By the fall of 1917, the German Air Force had fallen
behind the developmental curve of fighter aircraft.
The two best fighters, the Fokker Dr.I and the Albatros
D.V suffered from structural failures.
The Dr.I was actually passe by this time though it had
only just begun to appear in the Jastas, being based in a 1916 idea for a
supreme dogfighter at the point in time when the close-in high-g maneuvering of
a “dogfight” was seen as largely the tactic of the past.
The Dr.I was not fast enough to get away from its
enemies or to catch them.
The Albatros was a development of a 1916 design and had
the built-in failure of a single-spar lower wing since the Germans had decided
to copy the sesquiplane design of the now-obsolete Nieuport 11-17 fighters;
doing so with a heavy design like the Albatros was the opposite of what a
sesquiplane design required, and the result was a fighter its pilots were afraid
to throw around the sky with abandon, since it had the nasty habit of shedding
one or both of the lower wings when so doing.
The Pfalz D.
The airplane was so advanced in construction, with a
steel-tube fuselage and internally-braced wings, that it
was the only weapon used during the war specifically mentioned in the
| THE KIT |
 less said
about this abomination the better - there was certainly nothing good to say
about it.
less said
about this abomination the better - there was certainly nothing good to say
about it.
That is not the case with these kits.
They are “definitive.”
Wingnut Wings kits have been progressively getting
better and better, having started from excellent and proceeding from there.
The struts and cowling panels are close to scale
thickness, yet they are not fragile.
The Wingnut Wings kits include 210 parts, including 19
parts specific to the early Fokker-built D.
Decals are provided for five different airplanes.
Two of these are early Fokkers with the “streaky”
camouflage, and this is done with decals.
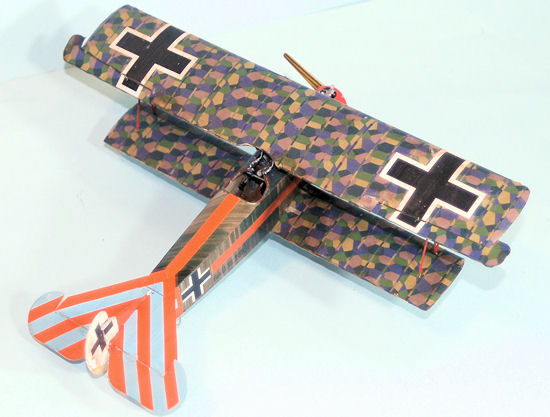
The four and five-color lozenge comes pre-fitted, with
the rib tapes printed in the sheet; it is thus pretty close to impossible to
screw up what to me has always been the most difficult part of a Fokker D.
Wingnut Wings has also released a separate decal sheet with five more options for each of these kits, and I know Pheon Decals is doing some sheets. Thus, the modeler will be confronted with the problem of deciding which of many interesting markings options will be used on the project. We should be so fortunate to have this problem with all our projects.
| CONSTRUCTION |
The major item to point out regarding this kit is the
fact that the struts and the internal structure are very close to “scale
thickness.”
This means they are fragile during construction, though the
completed sub-assembly of the interior is as solid as any of their other kits,
and the completed model is substantially strong.
However, during assembly, it is possible to harm the
outcome by using force anywhere along the process.
 I bring this up because Wingnut Wings kits are very
precisely designed, so as to insure that when parts are in place, they are in
the right configuration and alignment.
However, with these parts extra care needs to be taken.
I strongly recommend on the basis of my experience that
before you glue the wing parts together, you test-fit all the interplane and
cabane struts to the wing surfaces, and that you slightly widen the holes in the
wings where these parts attach, so that there is a smooth, easy fit without any
stress involved in positioning them.
If you do this so you enlarge the holes from the inside
of the wing, you will get the hole just large enough to accomplish this, while
still insuring a solid fit.
Once the struts are painted, I would also advise that
you scrape the paint off the attachment tabs, because this fit is so precise
that even a coat of paint can affect them.
I bring this up because Wingnut Wings kits are very
precisely designed, so as to insure that when parts are in place, they are in
the right configuration and alignment.
However, with these parts extra care needs to be taken.
I strongly recommend on the basis of my experience that
before you glue the wing parts together, you test-fit all the interplane and
cabane struts to the wing surfaces, and that you slightly widen the holes in the
wings where these parts attach, so that there is a smooth, easy fit without any
stress involved in positioning them.
If you do this so you enlarge the holes from the inside
of the wing, you will get the hole just large enough to accomplish this, while
still insuring a solid fit.
Once the struts are painted, I would also advise that
you scrape the paint off the attachment tabs, because this fit is so precise
that even a coat of paint can affect them.
Take your time in assembling the interior and handle the
framing carefully, and all will work easily with a beautiful result.
For a change, I started the model by gluing the wings
together and setting them aside.
I then went to my usual start point and painted
everything according to the instructions in the Erection Manual (calling what
Wingnut gives you “the instructions” as if they were a variation of the
nearly-useless crap one gets from Revell or Dragon is an insult to what you get
here).
Painting while everything is on the sprue is really the easiest way to
go with the many small detail parts and eases assembly when you are ready to
proceed.
While that was all setting up, I painted the wings with
Future, and when it was dry I applied the lozenge decals.
These are a pure joy as compared with the tedium of
cutting strips of lozenge to fit, laying them down, allowing them to set up,
then laying down rib tape decals and allowing them to set up, then turning the
wing over and doing the same on the other side.
That process used to take a few days and I dreaded it
more than doing rigging, but the Wingnut lozenge was all applied within about
half an hour and the wings were set aside to allow the decals to set.
These decals are thin and should be allowed to get to
the point of just starting to float off the backing sheet before you apply them
over a wet surface.
Then use a damp paper towel to take up excess, followed
by an application of decal solvent to make them set down fully.
The result looks great.
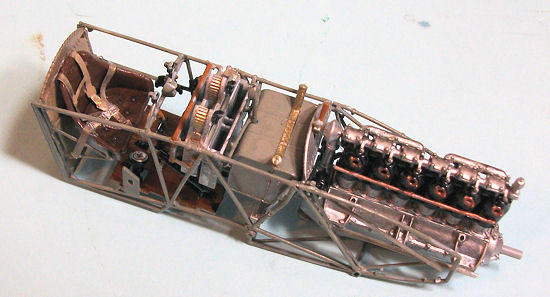
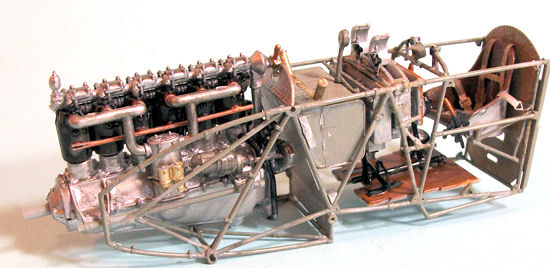 I then returned to assembly, following the Erection
Manual step for step.
As with all other Wingnut kits, if you commit this
radical act of following the instructions, construction is easy and the result
looks good, as you can see from the photos here of the completed interior.
I then returned to assembly, following the Erection
Manual step for step.
As with all other Wingnut kits, if you commit this
radical act of following the instructions, construction is easy and the result
looks good, as you can see from the photos here of the completed interior.
The fuselage was then glued together, and after it had
set up and the engine was installed on its bearers, the process of assembling
the cowling began.
This is very
fiddly, for the same reason the cowling on the Tamiya Spitfire series is fiddly:
it is thin, and has to fit precisely.
I started by assembling the radiator and gluing it to
the lower forward cowling piece and then attaching that, followed by the rear
lower cowling piece.
I then attached the rear side pieces.
Be very certain while you are doing this to get the fit
right, so that the attachment points for the cabane struts and the landing gear
remain in the clear for the later assembly of those parts.
I then attached the forward side panels.
Test fitting the upper panels made me realize all that
prior assembly needed to set up before proceeding.
When all was set, I assembled first the left, then the
right upper parts.
You need to do it in this order so they fit around the
radiator.
At this point you may need to squeeze each to hold them in proper
alignment until the glue sets.
Those of you doing this particular kit who choose to do
the Sachsenberg airplane will be spared this problem, since those upper parts
aren’t used.
With the fuselage assembled, it was time to proceed to painting and decals.
| COLORS & MARKINGS |
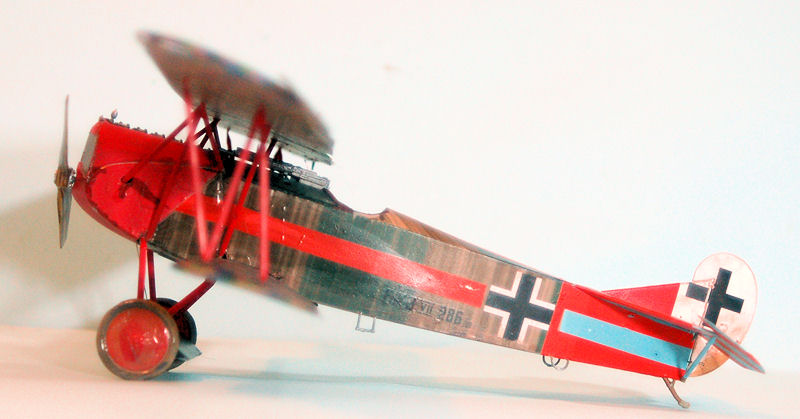
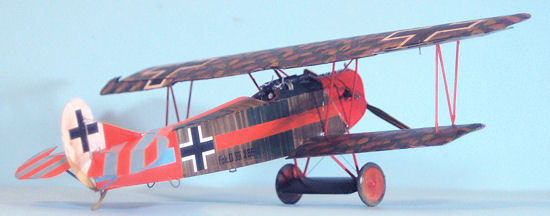
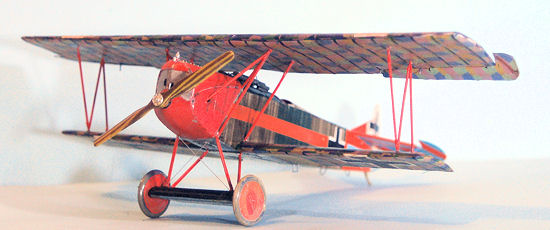
You may notice in the pictures that the red cowling on
this model looks “rough.”
That was intentional.
The original came out of the factory with the cowling
painted dark green.
The red paint was applied over that without any primer,
and so the dark surface “shows through” given that the red paint was thin.
I used
Xtracrylix “Red 23" and applied it by brush over the grey parts.
This paint doesn’t leave brush strokes when you apply it
by brush, and it dried leaving some “holidays” of a darker color coming through,
which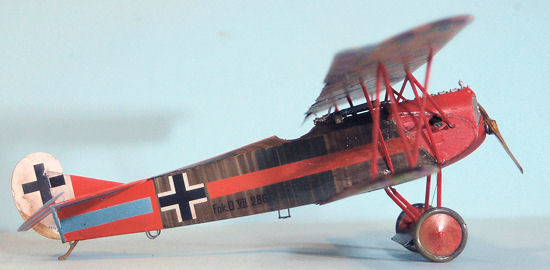 is a good approximation of what the original was.
Had I airbrushed this, I would have
had to apply the dark green (a color I suspect was close
to RLM 71 if not that color actually), then apply thinned Red to get the same
effect.
is a good approximation of what the original was.
Had I airbrushed this, I would have
had to apply the dark green (a color I suspect was close
to RLM 71 if not that color actually), then apply thinned Red to get the same
effect.
As an aside, for all the other marking and painting
options, I would suggest you apply the full lozenge to the fuselage and paint
the cowling dark green before you paint the final color, since on all the
originals that last paint was applied over lozenge and dark colors without an
intervening primer, so the underlying surfaces should “make their presence
known” under that color for an accurate look.
I first discovered this doing the all-red MvR Dr.I,
which had that paint applied over the factory-applied streaky camo, which can be
“seen” under the uneven final paint application, giving the model the “blood
red” color witnesses all described seeing.
This would indeed be an extra step in your process, but
I think the result is well worth the additional effort.
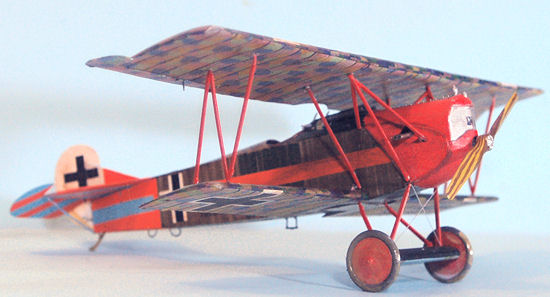
The lower part of the fuselage was painted with Tamiya
“Light Blue” (RLM 65), with the upper fuselage painted with Tamiya “Buff.”
The rear fuselage and the horizontal stabilizer and
elevators were painted with a mixture of Tamiya “Sky Blue” and “White” to get a
blue the same shade as the profile in the Erection Manual.
I then gave the fuselage and tail surfaces a coat of
Future.
I first applied the orange rear fuselage decals, so I
would know where to cut the side panels of the “streaky” camouflage.
Again, with these fairly large pieces of thin decals,
float them slightly off the backing sheet and apply them carefully to a wet
surface, then “mop up” the excess water and then apply decal solvent.
The same goes for the orange stripes on the horizontal
tail surfaces.
I also applied the orange area on the vertical fin. Let these set
up thoroughly before proceeding.
While the fuselage basic decals were setting up, I
applied the national insignia decals to the wings and let that set up.
When the fuselage was ready, I applied the national
insignia, then applied the orange stripe on each side.
This insured I got the orientation and alignment right.
I set the horizontal stabilizer in position on the
fuselage and then applied the orange stripe on the upper rear fuselage, to be
sure it was correctly aligned with the stripes on the stabilizer.
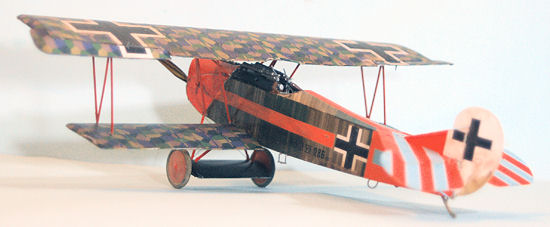
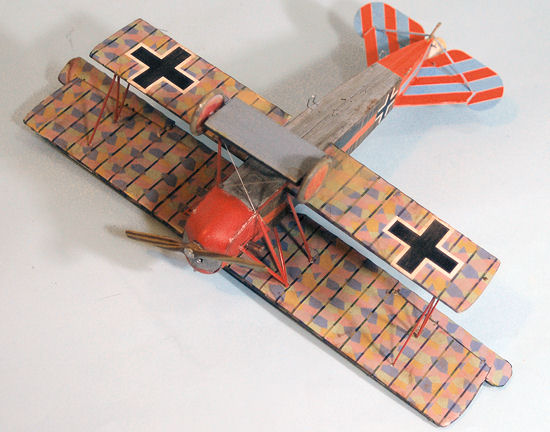 Wingnut Wings points out that the early Fokker-built
D.VIIs had a thinned brown “glaze” applied overall to reduce the intensity of
the colors.
The photos of Gabriel’s airplane are understandable for their
“muddiness” if you realize that this “glaze” had been applied.
I made mine with a mixture of Tamiya X-9 “Brown” in a
thinned mixture 1 part paint to about 6 parts rubbing alcohol, and applied it
over all the parts with a half-inch sable brush, to get it “glopped” on right.
When that was set up, it was time to weather further.
Wingnut Wings points out that the early Fokker-built
D.VIIs had a thinned brown “glaze” applied overall to reduce the intensity of
the colors.
The photos of Gabriel’s airplane are understandable for their
“muddiness” if you realize that this “glaze” had been applied.
I made mine with a mixture of Tamiya X-9 “Brown” in a
thinned mixture 1 part paint to about 6 parts rubbing alcohol, and applied it
over all the parts with a half-inch sable brush, to get it “glopped” on right.
When that was set up, it was time to weather further.
Everything I have read about the last year of the war
mentions how wet 1918 was; in fact, it was the wettest year Europe had seen
since the last year of the last great warm, 1815.
My great-grand-uncle’s diary of his time in the
Meuse-Argonne offensive has a complaint about the rain (in colorful
“Missouri-isms”) about every other entry.
So we can confirm the Western Front of 1918 was wet and
muddy, a good thing to remember when finishing a model used in that period.
These airplanes were not washed off and polished by
their crews every night.
The oil smears and mud stains remained.
I used thinned Tamiya “Smoke” applied with a 3/8" brush, for the oil stains on the fuselage sides and belly aft of the engine cowlings, then applied unthinned “Smoke” for the exhaust stain on the right side of the fuselage and the inner upper surface of the right lower wing. I used Tamiya’s “mud” from their weathering set for the wheels, the wing axle, and for “mud spray” on the lower surfaces of the lower wings and the tail where it was probably “rooster tailed” by the tail skid. Photos of Gabriel’s airplane show the white rudder to be pretty dirty.
| FINAL CONSTRUCTION |
 I attached guns and windscreen to the fuselage, then the
cabane struts were put in position and allowed to set up.
I then attached the upper wing, using cyanoacrylate glue
to get it in position, then popped the outer “N” struts into position and glued
them in.
I attached guns and windscreen to the fuselage, then the
cabane struts were put in position and allowed to set up.
I then attached the upper wing, using cyanoacrylate glue
to get it in position, then popped the outer “N” struts into position and glued
them in.
I attached the horizontal stabilizer and elevators and
the vertical fin and rudder.
I then attached the landing gear.
Due to the scale thickness of the gear attachment
points, I was glad to use .010 wire attached with cyanoacrylate glue for the one
bit of “rigging” necessary, since this strengthened the landing gear and keeps
the model from “rocking and rolling” as it would without supportive bracing.
I finished off by attaching the prop.
| CONCLUSIONS |
Resistance. Is. Futile. You can’t build just one.
December 2012
Review kit courtesy of Wingnut Wings.
If you would like your product reviewed fairly and fairly quickly, please contact the editor or see other details in the Note to Contributors.