Blue Max 1/48 Avro 504K
| KIT #: | 208 |
| PRICE: | $59.98 MSRP |
| DECALS: | Two options |
| REVIEWER: | Tom Cleaver |
| NOTES: | Short run with metal parts |
| HISTORY |
The Avro 504, which was built in greater numbers than any other single British aircraft type during the Great War with a total of 8,340 built by the parent company and contractors, is one of the true “greats” of aviation.
Alliot Verdon Roe was one of the great British aviation pioneers. His AVRO
504, which was first flown at Brooklands in July 1913, was the foundation
stone of the later success of the A.V. Roe Company, which would include
such immortals as the Lancaster and Vulcan bombers. The aircraft was
immediately ordered by both the Royal Flying Corps and the Royal Naval Air
Service for use in the reconnaissance role. An Avro 504A 5 Squadron, R.F.C.,
was the first British aircraft brought down by enemy fire. R.N.A.S.
Avro504s were used in the first long-distance air raid of the war, an
attack on the Zeppelin  sheds
at Friedrichshafen, led by Squadron Commander E.F. Briggs. By 1915, the
Avro 504 was only used in combat operations in secondary fronts like the
Middle East, and the airplane found its true calling as a trainer, with
4,800 employed in this role in the U.K. during the course of the war.
sheds
at Friedrichshafen, led by Squadron Commander E.F. Briggs. By 1915, the
Avro 504 was only used in combat operations in secondary fronts like the
Middle East, and the airplane found its true calling as a trainer, with
4,800 employed in this role in the U.K. during the course of the war.
The Avro 504J and 504K were the most successful versions of this ubiquitous airplane, since they introduced a revolutionary universal engine mount; the 504K was able to use any available rotary engine.
After the war, the 504K remained in service with the RAF as its principal trainer until the late 1920s, when it was retired to the newly-created Royal Auxiliary Air Force, where it remained in service until 1935.
Avro 504Ks served after the Great War with the air forces of the United States, Portugal, Denmark, Argentina, Estonia, Peru, New Zealand, Japan, Australia, Canada, Finland, Mexico, South Africa, Sweden, Norway and the USSR.
 With
demobilization, huge numbers of Avro504s were declared surplus and placed
for sale. In 1919, an Avro 504K without engine sold for 868 Pounds, with
the price dropping a year later for one with an engine for 650 Pounds. The
Avro 504 was to Great Britain what the Jenny was to the United States in
creating air mindedness in the 1920s, with Aerial Derbies and Air Traffic
Exhibitions expanding throughout the country during the post-war years.
Local flying clubs thrived with the airplane, and barnstormers like Alan
Cobham became well-known.
With
demobilization, huge numbers of Avro504s were declared surplus and placed
for sale. In 1919, an Avro 504K without engine sold for 868 Pounds, with
the price dropping a year later for one with an engine for 650 Pounds. The
Avro 504 was to Great Britain what the Jenny was to the United States in
creating air mindedness in the 1920s, with Aerial Derbies and Air Traffic
Exhibitions expanding throughout the country during the post-war years.
Local flying clubs thrived with the airplane, and barnstormers like Alan
Cobham became well-known.
Several Avro 504Ks still fly - yours truly had a ride in one at the Watsonville West Coast Antique Fly-In 30 years ago. In the U.K. visitors to the Shuttleworth Collection can see their well-known Avro 504K H5199 flying on late summer afternoons.
| THE KIT |
The only previous kit of the Avro 504 in 1/48 scale is one originally produced by Merit some 40-odd years ago that has been re-released over the years by SMER. With this new kit from Blue Max, the SMER kit should now be seen as no more than a possible source for decals in the latest release, and for the interplane and cabane struts if the modeler doesn’t want to use the Contrail strut material provided in the Blue Max kit. While the SMER kit can be turned into a nice model with a lot of effort it is viable only if price is the sole criteria for purchasing a model, as the Blue Max kit is thoroughly accurate in comparison.
 Blue Max does kits
of aircraft from the First World War that are unlikely to be done by other
manufacturers (though Roden now does both the S.E.5a and Bristol Fighter,
which were aircraft for which Blue Max was the first to do accurate 1/48
scale models five years ago). The kits are “limited run” in the way that
term used to mean in the early days of “limited run” kits, with plastic
parts produced by low-pressure injection molding, and pewter detail parts.
The kits are made for the experienced modeler who has accurate research
material at hand and is willing to see the kit as the basis for a model
that will be created with a liberal application of modeling ability. That
said, the end result is - in my experience - always worth the effort.
Blue Max does kits
of aircraft from the First World War that are unlikely to be done by other
manufacturers (though Roden now does both the S.E.5a and Bristol Fighter,
which were aircraft for which Blue Max was the first to do accurate 1/48
scale models five years ago). The kits are “limited run” in the way that
term used to mean in the early days of “limited run” kits, with plastic
parts produced by low-pressure injection molding, and pewter detail parts.
The kits are made for the experienced modeler who has accurate research
material at hand and is willing to see the kit as the basis for a model
that will be created with a liberal application of modeling ability. That
said, the end result is - in my experience - always worth the effort.
This kit provides the airframe in injection plastic with very good surface detailing. Due to the low-pressure molding process, there is flash, and the mold gates are thick enough they need to be cut off with a razor saw. Cleaning up the parts reveals that they are well-done and fit easily. The landing gear and interior detail is all provided in white metal. With the addition of seatbelts and extra detail that can be seen through the large cockpit openings, this looks to provide the basis of an accurate model that will be far superior to the sad old Merit kit now released by SMER.
Decals are provided for the Avro 504 on display at the RAF Museum, Hendon, in clear-doped linen and P.C.10, and for an RAF trainer in overall silver dope from the 1920s.
| CONSTRUCTION |
 This kit, which
is surprisingly simple in kit design, is not that hard to build, other than
the rigging, which is quite complex.
This kit, which
is surprisingly simple in kit design, is not that hard to build, other than
the rigging, which is quite complex.
I started by cleaning the flash off all the parts, and then assembling the upper wing. The wing is in three parts - I glued left and right wing to the center section and set it aside with bracing to set up with the correct dihedral. While that was going on, I drilled out the inner ends of the lower wings and put in some plastic rod to guide the location to the fuselage. I next attached the ailerons to the wings in dynamic positions. I did the same with the horizontal stabilizer and then turned to the fuselage.
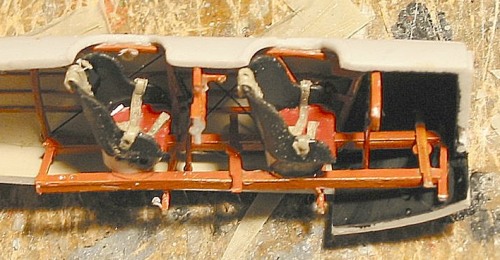 I painted the interior of the fuselage with Gunze-Sangyo “Sail Color” for
the fabric covering, then hand-painted the molded on inner rib detail. I
cleaned up the white metal inner structure parts, filing them to fit inside
the fuselage correctly, then painted them wood color. When that was dry, I
glued some wire in position for the internal bracing of the structure. I
used seats from the spares box that were better shaped and used Cutting
Edge posable resin British Sutton harnesses on them before gluing them in
position. When all the interior parts were attached, I glued the fuselage
halves together and ran some cyanoacrylate glue down the centerline seam.
I painted the interior of the fuselage with Gunze-Sangyo “Sail Color” for
the fabric covering, then hand-painted the molded on inner rib detail. I
cleaned up the white metal inner structure parts, filing them to fit inside
the fuselage correctly, then painted them wood color. When that was dry, I
glued some wire in position for the internal bracing of the structure. I
used seats from the spares box that were better shaped and used Cutting
Edge posable resin British Sutton harnesses on them before gluing them in
position. When all the interior parts were attached, I glued the fuselage
halves together and ran some cyanoacrylate glue down the centerline seam.
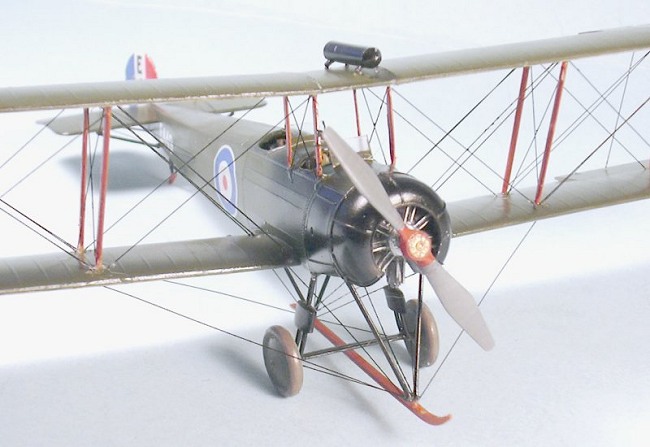
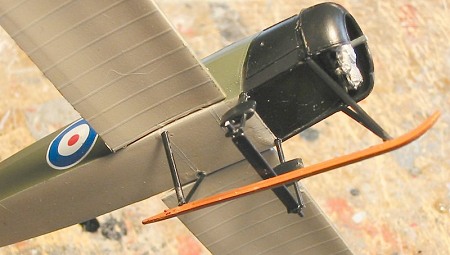 Chris Gannon had sent me some photos he had taken of the Avro 504K in the
RAF Museum, and I decided to do that specific airplane since it was
included in the decals. Studying the picture, I realized that the very
nice white metal engine the kit had was not the same engine as was used on
this airplane. The engine from a Roden Strutter kit looked more accurate
for this airplane, and one of the spare props in the Roden kit was exactly
like the prop on this airplane. Thus, I replaced the kit engine and prop
with these parts, and decided to use the engine on another work in
progress. Had I not had the Roden spare parts, I would have proceeded with
the kit parts, which are fine on their own, merely not correct for the
specific airplane.
Chris Gannon had sent me some photos he had taken of the Avro 504K in the
RAF Museum, and I decided to do that specific airplane since it was
included in the decals. Studying the picture, I realized that the very
nice white metal engine the kit had was not the same engine as was used on
this airplane. The engine from a Roden Strutter kit looked more accurate
for this airplane, and one of the spare props in the Roden kit was exactly
like the prop on this airplane. Thus, I replaced the kit engine and prop
with these parts, and decided to use the engine on another work in
progress. Had I not had the Roden spare parts, I would have proceeded with
the kit parts, which are fine on their own, merely not correct for the
specific airplane.
After sanding off the centerline seam and covering it with Mr. Surfacer 500 and then sanding that smooth, it was time to attach the wings. I had drilled out locating holes for the lower wings. When these were attached, I set the fuselage/wing sub assembly to the side, suitably braced for proper dihedral, to set up.
When that was dry, I painted the inside of the cowling and the firewall silver and attached the engine, then the cowling. After I attached the horizontal tail surfaces, the model was ready for painting.
| COLORS & MARKINGS |
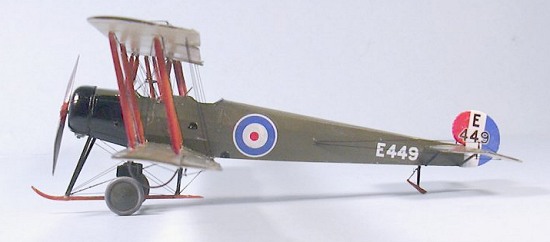
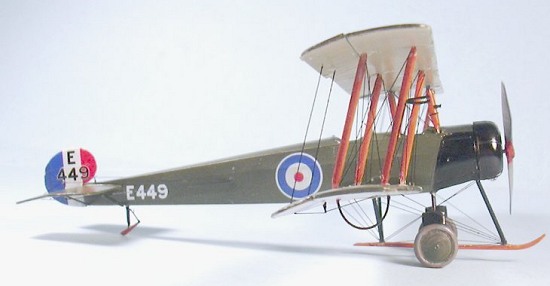 I first
pre-shadowed the model, then painted the lower surfaces with Gunze-Sangyo
“Sail Color” for the clear doped linen, and the upper surfaces with
Xtracrylix RAF Dark Green, which is the color the original airplane is (WW2
RAF Dark Green is one of the shades that WW1 PC.10 paint could come in and
was in fact the “correct” original color.) The forward fuselage and cowling
were painted with Tamiya Semi-gloss Black. When this was dry, I gave the
model a coat of Xtracrylix Gloss Varnish.
I first
pre-shadowed the model, then painted the lower surfaces with Gunze-Sangyo
“Sail Color” for the clear doped linen, and the upper surfaces with
Xtracrylix RAF Dark Green, which is the color the original airplane is (WW2
RAF Dark Green is one of the shades that WW1 PC.10 paint could come in and
was in fact the “correct” original color.) The forward fuselage and cowling
were painted with Tamiya Semi-gloss Black. When this was dry, I gave the
model a coat of Xtracrylix Gloss Varnish.
Decals:
The kit decals were used. These are very thin and did not need any decal setting solution - in fact, using any would have harmed them. When they were dry I washed the model to get rid of any setting stain, then gave it another coat of Xtracrylix gloss varnish.
| FINAL CONSTRUCTION |
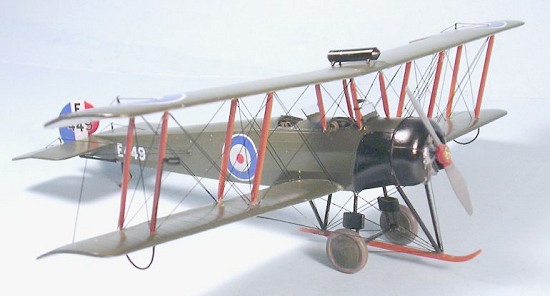
The struts were cut from the Contrail strut material to the proper length and sanded to the right shape, then I attached the white metal cabane struts with cyanoacrylate glue, then attached the upper wing with C-A glue while the wing was held in proper position with jigs cut from cardboard sheet. I then attached all the struts with C-A glue.
 The complex
landing gear was assembled with C-A glue.
The complex
landing gear was assembled with C-A glue.
Rigging:
I once again used .008 brass wire painted with gloss black to simulate the “japanned” raf wires used by RFC and RAF aircraft in the last two years of the war. The complex wire bracing for the landing gear actually strengthened it quite a bit, as did the wing wires steady the wing, since I used cyanoacrylate glue for these, which has a stronger joint than the white glue I usually use.
Final details:
I stained the lower fuselage with Tamiya “Smoke,” and then attached the prop and the windscreens, which I made from clear plastic sheet.
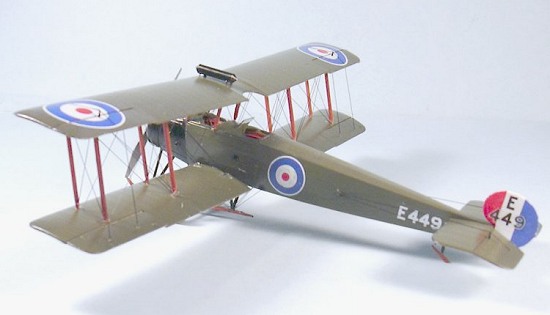
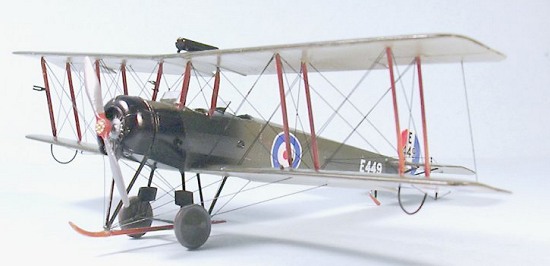
| CONCLUSIONS |
Definitely one of the best Blue Max kits (and I have done all of them). This might be a good choice for the modeler who is thinking of doing his first World War I model with complex rigging. As is usual, the secret to rigging is to take one’s time (in my case, three sessions over two days). I’m glad to finally have an accurate kit of one of the most famous British airplanes of the period. The old Merit kit is now thoroughly sidelined on every issue but price - and this new one is ten times better, so the fact it is ten times more expensive is quite justified.
February 2005
Copyright ModelingMadness.com
Review kit courtesy of Blue Max.
If you would like your product reviewed fairly and fairly, please contact the editor or see other details in the Note to Contributors.