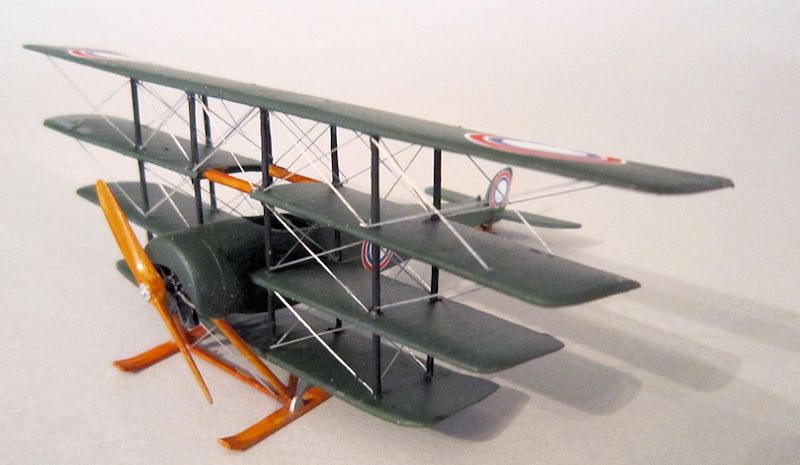
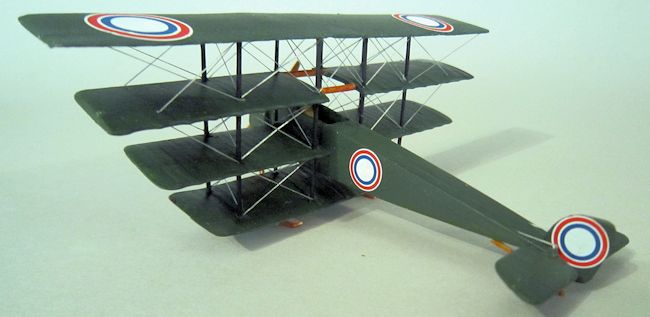
1/72 Saveljev Quadraplane
| KIT #: | AZ Moraine Saulnier Type G #7374 |
| PRICE: | About $20 for the AZ kit |
| DECALS: | |
| REVIEWER: | Chris Peachment |
| NOTES: |
The
fuselage and tailplane from the AZ Morane were used as a donor kit. |
| HISTORY |
I came across this aircraft while I was researching my previous kit of the
Anatra Anadwa, where I found it on the same website, listed below. It appealed
to me, first because the fuselage could easily be found in the AZ kit of the
Morane. And secondly because I had never built a quadruplane before.
In 1916 VF Saveljev and Vladislav Zalevskij built this experimental 2-seat
reconnaissance aircraft, using a fuselage from the French Morane G. The
Quadruplane was powered by an 80hp engine when it was flown on
 April 15, 1916.
According to the test pilot Ungmejster, “The aircraft is very responsive and may
compete with the 165hp Albatros, But it needs a 100hp Monosoupape engine.” Later
this engine was fitted with minor modifications, and the aircraft performed
numerous flights.
April 15, 1916.
According to the test pilot Ungmejster, “The aircraft is very responsive and may
compete with the 165hp Albatros, But it needs a 100hp Monosoupape engine.” Later
this engine was fitted with minor modifications, and the aircraft performed
numerous flights.
Scratch builders will find the following measurements useful:
User:
Imperial Russian Air Service
Engines:
Prototypes:
Gnome or Clerget 9 cylinder air-cooled Rotary, 80 hp.
Production:
Gnome-Monosoupape 9 cylinder air-cooled Rotary,100 hp.
Wingspan:
(8.5m / 9.3m)
Length:
(6 m)
After replacing the engine, and minor adjustments had been made, there were a number of test flights. The aircraft did not go into serial production, probably because of the difficulty in obtaining the engines.
| CONSTRUCTION |
I put the fuselage together from
an
AZ kit, which is simplicity itself. Just a basic interior, and two fuselage
halves which need a little sanding across its box section, in order to eliminate
the seams. After that it was a question of finding the wings. Normally I would
have scratch built them using the same technique from the Anatra. But in the few
photographs of the aircraft available, it is clear that the wings were of very
thin cross section. Moreover there seemed to be a discrepancy in information
about the struts. One side view drawing shows the aircraft with only a single
main strut joining all four wings, like the Sopwith Triplane. This is supported
by one photo. But all the other photos show quite clearly that it had two main
struts, in two bays. One can only assume that both were tried during the testing
of the aircraft. I decided to go with the main body of evidence, and have two
sets of struts. The pictures also suggest that instead of being the usual
 faired
type of strut, they were of round cross section. I can only surmise that they
were metal rod, and they seem to be painted black.
faired
type of strut, they were of round cross section. I can only surmise that they
were metal rod, and they seem to be painted black.
I found various sets of wings from my spares box, and I wish I could tell you
which kits they came from, but they are lost in the mists of memory. Suffice to
say that almost any 1/72 WWI wings will do, and it is mainly a question of
sanding them down to the correct chord and length, and ensuring that the
trailing edges are scalloped, which you can do with a sharp scalpel.
The second pair up from the bottom will be fixed to the fuselage sides.
And the second from the top consists of two wings joined in the middle by
horizontal spars, presumably to give the pilot some sort of a view.
Note that the span of each wing reduces by a regular amount the lower it gets.
The plans and the photos will help you here. And notice also that the tips of
the lowest wing are upturned. That is best left until a later moment though.
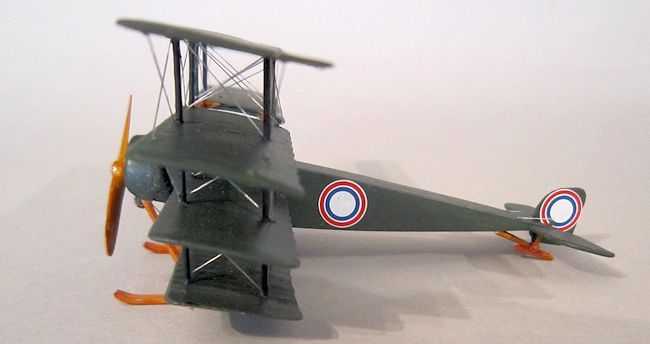
Once you are satisfied that the wings are the right shape, then comes the most
important part. I clamped them all together one above the other using some
strong clothes pegs. Then mark where the struts are to go from the plans, and
drill up from the bottom, all the way through the wings until you reach the top
wing, then stop when the holes are half way through the upper wing. Then use
eight lengths of plastic rod which look
 the right diameter, and glue them in
place on the bottom wing. You now have something which looks like the beginnings
of a wicker basket.
the right diameter, and glue them in
place on the bottom wing. You now have something which looks like the beginnings
of a wicker basket.
Thread the rods through the second lower wing until the gap is correct, and glue the fuselage in place to the wing roots. Allow to set before then threading the third wing on. Now measure the upper wing gap carefully, and trim the struts accordingly. Then glue the upper wing in place and then comes the ticklish business of inducing the stagger. You will have to rock the whole wing box forward while the glue is setting, and I had to encourage the lowest set of struts to bend slightly forwards with tweezers. Prop it all up with a couple of books to hold the right stagger and leave to dry. You now have a very strong quadruplane, and it is all over bar the shouting. You will need to tidy and sand down the underside of the lower wing, where the struts were pushed through the drilled holes.
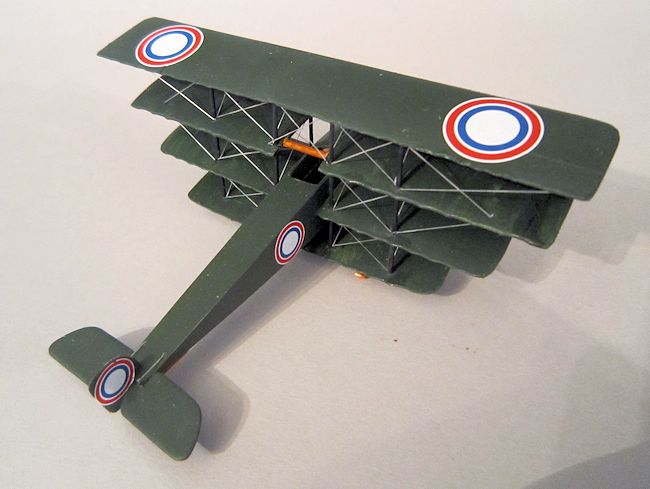
| COLORS & MARKINGS |
Painting
can now take place, and overall dark green seems to be agreed on as the usual
Russian colour. I used Lifecolor acrylic Italian Gloss Dark Green FS 14077, but
that might be a shade dark for some. A lighter olive would work just as well.
The gloss finish helped the markings bed down, which came from the spares box. A
coat of matt varnish was next.
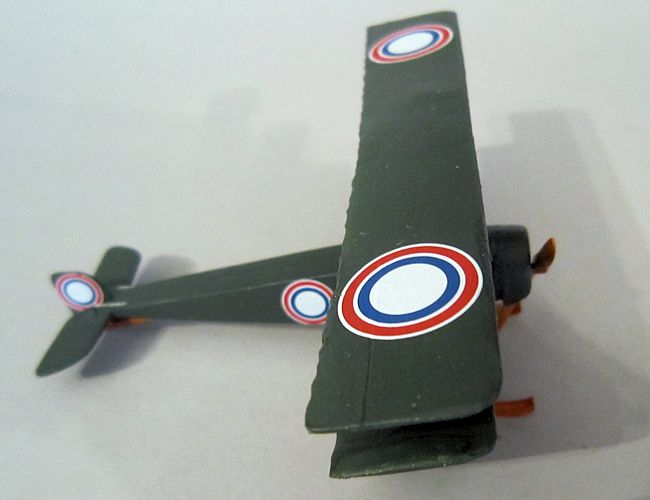
 After that you can settle down to many pleasant evenings of rigging, for which I
used my usual method of elastic thread coloured silver with a gel pen, and
secured with drops of superglue gel applied with a sharpened toothpick. When you
have finished you will be rewarded with the lovely sight of an aircraft which
looks like ten miles of metal wire held together by a few bits of wood and
linen.
After that you can settle down to many pleasant evenings of rigging, for which I
used my usual method of elastic thread coloured silver with a gel pen, and
secured with drops of superglue gel applied with a sharpened toothpick. When you
have finished you will be rewarded with the lovely sight of an aircraft which
looks like ten miles of metal wire held together by a few bits of wood and
linen.
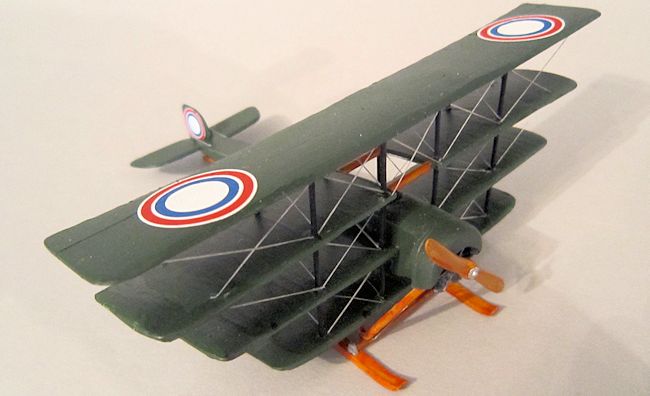
The undercarriage can be modified from the AZ kit, painted brown with a coat of
orange clear, as are the wing joining spars above the fuselage,
the propeller and the tail skid. All other interplane struts are matt
black. I chose to use skis just for a change, and cut them from thin strips of
20 thou plastic card, upturned the forward ends, and secured them to the axle
using tiny triangular mounting plates cut from scrap. Just before they are
finally set, rest the aircraft on a flat surface in order to get the skis at the
right angle.
As usual the final touch is to add the prop.
| CONCLUSIONS |
 A fairly easy exercise in scratch building which might suit a modeler's first
attempt, especially if you have a spares box well stocked with old WWI wings. It
is certainly unusual, and I can't find another example of this aircraft in model
form on the internet.
A fairly easy exercise in scratch building which might suit a modeler's first
attempt, especially if you have a spares box well stocked with old WWI wings. It
is certainly unusual, and I can't find another example of this aircraft in model
form on the internet.
| REFERENCES |
Obviously there are no surviving aircraft, not even in a museum.
The
photos do suggest variation in the prototypes, so it is a question of choosing
which one you want. If you are scratch building the wings, then the single strut
type might be an attractive possibility.
http://www.wwiaviation.com/russia1916.html
http://www.wwiaviation.com/popup/Saveljev_Quadraplane.html
http://www.wwiaviation.com/quadruplanes.html
Chris Peachment
April 2014
Copyright ModelingMadness.com. All rights reserved. No reproduction in any form without express permission from the editor.
If you would like your product reviewed fairly and fairly quickly, please contact the editor or see other details in the Note to Contributors.