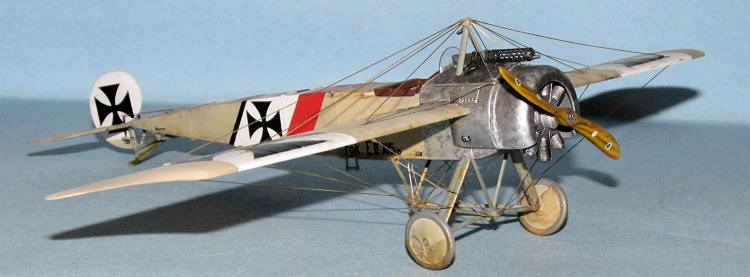
| KIT #: | 8156 |
| PRICE: | $34.95 SRP |
| DECALS: | Five options |
| REVIEWER: | Dan Lee |
| NOTES: | Profipak |

| HISTORY |
The Fokker
Eindecker (German for Monoplane) was the first ever fighter equipped with a
synchronization gear that allowed a machine gun to fire through the propeller
arc and would be forever known as the Fokker Scourge as coined by the British
Press as it cleared the skies of RFC and RNAS aircraft (aka Fokker Fodder.)
It was based in
large part on the Morane Saulnier H monoplane, but it was constructed using a
welded steel frame rather than the Hís wooden frame.
The Eindecker had very good dive and climb properties, but poor roll
abilities due to the flexing of the wings.
It was armed with a 7.92mm Parabellum machine gun mounted on the
centerline.
 From July
1915 till early 1916, the Eindecker owned the skies on the Western Front as
fighter pilot pioneers like Max Immelmann and Oswald Boelcke developed fighter
tactics and maneuvers that are still used today.
The era of the Fokker Scourge ended with the arrival of British pusher
fighter aircraft like the DH2 and the French Nieuport 11.
Over 400 Eindeckers
were built (mostly the EIII model) before production stopped.
Only one original (captured when the pilot landed on the wrong airfield
and provided a working copy of the synchronization gear to the Allies) survived
both World Wars and currently resides in the
Ernst Udet
Ernst was the 2nd
highest scoring German ace in World War One.
He was born on April 26, 1896.
When war broke out in 1914, the short (5í3Ē) Udet was not allowed to join
the Army. He made a couple of
attempts and managed to join the Air Corps in 1915 after he earned a pilots
license. He was quickly assigned to
an observation squadron flying two seaters.
He nearly lost his life and that of his observer when he stalled his
plane into the ground after he pulled a too hard bank in a fully loaded two
seater. That incident landed him in
the hoosegow for a week. Ernst was
transfered to fighters almost immediately after his first mission back from
ďjailĒ, he saved himself and another officer when a bomb hand thrown by the
officer was lodged in the landing gear of their two seater by performing
acrobatic maneuvers to dislodge the bomb.
Ernstís career as a
fighter pilot nearly ended the first time he attacked the enemy.
He could not pull the trigger while attacking a French Farman two seater
and the gunner nearly killed him.
He quickly learned to become aggressive in his attacks.
In 1917, he got into a
dogfight with
 By the time
he joined the Flying Circus of JG1, he had already scored 20 kills.
During his time with the Circus he would add 42 more kills (most of them
against the British) for a total of 62 and command Jasta 4 (which was part of
JG1.) Udet was well known for his
devotion to Von Richoften (who demanded it of his men) as well as his partying
and womanizing but neither did affect his flying or leadership.
Post War Ernst
became a famous stunt flyer and playboy.
He joined the Nazi Party in 1933 in part because his former squadron
leader Hermann Goering promised him a chance to help create the Luftwaffe.
He was well known for being an advocate of dive bombing after being
influenced by the two Curtis Goshawk Helldivers purchased by the Nazis in the
late 1930s. At the start of World
War 2, Ernst was the Director General of Equipment for the Luftwaffe.
As the war dragged
on, Ernst Udet regretted the war and his role in part because one of his
girlfriends was a Soviet sympathizer and because Hermann Goering was a fraud and
failure as a leader who frequently lied to Hitler when it came to bad news.
On
| THE KIT |
 The latest
Eduard kit of this ground breaking plane was released in late 2008.
It consists of 95 plastic parts in the usual Eduard olive green plastic
and 80 PE parts include several painted pieces for the instruments.
The plastic is
flash free with excellent detail including the very prominent wing ribs.
The kit comes with
an excellent instruction booklet made up of big glossy pages with several color
pages for the various scheme and shows exact parts placement.
| CONSTRUCTION |
It all began with
the cockpit which was even more fiddly than usual for a WW1 cockpit.
I followed the instructions (!) but had some issues with the internal
framework not fitting exactly (my mistake) and I recommend that you add the
control stick after youíre done this model because I broke it off way too many
times.
 Unfortunately,
I had a bit of an issue lining up the fuselage halves so I had some gaps and
steps to deal with. This would mean
that I would need to sand away the fine detail.
The fuselage sat for a few months (not intentionally, but I was busy)
till I could figure out what I was going to do.
I used CA glue to fill the gaps and proceeded to sand it down.
Once I got the gaps done to my liking, I glued on 0.040Ē wide flat
plastic strip at each juncture to replace the sanded down detail.
Looking back I wish I had some half round strip instead, but the local
hobby shops didnít have any left so I went with what I had.
The last piece I added was a plate representing the rear fuselage behind
the cockpit. There was a rather
prominent gap that needed to be filled (I used Vallejo plastic putty.)
Once done, I added the PE parts for the seat belts, control wire eyelets
and to represent the fabric stitching underneath.
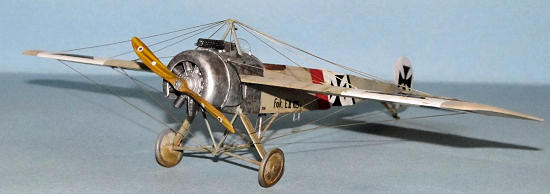 One thing
I kept doing was test fitting the pieces to make sure they fit and lined up.
Thanks to my ham handed installation of the internal framework, I had to
trim off a bit of it to get everything to fit just right, but it will not be
noticed thanks to the cramped cockpit.
It was during one of the test fittings when I realized I had screwed up
and added the fuselage part with the rear fuel tank but Udetís plane did not
have it. I gently had to pry it
apart (nearly made a mess of it) and redo all my work.
Thatís what I get for not double checking my double checking.
The engine was cleaned up, painted and the PE parts were added. It was fairly straightforward, but watch out for the PE because it is a touch delicate.
| COLORS & MARKINGS |
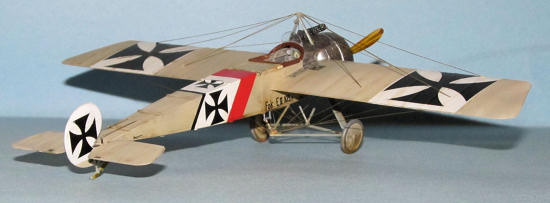 The first
thing I painted was the cowling and associated metal portions.
I masked off everything and sprayed on a base coat of Tamiya TS-30 Old
Silver Acrylic Lacquer from the spray can as at the time I wasnít sure how to
proceed with the etched metal of the Fokker Cowling.
All I knew was that was going to use acrylic paint and the Lacquer
wouldnít be affected by rubbing alcohol when I screwed up.
Thanks to a
suggestion from Tom Cleaver, I found a way to do the etched metal without going
crazy. He suggested that I use a
pencil eraser whittled to a 1/16Ē diameter dipped in metalizer.
It led me to a less toxic method using Micro Brushes and Citadel Acrylic
paint.
I dipped a Micro
Brush fine tip brush into Citadel Steel, wiped off most of the paint and then
spun it in a circular motion on the surface of the aluminum part.
It left a faint discolored outline which is what the etching looks like
from a ways away. I went line by
line and ended going through one brush on each part because the thin brush
handle would break.
The two bladed prop
was masked using really thin cut strips of Tamiya tape and sprayed red brown to
give a representation of the laminated prop.
When the paint was dry I dry brushed on some Vallejo Yellow Ochre to town
down the red and blend the demarcation lines between the colors a bit.
The prop was then sprayed with two light coats of Gunze Clear Yellow.
It was later decaled and the PE prop hub (sprayed with TS-30 Old Silver)
was glued on with CA glue.
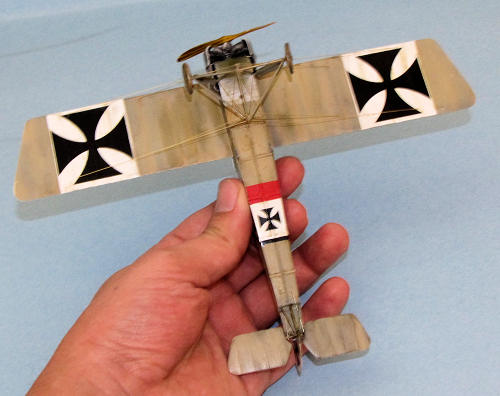 The rest
of the plane proved to be simpler.
I masked off the silver areas of the fuselage then preshaded the canvas portions
with XF-75 Kure Grey (I was painting a model of the I-400 sub at the same time.)
When it was dry, I sprayed on several light coats of Tamiya XF-55 Deck
Tan and later Gunze Sail Color for a slight variation.
The tail was painted flat white while the bottom portion was painted Deck
Tan. Once dry, I sprayed on a
couple of coats of Tamiya Clear Gloss in preparation for the decals.
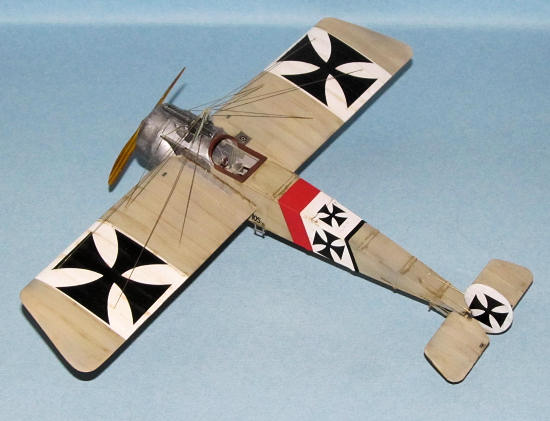
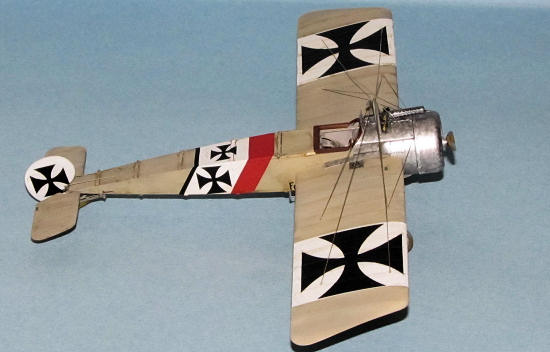
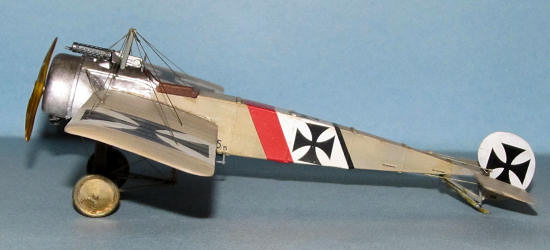
For decals,
I used Ernst Udetís
markings. These Eduard decals
proved to be easy to use. I had no
real issues with them going over the detail when I used Micro Set/Sol.
Once the decals had settled down, I wiped down the plane with a damp
cloth to remove the excess decal solution.
Weathering and
Final Coat
I used the paint guide as a guide. Udetís plane seemed a bit weathered and worn (in part because it was an older EII model) so I went with that. I used a watercolor wash for the topside and a combination of watercolor and pastels for the bottom. The wheels were rather dirty (maybe I over did it) and the underside was streaky. The excess (and there was a lot of it) was removed. Exhaust stains made up of clear yellow, flat black and dark grey were sprayed on the underside. I shot a few thin coats of Xtracrylix Satin Coat for the final coat (this was done after final assembly and the rigging was completed.)
| FINAL CONSTRUCTION |
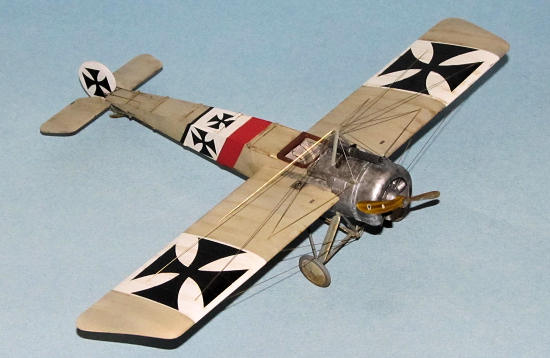 I attached
the wings, the tail assembly, the landing gear, engine and cowling to the
fuselage. I used CA glue for the
wings because the wings sagged when I used Tamiya Extra Thin liquid glue.
Actually, I used CA glue for most of the assemblies because I had
problems keeping everything from sagging as the Eindecker is a delicate model.
Once the major
parts were put together, I added all the PE details and smaller plastic bits.
This proved to be less of a hassle than normal because there wasnít much
to add.
I added the rigging
next and took about 3 hours of work to get everything done using white glue and
about 3 1/2 feet worth of 0.008 brass wire.
A WW1 monoplane is slightly easier to do than a biplane, but not by much.
FYI, Eduard provides the very necessary rigging guide.
The last part was
the windscreen. It fit right in
between the cockpit opening and machine gun.
| CONCLUSIONS |
The Eduard Fokker
Eindecker is a very good good and representation of the first real fighter.
I have been told that this kit is a significant upgrade over the older
Eduard kit which used a lot more PE than provided here.
It is a kit than needs patience and prior planning to build, but if you
do so then you will be rewarded with an excellent model.
I recommend this kit to experienced modelers who have had a few WW1 kits under their belt.
August 2011
If you would like your product reviewed fairly and fairly quickly, please contact the editor or see other details in the Note to Contributors.