Eduard 1/48 Der Rote Flieger
| KIT #: | 1136 |
| PRICE: | $74.95 SRP |
| DECALS: | Ten options |
| REVIEWER: | Dan Lee |
| NOTES: |
Contains two kits |
| HISTORY |
The Man
Manfred Von Richthofen was born into a Prussian
aristocratic family located in
Cavalry proved to be useless against the
machine gun so the Uhlans were converted to infantry.
Manfred found this unsatisfactory and soon wanted a transfer to flight
school where he learned to be an observer.
This also proved unsatisfactory even though he apparently shot a plane
down with his machine gun.
 By March 1916, he became a pilot flying two
seat observation aircraft.
In
August 1916, Manfred met the Oswald Boelcke, the man who devised the air to air
combat tactics that are still in use today.
Manfred impressed Boelcke enough to be picked by him to become part of
Jasta 2.
By then the Albatros
scouts were starting to replace the obsolete Fokker Eindeckers in front line
units.
By March 1916, he became a pilot flying two
seat observation aircraft.
In
August 1916, Manfred met the Oswald Boelcke, the man who devised the air to air
combat tactics that are still in use today.
Manfred impressed Boelcke enough to be picked by him to become part of
Jasta 2.
By then the Albatros
scouts were starting to replace the obsolete Fokker Eindeckers in front line
units.
Soon Manfred started racking up kills
(including then top British Ace Lanoe Hawker) and by January 1917, he earned the
Blue Max and was given command of Jasta 11 (soon to be known as the Flying
Circus.) His most productive time was in the Spring of 1917 (aka Bloody April to
the RFC) when he and his unit became the most feared on the Western Front.
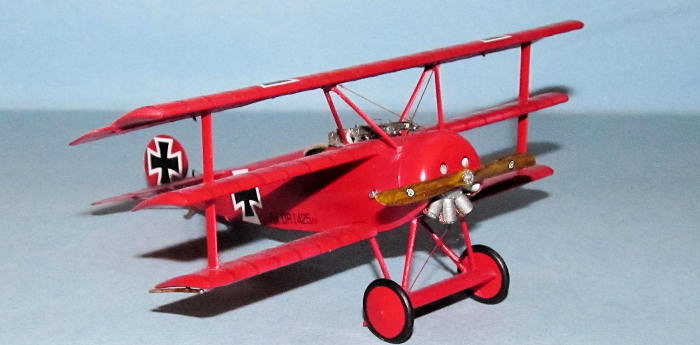
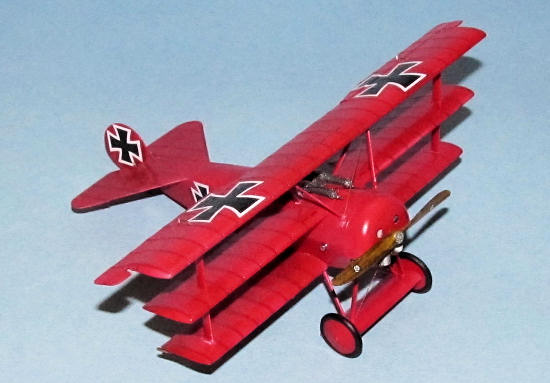
He became well known at the time for his all red Albatros DIII (the type
he flew the most and got the most kills in.)
Manfred was shot down in April 21 1918 by
Snoopy, well, more than likely an Aussie Ack Ack unit while flying one of his
famous Fokker Dr1s.
The Plane
No WW1 plane is more famous than the Fokker
Triplane.
It was designed as the
German equivalent of the Sopwith Triplane that terrorized German pilots in 1917.
Despite its reputation as a fighter, the Fokker Dr1 was something of a
dud as it suffered through many teething problems including poor design/layout
which put the pilot at risk of head injury even in a minor crash landing,
structural problems including the wing material (!) plus a very low top speed
relative to its contemporaries due to the extreme high drag of having three
wings.
The one advantage the Dr1
had was exceptional maneuvering but not as exceptional as the Sopwith Triplane
due to the fact that the Sopwith had flaps on all three wings unlike the Fokker.
Only 320 or so were produced by mid 1918 but most were replaced with the
much better Fokker DVIIs as soon as DVIIs came off the production line.
| THE KIT |
 This Dr1 is from the Eduard Dual Combo Kit, Der
Rote Flieger (the Red Baron) titled after a German move about the Red Baron and
part of the movie cross promotion.
The kit also comes with a Albatross DV kit as well as a Blue Max Replica and
resin figures of the Manfred and Lothar Von Richthofen.
The kit comes with PE, wheel masks and many decal options for both the
Albatros and Dr 1.
This Dr1 is from the Eduard Dual Combo Kit, Der
Rote Flieger (the Red Baron) titled after a German move about the Red Baron and
part of the movie cross promotion.
The kit also comes with a Albatross DV kit as well as a Blue Max Replica and
resin figures of the Manfred and Lothar Von Richthofen.
The kit comes with PE, wheel masks and many decal options for both the
Albatros and Dr 1.
The kit parts are very clean with some flash on
the trailing edge of the wings and finely detailed.
For a more detailed preview of the Dr.1 kit
please follow
this link.
One thing of note is that this particular kit
has the extra parts to build the F1 prototype.
| CONSTRUCTION |
Like most if not all of my aircraft models,
construction began with the cockpit.
Various interior parts which were painted with
 Once it was all dry, the PE parts were added to
the interior including the seat belts which are the most painful part of the
cockpit assembly.
Once it was all dry, the PE parts were added to
the interior including the seat belts which are the most painful part of the
cockpit assembly.
The engine was painted using various metallic
shades, the PE glued on and installed.
The I really do recommend that you spend some time working on this as the
The fuselage bits were glued together and then
the seams were filled and sanded.
One thing I really loved about the engineering of this kit was that Eduard
designed the model that most of the seams to be hidden away or covered by PE.
The only place I had to sand/fill was the top side of the rear fuselage.
The model was left to sit for a week (if I recall correctly) before the
seam was filled and sanded smooth.
Another aspect of the this kit that makes it a
step about previous Triplane models is that Eduard made the interplane struts
for all three wings one piece so that all three wings keep alignment.
That being said, the wing and tail parts were cleaned up but not
assembled as there was a lot of painting to do.
At the time the landing gear was assembled.
| COLORS & MARKINGS |
Paint
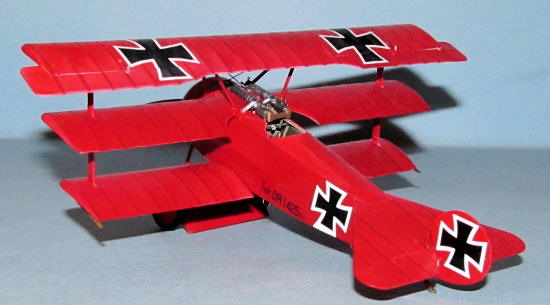
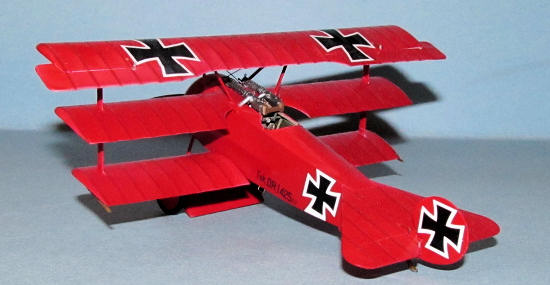
I went with the Red Baron’s famous all red
Triplane markings.
Various areas
were masked off (especially the where the interior framing showed up using 1mm
strips of cut tape) and I sprayed on flat white as primer for the red.
I made a mistake painting this
 plane when I painted the white undercoat.
I should have painted white where the airframe is right up against the
fabric and not the gaps in between the framing which I have corrected on my
later WW1 builds.
plane when I painted the white undercoat.
I should have painted white where the airframe is right up against the
fabric and not the gaps in between the framing which I have corrected on my
later WW1 builds.
For the majority of the plane I used a
combination of X-7 Red and Gunze RLM23.
This was done in several thin coats.
The wheels were masked of and painted dark grey
while the prop was dry brushed in a wood pattern and sprayed with clear yellow.
Decals
For the most part the decals went on well, but
I goofed on the tail iron crosses and put them at the wrong angle.
It is very noticeable in the photos.
I would have redone them, but I don’t have any extras of that particular
iron cross style in that size so I was stuck with them.
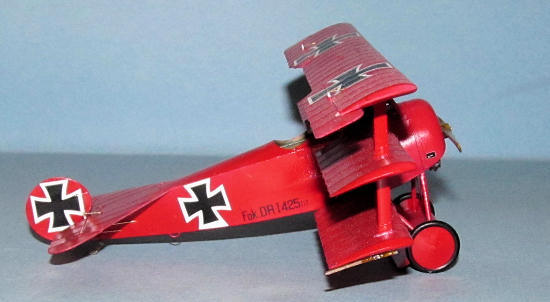
Weathering
I did some minor weathering along the wheels
and that was pretty much it.
I
assumed that someone as meticulous and fussy as the Red Baron would expect his
plane to be the same way.
| FINAL CONSTRUCTION |
The machine guns were modified with Eduard PE
(using CA glue), painted and glued in.
I have to admit the PE really does make the
The wings, struts and landing gear were glued
in place.
At this point I suffered
some clumsy stupidity and dropped it on the ground.
The model for the most part was intact except that on impact a couple of
the landing gear struts were broken.
To say I was not very happy
 would be an understatement.
I tried to repair the landing gear, but I could not.
Instead of stomping on it in a hissy fit, I boxed the remains till I
could figure out what I could do with it.
would be an understatement.
I tried to repair the landing gear, but I could not.
Instead of stomping on it in a hissy fit, I boxed the remains till I
could figure out what I could do with it.
Salvation came about 8 months later when I
bought a Fokker Dr1 weekender kit very cheap because it came with some wrong
parts but had intact landing gear parts.
I quickly assembled and painted the landing gear (again.)
The final tiny bits were painted and glued in
place including the windscreen.
When I first built this model, the original
plan was to try fishing line rigging (again) as it hasn’t really worked for me.
I drilled the necessary holes in the correct (initial) parts and glued in
the fishing line then sanded and filled the holes.
Things did not go well as I put a too hot burnt match on the fishing line
to straighten out the kinks and melted the thread which why I went immediately
to plan B (brass wire.)
You won’t
see any holes in the struts as the original parts were the ones that had broken
off.
The brass wire rigging took
about 15 minutes to as I measured and cut four lengths of brass wire attached
with white glue to fit in between the landing gear and between the struts of the
forward cockpit.
Another four 1cm
lengths were made for the flap actuators.
That was it.
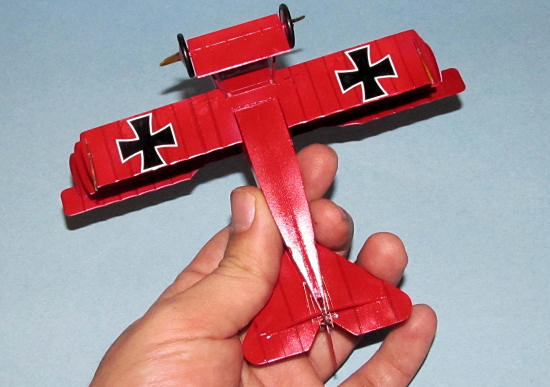
Voila, I had my flawed and battered Dr 1 done.
| CONCLUSIONS |
The Eduard Fokker Dr1 is perfect for the beginner WW1 who is not a fan of rigging. It is a well designed model with very colorful schemes that can be made into an eye catching showpiece especially for those who are not clumsy. I highly recommend it for all levels of modeler.
November 2011
If you would like your product reviewed fairly and fairly quickly, please contact the editor or see other details in the Note to Contributors.