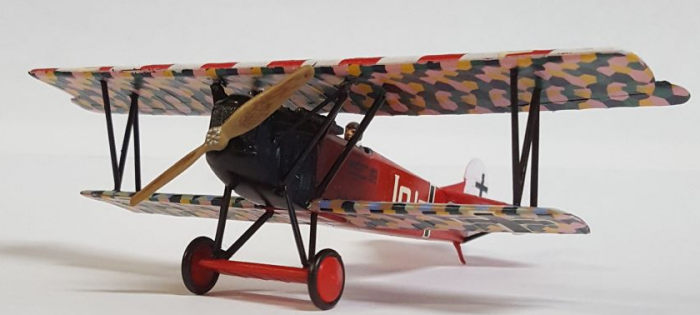
Revell 1/72 Fokker D.VII
| KIT #: | 4156 |
| PRICE: | $5.00 'used' |
| DECALS: | One option |
| REVIEWER: | Chris Mikesh |
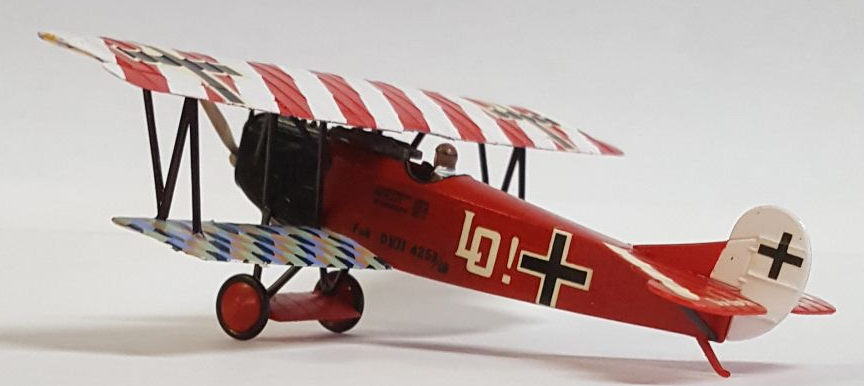
| NOTES: | Still a remarkable kit! Ernst Udet version. |
| HISTORY |
 The Fokker D.VII
was a German World War I fighter aircraft designed by Reinhold Platz of the
Fokker-Flugzeugwerke. Germany produced around 3,300 D.VII aircraft in the second
half of 1918. In service with the Luftstreitkrafte, the D.VII quickly proved
itself to be a formidable aircraft. The Armistice ending the war specifically
required, as the fourth clause of the "Clauses Relating to the Western Front",
that Germany was required to surrender all D.VIIs to the Allies.
Surviving aircraft saw much service
with many countries in the years after World War I.
The Fokker D.VII
was a German World War I fighter aircraft designed by Reinhold Platz of the
Fokker-Flugzeugwerke. Germany produced around 3,300 D.VII aircraft in the second
half of 1918. In service with the Luftstreitkrafte, the D.VII quickly proved
itself to be a formidable aircraft. The Armistice ending the war specifically
required, as the fourth clause of the "Clauses Relating to the Western Front",
that Germany was required to surrender all D.VIIs to the Allies.
Surviving aircraft saw much service
with many countries in the years after World War I.
| THE KIT |
First molded
in 1963, this great kit has good external details such as fabric, and detailed
surfaces. My example was molded in red plastic with little to no flash. The box
date was 1980, and this kit was still produced as late as 2013. It is simple to
assemble and requires little correction. Several versions over the years offer
different decal and paint options.
| CONSTRUCTION |
Typical of Revell in the early ‘60s, all details are raised. Assembly begins with the fuselage halves. Keep in mind that the red plastic on the fuselage walls is thin, and a dark interior will show through. I painted the interior a “wood” color of light brown. There are no other details and the pilot sits on a stick (ouch!). The pilot is typical of Revell for its day. Tan uniform, Brown or black boots, brown helmet and of course the white scarf. But install Oberleutnant Udet later.
 Glue the two fuselage halves
together. While the fuselage is drying, your next obstacles are the wings.
Assuming you are making the Erns Udet version “Lo”, you are going to pre-paint
and decal a lot of parts. The wings are solid and may only need a little
refining with a sanding stick. The elevator and rudder are also 1 piece. Almost
everything else is straight forward and a great fit.
Glue the two fuselage halves
together. While the fuselage is drying, your next obstacles are the wings.
Assuming you are making the Erns Udet version “Lo”, you are going to pre-paint
and decal a lot of parts. The wings are solid and may only need a little
refining with a sanding stick. The elevator and rudder are also 1 piece. Almost
everything else is straight forward and a great fit.
After sanding the seams on the fuselage (if needed), the lower wing is attached (before you assemble, see lozenge notes below). You will discover some gaps, but this is easily resolved with filler. The elevator and rudder also have gaps that may need attention. Dry fit! Dry fit! Dry fit!
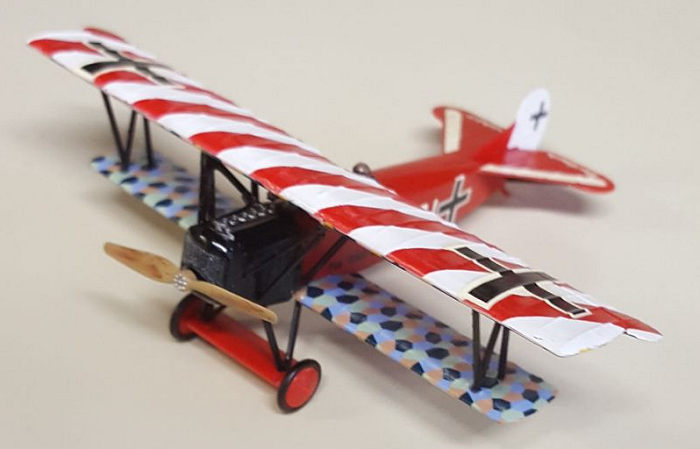
Top Wing: The wing is a solid piece so there is no assembly. Paint and decal this wing separately before full assembly. (You’re going to love this…) DON’T paint your wing red. Airbrush white overall – top and bottom – so you see no red of the plastic through the paint. Let it cure for at least 24 hours. I don’t recommend aerosol, as it thins at the edges, and you will still see red.
RED and WHITE STRIPES:
Tamiya must love this model as they made a masking tape 6mm
wide and is perfect for this wing. Using the drawings start laying down strips
of tape at the appropriate angle on the wing. Use another piece of tape as a
separation template to place the next strip. Remember, you are covering the
white and will airbrush the red on the exposed area. Press the tape very firmly.
I used Tamiya 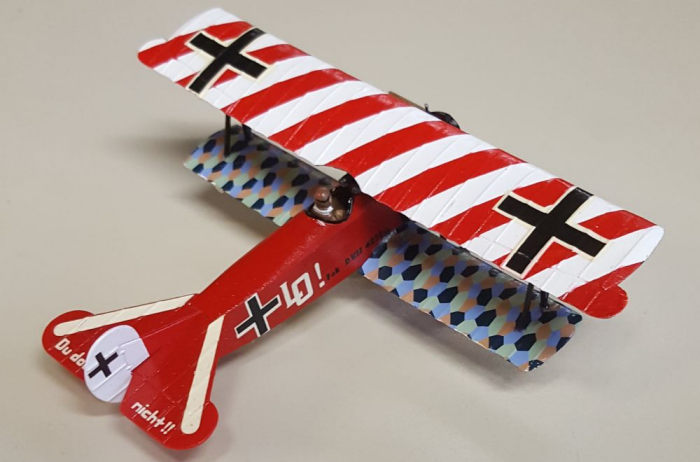 White X-2, and the Red is Tamiya X-7. Once you see what you are
doing you will have a smile on your face and really enjoy it. (Note: The Revell
paint scheme calls for approx. 9-10 white stripes. Other resources show as many
as 16 stripes. Tamiya makes a 5mm tape for more stripes, but the concept remains
the same.)
White X-2, and the Red is Tamiya X-7. Once you see what you are
doing you will have a smile on your face and really enjoy it. (Note: The Revell
paint scheme calls for approx. 9-10 white stripes. Other resources show as many
as 16 stripes. Tamiya makes a 5mm tape for more stripes, but the concept remains
the same.)
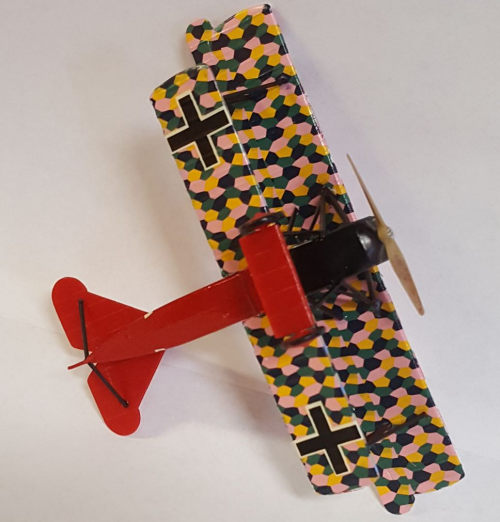
Bottom Wing: Easier still if you have the lozenge decals. Pre-Paint the wings with the same white as the top wing, otherwise you will have a red-ish tint on the lower wing that is not on the top. The Blue-ish pattern goes on top, and the other pink/orange-ish lozenge pattern on the bottom.
MORE on the Lozenge: Below in the resource list, you will read hours worth of information on lozenges. Is the direction right or wrong? Seam tape or not? Manufacturer or field repair? You can easily go nuts sorting it out. It will also depend on what you want to depict, and how detailed. I am content with something that looks great and without the pain of super detailing (I can’t see it anyway). As you will read, the direction and seams can be debated forever. There are not too many first-hand resources of Udet’s plane – so just enjoy and keep building.
 Pre-paint and decal as much as you
can before assembly. All the wood parts were Dessert Tan (interior and wood)
XF-59, Red Brown XF-64 as needed. Metallic Grey for engine parts, and Black
cowling as needed.
Pre-paint and decal as much as you
can before assembly. All the wood parts were Dessert Tan (interior and wood)
XF-59, Red Brown XF-64 as needed. Metallic Grey for engine parts, and Black
cowling as needed.
This is the time to slow down because this stage is where most modelers mess up a great presentation. I used Warbird Decals for the Lozenge patterns #72013 for the lower (bottom) side of both wings and #72012 for the upper half of the lower wing. These decals are a little stiff and will break, but very manageable with MicroSol, and Microset. Once set you will appreciate them for the quality.
The Revell kit decals are off register, a bit yellowed and not white compared to the white paint. Consider tinting the paint to match the decals or replace decals. But in my case, they went down on the model very well. MicroSol/Set also helped settle them on the model beautifully.
Add the final stuff: Wheels, tail skid, pilot, engine, front radiator/propeller, and upper wing. Just make sure that anything attached with a strut is straight, and the upper wing is not twisted. Almost done… (Are ya smile’n yet?)
| CONCLUSIONS |
The Revell kit is kind of a
‘generic’ Fokker, and a lot of the particulars are not represented. (Look at the
different Roden kits for examples of different versions.) If you are looking for
an easy build, something cool on the shelves, ‘Wow’ factor, or a weekend build,
you found it. It is an old kit – but is gracefully aging. Even now – very
recommended.
Kind commentary is welcomed.
| REFERENCES |
https://www.tapatalk.com/groups/hyperscale/question-about-wwi-german-lozenge-decals-t221695.html
August 2021
Copyright ModelingMadness.com. All rights reserved. No reproduction in part or in whole without express permission.
If you would like your product reviewed fairly and fairly quickly, please contact the editor or see other details in the Note to Contributors.