| KIT #: | ? |
| PRICE: | $ |
| DECALS: | Four options |
| REVIEWER: | Carmel J. Attard |
| NOTES: | Vacuform plastic with white metal parts |

| HISTORY |
There
was a time where the bombing technique and the aircraft that delivered the bombs
have been refined. The giant aircraft associated with this concept development
were the Gotha IV bomber. Half of the 230 total Gothas built, served
operationally, and the others being used for training. Regarded as the first
multi engined heavy bomber to serve with any air force, they made around 400
raids between 1914-1917, losing one aircraft to enemy fighters in the process.
The strategic bombing that the Gotha IV conducted on the British mainland was
more than tactical as it weakened the enemy morale. The 23.7 Meter span Gotha
bristled with up to 7 machine guns in addition carried a ton of bombs, had a
range of 800 Km, and climbed to 21,000ft and had a maximum
 speed of 87 mph. All
the German bombers used over the UK tended to be Gothas so far as the British
public was concerned but it was later known that operating alongside were
Friedrichstofen and the Larger Staaken RE VI. One of the drawbacks with the
Gothas was that it had an exposed gunner when used in daytime raids and hence it
was later moved to night raids to overcome strong British defenses. The Gothas
carried a respectable bomb load over a 7-8 hour mission flying over London and
back on a dark moonless night.
Most successful bombing raids were carried out at night operating in small groups. The first attack mounted by the Gothas did not penetrate as far as London. Shorncliffe, Folkstone and Chariton bore the brunt of the bombing on the 25th of May 1917, when 21 aircraft succeeded in killing 95 people and injuring 195 more. Witnessing the raiders escape, apparently unscathed, produced several criticism of British Defenses, and the morale of the public was badly jolted by the thought that further attacks were inevitable. On the 7th of July 1917, 22 Gotha bombers raided the area around St.Paul’s Cathedral in London, including the London’s Post Office. As a result of the bombing on that night, 193 were injured and 57 civilians died. The Royal Flying Corps and the Royal Naval Air Service pilots did their best to intercept the enemy from home bases and from Dunkirk. It was after the war ended that was known that one Gotha had been lost over the channel and another one crashed in Belgium upon returning from a raid. Later it was also came to be known that every landing, even in calm weather was hazardous and this is reflected in German reports dated 18th January 1918 which stated that every third night, bomber loss was due to accidents. Most landing mishaps involved nose-over landings. In an attempt to rectify this, various experiments were carried out with wheel arrangement.
 The destruction caused by the WWI bomber
was awesome and tied down a great amount of British defenses in London. The unit
responsible for these attacks was Bombengeschwader 3 based on two airfields in
Belgium. There were 30 Gotha bombers at this base. They were powered by Mercedes
engines, which enabled the aircraft to fly at 15,000 ft while carrying six 110
lb bombs. There was no air raid early warning system and upon reaching the
target they spent time dropping the bombs, and by the time the defending
fighters could climb to attack them the Gothas be on their way home. By early
1918, raids on England began to decline and the Gothas of Kagohl 3, were
destined to the Western Front in support of the last great German offensive.
These conducted night raids on short missions that permitted them to carry
heavier bomb loads and dispense them with the equipment necessary for long-range
altitude raids of earlier months.
The successful development of the Gotha bombers initiated the first strategic bomber attacks on the British isled. Mass flights were made over the period of May 1917 – August 1918, mostly at night from bases in Belgium. These were conducted to bomb and terrorize the war-weary civilians until operations finally switched to Western Front where Gothas flew short tactical missions to back up German offensive threats.
| THE KIT |
The multi engine WWI bomber, the Gotha IV was released by
Rareplanes and long before the type appeared in same scale in injection-moulded
form, At the time of its release it was a very welcome kit in view of its
historic past and biplane models were not the order of the day and the trend of
the market favored towards combat aircraft of WWII. This was in fact a very
pleasant model and some time later Aeroclub released a set of white metal detail
parts to go with the Rareplanes kit. The cost of the vacform kit
 was 5sterling
while the detail metal parts cost 7sterling. Both releases produced a kit, which
was pleasing to build and unique to add to any collection.
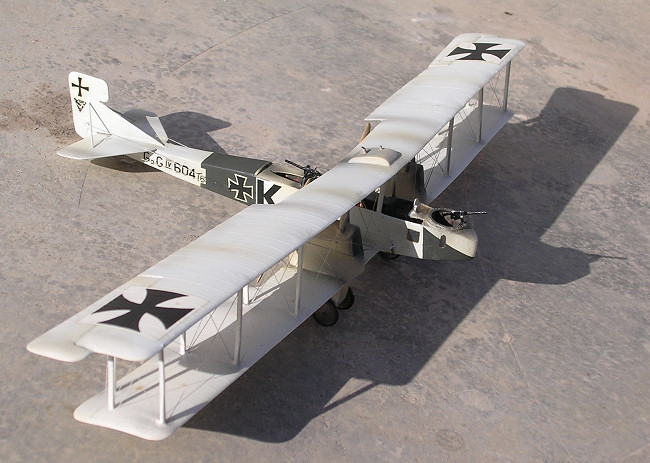
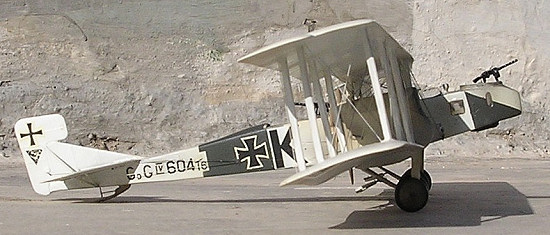
The Gotha IV came in a sturdy cardboard box with a light blue two-tone box illustration having the Rareplanes motif and a side view of the massive bomber. At the time of release the kit was distributed by Hannants but I have obtained my copy from Aeroclub along with the detail parts for an additional cost. It was indicated on the box cover that the kit contained highly detailed vacuum formed styrene mouldings, clear transparencies, multi view scale plans, picture article references, colour and marking detailed and injection moulded struts. In fact I found it to be highly accurate and offering such simplicity of assembly technique presented to the modeler to make a true scale replica of the Gotha E IV Serial k 604/16 of Kaghol 3 that was based in Ghent, Belgium during 1917.
The instructions are comprehensive and gives a side-sectioned view alongside a plan view, and an assembly exploded drawing which were easy to follow. The instructions suggested a sequence of assembling the kit. Fixing first the wings and tail to the fuselage, add the center section struts and motors. Positioning the outer wing struts on the lower wing follows this. When dry the upper wings can then be fixed to the struts with cyano glue and the interplane struts fixed with normal styrene cement. I used liquid cement all the way without any trouble and used super glue when it came to fix the metal parts.
| CONSTRUCTION |
In a more detailed fashion, I scored vertically the white, soft
plastic and around each moulded part with the tip of a sharp blade before
bending and breaking it away from the carrying sheet. Moulding pips were removed
with a razor blade. The fuselage
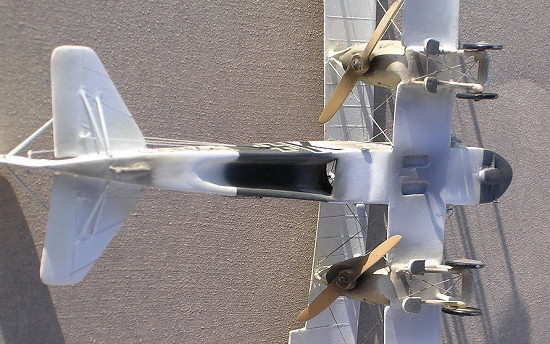 centerline joints were sanded on a large shee
of wet and dry sanding paper, using heavier pressure where plastic is more
condensed. The trailing edges of wings and tail planes required more scraping
and heavy sanding to produce sharp edges. The ailerons on the underside of wings
were scraped to correspond with those on the upper wing surfaces. Two fin and
rudder mouldings were supplied but it is advised to use one only as two would
result in a thick section. This unit was sanded and shaped to symmetrical
section to correspond to scale appearance.
A full size drawing of the strut shape is illustrated on the
instructions and 14 equal lengths were cut and shaped with a set of files. The
box fuselage, which is split vertically, had the windows cut open and the
interior parts cemented to one side. These included bulkheads, seats, control
column, and interior painting detail also added. The two halves were then
cemented together using tape to secure them together until dry. The already
shaped lower wings had the bomb vents at center section drilled and filed to two
oval shaped across and chord wise. Undercarriage struts cut to size and white
metal wheels added,. White metal spinners, props, column, guns on mounting were
all trimmed and refined to final shape with smooth files. These are fitted in
place. The metal engines were inserted inside the vacform cover built around
them since the version was a later mark the engines remained partly visible.
Parts were joined using super glue, then ‘Vee’ struts were fixed to upper engine
mount. These were made from Contrail struts that came with the kit and were of a
different size than those mounted on the wings. I also made blind holes to the
places where the struts were to be fixed for the accurate location of these
parts. 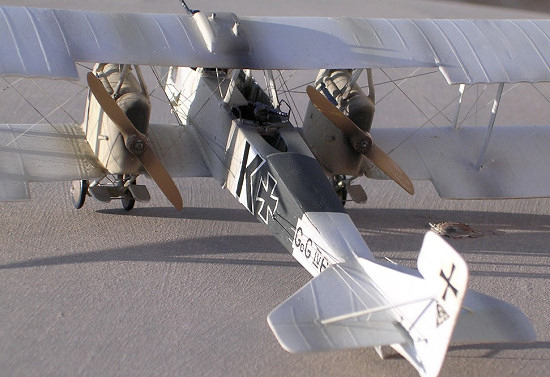
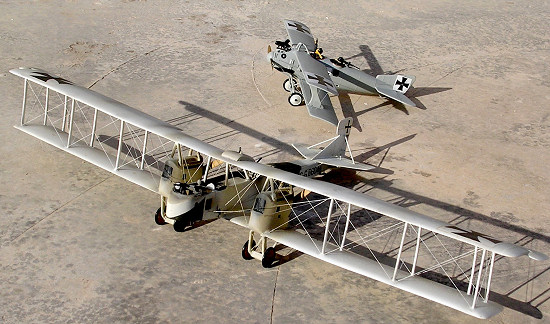
Cutting the struts to exactly the same height is imperative to get things moving smoothly. I then lowered the upper wings on the already dried and set lower assembly. Sufficient rigging detail is given in the drawing and referring to more photos of the Gotha bomber made betters understanding and consolidates their position. All large WWI warplanes had explicit rigging if not too complicated at some point however all the wires are connected and one could move along with making these using invisible thread passed through holes that were drilled adjacent to wing struts and other places of attachments. There were areas where thin steel wires were used where short rigging was needed. The rigging went without a hitch and I admit I enjoyed doing it. The thread was secured at its hole using tiny drop of superglue which was given time to set and then sanded carefully. Too much rush with sanding will loosen the thread again and that is the time when you should make a stop and continue with the kit at some later stage.. The control wires were fitted to the outside along the fuselage again using invisible thread, which started from the cockpit area and moving towards the rear of fuselage.
Sanded areas were given a light grey primer and smoothened again in preparation for the paintwork.
| COLORS AND MARKINGS |
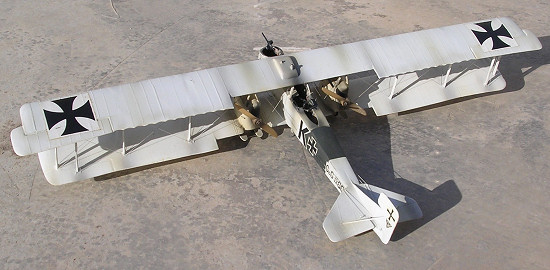
Open areas were masked with tissue paper and masking tape and
the model was given an overall coat of a mix consisting of white, a touch of
blue and light grey giving the kit the very light grey that I aimed for. Other
areas we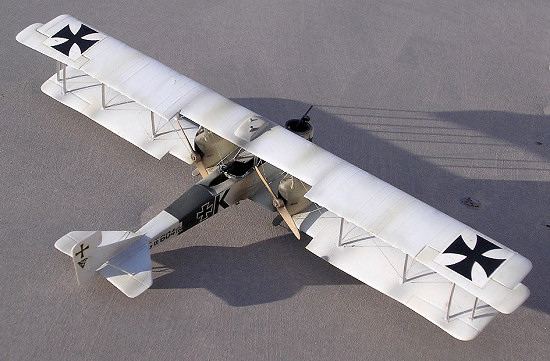 re painted dark green at mid fuselage and other sections. Engine
nacelles were light grey and the radiators were painted metal. The triangular
shaped triangular Gotha motif was hand painted on a white decal. ‘K’ letter on
nose was made from black decal strips. Maltese cross German markings above and
below wings were obtained from spare decal box. Props painted in wooden shade of
tan and guns in dark grey. Finally the Gotha model was given a semi matt coat of
Humbrol varnish and areas in way of exhaust were given a slight burst of mix of
varnish and drops of engine grey.
| CONCLUSIONS |
The end result was quite pleasing and was surprised of the strength that the rigging added to the large flimsy vacform kit so much so it retained the correct alignment of the wings to fuselage even after a couple of years have passed since its completion. The Gotha IV was a significant addition to the WWI section of my models in view of the important part it played in part of history of strategic bombing.
June 2006
If you would like your product reviewed fairly and fairly quickly, please contact the editor or see other details in the Note to Contributors.