Revell 1/72 SE.5a
| KIT #: | H-633/4108 |
| PRICE: | $5-10.00 each |
| DECALS: | One option in each kit |
| REVIEWER: | Chris Mikesh |
| NOTES: |
| HISTORY |
 This is a kit that many of us once built - probably in an
hour! Paint and all! (Or maybe no paint!) I miss those days of not worrying
about seam lines and getting things straight. The box art was the inspiration
that compelled many of us to build whole Air Forces.
This is a kit that many of us once built - probably in an
hour! Paint and all! (Or maybe no paint!) I miss those days of not worrying
about seam lines and getting things straight. The box art was the inspiration
that compelled many of us to build whole Air Forces.
Gone are the days of slamming together kits for the fun of it. As modelers, most of us have gotten too serious about this Hobby. So, I challenged myself to see how quickly I could re-live some of my memories by slamming together a kit. This time - with many decades of skill and resources accumulated, I've challenged myself to build a model in a 3-day weekend. I know it is a far cry from the 3 hours when I was a kid. But this time I'm going to use paint, decals, filler, Etc. as needed.
(Abridged from Instruction sheet) In the course of the First World War, two British aircraft were to emerge as superior examples of the development of the art of fighting craft. These were the Sopwith Camel and the Royal Aircraft Factory’s SE5A. The SE5A could outperform most of the German fighters of its period and was only bested when the new Fokker D-VII appeared on the battle scene. The British Scout was fast, well-built, could stand considerable punishment, and had excellent handling characteristics, all of which helped it gain the advantage in combat. It was designed for ease of maintenance, a feature which contributed to its rather angular lines.
| THE KIT |
 The kit itself is pretty much what you remember if you
built it as a kid. The external surfaces are excellent in my opinion. I
appreciate the “fabric covering” even if it is out of scale. Other reviews on
Modeling Madness have different opinions, but that is based on the modeler’s
perspective. It’s an OTB project, so I wanted to preserve as mush surface detail
as I could.
The kit itself is pretty much what you remember if you
built it as a kid. The external surfaces are excellent in my opinion. I
appreciate the “fabric covering” even if it is out of scale. Other reviews on
Modeling Madness have different opinions, but that is based on the modeler’s
perspective. It’s an OTB project, so I wanted to preserve as mush surface detail
as I could.
The surface detail is crisp, with no flash or deformities. It is simple construction, 2 fuselage halves, elevators, two wings, a pilot, and landing gear. Instructions decals and other details may vary depending on the revision of issue. There is no interior detail. The Pilot is very snug and can be added after the kit is painted.
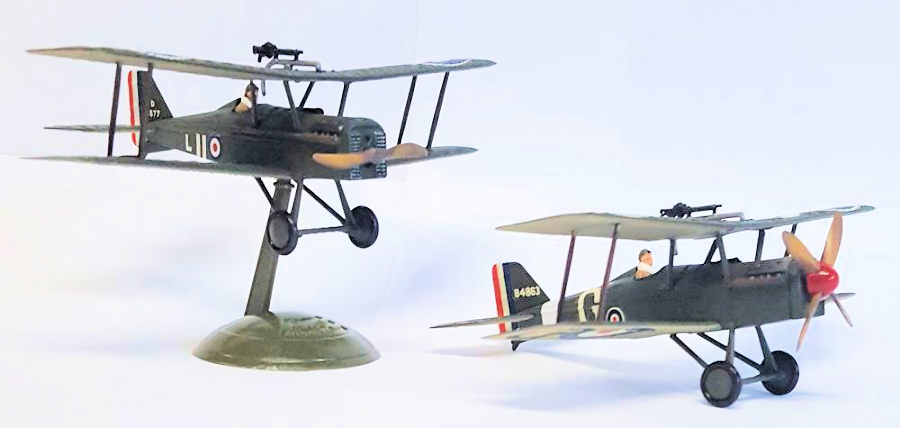
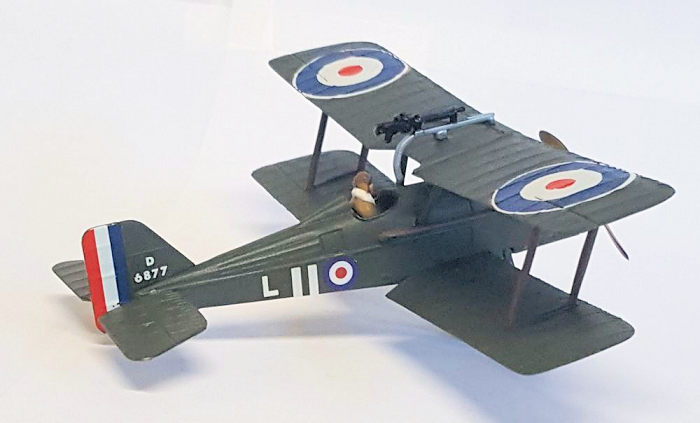
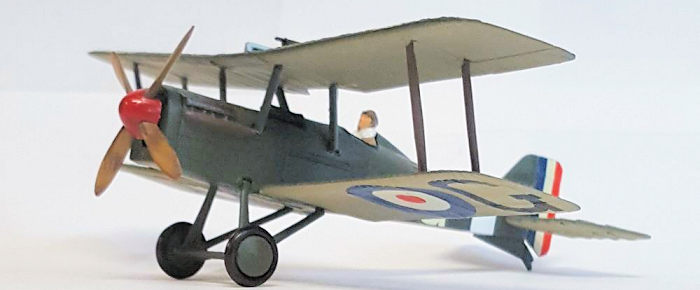
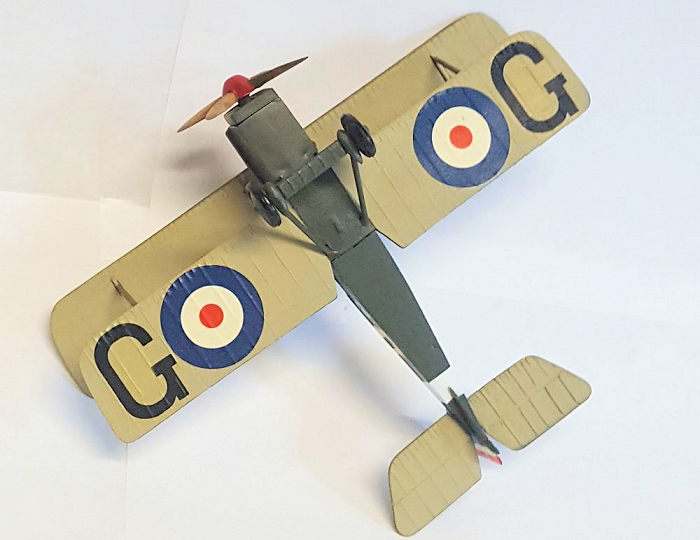
Historically, SE5As were olive drab on top and fuselage, with a sand or cream color (linen) on the bottom of the wings. Kit number H-633 has decals for number 41 Squadron. Stock number H-4108 has decals for Captain McCudden. His aircraft has an added four-blade propeller, a different radiator, and a prop hub provided in the kit. Otherwise the kits are the same. Both have the same paint scheme.
| CONSTRUCTION |
 The Revell SE5a is a pretty simple
kit and impressive when built OTB (out of the box). The 3-day challenge
starts…NOW! (It’s almost like Forged in Fire
or a cooking game show!) The 3-day challenge is
24 working hours (8 hours X 3 days).
The Revell SE5a is a pretty simple
kit and impressive when built OTB (out of the box). The 3-day challenge
starts…NOW! (It’s almost like Forged in Fire
or a cooking game show!) The 3-day challenge is
24 working hours (8 hours X 3 days).
(Day 1) I received McCudden's SE5A (H-4108) earlier from Rare Plane Detective, and when opened to start the project, I discovered it minus 1 horizontal stabilizer. (2 minutes… STOP the Clock!) Groan! I contacted RPD (Jeff) who sent out another kit. Now I have 1.9 SE5As!
(Start the clock again) I couldn't resist the possibility of making a new horizontal stabilizer from scratch. Why should I waste a perfectly good model, when I have the skills to produce another one?
(Accumulated time: 1.5 hours) The horizontal stabilizer was made from Evergreen plastic with stretched sprue for the ribs. It was simple enough just to copy the replacement elevator. I used extra liquid cement to melt down the sprue ribs and give it more of a flatten appearance. Although, it doesn't look exactly the same, it will do for a weekend project.
(Accumulated time: 4 hours) The fuselage halves do not fit perfectly straight from the kit box. You will see this as you dry fit the fuselage halves together. The pins on the starboard side of the fuselage are just a small fraction off vertically. An easy solution is to remove them. You can simply mate the two fuselage halves together and keep them straight. Once the glue sets a quick rub with the sanding stick and the seam is gone.
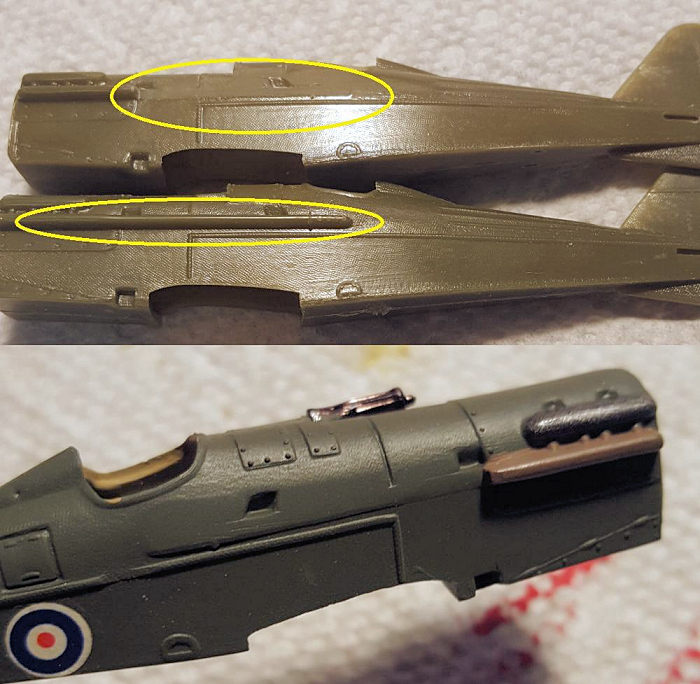 Some fast internet research on the SE5a, will show that
Captain McCudden had removed the exhaust pipes on his aircraft (“G”). Sadly, the
pipes are molded into the fuselage. If continuing with his scheme, the extended
exhaust pipes will need to be removed.
Some fast internet research on the SE5a, will show that
Captain McCudden had removed the exhaust pipes on his aircraft (“G”). Sadly, the
pipes are molded into the fuselage. If continuing with his scheme, the extended
exhaust pipes will need to be removed.
(Accumulated time: 6 hours) How hard is it going to be to chop these pipes off? Razor saw to the rescue! But this turned out to be very un-wieldy and started to damage the model. After 10 minutes I was only 1/8th inch along because the saw teeth were filling up with plastic. This is frustrating! The music to Conan the Barbarian is playing in the background, so I was inspired to try brute force (mostly out of frustration)! 100 grit sanding stick (nearly asphalt) removed it in short order. As I got closer to the fuselage, I used a finer sanding stick and knife to reduce damage to the rest of the fuselage detail. I spent more time on the Razor saw than the 100-grit grinder!
(Accumulated time: 7 hours) Next up is the olive drab. Since the bottom of the wings are Linen colored it is easiest to spray everything Olive and worry about the bottom later. But first, I had to dry fit the bottom wings and radiator to make sure everything fit right. Revell rarely disappoints. On both kits the bottom wing was nearly a perfect fit and the radiators were too. Minor sanding at the seams and it was a near “Fujimi” fit.
| COLORS & MARKINGS |
I test sprayed Tamiya AS-6 “Olive Drab (USAAF)” on a piece of cardboard. I have had a lot of experience with Tamiya paint, and discovered that you must wait for the paint to dry before you can see the true color. It sprayed green but turned browner as it dried. Nearly perfect!
(Accumulated time: 8 hours) All parts were laid out and secured on my painting board to be sprayed and it started raining!! (Tick-Tock) After an hour, or so, it stopped raining and sprayed everything except the bottom of the wings. No drips, but I had to let it dry.
 What is the color of the bottom side of the wings? Most
feedback from the experts said it is Tamiya XF-55 Deck Tan, or Humbrol 103
Cream. Both colors seemed a bit extreme. I’m not an expert but looking at color
pictures (sometimes deceiving) I mixed Tamia XF-55 deck tan, and about 30% of
XF-60 dark yellow. Once sprayed and dried against the Olive, and we have a
winner. Masking is easy as most everything is one sided. Large masking can be
used in most places to prevent the airbrushing overspray. Just make sure the
Olive paint is dry. The bottom was perfect when done.
What is the color of the bottom side of the wings? Most
feedback from the experts said it is Tamiya XF-55 Deck Tan, or Humbrol 103
Cream. Both colors seemed a bit extreme. I’m not an expert but looking at color
pictures (sometimes deceiving) I mixed Tamia XF-55 deck tan, and about 30% of
XF-60 dark yellow. Once sprayed and dried against the Olive, and we have a
winner. Masking is easy as most everything is one sided. Large masking can be
used in most places to prevent the airbrushing overspray. Just make sure the
Olive paint is dry. The bottom was perfect when done.
(Accumulated time: 13 hours) Biplanes are very fragile. A plane this size is also difficult to decal in tight places. Do the decals at this stage before assembly. I did the fuselages and alternated to the wings. As one model was early Revell of Germany, and the other Revel GB, the decals were made by different companies. Both terrible by modern standards. The H-633 41 Squadron “Stock” SE5a had 55-year-old glossy decals. I did not see any breaks or faults. The H-4108 (McCudden) decals were dreadful! They were like the old Esci decals that had no adhesive and were thick. They were also off register.
Micro Sol, and Set helped a lot. But I had to pay attention as they would curl sometimes. McCudden’s decals were off register badly for the fuselage rondels and not usable. I found some 1/144 scale decals that were close enough and substituted them. Captain McCudden’s decals have all ‘silvered’, (poor adhesive and air gets under the decal) while the 41 Squadron decals settled near perfect. I used an X-acto knife to punch a small hole in strategic places on McCudden’s decals and washed it with diluted Future Floor finish. The holes allowed the clear to get under the decal and sealed the decals. This solved the ‘silvering’ problem mostly.
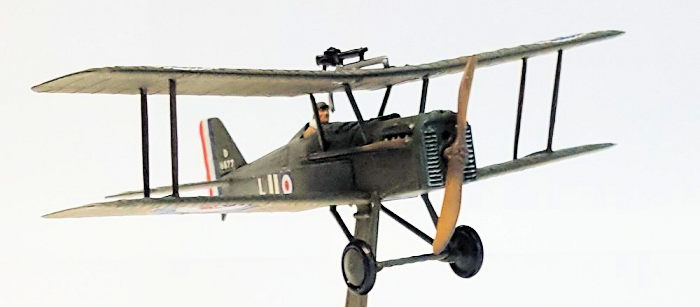
(Accumulated time: 17 hours) The exhausts are Tamiya XF-64 Red Brown and a smear of black. The wood parts are also Tamiya XF-64 Red Brown with a smear of XF-59 Dessert Yellow to imitate wood grain. By now all the decals are dry.
| FINAL CONSTRUCTION |
Sand all contact points and make sure they all fit. Add the machine gun on the fuselage because you will not be able to reach it with the top wing mounted. The bottom wings were straight and true to the fuselage. Just add cement. Next the outer struts were added, and the top wing centered. The inner struts needed to be fitted, but they went on with no trouble either. DON’T get anxious! The inner struts can push the wing out of center or push out the outer struts. Keep an eye on what you are doing. A dot of super glue in the right place will help to anchor the wings.
 The elevators never did fit well. But keep dry fitting so
they close gaps. The scratch-built elevator turned out pretty good and was very
comparable to an original.
The elevators never did fit well. But keep dry fitting so
they close gaps. The scratch-built elevator turned out pretty good and was very
comparable to an original.
(Accumulated time: 23 hours, HURRY!) Landing gear, wing gun, and pilot went on last. The Pilot was painted with Khaki, a white scarf and brown helmet, but you can’t see anything under chest level. When building the landing gear, assemble it the best you can with liquid cement and let it set for 20 minutes before attaching it to the model. This will give you enough firmness but flex to level it to the model.
(TIMES UP!) They were completed in 3 days, but the last coat of Future was applied an hour later. This protects the decals and gives a more consistent sheen overall. It also levels out the odd touch ups. I did two models, and a part replacement – so I think I deserve a little slack.
| CONCLUSIONS |
This was fun. The SE5a is an easy build and looks great in your WWI collection. Sure – if I wanted to put more detail into the kit, like a cockpit, wires and such, it can be done and would look wonderful. There are some other details such as filling in the wing slots where the outer struts attach and detailing that area a little better. I wish I had the foresight to purchase better decals. Would I recommend the kit? Oh yes! It really holds its own when finished. It’s clean out of the box and has no bad traits or surprises. I wish I had a real one!
| REFERENCES |
Mostly from other modelers on Modeling Madness.
https://en.wikipedia.org/wiki/Royal_Aircraft_Factory_S.E.5
https://en.wikipedia.org/wiki/James_McCudden
Chris Mikesh
23 November 2020 Copyright ModelingMadness.com I would welcome encouraging commentary
and friendly connection. If you would like your product reviewed fairly and fairly quickly, please
contact
the editor or see other details in the
Note to
Contributors. Back to the Main Page
Back to the Review
Index Page
Back to the Previews Index Page