Monogram 1/48 Sopwith Camel
| KIT #: | 74004 |
| PRICE: | |
| DECALS: | one option |
| REVIEWER: | Pablo Calcaterra |
| NOTES: | Farewell present from my father before coming to live in Canada |
| HISTORY |
Canadian connection to the Red Baron’s end
I love, truly love the book written by British
pilot Arthur S Gould Lee titled “No Parachute”. If you have not read it and
you want to get into the WWI topic, you cannot miss it. It is truly
outstanding. Based on the
 letters
he wrote to his wife during the war. It has been an inspiration to build a
WWI biplane, something not under the radar for me.
letters
he wrote to his wife during the war. It has been an inspiration to build a
WWI biplane, something not under the radar for me.
Not too much can be added to the life of the Red Baron that has not been already said. Even his death is now popularly acknowledged as being the result of an Australian gunner who hit him with a single bullet. In the references you can find all the detailed research done by Dr. Miller and that supports this theory.
As far as I am aware Capt. Brown did not even claim the kill as he was unsure if he had hit the Triplane or not during the chase in which he was trying to save the life of Lt. May. The RAF officially credited Brown with the kill and as a consequence he was given a bar to his DSC. The Roy Brown Society does not claim the kill but says that he was involved in the incident.
Roy Brown died in 1944 aged 50 shortly after being photographed with Screwall Beurling .
| THE KIT |
 My father
gave me this one as a present before leaving for Canada for good. It sat in the
pile for a long time and was built in two phases as I was not really engaged and
really disheartened by the issues with the built.
My father
gave me this one as a present before leaving for Canada for good. It sat in the
pile for a long time and was built in two phases as I was not really engaged and
really disheartened by the issues with the built.
This is the original Aurora kit from 1957 taken on by Monogram in 1979 and reissued with new decals in 1991 (which is the version I have). There are very few parts in an extremely large box. You can probably fit the kit 8 times in the box and still have room for more!
Plastic is somehow brittle and beige coloured. Decals were not great but good enough. Instructions are quite detailed especially when it comes to rigging.
| CONSTRUCTION |
As the interior is bare (not a floor or control stick) I painted the pilot as it was going to cover the opening in the cockpit. At that time, without knowing I was going to build Brown’s plane, I painted a early 1900s moustache on this face.
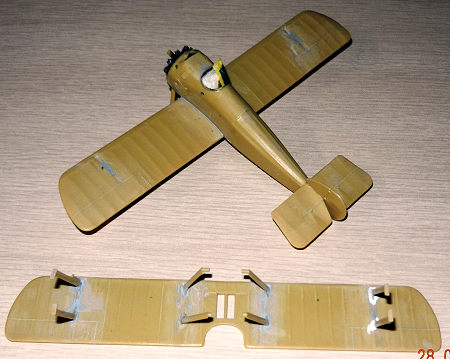 Fuselage
halves go together with no fuss. I added the bottom wing and there is a large
gap or step in the front and back of it that required putty. As the wing struts
are a large romboid that leaves large gaps on the top of the bottom wing and
bottom of the top ones I cut out the horizontal parts of the romboids and glued
them to the wings leaving two holes for each one of the struts. Putty covered
the gaps between the wing and these horizontal cut out parts. Sanding and hiding
the union was boring and not easy and I dropped the project for many years.
Fuselage
halves go together with no fuss. I added the bottom wing and there is a large
gap or step in the front and back of it that required putty. As the wing struts
are a large romboid that leaves large gaps on the top of the bottom wing and
bottom of the top ones I cut out the horizontal parts of the romboids and glued
them to the wings leaving two holes for each one of the struts. Putty covered
the gaps between the wing and these horizontal cut out parts. Sanding and hiding
the union was boring and not easy and I dropped the project for many years.
Once I decided to finish the kit I continued with the tedious sanding and putting of the wings. Once ready I added the engine, landing gear and tail. After wrapping the pilot in tissue paper I was able to start painting the Camel.
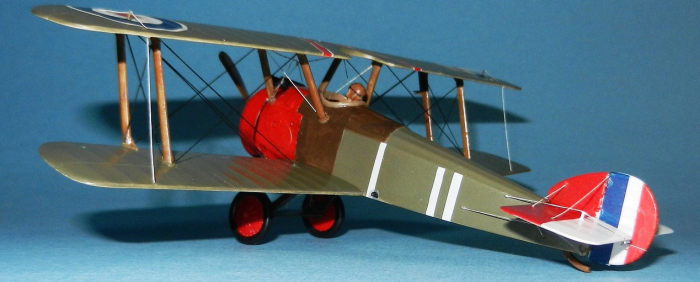
| COLORS & MARKINGS |
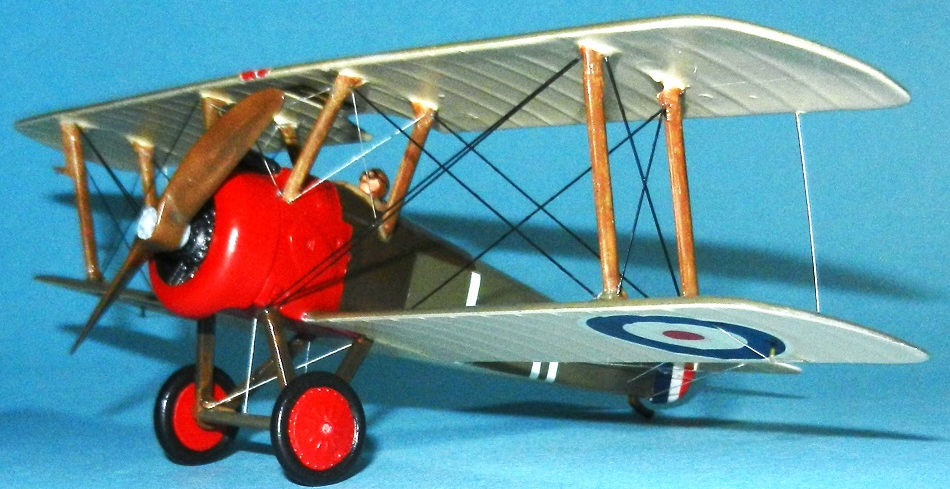
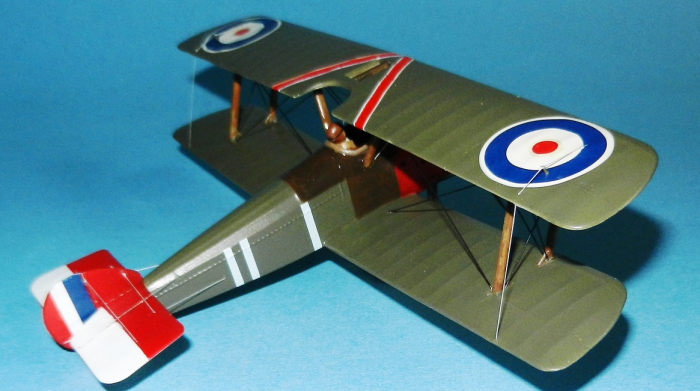
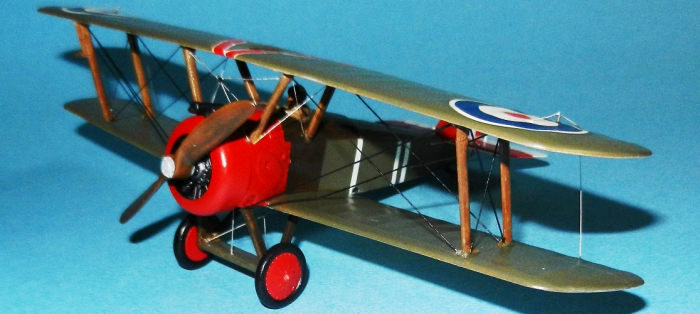
The entire tail unit and the engine cover were painted white and masked. Undersides were painted in ModelMaster Sand. The rest of the plane was given a nice coat of ModelMaster Acryl Olive drab. Engine cover, wheel hubs and tail areas were then painted red.
Struts, propeller and area around the cockpit were first painted light brown and covered with a brushed coat of Winmax polyurethane varnish. Before it dries up I used a piece of cotton and carefully moved it in one direction creating with simple strokes the illusion of wood grain.
 Future was
applied and the plane was ready for the decals.
Future was
applied and the plane was ready for the decals.
Main decals (rudder, roundels, some stencils) are from the kit. The red and white V on top of the top wing and the vertical lines on the fuselage were self made. These were covered with matt clear varnish.
I then completed the build by first adding the the machine guns. Gluing the wings top and bottom portions was really tricky. Even though I had dry fitted the struts many times these seemed to be a bit short and I had to use superglue, time and patience as they kept on snapping off once the opposite side was set in place…
After several hours of fighting wings were decently in place and adding the wiring was not that difficult using pieces of stainless steel 0.010 wire. I added the engine cover, the propeller with details highlighted in silver, the wheels and my tribute to Roy Brown was completed.
| CONCLUSIONS |
Extremely basic kit that has been (no doubt about it) superseded by Eduard. It shows its age but with a lot of hard work can be built into a “decent” replica of a Camel (and I am no Camel expert!)
Gracias Viejito!
| REFERENCES |
https://net.lib.byu.edu/~rdh7/wwi/comment/richt.htm
Roy Brown Society
8 March 2022 Copyright ModelingMadness.com.
All rights reserved. No reproduction in part or in whole without express
permission. If you would like your product reviewed fairly and
fairly quickly, please
contact
the editor or see other details in the
Note to
Contributors.