ESCI & Eldon 1/72 SE.5a
| KIT #: | 8463/5-21-028 |
| PRICE: | $cheap |
| DECALS: | One option |
| REVIEWER: | Brian Baker |
| NOTES: | Cheap, older kit with definite possibilities. |
| HISTORY |
The S.E.5A evolved from a series of experimental
fighters designed and produced by Britain’s Royal Aircraft Factory prior to and
during the early stages of World War I.
Many RAF products were ungainly pushers and slow,
lumbering observation planes, but the S.E.2 high speed biplane produced a
formula that resulted in the
 configuration followed by nearly all high
performance fighters of that era.
Followed by the S.E.4 and S.E.4A, the first S.E.5 was
powered by a 150 hp. eight cylinder Hispano-Suiza water cooled engine equipped
with a frontal radiator.
First appearing in 1916, the S.E.5 was at first plagued
by engine and structural problems, but once these were finally solved, plane was
a very successful fighter.
Never satisfied with the status quo,
British engineers tried several
different 200 hp. engines for added performance,
including the Sunbeam Arab, Wolseley W.4A Viper, and the upgraded Hispano Suiza.
The Hispano powerplant became standard, and the S.E.5A,
as it was now known, became one of the outstanding fighters of the war.
Fifty-six
S.E.5A’s were produced by Curtiss in the U.S. during the
war, and some were later rebuilt by the Eberhardt Company, where they were used
until the late twenties.
The Royal Air Force quickly disposed of them after the
war, and a few were sold to civilians. A small number of two seat conversions
were also flown.
configuration followed by nearly all high
performance fighters of that era.
Followed by the S.E.4 and S.E.4A, the first S.E.5 was
powered by a 150 hp. eight cylinder Hispano-Suiza water cooled engine equipped
with a frontal radiator.
First appearing in 1916, the S.E.5 was at first plagued
by engine and structural problems, but once these were finally solved, plane was
a very successful fighter.
Never satisfied with the status quo,
British engineers tried several
different 200 hp. engines for added performance,
including the Sunbeam Arab, Wolseley W.4A Viper, and the upgraded Hispano Suiza.
The Hispano powerplant became standard, and the S.E.5A,
as it was now known, became one of the outstanding fighters of the war.
Fifty-six
S.E.5A’s were produced by Curtiss in the U.S. during the
war, and some were later rebuilt by the Eberhardt Company, where they were used
until the late twenties.
The Royal Air Force quickly disposed of them after the
war, and a few were sold to civilians. A small number of two seat conversions
were also flown.
| THE KIT |
Although several
kits of the S.E.5 are listed in the Burns Kit Guide,
including Fuji, Pavla, Plastiques Dermatt, Renwal (a printed fabric cover kit),
Revell, Roden, and Scaleplanes, probably the Roden kit is the newest and most up
to date.
However, there are plenty of the Eldon-Entex kits available at Swap
meets, along with their
Revell cousins,
and since this was such an important
aircraft, any
serious 1/72 scale kit collection should include a number of these.
I’ve had these kits in my stash for a long time, and
decided to see what it was like to build kits that were almost 50 years old.
The only difference between these three kits is that
the Entex kit has “Japan” printed on the inside of the fusel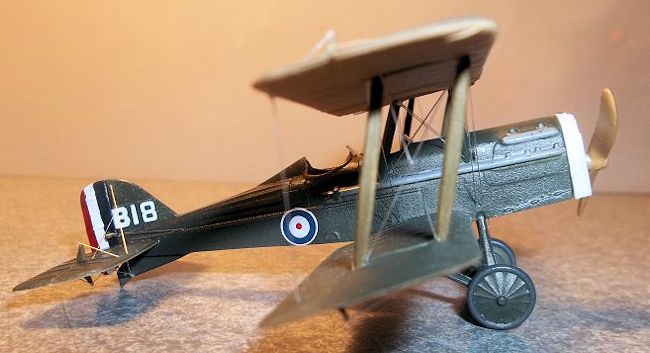 age, while the
ERTL/ESCI kit says “Italy”.
Wherever they were made, and whoever made them, they are
all the same kit.
The ESCI kit is even labeled “French SE-5” although the
box art and decals depict a British aircraft, while the other have decals for
the same American aircraft.
age, while the
ERTL/ESCI kit says “Italy”.
Wherever they were made, and whoever made them, they are
all the same kit.
The ESCI kit is even labeled “French SE-5” although the
box art and decals depict a British aircraft, while the other have decals for
the same American aircraft.
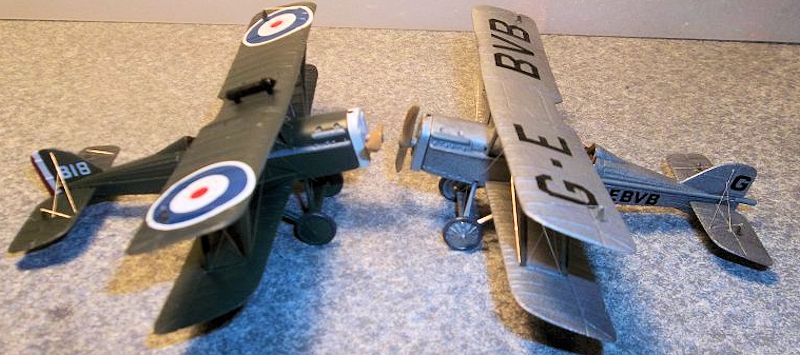
Cast in different colored plastic
(Entex—silver, Eldon—pale grey, and ERTL—light tan), the
kits are all the same.
The biggest problem is the cockpit interior, which is
blocked off by partitions, requiring trimming to allow the interior to be
detailed.
This is not a difficult task, but does require a certain amount
of finesse.
Once this area is smoothed out, sidewall detail can be made, and
a seat can be inserted.
You won’t be able to see much through the cockpit hole,
but an attempt should be made anyway. There is a certain amount of flash that
has to be trimmed off, which is par for the course with these old models.
Exterior
detail is really quite good for a kit of this vintage,
and the rib detail, while a little overdone, is
acceptable.
The wing struts fit into slots in the wing surfaces, and line up
pretty well, although I had a little trouble with the cabane struts, as they
didn’t line up right on either model.
The landing gear struts were a little wobbly, but I
managed them OK.
The horizontal tailplanes fit into slots very nicely, and it is
not a difficult model to get aligned.
| CONSTRUCTION |
| COLORS & MARKINGS |
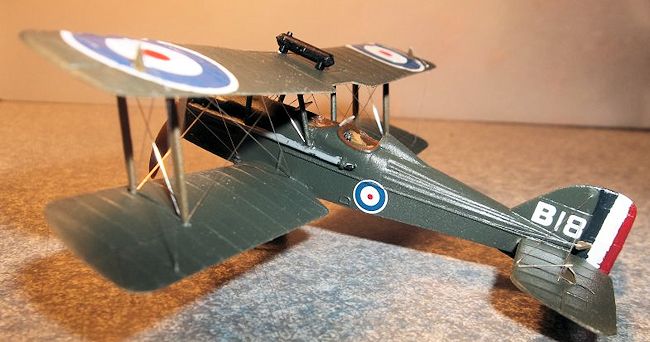
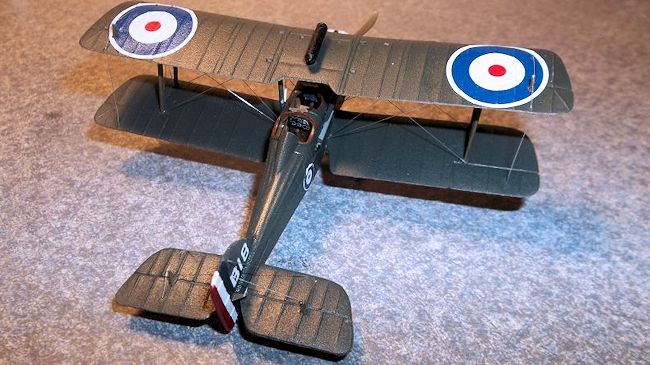 These are very tiny aircraft in 1/72 scale, and you
don’t need much paint.
I painted the airframes before attaching the upper
wings, and did the struts in the proper colors.
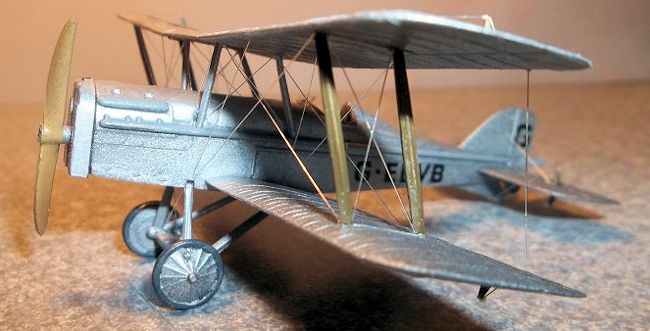
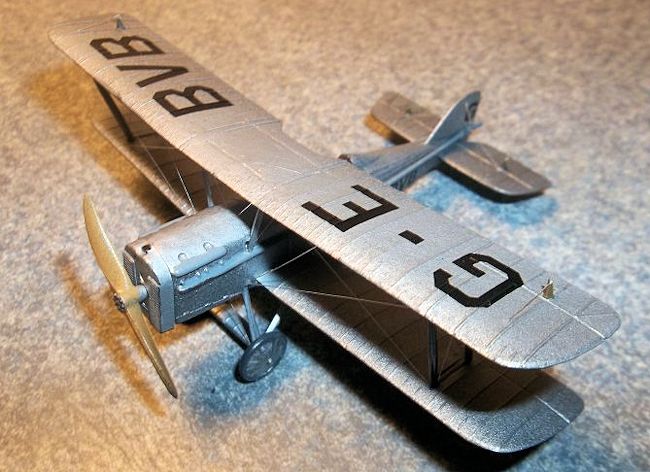
The trainer had standard RAF colors, while the skywriter
was silver overall with black letters.
These are very tiny aircraft in 1/72 scale, and you
don’t need much paint.
I painted the airframes before attaching the upper
wings, and did the struts in the proper colors.
The trainer had standard RAF colors, while the skywriter
was silver overall with black letters.
That was about it.
I added control horns, and used unstranded electronic
wire for rigging.
| CONCLUSIONS |
 I built a Revell kit years ago, and from the looks
of it, it is really quite similar to these kits.
I built a Revell kit years ago, and from the looks
of it, it is really quite similar to these kits.
Look for these in your next visit to the swap meet.
They’re very cheap, and make into quite nice models.
| REFERENCES |
March 2014
If you would like your product reviewed fairly and fairly quickly, please contact the editor or see other details in the Note to Contributors.