Academy 1/32 Nieuport 17
| KIT #: | 12121 |
| PRICE: | $28.00 |
| DECALS: | Three options |
| REVIEWER: | Chris Peachment |
| NOTES: |
This
new “WWI Centenary” version has an etched fret and new decal sheet.
There is also a card of thick black rigging thread |
| HISTORY |
Our Editor, Scott Van Aken, previewed this kit back in 2009 on this website,
though as far as I can see no one has built this kit so far.
There are a sufficient number of excellently reviewed other Nieuport 17s on this
website, so I will keep the history short.
The 17 was a
larger
development of the 11, with a more pow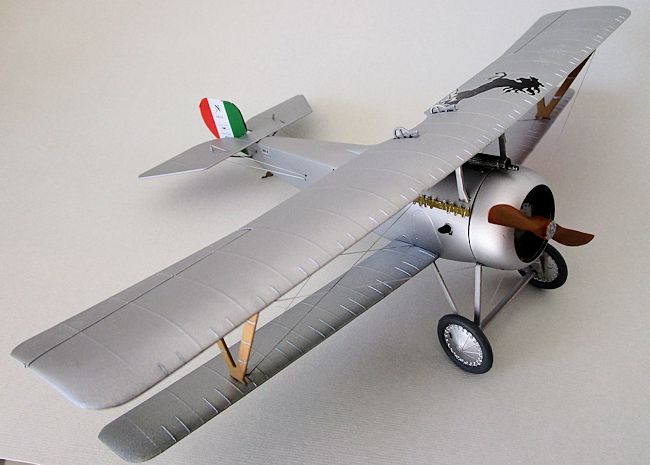 erful engine, larger wings, and
improved aerodynamics. It was first fitted with a 110 hp Le Rhone engine, though
later versions were upgraded to a 130 hp version. It had such outstanding manoeuverability and rate of climb, that German manufacturers were urged to copy
the aircraft, and many engines from
crashed Nieuports were salvaged and used.
Unfortunately, it suffered the usual inadequacy of all sesquiplanes. The
lower wing was torsionally weak due to its single spar construction, and had a
nasty habit of disintegrating in high speed dives. Which is not the kind of
behaviour a pilot wants from his fighter.
erful engine, larger wings, and
improved aerodynamics. It was first fitted with a 110 hp Le Rhone engine, though
later versions were upgraded to a 130 hp version. It had such outstanding manoeuverability and rate of climb, that German manufacturers were urged to copy
the aircraft, and many engines from
crashed Nieuports were salvaged and used.
Unfortunately, it suffered the usual inadequacy of all sesquiplanes. The
lower wing was torsionally weak due to its single spar construction, and had a
nasty habit of disintegrating in high speed dives. Which is not the kind of
behaviour a pilot wants from his fighter.
The wing mounted Lewis gun of the 11 was replaced in French service with a
synchronised Vickers gun on the nose.
In British service the wing mounted Lewis was retained, on a Foster
mounting, a curved metal rail which made it easier for the pilot to change
ammunition drums and clear jams.
A
few aircraft were fitted with both guns but in practice this reduced performance
due to extra weight and drag, and a single machine gun remained standard.
| THE KIT |
The three decal options are:
1. The Red Indian Head insignia of Escadrille 124 in the spring of 1917.
2.
The Flying Stork insignia of Escadrille 3 in July 1916
 3.
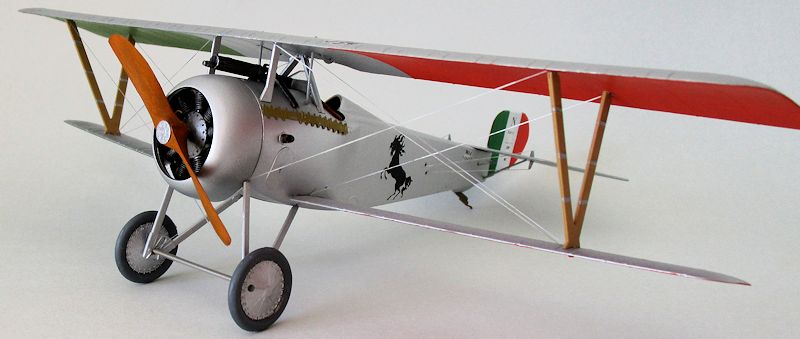
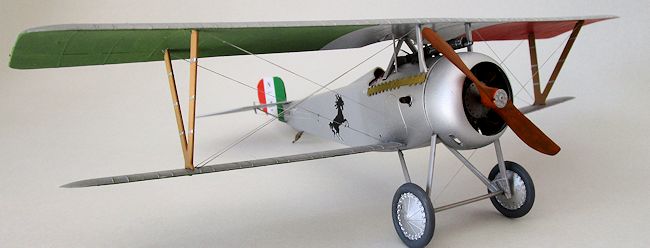
Italian ace Captain Francesco Barraca's mount in 1917, with
Prancing Horse motif.
3.
Italian ace Captain Francesco Barraca's mount in 1917, with
Prancing Horse motif.
There are etched but no resin parts and one small clear windscreen. The etch is
thick and hard to bend in certain cases, and there are no seat belts. The
moulding is perfectly acceptable, and while it is not overly detailed, it is
still a nice mainstream injected kit.
I would say it would be ideal as a starter kit for anyone dipping their
toes into WWI aviation. Parts are not too numerous, it all fits together well
with minimal sanding or filling.
And
the rigging is simple.
Although the
rigging thread supplied is far too thick and best consigned to the spares box
for when you next make a sailing ship.
| CONSTRUCTION |
Construction began as usual with the interior, and this is
straightforward assemblage of controls and bulkhead spars. I painted the inside
a pale buff colour, with some wooden spars and metal for the control bars. The
seat was dark plywood, and needs some holes drilling in the backrest. In this
scale it badly needs some seat belts, and I didn't have any in the spares box of
the right width. Tamiya masking tape was used.
And then comes the first dilemma. From
all the research that I could find, it seems that most 17s did not have an
instrument panel, but scattered the dials randomly around the interior frame.
However the kit
 comes with an etched panel and some wood grain decals for it,
along with dial decals. Since I was making the kit out of the box, I went with
that, assuming that Academy might have done better research than I, but that may
well be erroneous.
comes with an etched panel and some wood grain decals for it,
along with dial decals. Since I was making the kit out of the box, I went with
that, assuming that Academy might have done better research than I, but that may
well be erroneous.
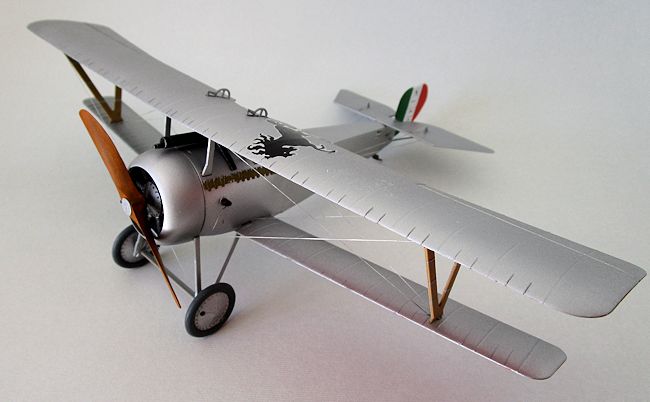
Lower wing and tailplanes were fixed to the finished fuselage and, as
with all biplanes, painting was begun before final construction. In this case it
was simply an overall blast from a silver rattle can, with some polishing done
on the forward panels and cowling. Note that the engine cowl is slightly too
narrow for the forward fuselage, but a little sanding on the forward panels
helped it fit.
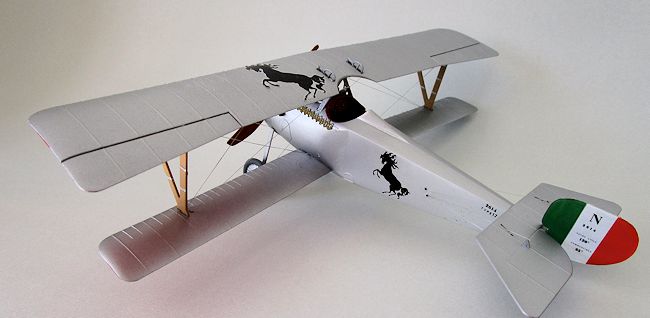
The lower surfaces of both wings will need to be masked off and painted
Italian green and red. In retrospect I should have painted the tricolour
onto the fin, because the decals proved problematic. More of that later.
The engine is simple, and was given a coat of matt black followed by
gunmetal dry brushing to point up the cooling fins and other details. Intake
pipes are dirtied up copper. The propeller was hand painted in wood, with
dark wood streaks and a final coat of clear orange.
 I painted the struts in wood, and then tried to use the etched
metal bandages for the V-struts, but they proved to be too thick to be bent to
shape, and so I painted them on instead. The upper wing machine gun is not a
good representation of a Lewis gun, which was usually left off French and
Italian machines anyway. The Vickers machine gun got the black and gunmetal
treatment, along with its ammunition belts, and was put in place, along with the
cabanes. Normally, I would now decal the whole machine, but since the markings
were simple, I chose to mount the upper wing. There were no problems with this.
The aileron control rods can be slid through the upper wing slots, and the
etched stitching for the side panels was given a coat of sand dark yellow and
superglued in place.
I painted the struts in wood, and then tried to use the etched
metal bandages for the V-struts, but they proved to be too thick to be bent to
shape, and so I painted them on instead. The upper wing machine gun is not a
good representation of a Lewis gun, which was usually left off French and
Italian machines anyway. The Vickers machine gun got the black and gunmetal
treatment, along with its ammunition belts, and was put in place, along with the
cabanes. Normally, I would now decal the whole machine, but since the markings
were simple, I chose to mount the upper wing. There were no problems with this.
The aileron control rods can be slid through the upper wing slots, and the
etched stitching for the side panels was given a coat of sand dark yellow and
superglued in place.
For rigging I used elastic mending
thread, painted silver with a felt tip marker pen. Each end was secured with a
tiny drop of superglue gel applied with a sharpened toothpick. I find the gel
makes life a lot easier, as it is possible to control the small amount much more
precisely than the usual superglue, which can run all over the place. Also,
elastic thread soaks it up and sets very quickly, which is a bonus when rigging.
There is a useful rigging chart which
shows where all the main rigging and also the control wires go. The holes in the
fuselage for control wires were pre-drilled and rather too large. In an ideal
world, I would have blanked them off and re-drilled them, but I wanted to show
this model as it came out of the box.
 After that came the undercarriage,
which was also cross rigged with a couple of wires. The wheel hubs are nicely
detailed, with the ends of the spokes showing through the fabric covers.
After that came the undercarriage,
which was also cross rigged with a couple of wires. The wheel hubs are nicely
detailed, with the ends of the spokes showing through the fabric covers.
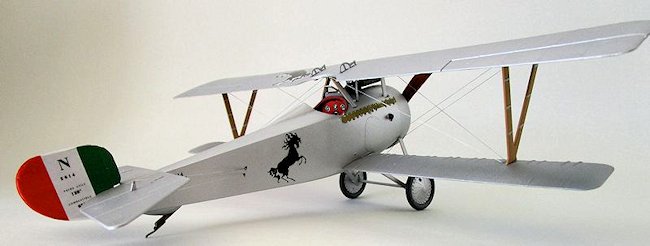
Finally, the only area which caused me some grief in the build was the
tricolour decal for the tail. The decals so not stick very well, and it proved
impossible to coax the slight overhang around the top edges of the fin, no
matter how much softener was used. The decal started to split and break
up. So I trimmed it all down with a razor blade and painted the fin edge to
match. Be warned that it will save you time and heartache if you painting the
whole thing in the first place.
The lovely Prancing Horse motif was later passed on by the Baracca family to their friend Enzo Ferrrari, who of course used it on his cars. So you could say that this particular machine is the very first Ferrari. There is a little silvering here of the decal and it would have been better to trim some of the carrier film first, especially from between the rear legs of the horse.
| CONCLUSIONS |
 So there you have a very simple and straightforward introduction to WWI
aviation and also to 1/32 scale modelling. It would be ideal for a beginner in
either field. The finished item has great charm, and I would suggest that
because the model is something of a blank canvas it would lend itself to
super-detailing very easily. It is also good value for money.
Wingnut Wings haven't yet done a Nieuport, but if and when they do, it will be
at least four times the price of this one.
So there you have a very simple and straightforward introduction to WWI
aviation and also to 1/32 scale modelling. It would be ideal for a beginner in
either field. The finished item has great charm, and I would suggest that
because the model is something of a blank canvas it would lend itself to
super-detailing very easily. It is also good value for money.
Wingnut Wings haven't yet done a Nieuport, but if and when they do, it will be
at least four times the price of this one.
| REFERENCES |
http://www.flugzeuginfo.net/acdata_php/acdata_nieuport17_en.php
http://www.airliners.net/photo/Nieuport-17-Scout/1952318/L/
http://www.wwiaviation.com/gallery-nieuport-17.html
http://www.airliners.net/photo/Nieuport-17-(replica)/0883225/L/
July 2015 If you would like your product reviewed fairly and fairly quickly, please
contact
the editor or see other details in the
Note to
Contributors.