| KIT #: | 7260 |
| PRICE: | £10.60 |
| DECALS: | One option |
| REVIEWER: | Stephen Foster |
| NOTES: | Some small parts break easily |
| HISTORY |
 for
the observer in front of the propellor. In the case of the Vickers FB 5
and FE 2b it was decided at an early stage that these machines could be
armed with a machine gun or rifle for defence: they were not intended to
be fighters as the concept only evolved slowly in 1915.
for
the observer in front of the propellor. In the case of the Vickers FB 5
and FE 2b it was decided at an early stage that these machines could be
armed with a machine gun or rifle for defence: they were not intended to
be fighters as the concept only evolved slowly in 1915.| THE KIT |
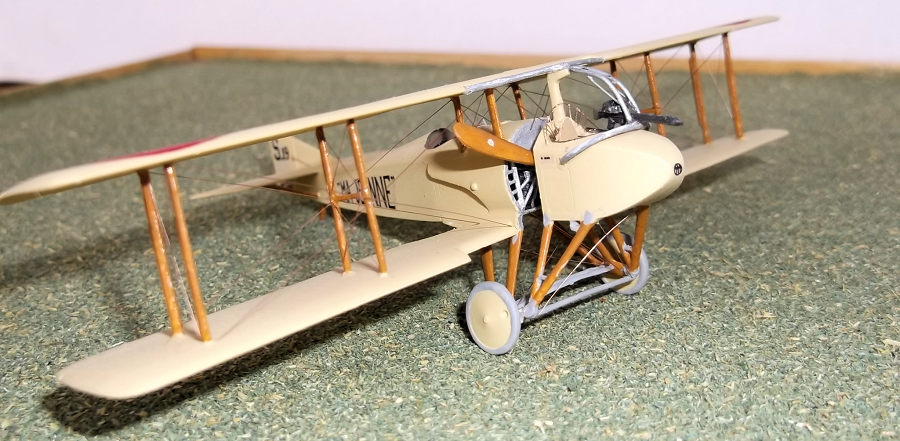
 The kit is moulded in a softish white plastic. The struts and smaller
parts associated with the gun mounting and undercarriage are very thin
and delicate and are easily damaged or broken. Even though I took great
care to remove these parts from the sprue I managed to break several
pieces. In fact I found it easier to replace some of these parts with
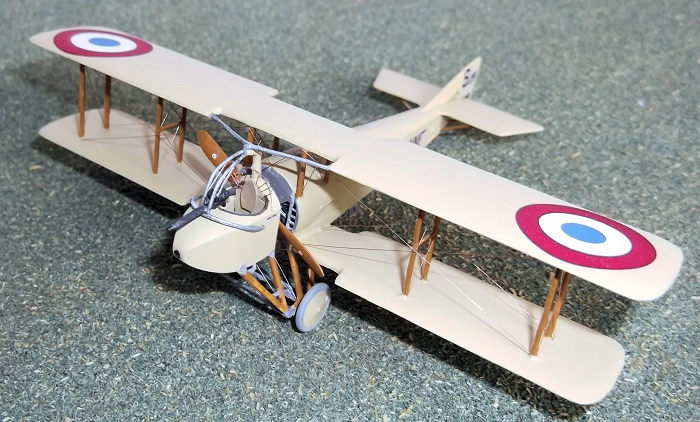
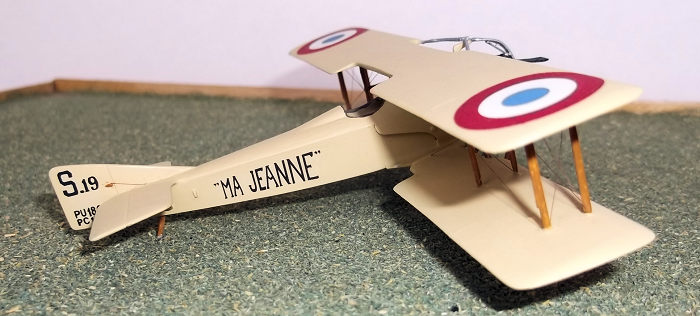
Evergreen strip. The transfers are for one option and were printed well
and although the tail markings were too large, I still used them as I
did not have suitable replacements. The instructions are on a double
sided A4 sheet with a brief history in English and Russian.
The kit is moulded in a softish white plastic. The struts and smaller
parts associated with the gun mounting and undercarriage are very thin
and delicate and are easily damaged or broken. Even though I took great
care to remove these parts from the sprue I managed to break several
pieces. In fact I found it easier to replace some of these parts with
Evergreen strip. The transfers are for one option and were printed well
and although the tail markings were too large, I still used them as I
did not have suitable replacements. The instructions are on a double
sided A4 sheet with a brief history in English and Russian.| CONSTRUCTION |
 Assembly starts with the basket or pulpit at the front, followed by the
fuselage halves. The cockpit interior is very basic and only has a
pilot’s seat and some internal structure moulded to the fuselage sides.
In view of the fact that very little of the interior can be seen on the
completed model this probably does not matter too much.
Assembly starts with the basket or pulpit at the front, followed by the
fuselage halves. The cockpit interior is very basic and only has a
pilot’s seat and some internal structure moulded to the fuselage sides.
In view of the fact that very little of the interior can be seen on the
completed model this probably does not matter too much.| COLORS & MARKINGS |
 I
paint my biplanes before I attach the top wing because it makes access
to all parts much easier. I used a mixture of Humbrol clear doped linen
with a small amount of light brown for the body of the model, light grey
for the tyres, axle and engine bracket, aluminium for the gun ring and
mount, and Revell SM 382 tan for the struts and undercarriage legs. The
markings were also put on at this stage.
I
paint my biplanes before I attach the top wing because it makes access
to all parts much easier. I used a mixture of Humbrol clear doped linen
with a small amount of light brown for the body of the model, light grey
for the tyres, axle and engine bracket, aluminium for the gun ring and
mount, and Revell SM 382 tan for the struts and undercarriage legs. The
markings were also put on at this stage.| CONCLUSIONS |
| REFERENCES |
3 August 2021
Copyright ModelingMadness.com. All rights reserved. No reproduction in part or in whole without express permission.
If you would like your product reviewed fairly and quickly, please contact the editor or see other details in the Note to Contributors.