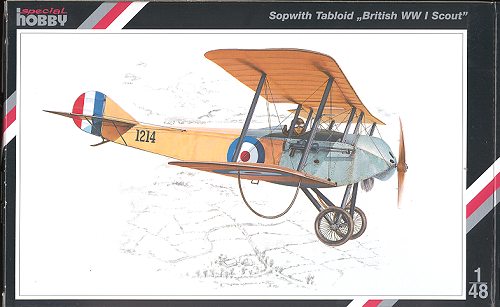
Special Hobby 1/48 Sopwith Tabloid
|
KIT # |
48011 |
|
PRICE: |
$36.00 |
|
DECALS: |
Three Aircraft |
|
REVIEWER: |
|
|
NOTES: |
Short run with resin |
|
BACKGROUND |
As for the history and first impressions of the kit, I think that Tom Cleaver has done an excellent job on this matter in his earlier preview. I concur with his observations and I don’t think I could add more.
|
CONSTRUCTION |
First let me say that this is a nice kit. There are two glitches in the build and they are,
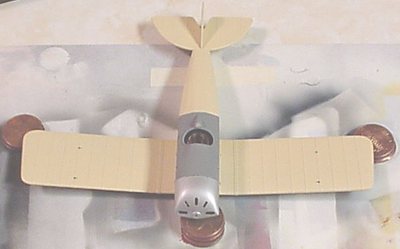
 One, the
rear fuselage needs to be cut out to allow the Horizontal stab to fit correctly
on the fuselage. The stab is to fit so the top of the fuselage makes a strait
line down the whole length, over the horizontal stabilizer, from the cockpit to
the kingpost. If you don’t do this bit of surgery the vertical stab and
horizontal stab will sit about two millimeters too high. This is the only
problem that needs to be fixed and it isn’t that hard to do.
One, the
rear fuselage needs to be cut out to allow the Horizontal stab to fit correctly
on the fuselage. The stab is to fit so the top of the fuselage makes a strait
line down the whole length, over the horizontal stabilizer, from the cockpit to
the kingpost. If you don’t do this bit of surgery the vertical stab and
horizontal stab will sit about two millimeters too high. This is the only
problem that needs to be fixed and it isn’t that hard to do.
Two, the upper wing is too long and makes the tops of the struts angle slightly outboard. To fix this you will need to cut one millimeter from the wing tips and reposition the alignment holes in the top wing. This is not the best fix because the struts should line up with the ribs. The most correct fix would be to cut two millimeters from the center of the wings and just rejoin them. All the struts will line up and look correct. This problem, in my opinion is not that noticeable and you may not feel it necessary to make this modification.
 Other
then the previously mentioned items the kit is very strait forward. The cockpit
is well done and the Instrument panel is very nice. If the modeler wishes to
add more detail to the cockpit it would not be difficult. I did not have to do
anything more then the expected clean up and the internal parts fit inside of
the fuselage half without any special fitting.
Other
then the previously mentioned items the kit is very strait forward. The cockpit
is well done and the Instrument panel is very nice. If the modeler wishes to
add more detail to the cockpit it would not be difficult. I did not have to do
anything more then the expected clean up and the internal parts fit inside of
the fuselage half without any special fitting.
I started by removing all the parts from the sprues and cleaning them up. All the parts that would be in a lacquered wood finish I painted Radome tan. I let these dry for a day or so and use oil paints thinned with linseed oil to make the wood grain. You can make the wood parts darker or lighter just by the shades of oil paint use.
The fuselage went together well and as I was test fitting things I noticed the problem with the tail. As I said earlier you need to cut out a bit of the fuselage to get the tail to fit properly. This is not hard but it takes some time and patience so all will fit properly. Other than this, the kit had a tendency to fall together.
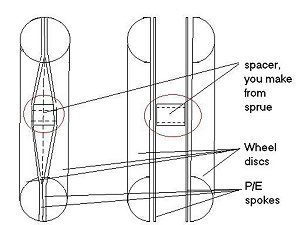 One
process that for me was new was building the spoked wheels. In the instructions
you are just shown that these parts are put together. I used super glue to glue
the tires to the spokes and glued a spacer to the inside of a set of two units,
pressed them together and it worked well. I then drilled out the hole for the
under carriage axle.
One
process that for me was new was building the spoked wheels. In the instructions
you are just shown that these parts are put together. I used super glue to glue
the tires to the spokes and glued a spacer to the inside of a set of two units,
pressed them together and it worked well. I then drilled out the hole for the
under carriage axle.
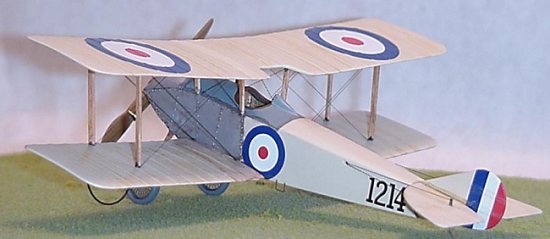
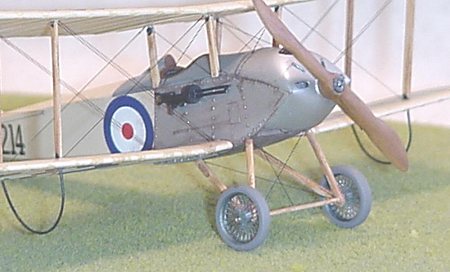
 I
decided to build a later aircraft No.1214 of the RNAS in April 1915. This
aircraft had conventional landing gear and metal loops to protect the wings.
You will have to build them, as the kit doesn’t provide the parts or material to
build them. I built mine from brass wire. The instructions have a template to
bend them; they’re not hard to do.
I
decided to build a later aircraft No.1214 of the RNAS in April 1915. This
aircraft had conventional landing gear and metal loops to protect the wings.
You will have to build them, as the kit doesn’t provide the parts or material to
build them. I built mine from brass wire. The instructions have a template to
bend them; they’re not hard to do.
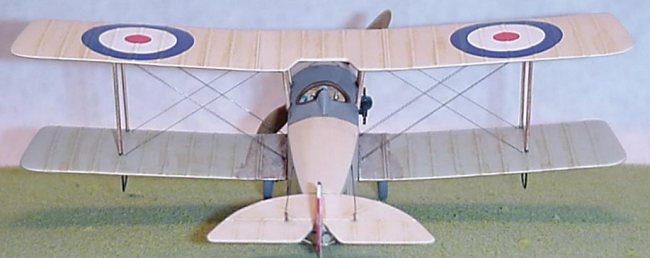
The struts lined up perfectly and needed no lengthening or shortening. I find that if you are going to have a problem with a biplane you will have it with putting on the upper wing. No problem was had doing this. The only problem here is the fact that the struts are supposed to be vertical when viewed from the front and because of the long upper wing they wont be perfectly vertical unless you reposition the struts or shorten the wing.
|
PAINTING & MARKINGS |
The kit comes with decals for three different aircraft.
First is No.1214 of No. 1 Squadron, RNAS, April 1915. This is the one that was
fitted with a bullet deflector and carried a Lewis gun that could fire through
the propeller similar to the Morane-Saulnier. Second is No.394, August 1915.
As No.167, (I assume that some time between August and October its tail number
had been changed) and flown by Squadron Commander Spenser Gray, this aircraft
took off from Antwerp Belgium on October 9,1914 and sent on a mission to bomb
the Zeppelin sheds in Cologne. He could not find the sheds and bombed
 the railway station in
Cologne. He was forced to land and made his way back to Antwerp before the
allies evacuated it. Third is No.326, RFC, 1914. I have no other information
on this third aircraft.
the railway station in
Cologne. He was forced to land and made his way back to Antwerp before the
allies evacuated it. Third is No.326, RFC, 1914. I have no other information
on this third aircraft.
When it comes to painting, I don’t think that you can have
an easier paint job then a CDL or Clear Doped Linen finish. CDL finishes come
in quite a few different shades of color. Basically they ranged from an almost
perfect white to a fairly dark shade of brown. Now add the fading or bleaching
of the sun along with dirt and oil and you can see that you have an almost
unlimited variation of color. In fact I’ve seen pictures of aircraft, side by
side and with serial numbers that suggest that they came off the assembly line
one after the other, and they are obviously different shades of CDL. I assume
that either different lots of linen were use or they were left in the weather
differently. To reproduce this I start out
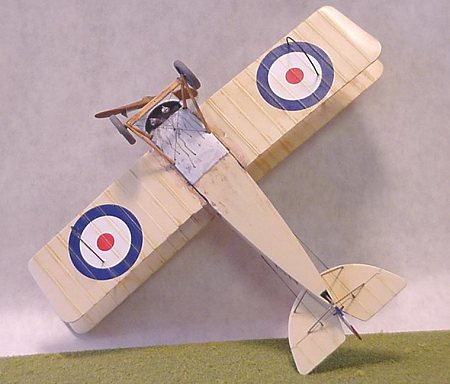 with a coat of Radome Tan,
this is a very light tan that allows you to use pastels or dry-brushing
techniques to either lighten or darken the finish to replicate a CDL finish.
with a coat of Radome Tan,
this is a very light tan that allows you to use pastels or dry-brushing
techniques to either lighten or darken the finish to replicate a CDL finish.
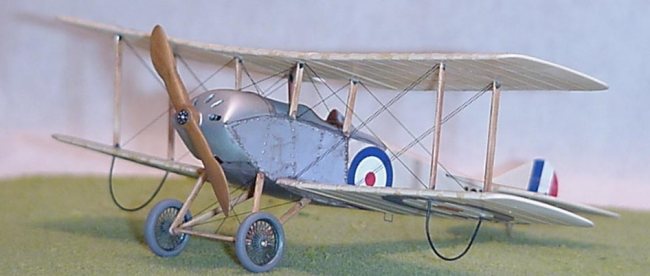
After I painted the CDL I masked it off and painted the cowling Silver and the upper deck Neutral Gray. As I’ve said earlier all the parts that would be in a Lacquered Natural Wood Finish or LNWF, I painted Radome tan. I let these dry for a day or so and use oil paints thinned with linseed oil to make the wood grain. You can replicate almost any type of wood using this technique, from dark Mahogany to Ash and Pine just by using different shades of oil paint.
The decals are very nice and sharp. The registration is spot on and they go on very well and snug right down to the part, they look very nice.
Rigging is quite simple on this aircraft as it is a single bay wing and there is no cross bracing, for and aft between the interplane struts. This was to facilitate wing warping. Oh, I forgot to tell you that this aircraft like all of the early aircraft controlled the roll axis by wing warping and did not have ailerons. Cross bracing was added after later aircraft were produced with ailerons or earlier aircraft were retrofitted with them.
|
CONCLUSIONS |
The kit is well engineered as is attested by the ease of assembly. In many ways it is comparable to the newest Eduard profi-pack kits. It was also very fun to build. I did not have many references of this aircraft and was forced to look through many books on World War I for any pictures that could help me. I know of the windsock mini datafile #9 but could not get a hold of one in time to build this kit. This kit would be a good first World War I kit. If you have not worked with photo-etched or resin parts, this is a good kit to try them. They are of excellent quality and will give you the experience and confidence needed to work on a kit of lesser quality.
A= The best, easiest and most accurate
F= The worst, most difficult and inaccurate.
Accuracy B+ The top wings
Fit B You will need to cut out a place for the stabilizer.
Ease of construction B+ See the above.
Aircraft options B Parts and decals for three aircraft.
Decal quality A Thin, accurate and adhere without solvents or setting solution
Instructions B+ You can build the kit without any other references than the instructions.
|
REFERENCES |
The instructions
Fighter Aircraft of the 1914-1918 War by: W. M. Lamberton, E. F. Cheesman, J. D. Carrick, F. Yeoman and D. A. Russell; Harleyford publications Limited, Letchworth, Herts, England
January 2003
Copyright ModelingMadness.com. All rights reserved. No reproduction in any form without express permission from the editor.
If you would like your product reviewed fairly and fairly quickly, please contact the editor or see other details in the Note to Contributors.