Roden
1/72
PKZ-2 Helicopter
|
KIT #: |
ROD-008 |
|
PRICE: |
$11.00
|
|
DECALS: |
One option |
|
REVIEWER: |
Stephen Foster |
|
NOTES: |
Short run |
Readers may be surprised to learn, as I was, that the worlds first
helicopter flew on 2 April 1918. (There is debate on this with the
unstable Gyroplane #1 of 1907 considered the first to lift a man off the
ground. The first free-flight helicopter is considered to be Paul Cornu's
invention of later in 1907. It was also highly unstable. Ed) The PKZ was an Austro-Hungarian design and had
been developed from an idea of S. Petroczy von Petrocz who wanted to replace
hydrogen filled gallons as observation platforms. Petroczy argued that a
 motor driven helicopter offered many advantages and in 1916 started
development and testing work to try out the idea. By mid 1917 enough work
had been done to sow that the idea was feasible and what the design
parameters would need to be. In January 1918 W. Zurovec had a design for a
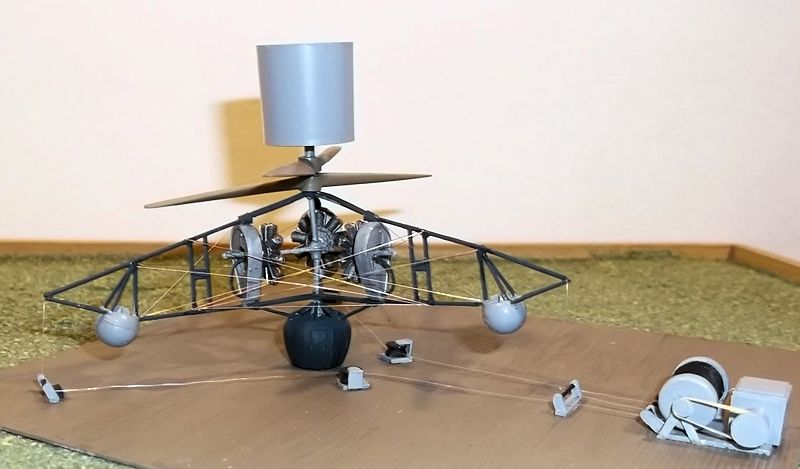
helicopter patented and this became known as the PKZ - 2. This machine had
two contra-rotating propellors powered by three 100 hp Gnome rotary engines.
It a had a 1 meter diameter airbag cushion and three smaller airbags on
outriggers, the whole being built on a light tubular frame. The outriggers
were tethered by cables to the ground, and three motors were used to allow
the cable to be payed out and drawn in during flight.
motor driven helicopter offered many advantages and in 1916 started
development and testing work to try out the idea. By mid 1917 enough work
had been done to sow that the idea was feasible and what the design
parameters would need to be. In January 1918 W. Zurovec had a design for a
helicopter patented and this became known as the PKZ - 2. This machine had
two contra-rotating propellors powered by three 100 hp Gnome rotary engines.
It a had a 1 meter diameter airbag cushion and three smaller airbags on
outriggers, the whole being built on a light tubular frame. The outriggers
were tethered by cables to the ground, and three motors were used to allow
the cable to be payed out and drawn in during flight.
The first test flight took place on 2 April 1918 and found to be
underpowered so 120 hp Le Rhone engines were substituted for the Gnomes.
This machine carried out a total of 36 test flights up to 50 meters high. In
June 1918 it was to be demonstrated to some senior officers of the
Austro-Hungarian air force although Zurovec thought that the machine was not
ready for such an inspection. However the trials went ahead but due to the
engines overheating power was lost and the machine crashed and was badly
damaged. Later that month the project was cancelled as the general situation
in Austria - Hungary was deteriorating rapidly and scarce resources were
required urgently elsewhere.
When I first found out about this machine I had no idea that Roden
produce a kit. Being interested in non-mainstream aircraft and especially
early aircraft and flying machines generally, I decided to get one.
The kit is well moulded in dark grey slightly soft plastic with very
little flash, but some mould seams. These are easily removed with some
gentle filing, although the parts tend to be very small. The transfer sheet
in my kit was slightly out of register so I did not use the markings. In any
event there is no definite evidence that any markings were carried so these
are optional. Removing the parts from the trees requires great care as they
are delicate - indeed the instruction sheet warns modellers of this so take
heed. I also did not remove some parts until I needed them as they can
easily be lost. The engines were the highlight of this kit. They are
excellent mouldings, flash free and very finely detailed. I am a scratch
builder and conversion addict and I am seriously considering buying a second
kit just to get the engines as they are so good.
The assembly instructions are clear on two sides of A5 paper and should
be straightforward except for stage 5 which I will comment on later. I
painted some parts as I went along, including the engines and fuel tanks as
it is not possible to do this once the kit is assembled, so keep this in
mind when reading on. Initial assembly of the engines, fuel tanks and
outriggers and airbag is very simple. Do take care with this though to
ensure that all is correctly aligned and all three outriggers are identical
in every way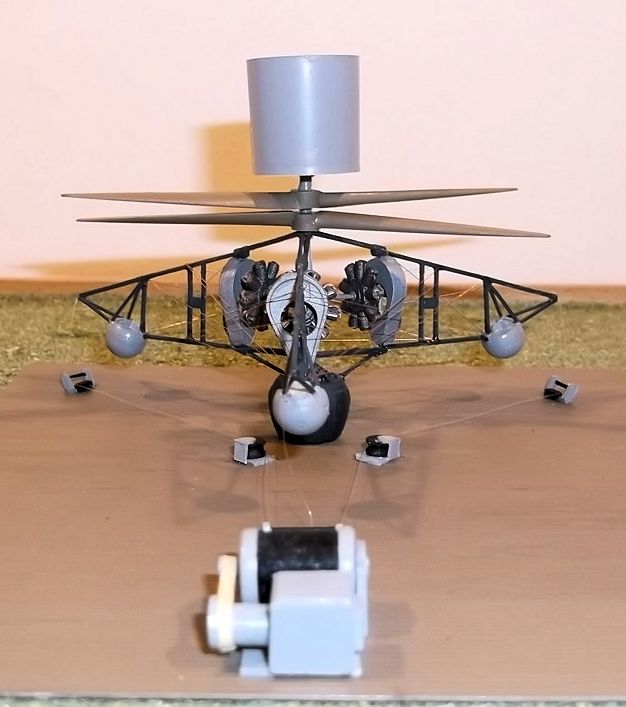 . The struts which sit on the airbag need to be cemented
carefully as I found this part a little weak. Now the problems start.
. The struts which sit on the airbag need to be cemented
carefully as I found this part a little weak. Now the problems start.
Assembly of the engines and fuel tanks to the central drive shaft and then
the upper frame (stage 5) is very far from easy. The easiest way to do this
is to make a small stiff collar from paper and have this ready. Assemble the
engines to the drive shafts, but when the central vertical shaft is fitted
to the top of the airbag this has to be held vertically so now slip the
collar over. The upper part of the shaft can then be cemented in place
together with the fuel tanks and the triangular upper frame. Getting all of
this correctly aligned is very tricky because everything is so delicate and
rather flimsy. If you succeed remove the collar when all is dry.
Now the
second awkward part. The arms of the outriggers are supposed to be cemented
to the ends of the central triangular struts but there are no holes for
this. I drilled small holes in the ends of the triangular frames to make a
stronger joint, but even then it is not very strong and great care is needed
to get everything properly aligned again. Only attach one outrigger at a
time and wait until it is dry before proceeding with the newt one. I did not
help myself with this model as I managed to drop something on to the main
sub-assembly and damaged the central drive shaft which caused some mis-alignment
which I have not been able to correct properly.
The propellors can be fitted last but then the drive shaft does not
protrude above the upper propellor so I had to glue the basket on top with
fuse wire and superglue. The hole in the base of the bucket is also
hopelessly small so will need to be enlarged.
The colour scheme is rather
drab as it is a combination of light and dark grey. There is a colour
diagram on the back of the box which can be used as a guide.
 This is not a model for the faint hearted, impatient or beginner. Its
main drawback is the fragile nature of the whole thing. In an attempt to
capture the delicate nature of this machine accurately, robustness has been
sacrificed for authenticity. I suppose that there would never be a large
market for a model like this so the manufacturer has tried to satisfy the
serious collector, which in itself is no bad thing. However I found the kit
frustrating at times and although I am very used to fiddly parts and have
converted several pusher biplanes without too many problems, I did not
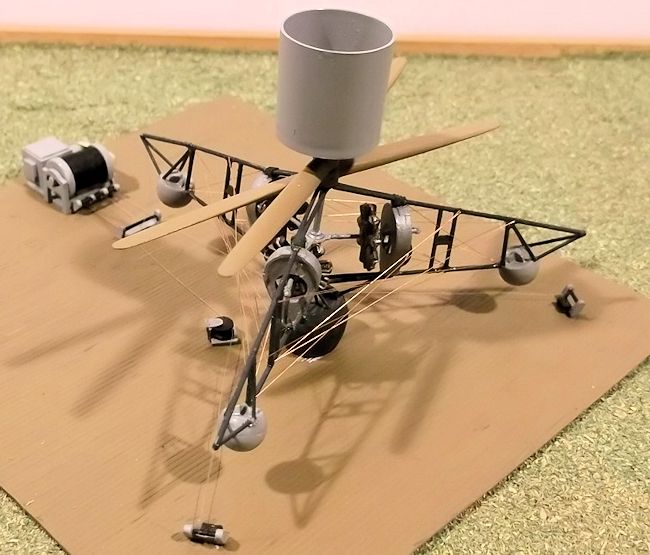
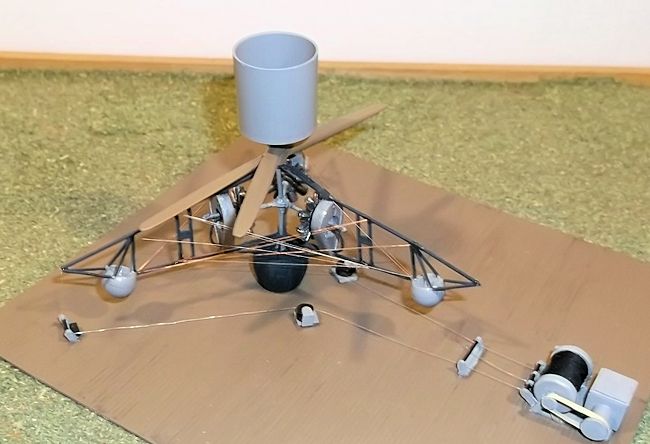
really enjoy building this kit. I made a small diorama assembly from scratch
based on photos on the Roden website and found that more satisfying. This is
an unusual model which grabs the attention, but it has real hidden problems
too.
This is not a model for the faint hearted, impatient or beginner. Its
main drawback is the fragile nature of the whole thing. In an attempt to
capture the delicate nature of this machine accurately, robustness has been
sacrificed for authenticity. I suppose that there would never be a large
market for a model like this so the manufacturer has tried to satisfy the
serious collector, which in itself is no bad thing. However I found the kit
frustrating at times and although I am very used to fiddly parts and have
converted several pusher biplanes without too many problems, I did not
really enjoy building this kit. I made a small diorama assembly from scratch
based on photos on the Roden website and found that more satisfying. This is
an unusual model which grabs the attention, but it has real hidden problems
too.
Grosz P. M. Austro-Hungarian
Aircraft of World War 1, Flying
Machines Press, 1993.
Grosz P. M. The PKZ - 2,
Mini Datafile No 2, Albatross Publications
Stephen Foster
June 2014If you would like your product reviewed fairly and fairly quickly, please
contact
the editor or see other details in the
Note to
Contributors.
Back to the Main Page
Back to the Review
Index Page