
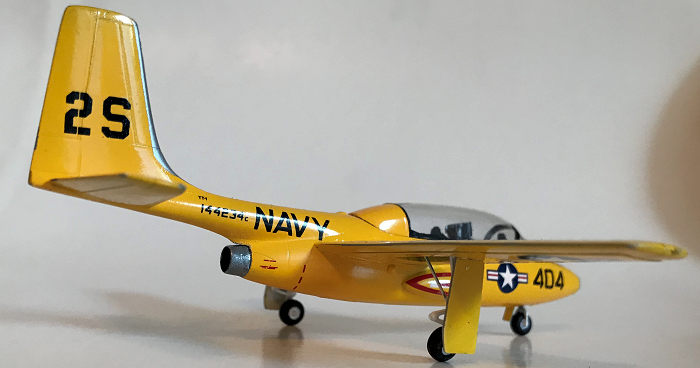
Special Hobby 1/72 TT-1 Pinto
| KIT #: | SH 72206 |
| PRICE: | $25.00 or so |
| DECALS: | Four options |
| REVIEWER: | Joel Hamm |
| NOTES: | Short run |
| HISTORY |
This build marks a return to modeling trainers, U/T’s, L-birds, drafted civvies, X-planes, dark horses, nice-tries, has-beens, wannabees, might-a-beens, and never-wuzzes. Actually, it marks a return to modeling anything.
For some time, the
passion for plastic had been waning; drooping several moons ago to absolute
zero. The Pinto had come back from winter quarters in a state of paint and
partial put-together; but couldn’t
 seduce
me into sitting down and diddling again with sanders, scrapers, and magic
potion bottles. With the vernal equinox fast approaching, too many real
tasks took priority.
seduce
me into sitting down and diddling again with sanders, scrapers, and magic
potion bottles. With the vernal equinox fast approaching, too many real
tasks took priority.
Ultimately, outside forces conspired to provide the needed push. First, there was global warming, which vaporized the garden and turned the greenhouse into a brown house. Then the skies darkened with clouds of mosquitos, may flies, horse-eating horse flies, and other carnivores, deepening further the misery of venturing au dehores. These were engendered by daily afternoon thunder-torrents that might have provided the opportunity to retreat to the workbench, except for inevitable loss of electrical service.
Lastly, my top priority, must-do project was put in indefinite scratch and hold by the county government, which decreed that a permit application to convert this 1:1 tumble-down into a habitable domicile must for approval be routed through the departments of Engineering, Zoning, Health, Environment, and Finance; the Chesapeake Bay Authority, the Department of Transportation, Army Corps of Engineers, the Taliban, the Ringling Brothers Barnum and Bailey Circus, and the Abominable Snowman.
With no diversions available besides snacking, snoozing, and clicking through You Tube videos explaining that 9/11 was actually a holographic hoax; and that a 747 could be fueled by a mix of apple cider vinegar and Clorox, the Pinto came out of cold storage.
 But
enough of personal problems; let’s talk about this airplane.
But
enough of personal problems; let’s talk about this airplane.
…Born of a USAF requirement for an all-jet primary trainer. That honor went to Cessna’s T-37; but the Navy also decided to try bypassing props for their pilot pupils. The idea was sound, but the Pinto lacked power and endurance. After but a few years, the 14 plane production run was sold into civilianship, where it was stripped down, up-engined, and tip tanked into the Super Pinto personal rocket ship and airshow star. One or more were reportedly converted into armed FAC / COIN prototypes, back in the Vietnam days, when hardpoints were hung on everything from Cessna Skymasters to a turboprop powered P-51. Neither info nor pics of that project were available on GOOGLE, GAGGLE, GIGGLE, or GURGLE.
| THE KIT |
Despite the Pinto’s small and insignificant footprint on the path of aircraft development, it was not ignored by model kit makers. Shortly after the real thing came out, 1/48 +/- close-enough copies were issued by Aurora and Strombecker. These might have shared the same molds. Vacuforms in several scales are still findable on old model sites, as is a semi-recent 1/72 resin pouring from Olymp Pro. A few years ago Special Hobby kitted this injection, which is out of production but not out of stock.
| CONSTRUCTION |
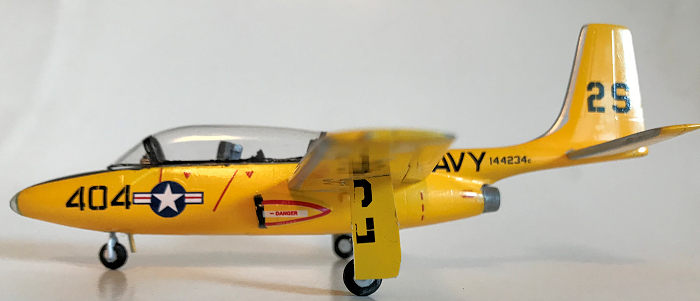
This site already holds one build report describing the box contents and construction details; so only elaborations and differences of opinion need be noted. Since the expansive cockpit, viewable through a thick but clear canopy, is the high point of this model, corrections and additions here are worthwhile. The large opening allows all furnishings to be dropped in post-painting; only the tubs and nose weight have to be added before joining the fuselage halves.

The fore and aft floor/ console pieces are best inserted separately. The previous author mentioned that the tab meant to hold the nose gear won’t, because with only slight incentive it breaks off and vanishes. It should be replaced by a length of tubing, or plastic block drilled to accept the nose strut.
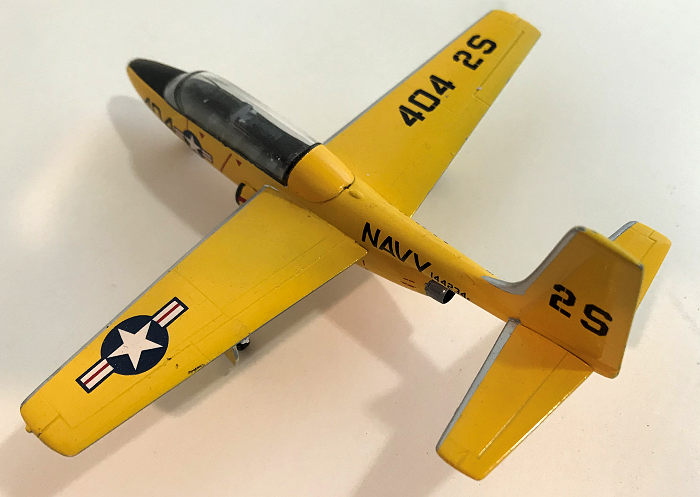
The right and left sides suffer from a height discrepancy. The difference is least noticeably sanded away on the belly, meaning loss of two access panels. Rather than re-scribe, I replaced them with snippets of foil tape, suitably shaped and pin-pricked to simulate fasteners. The slightly raised surface looks convincing, and hides a troublesome seam. Not to mention, it’s on the underside, where no one looks. Have to try this again when the opportunity arises.
The engine scoops are most easily attached before the wing. The location is engraved, but hard to spot. Larger, squarer scoops for the Super TT-1 are on the sprues, so get the correct ones. In fact, all Super parts, except decals and marking diagrams, are in the kit.
The landing light lens is molded too large and too rotund. Prior to painting, attach it to the nose, fair it into the fuselage, and re-polish to clarity.
| COLORS & MARKINGS |
 Available
photos show the interior to be painted a semi off white grey with maybe a tinge
of green thrown in. I took the logical and lazy route, leaving it unpainted
plastic. The outside got shpritzed with Tamiya white surface primer. Big
Mistake, because it made a mess of grain, globs, fish eyes, and orange peel; had
to be cured, sanded smooth, and replaced with Testors gloss white.
Available
photos show the interior to be painted a semi off white grey with maybe a tinge
of green thrown in. I took the logical and lazy route, leaving it unpainted
plastic. The outside got shpritzed with Tamiya white surface primer. Big
Mistake, because it made a mess of grain, globs, fish eyes, and orange peel; had
to be cured, sanded smooth, and replaced with Testors gloss white.
That got covered with Square Bottle brand yellow, then masked for black glare panel and silver de-icing panels. When the Tamiya Curvy Tape came off the only problem revealed was a slight asymmetry between the wing leading edges. I re-taped and repaired this with a chrome silver paint pen - $12 at Hobby Lobby. Big Mistake Number Two: The pen solvent was too hot and lifted the tape and the four underlying paint layers. That’s when I remembered why I had put this hobby on indefinite hold.
Decals are excellent on all counts, but finicky when placed on that itsy bitsy teeney weeney tail boom. They don’t need setting fluid, but a dose of Solva-Stuffs don’t hurt them none neither.
| CONSTRUCTION CONTINUES |
Back to the task of filling the cavernous cockpit. The kit ejection seats are hardly better than the 1950’s Aurora / Strombecker pieces. Mine started life as a set of True Details intended for a Phantom jet, then had their drogue chute packs excised, and replaced with more reasonable headrests. Photos suggested green seat pads on a grey frame, with black and silver details that no one would ever see.
If the seats are attached
where indicated on the floor boards, the instructor ends up blinded under the
opaque portion of the canopy, and the student requires stilts and arm extensions
to reach his controls. Both need to be moved forward. Even with the seats properly located, the cockpit is
still overly open because both instrument panels lack glare shields, which are
easily made from sheet plastic or leftover bits of brass. I added a tad more
busying with scraps shaped like something that belongs in front of a pilot’s
face – HUD’s, gunsights, or who-knows-whats.
need to be moved forward. Even with the seats properly located, the cockpit is
still overly open because both instrument panels lack glare shields, which are
easily made from sheet plastic or leftover bits of brass. I added a tad more
busying with scraps shaped like something that belongs in front of a pilot’s
face – HUD’s, gunsights, or who-knows-whats.
The airplane underside also needs doctoring. The nosegear is too short to add the trailing torque link, which even if muscled in crowds the gear door. The strut should be stretched and slid into whatever receptacle was glued to the forward bulkhead. Conversely, the main gear and doors can afford to lose some length. Retraction links are best made from wire, thin rod, or pulled sprue – unless you really enjoy cleaning up mold seams on sub-microscopic parts.
After the plane was finished and workbench readied for the next patient, I reviewed the MM build article, hit the closing remark about not forgetting the belly scoop, remembered that I had forgotten, dove unsuccessfully in the dumpster and parts bin, then resolved to add it at a later date.
| CONCLUSIONS |
Looked to be a quick’n’easy put-together; but nothing is easy in Easy Company.
7 September 2018
Copyright ModelingMadness.com
If you would like your product reviewed fairly and fairly quickly, please contact the editor or see other details in the Note to Contributors.
Back to the Main Page Back to the Review Index Page Back to the Previews Index Page