| KIT #: | ? |
| PRICE: | $ |
| DECALS: | |
| REVIEWER: | Chuck Horner |
| NOTES: | Only the forward fuselage is used. |

| HISTORY |
 Step right
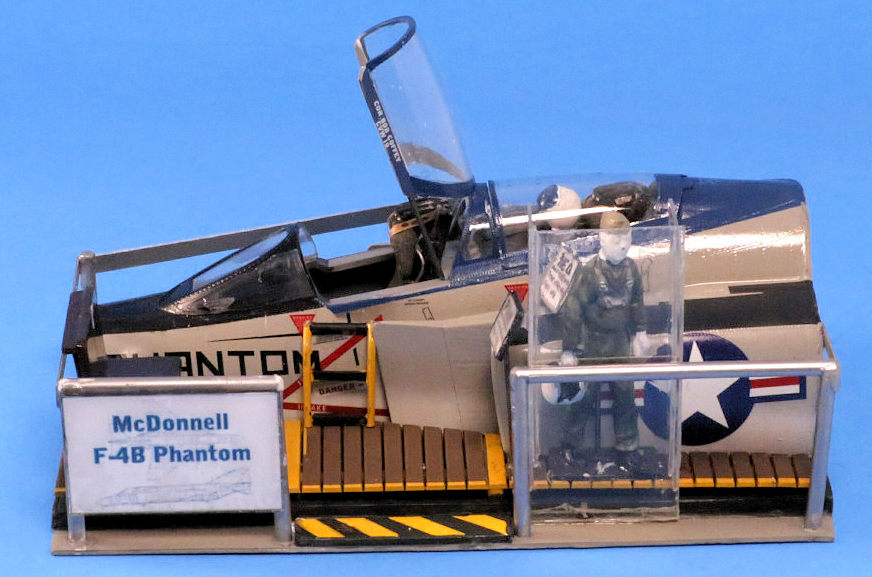
up! The new Phantom Cockpit Exhibit is now open!
The Phantom first flew in May, 1958 after a long gestation period by McDonnell. There was no X prototype. The first aircraft was part of twenty-three production, service test aircraft initially designated F4H-1, in the old system, and later F-4A, under the new designation system. The F-4B was the first real production model for the Navy. The Phantom, in all its models, served the Navy, Marines, Air Force, the UK, Germany, Japan, Israel, and a host of other countries well into the late 20th century, and for some, into the 21st century.
| THE KIT |
 Oh, the
things that come from a modeler’s work bench when one has too much time.
I was working on a project that back-dated a Phantom to a very early F4H-1. The conversion set replaced the entire front fuselage of the 1/48 scale Academy F-4B. In between drying times of glue and paints on the F4H-1 project, I decided I would use the left-over Academy kit parts to build a “Museum Exhibit”.
I did this for real back in the 1980’s with an F-100 cockpit when I was Operations Manager of the New England Air Museum. This had been part of a simulator for the Connecticut Air National Guard which flew both the F-100A’s and D’s. We had the cockpit but not the room-size computers that it must have needed to run it. I had to convince the curator to bring this out of storage and actually allow people to get in it! This is not something museum personnel were open to doing at this point in time. The exhibit was not as elaborate as this model, but kids (or adults) could get in and we had some cockpit lights and sounds for added effects. It has survived the public for all these years.
| CONSTRUCTION |
My original thought was for something simple – the cockpit on a base.
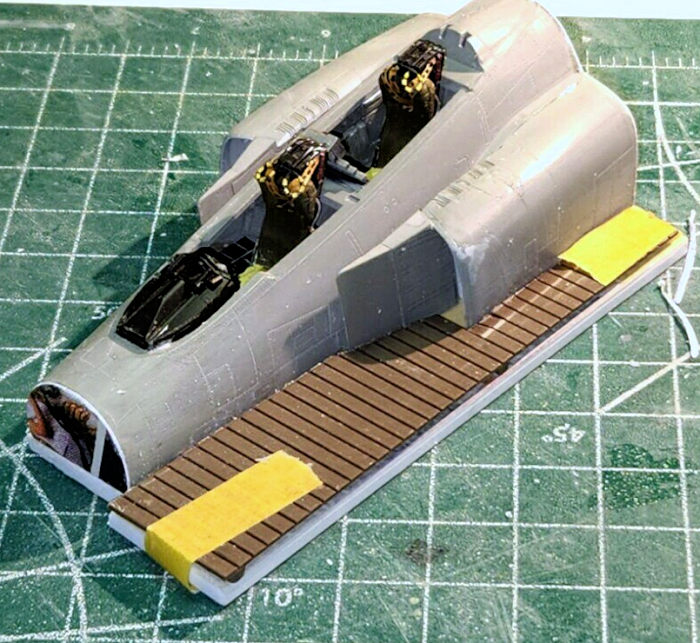
I built up the Academy cockpit, mostly out of box. I need to scratch-build the right wall in the rear cockpit since I used that kit part for an F4H-1 and I added some details to the seats since they would be prominent.
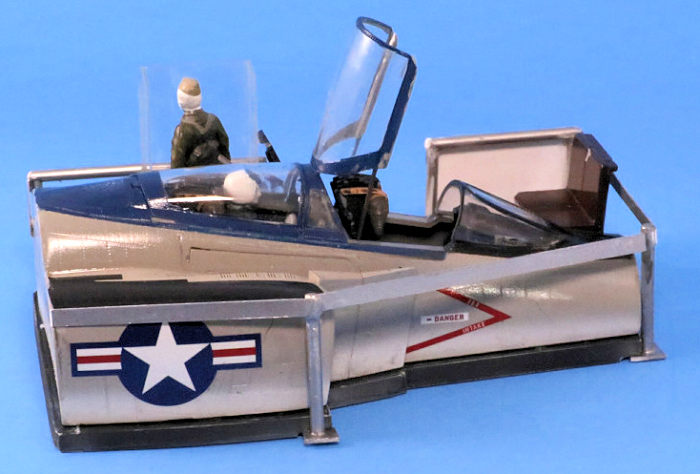
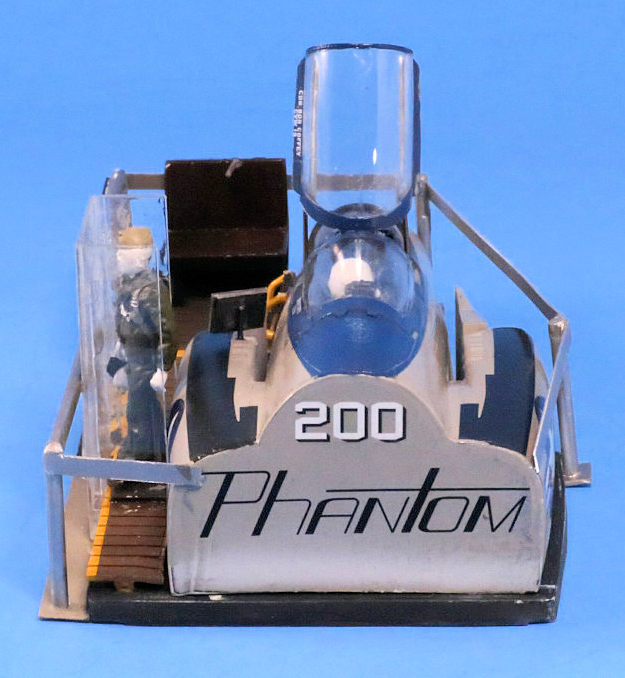
I painted the build with Tamiya acrylic lacquers. The interior is Dark Gull Gray and black and the exterior is my own mix of Light Gull Grey over Insignia White plus black and dark blue. I took some artistic licenses with paint and markings to make the Exhibit more interesting. Decals are mostly from the unused Academy sheet with a few from the early F4H-1 sheet.
T he
F4H-1 project used the bottom portion of the kit fuselage, so making my Exhibit
sit flat was easy. I created the base from part of an old plastic sign that was
3mm thick. From there, things began to spiral out of control.
The brown planked walk-way is a picket fence from a model train scenic kit, the railings are plastic tubes and the waiting bench seat is an unknown item from the spares box. I painted the yellow “safety marks” on the walkway and added the black and yellow striped step at the entrance from sheet plastic.
At this point, the Exhibit had become the primary project with the F4H-1 sitting on the sidelines.
A next major step for me was adding a flight crew. I’m not much of a figure painter, but I save them from various kits. Monogram has had a number of kits with good standing pilots and crew. The pilot is from the Monogram F-5 kit, along with a portion of the F-5 boarding ladder. I reasoned that the rear cockpit would be very hard for the public to get into with this set up, so I put the REO, the pilot from the Monogram F-104 kit, in the cockpit and closed the canopy. Since these were mannequins, I saved myself the trouble of painting faces by just making them white. To complete the cockpits, I added “bracing”, in the form of brass rods, to keep the front canopy up. We did something similar to the real F-100 exhibit.
I’d run out of steam at this point and needed to get back to the F4H project. I reasoned that you couldn’t just leave a fully dressed mannequin unprotected, the public would strip it of all equipment in a day. I added a clear case around it using plastic from some product packaging that I had saved.
Finally, signage. You can’t have an exhibit without some signs. I created the main exhibit label and small “Pilot” and “REO” labels in Microsoft Publisher and printed them on plain paper with my inkjet. I added a clear plastic cover to each and attached the main sign to the front railings and the small labels to thin brass rods.
Finally, I called it done … before I came up with any more ideas!
| CONCLUSIONS |
It was certainly an interesting build. Not knowing where I was going or how to get there, made it a challenge and I am quite pleased with the outcome. Today, many air museums have cockpit sections on display, with some open to get in. Kids and adults alike, really get a kick out of sitting in a real fighter cockpit.
Chuck
Horner
27 March 2025
Copyright ModelingMadness.com.All rights reserved. No reproduction in
any form without express permission from the editor.
If you would like your product reviewed fairly and fairly quickly, please
contact
the editor or see other details in the
Note to
Contributors. Back to the Main Page
Back to the Review
Index Page
Back to the Previews Index Page