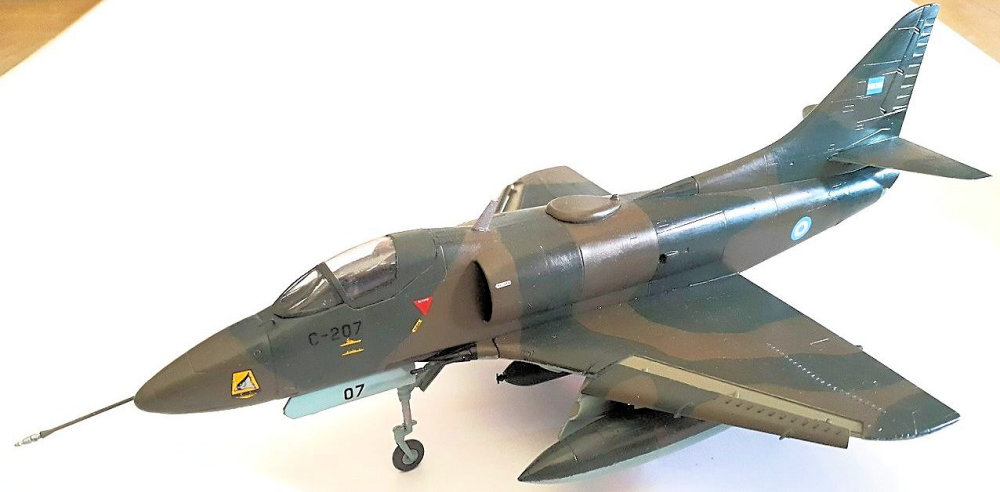
Hobbycraft 1/48 A-4B "Malvinas/Falklands."
| KIT #: | HC 1433 |
| PRICE: | 1400ARS |
| DECALS: | Seven options |
| REVIEWER: | Francisco Santoro |
| NOTES: | Black box edition (good decals), nose wheel gear bay doesn´t have a positive locating point. |
| HISTORY |
Argentina got a total of 130 A-4 Skyhawks since 1965. The Argentinian Air Force received 25 A-4Bs (labelled as Ps, but locally known as Bs) in 1965, and another 25 in 1970, all of them refurbished by Lockheed in the United States. The Bs had three weapon pylons, and were destined to the 5th Air Brigade.
In 1976, 25 A-4Cs were bought to replace the ageing F-86F-40 Sabres in service with the 4th Air Brigade. They were received as is, had five weapon pylons, and could carry the AAM AIM 9B Sidewinder missile.
 The Navy
(Armada), also got their hands on Skyhawks version B, labelled A-4Q, plus spare
parts. They were received in 1971, and immediately replaced the F9F Panther and
Cougar in use onboard the ARA 25 de Mayo aircraftcarrier.
The Navy
(Armada), also got their hands on Skyhawks version B, labelled A-4Q, plus spare
parts. They were received in 1971, and immediately replaced the F9F Panther and
Cougar in use onboard the ARA 25 de Mayo aircraftcarrier.
During the Malvinas War, Skyhawks, armed with unguided bombs, had some successes against the Royal Navy, sinking the destroyer Type 42 HMS "Coventry", the frigate Type 21 HMS "Antelope", and causing heavy damage to the logistic landing ship RFA "Sir Galahad" (ended up as a war grave), Type 42 HMS "Glasgow," and frigates HMS "Argonaut" and "Sir Tristram." A-4Qs departing from Río Grande, Tierra del Fuego, played a role in the bombing runs against British ships, sinking the Type 21 HMS "Ardent." The Skyhawks also played a role in damaging the light aircraftcarrier HMS "Invincible," damage not recognised by the Royal Navy.
A total of 22 A-4s were lost to all causes during the six weeks of the war.
| THE KIT |
Hobbycraft´s A-4B comes in a side opening carboard box, sturdier than those of Revell Germany. The cover shows A-4B C-207 flying between naval gunfire after dropping its bombs on its target.
The box contained three transparent bags, one for the bombs and fuel tanks, another one for the clear parts, and the last one for the bigger pieces (wings, fuselage, etc...). The parts were molded in light grey plastic with recessed panel lines
 The
instructions have a total of 11 constructions steps, the 10th showing the
location of the fuel tanks and bombs on their respective hardpoints, and the
11th one marking the placement of the three antennaes options.
The
instructions have a total of 11 constructions steps, the 10th showing the
location of the fuel tanks and bombs on their respective hardpoints, and the
11th one marking the placement of the three antennaes options.
Because this is a black box version, the decals look really nice, with options for 8 aircraft. You have enough decals to make one Argentinian plane, and the Singaporean one. The numbers for the Argentinian aircraft are: C-239, C-207, 3-A-308, 3-A-302, 3-A-304 and 3-A-309.
Important note: Hobbycraft´s instructions fail to mention that you have to glue the nose gear´s retraction strut and two C-shaped pieces onto the tail. They´re are shown in the 11th step, but not shown in the assembly diagrams. The three pieces are on the sprues, but I didn´t notice them until now (4/2/18). Since the model had already been painted, decaled and varnished, I didn´t even try to glue them and risk damaging the model. Maybe for the next one.
| CONSTRUCTION |
I got a kick for an Argentinian aircraft after finishing my Bf 109E-3 in 1:48 from Academy. The only requirement needed was that the aircraft should have the colours I already had, because I didn´t want to buy more paints. After searching for a bit, I came up to the conclusion that the aircraft that matched my requirements was the A-4B Skyhawk.
Every
aircraft begins with the cockpit, and this one wasn´t the exception. I brush
painted the cockpit sidewalls and the seat with Revell Tank Grey 78 (seat´s
cushion in black and small details in a rust colour). Gluing the cockpit to the
right fuselage sidewall took me some time, because the contact points were too
small. Next came the nose gear well, which doesn´t have m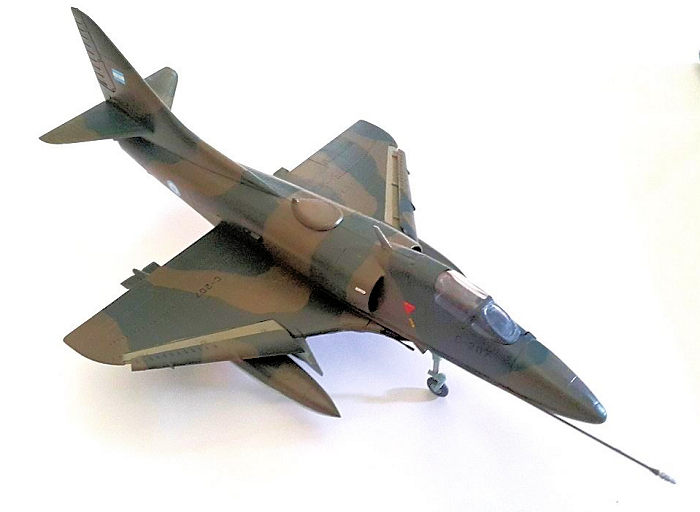 any
positive contact points, sits too high on one side, so be careful here, because
a badly positioned gear well will leave you with a low nose Skyhawk.
any
positive contact points, sits too high on one side, so be careful here, because
a badly positioned gear well will leave you with a low nose Skyhawk.
Before closing the fuselage, you must add some weight. Hobbycraft doesn´t say how much, but Hasegawa recommends 8 grams. I think I glued more or less 20g immediately behind the cockpit and in the solid area behind the nose. After letting that glue dry (and let it dry, otherwise the plastic will melt), the fuselage halves were glued, together with the nose. With the fuselage dry, I glued the exhaust intakes, the radomme, the fin, the exhaust and the horizontal stabilisers.
The wings were next. I opened the two inner and ventral holes for the version I was making. The wings have a great fit, but the holes were a bit too large for the mounting tabs of the pylons, so they had a loose fit (probably I shouldn´t fully open the flashed holes for my next build).
I decided to glue the fuselage and wings together, and left them to dry for some hours. That assembly leaves a small gap that can be corrected with some filler (I didn´t do anything). While working on other pieces, I accidentally pushed and dropped my model from the table. Luckily, the only thing that had broken loose was one of the lead weights located in the nose cone. I thought about removing the nose and regluing the weight, but that would´ve ruined the entire section, so I left it like it was.
| COLORS & MARKINGS |
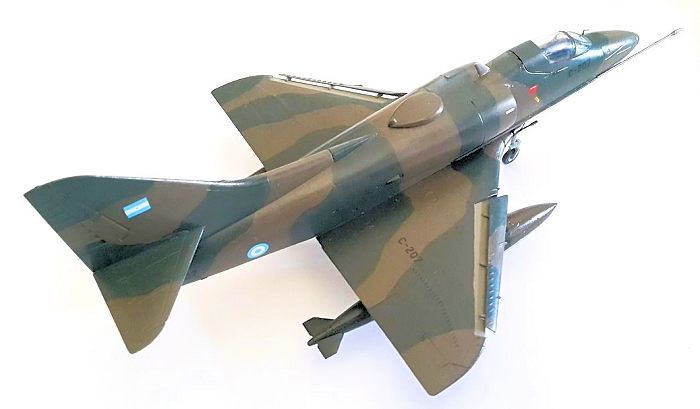
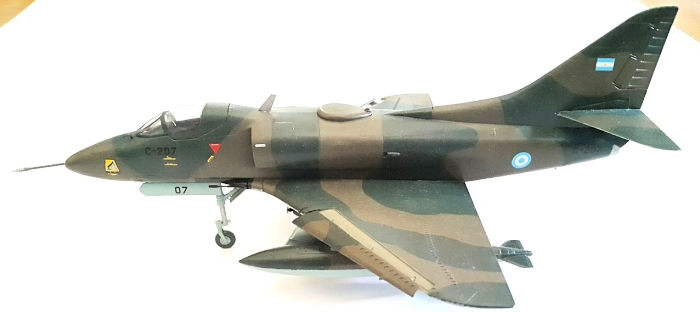
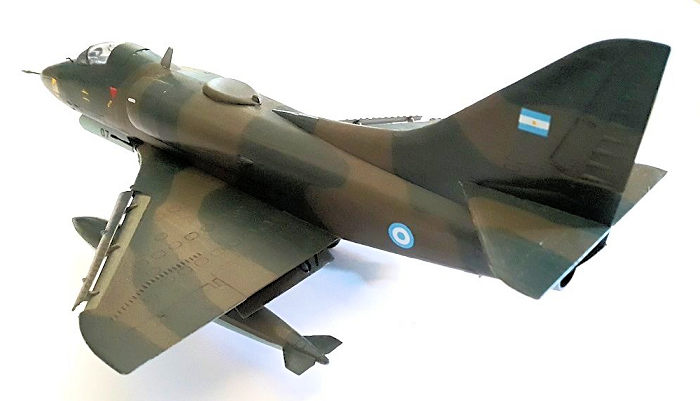 The painting
scheme was simple, uppers in dark brown and dark green with the undersides in
light blue, slats olive grey (I didn´t have red), and flaps in dark brown (they
were red when the aircraft was delivered, photo of it on link #7 in the
"References" section).
The painting
scheme was simple, uppers in dark brown and dark green with the undersides in
light blue, slats olive grey (I didn´t have red), and flaps in dark brown (they
were red when the aircraft was delivered, photo of it on link #7 in the
"References" section).
The first task was to outline with a pencil the areas to be painted in the two upper colours. Once that was done, I began brush painting the dark green areas with Revell 40 (Black Green), waiting for the former coat to dry before giving it another one. Same thing was done with the areas in dark brown, painted with Revell 46 (NATO Olive Brown).
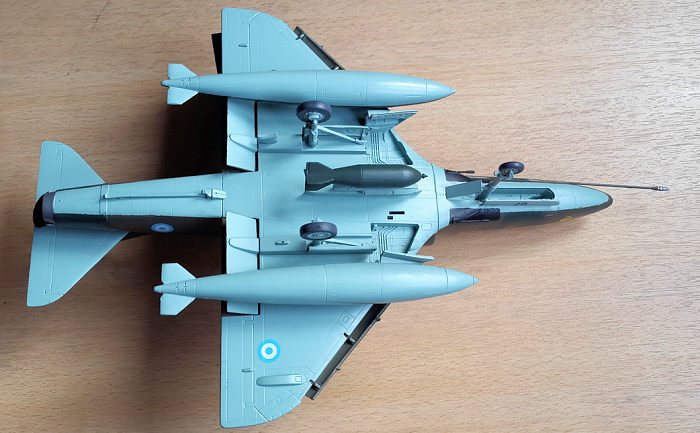
After the upper surfaces were dry, I went on to paint the undersides with Revell 49 (Light Blue), which included the bomb and fuel racks.
Next to paint were the smaller details (landing gear and its doors, refuelling probe), plus the bomb and what makes a Skyhawk stand between other aircraft, its fuel tanks. The first ones were painted in light blue, the bomb in black green, and the fuel tanks were painted with the camouflage colours. The wheels were painted in Revell 78 (Tank Grey) with light blue hubs.
With all that painted, the aircraft was mounted on its landing gear. I thought the mounting peg for the nose gear was too large, so I trimmed it a bit, not realising it was for the aircraft to have the correct nose up position (my model does have a nose up look, luckily). The main gear was next. The left one fitted nicely into its hole, but I had to trim the left one because it didn´t sit correctly.
 The flaps and
their location on the wings were painted in Revell 46 (NATO Olive Brown), and
the slats in Revell 45 Olive Grey (I didn´t have red).
The flaps and
their location on the wings were painted in Revell 46 (NATO Olive Brown), and
the slats in Revell 45 Olive Grey (I didn´t have red).
The penultimate step for this build were the decals. I brushed a coat of Revell´s gloss varnish on the entire aircraft to even out the paint. The decals were added, placed carefully on their spots, and then sealed with a coat of Revell´s matt varnish.
Finally, I glued the canopies, the slats, flaps (with CA), refuelling probe, and the two antennaes needed for the Argentinian version. Now, can you spell Carpet Monster? While I was handling the model yesterday, I accidentally passed my finger over part E31 (a really small L-shaped piece). I managed to find it twice, just to lose it the third time when I was handling it with a pair of tweezers. I made a replacement part out of a metal staple, but it isn´t the same.
| CONCLUSIONS |
I like how this came out. It looks nice together with my Bf 109E-3, I was able to have fun while building it (no rushing), and it was of a subject I wanted to have.
When it comes to early 1:48 Skyhawks, Hasegawa and Hobbycraft are the only ones "available," both are out of production, but appear from time to time at online sale sites (and are rather expensive). However, you can´t make an Argentinian A-4B/C straight from the Hasegawa kit, since you need a radomme (which comes in Hase´s limited release shown in link #8).
Maybe with some luck, Kinetic will release an early, state of the art, A-4B/C with Argentinian markings (they released a Mirage IIIEA and will release an IA-58 Pucará this year), or Airfix will upscale their 1:72 version.
| REFERENCES |
Links 3, 5 and 8 are in English. Link 7 shows C-207 when it was delivered to Argentina without camouflage and red flaps, and with camouflage and camouflaged flaps (the first photos are of C-207 stored in a museum and with its 1986 camouflage, it was never restored).
1) https://es.wikipedia.org/wiki/Douglas_A-4_Skyhawk#Argentina
2) https://www.taringa.net/posts/imagenes/13342786/La-historia-del-A4-Skyhawk-en-la-Argentina.html
3) http://airmodeller.tripod.com/48UsaA4b.htm
4) http://soloskyhawk.blogspot.com.ar/2009/12/c-207-un-skyhawk-mucha-historia.html
5) http://modelingmadness.com/review/mod/us/cala4.htm
6) http://www.amilarg.com.ar/a-4b.html
7) http://arqueologiaaeronautica.blogspot.com.ar/2013/02/a4d-2-4b-skyhawk-c-107-bunos-142688-sus.html
8) https://modelingmadness.com/review/mod/us/aba4bcpreview.htm
6 March 2018
Copyright ModelingMadness.com If you would like your product reviewed fairly and
fairly quickly, please
contact
the editor or see other details in the
Note to
Contributors. Back to the Main Page
Back to the Review
Index Page
Back to the Previews Index Page