Matchbox 1/72 A-7D Corsair II
| KIT #: | PK-101 |
| PRICE: | $ |
| DECALS: | Two options |
| REVIEWER: | Dan Lee |
| NOTES: | AirDocs 72016 decals |
| HISTORY |
 The A-7D came out of the US
Army's need for better close air support during the Vietnam War. Instead of
allowing the Army to fly fixed wing planes, the USAF decided instead to fund the
purchase of a close air support plane for battlefield use. To the dismay of the
top USAF brass, they found out that the US Navy's A-7A Corsair II proved to be
the plane they were looking for. They replaced the Corsair II's original engine
with a much more fuel efficient and powerful turbofan engine based on the
RollsRoyce Spey engine, better avionics and a M61 Vulcan six barrelled 20mm
cannon instead of the two single barrel Colt 20mm cannons (which the USN later
adopted as the A-7E.) In the end, the USAF purchased 459 aircraft (some were
purchased in part to keep LTV's production lines from closing) flown by several
TFW wings around the world as well as in South East Asia where it did quite well
as it had the lowest loss rate per comat sortie of any USAF plane in SEA. After
Vietnam, the Corsair IIs were phased out of most active duty squadrons and
replaced by A-10 Warthogs in part because the USAF brass was not happy flying
another Navy plane. Most A-7Ds were flown by ANG and reserve units till the
early 1990s.
The A-7D came out of the US
Army's need for better close air support during the Vietnam War. Instead of
allowing the Army to fly fixed wing planes, the USAF decided instead to fund the
purchase of a close air support plane for battlefield use. To the dismay of the
top USAF brass, they found out that the US Navy's A-7A Corsair II proved to be
the plane they were looking for. They replaced the Corsair II's original engine
with a much more fuel efficient and powerful turbofan engine based on the
RollsRoyce Spey engine, better avionics and a M61 Vulcan six barrelled 20mm
cannon instead of the two single barrel Colt 20mm cannons (which the USN later
adopted as the A-7E.) In the end, the USAF purchased 459 aircraft (some were
purchased in part to keep LTV's production lines from closing) flown by several
TFW wings around the world as well as in South East Asia where it did quite well
as it had the lowest loss rate per comat sortie of any USAF plane in SEA. After
Vietnam, the Corsair IIs were phased out of most active duty squadrons and
replaced by A-10 Warthogs in part because the USAF brass was not happy flying
another Navy plane. Most A-7Ds were flown by ANG and reserve units till the
early 1990s.
| THE KIT |
See Vic Scheuerman's preview of the kit. https://www.modelingmadness.com/review/mod/previews/pk101.htm
| CONSTRUCTION |
 I built this old Matchbox 1/72 A-7D OOB except for the
decals because I was annoyed with working with uncooperative resin and PE pieces
as well as stubborn paint jobs that weren't going anywhere at the time. Also
wanted to practice working on SEA camo.
I built this old Matchbox 1/72 A-7D OOB except for the
decals because I was annoyed with working with uncooperative resin and PE pieces
as well as stubborn paint jobs that weren't going anywhere at the time. Also
wanted to practice working on SEA camo.
It was a straight forward build. I had purchased a resin cockpit originally for the Fujimi kit, but decided to leave it as is with a pilot in the seat instead of trying to jam in a stubborn resin pit into a kit it wasn't designed for (Fujimi.) The only mod I did with the cockpit was make the seat look a lot more like an Escapac Seat than the generic ejection seat Matchbox put in the plane. I painted the pilot the best I could.
I glued together parts mostly with CA along the visible seams and Tamiya Extra thin on the mounting points. I do this so I don't have surprise phantom seams that show up when I use Tamiya Extra, not because I own stock in CA glue companies. It's a small trick that removes headaches (and adds its own like working quick to slap everything together thanks to CA glue's quick setting time.)
The Matchbox seam trencher was in full display with the kit. I used Perfect Plastic Putty to fill in the gaps and some of the more blatant trenches on the airframe (especially where the folding wings meet the rest of the wing.)
| COLORS & MARKINGS |
 I primed the model with Badger's Grey Stynylrez
because of the multicolor plastic (cool as a kid, but a pain if you're trying to
make it look good.) I had to polish all the glitches and glops in the primer
using polishing cloths.
I primed the model with Badger's Grey Stynylrez
because of the multicolor plastic (cool as a kid, but a pain if you're trying to
make it look good.) I had to polish all the glitches and glops in the primer
using polishing cloths.
For the SEA camo, I used Vallejo Model Air greens for the top and Tamiya Dark Earth for the brown (lightened with desert tan.) The light grey coat was done with Model Master Acrylic FS36622.
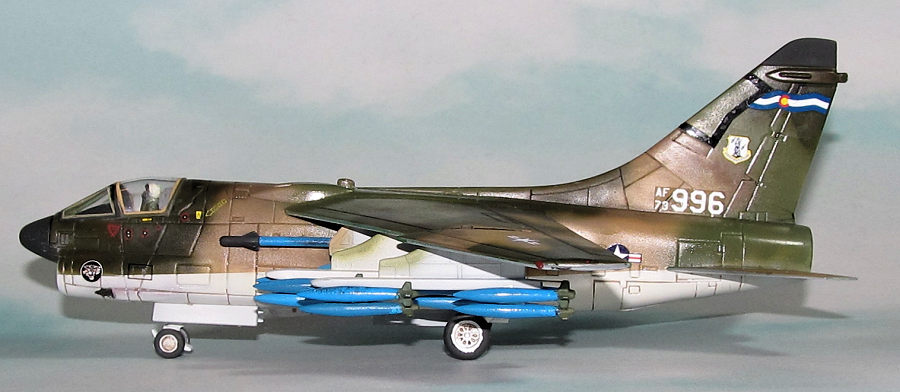
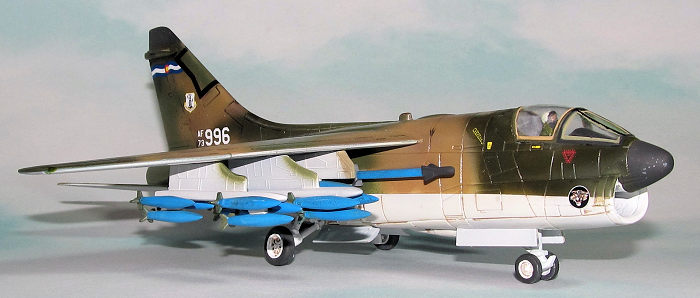
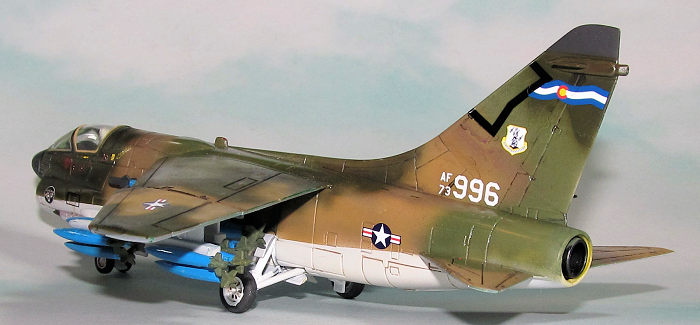
The initial gloss coat was Vallejo Acrylic gloss. I used the Colorado ANG decals came from the AirDocs sheet 72016 of the SLUF.
| FINAL CONSTRUCTION |
 Most of the small parts were glued without too much
problem (landing gear was painted flat white). I did a little plastic surgery on
the nose landing gear to get it in because I forgot to install it when sealing
up the fuselage.
Most of the small parts were glued without too much
problem (landing gear was painted flat white). I did a little plastic surgery on
the nose landing gear to get it in because I forgot to install it when sealing
up the fuselage.
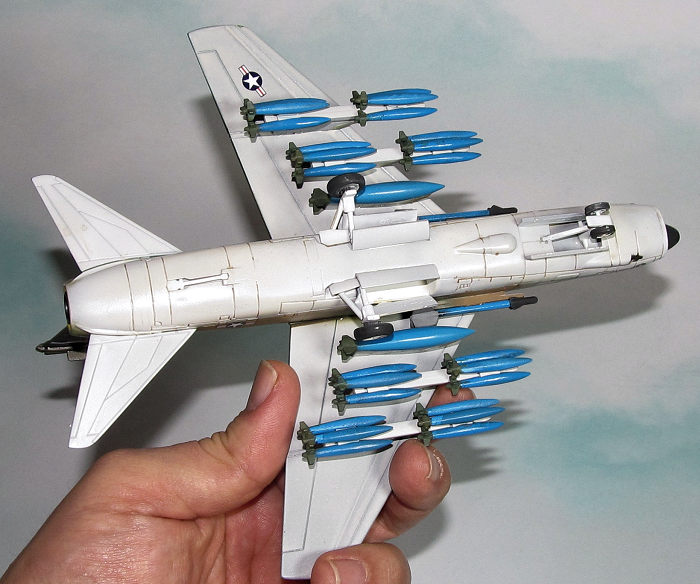
The Matchbox SLUF looks naked without weapons (also the big holes for the barren pylons would need filling in) so I loaded it for bear (training bear.) I painted the incorrectly shaped weapons sky blue to emulate training bombs as ANG aircraft rarely have anything except a couple of pylons occupied (and as I mentioned the pylons don't look good without anything on them.) The weapons and pylons were glued on with CA glue.
I did a lot of work on the canopy. I tried to make my own masks for doing the base paint as well as practice masking/painting the prominent seals around the canopy/windscreen glass. Also I tried to emulate the center windscreen HUD color. I used a mix of 3 drops of Vallejo Gloss with 1 tiny drop of Vallejo clear green and sprayed it on in very light coats to get the "Coke Bottle Glass" look of the HUD.
| CONCLUSIONS |
So there it is. My 1/72 simple build. The paint job is a bit flawed (weapons) but I'm glad I had some practice working on the SEA camo pattern and other skills which came into good use when I did build the Fine Molds F-4C Phantom.
9 September 2025 Copyright ModelingMadness.com. All rights reserved. No
reproduction in part or in whole without express permission from the editor. If you would like your product reviewed fairly and
fairly quickly, please
contact
the editor
or see other details in the
Note to
Contributors.