Monogram 1/48 F-106 Delta Dart
| KIT #: | 5809 |
| PRICE: | $15-20 'used' |
| DECALS: | One option |
| REVIEWER: | Blair Stewart |
| NOTES: | Fit problems, but builds into nice model |
| HISTORY |
The Convair F-106 Delta Dart was the primary all-weather interceptor aircraft of the United States Air Force from the 1960s through to the 1980s. Designed as the so-called "Ultimate Interceptor", it proved to be the last dedicated interceptor in U.S. Air Force service. It was gradually retired during the 1980s, with the QF-106 drone conversions of the aircraft being used until 1998.
 The
F-106 served in the contiguous US, Alaska, and Iceland and briefly in
Germany and South Korea. In service, the F-106's official name, "Delta
Dart," was rarely used, and the aircraft was universally known simply as
"The Six." Although contemplated for use in the Vietnam War the F-106 never
saw combat, nor was it exported to foreign air forces. Following the
resolution of initial teething problems – in particular an ejection seat
that killed the first 12 pilots to eject from the aircraft – the F-106’s
exceptional performance made it very popular with its pilots. After the
cancellation of their own Avro Arrow, the Canadian government briefly
considered purchasing the F-106C/D.
The
F-106 served in the contiguous US, Alaska, and Iceland and briefly in
Germany and South Korea. In service, the F-106's official name, "Delta
Dart," was rarely used, and the aircraft was universally known simply as
"The Six." Although contemplated for use in the Vietnam War the F-106 never
saw combat, nor was it exported to foreign air forces. Following the
resolution of initial teething problems – in particular an ejection seat
that killed the first 12 pilots to eject from the aircraft – the F-106’s
exceptional performance made it very popular with its pilots. After the
cancellation of their own Avro Arrow, the Canadian government briefly
considered purchasing the F-106C/D.
The F-106 was progressively updated in service, with improved avionics, a modified wing featuring a noticeable conical camber, an infrared search and track system, streamlined supersonic wing tanks which provided virtually no degradation to overall aircraft performance, better instrumentation, and features like an inflight refueling receptacle and an arrester hook for landing emergencies.
| THE KIT |
Originally released in 1983, Monogram’s F-106 Dart was one of many “modern day” aircraft they modeled. It was part of Monogram’s 1/48th scale Century Series releases, which started with the F-104 (kit no. 5409) and followed in 1980 by the F-100 (kit no. 5416), the F-105D in 1985 (kit no. 5812 – note that Monogram released an F-105G, no. 5806, in 1982 and an F-105F, no. 5808, in 1983), and the F-101B (kit no. 5811), also in 1985. For some reason, they did not release the F-102 (kit no. 5827) until 1990.
 Typical of
Monogram at the time, the kit had raised panel lines (no big deal for us old
timers) and pretty decent detail given the times. The kit consists of around 100
parts molded in light gray plastic and another 10 parts that are clear plastic.
There is an alternate canopy included in the kit.
Typical of
Monogram at the time, the kit had raised panel lines (no big deal for us old
timers) and pretty decent detail given the times. The kit consists of around 100
parts molded in light gray plastic and another 10 parts that are clear plastic.
There is an alternate canopy included in the kit.
The Monogram instructions are very adequate and include 42 steps to complete the kit. The decals are very good, but they contain very little stenciling (which is probably accurate, since most of the F-106 pics I could find on the internet showed little to no stenciling on them).
I decided to assemble this model because I am in the process of paring down my kit stash. In the process, I discovered this kit and decided I had to make a go at building it (along with the other Monogram 1/48th scale century series aircraft). This decision was made easier by the fact that – yes, you guessed it – I had two of them, one of which I sold.
| CONSTRUCTION |
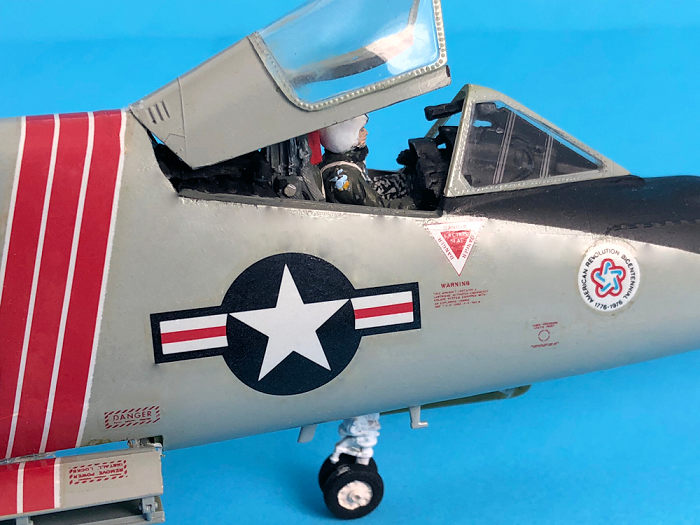
The first two steps involve assembly of the ejection seat and the cockpit tub. I sprayed the tub dark gray, and after assembly, I hand painted the cockpit with artist acrylics.
 The next
step was to assemble the upper fuselage halves. It was here that I began to run
into problems with alignment and fit, but I got it as close as possible using
tube glue and then methyl ethyl ketone (MEK) for the final sealer. At this
stage, both the instrument panel and the cockpit tub can be inserted from the
bottom of the fuselage and glued in place.
The next
step was to assemble the upper fuselage halves. It was here that I began to run
into problems with alignment and fit, but I got it as close as possible using
tube glue and then methyl ethyl ketone (MEK) for the final sealer. At this
stage, both the instrument panel and the cockpit tub can be inserted from the
bottom of the fuselage and glued in place.
The next stage is to assemble the nose landing gear wall and insert it into the lower fuselage. Again, I ran into fit problems that required removal of quite a bit of plastic to get the wheel well to fit underneath the cockpit. I also had an issue with getting the gear to install at the correct angle and depth. After numerous tries, I finally got the gear to sit where I thought it looked right.
I glued the one piece upper wing to the aircraft bottom (part no. 4) and then skipped to step 31 to glue the upper fuselage to the bottom. Again, I experienced major fit problems, particularly in front and behind the wings. Seeing that I would need to do a lot of filling and sanding, I assembled both intakes and glued them to the fuselage and wing joints.
 After a
few days of fill/sand/fill, I finally got the fuselage and intakes looking
pretty decent, so I moved on to complete other assemblies. One of the more
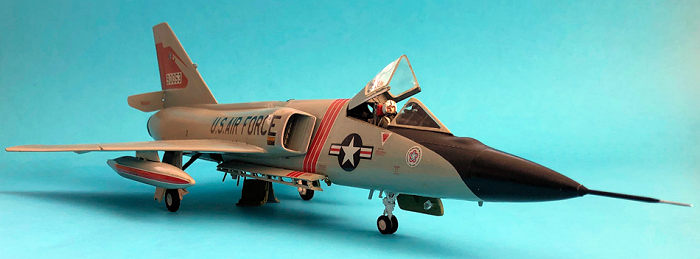
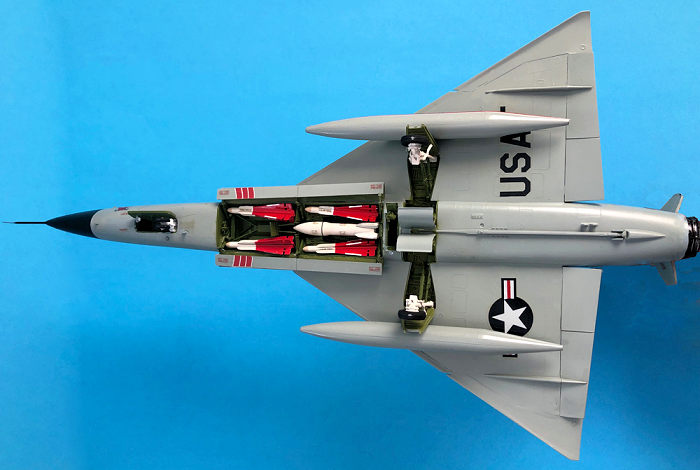
finicky assemblies is the missile bay, which I opted to model open with the air
to air missiles installed. The main problem is the door actuator assemblies are
quite delicate, and, as one might expect, I broke more than one of them during
assembly (there are three on each side of the missile bay). Once I got these
glued together, I painted the missile bay with Testors zinc chromate.
After a
few days of fill/sand/fill, I finally got the fuselage and intakes looking
pretty decent, so I moved on to complete other assemblies. One of the more
finicky assemblies is the missile bay, which I opted to model open with the air
to air missiles installed. The main problem is the door actuator assemblies are
quite delicate, and, as one might expect, I broke more than one of them during
assembly (there are three on each side of the missile bay). Once I got these
glued together, I painted the missile bay with Testors zinc chromate.
The next step was to glue the main landing gear to the aircraft. Again, there are some delicate actuators involved, so I had to be careful as I glued these into place.
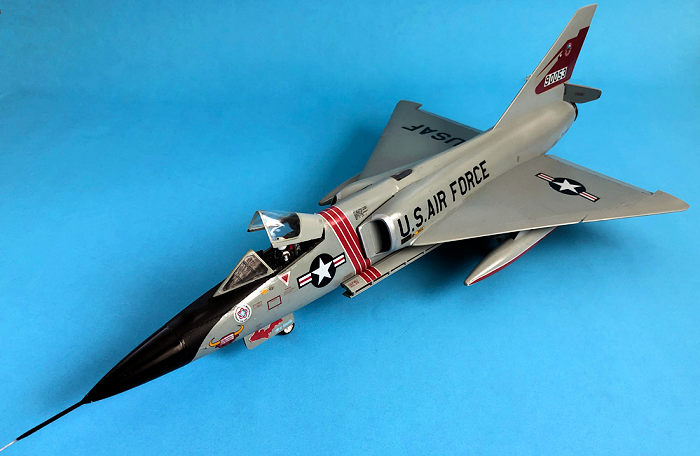
I then assembled the drop tanks and glued them to their wing stations, since they would be painted the same color – FS16473 Light Gray – as the aircraft.
I assembled the four Falcon air-to-air missiles and the one Genie and set them aside for painting.
| COLORS & MARKINGS |
 I was now
ready to paint the aircraft. After masking the canopy and temporarily gluing it
to the fuselage with white glue, I first sprayed the wheel wells and the missile
bay with Testors Model Master Zinc Chromate. Once this dried, I covered these
areas with damp Kleenex and sprayed the entire aircraft with Model Master gloss
Aircraft Gray, which is Testors version of FS16473 (ADC Grey).
I was now
ready to paint the aircraft. After masking the canopy and temporarily gluing it
to the fuselage with white glue, I first sprayed the wheel wells and the missile
bay with Testors Model Master Zinc Chromate. Once this dried, I covered these
areas with damp Kleenex and sprayed the entire aircraft with Model Master gloss
Aircraft Gray, which is Testors version of FS16473 (ADC Grey).
I painted the Falcon missiles Testors Gloss White, then masked them and sprayed the lower missile body with Model Masters Guards Red.
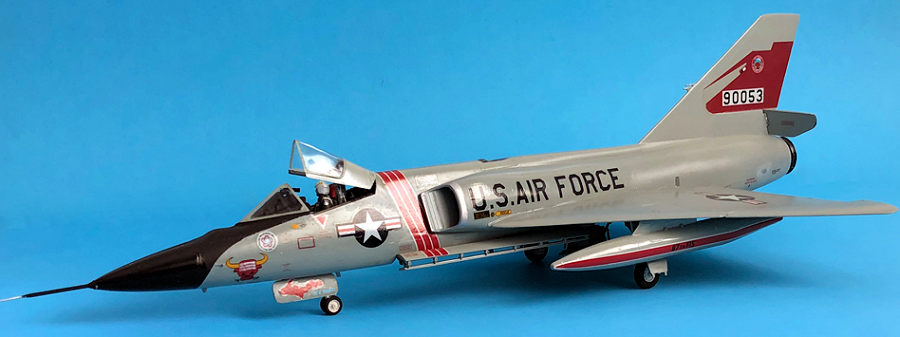
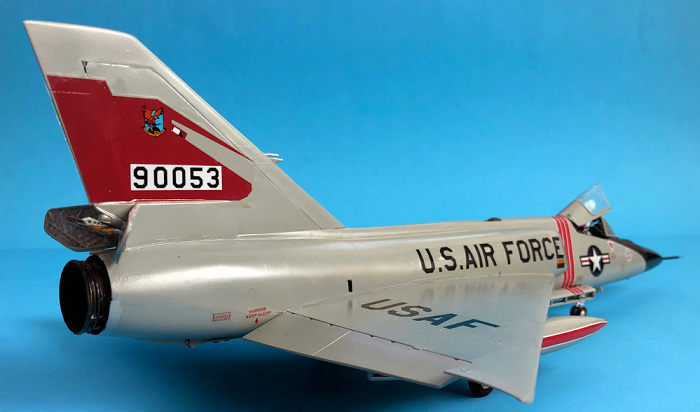
I had previously purchased a Microscale F-106 decal sheet, which I thought about using for this model. But the kit decals looked so good that I chose them instead. The decals are for the Squadron Commander’s aircraft of the 87th Fighter Interceptor Squadron stationed at Sawyer AFB, Michigan. Let me say that after over 30 years, these decals went on beautifully without a single problem. This is amazing considering the rough times Monogram had in the seventies and very early eighties providing kit decals that were halfway decent.
| CONCLUSIONS |
This kit has fit problems and raised panel lines. But if you are willing to hang in there with the assembly and finishing process, you can create a very decent replica of the F-106. Considering that it cost around $8 in the eighties and you can now find them at various auction sites for under $20, the kit is a great bargain.
| REFERENCES |
1. “F-106 Delta Dart,” deltadart.com, September 2019.
2. “Convair F-106 Delta Dart,” Wikipedia, September 2019
Copyright ModelingMadness.com
If you would like your product reviewed fairly and fairly quickly, please contact the editor or see other details in the Note to Contributors.
Back to the Main Page Back to the Review Index Page Back to the Previews Index Page