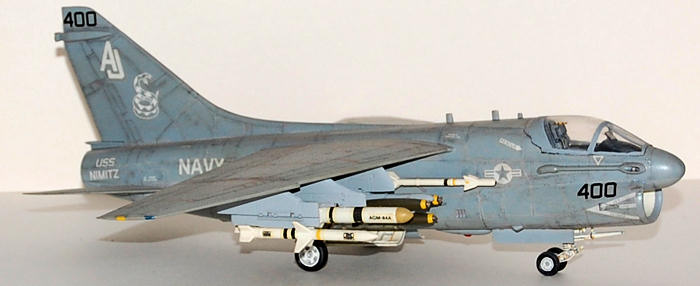
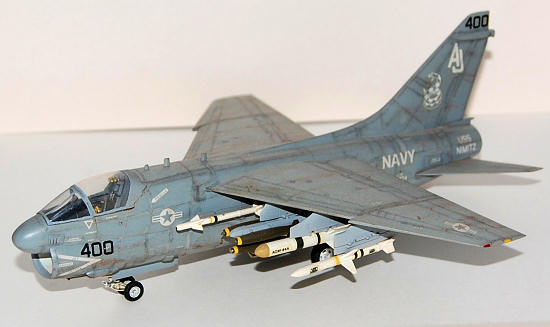
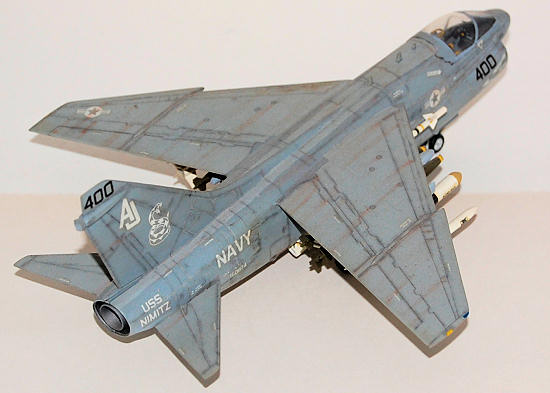
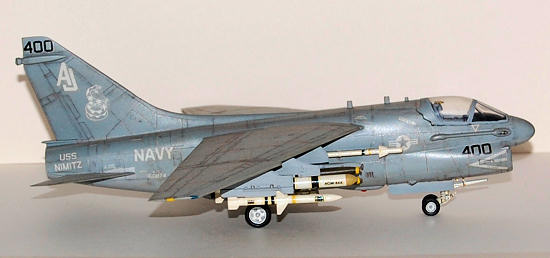
Fujimi 1/72 A-7E Corsair II
| KIT #: | F-9 |
| PRICE: | $11.75 in 1987 |
| DECALS: | Several options |
| REVIEWER: | Shawn Payne |
| NOTES: |
Superscale 72-516 decals
used.
An older kit that still holds its own today |
| HISTORY |
The Ling-Temco-Vought A-7 Corsair II is a carrier-based subsonic light attack aircraft introduced to replace the United States Navy's A-4 Skyhawk, initially entering service during the Vietnam War. The Corsair was later adopted by the United States Air Force, to include the Air National Guard, to replace the A-1 Skyraider, F-100 Super Sabre and F-105 Thunderchief. The aircraft was also exported to Greece in the 1970s, and Portugal and Thailand in the late 1980s. The A-7 airframe design was based on the successful supersonic F-8 Crusader produced by Chance Vought. It was one of the first combat aircraft to feature a head-up display (HUD), an inertial navigation system (INS), and a turbofan engine. (History from http://en.wikipedia.org/wiki/A-7_Corsair_II . Ed)
| THE KIT |
In the mid 80’s Fujimi released a series of 1:72 A-7 models covering the A version to the E version. These models had at the time set the industry standards in details and refined molding and still hold up today as good quality models of the A-7 family.
This kit
come packed in two plastic bags.
The moldings are crisp and free of flash.
Injection markings are in areas that do not
 require
filling and sanding. Very little
clean up is required of the parts before beginning construction.
require
filling and sanding. Very little
clean up is required of the parts before beginning construction.
The
details in the moldings of the wheel bays and cockpit are good for a model of
this scale. Raised detail for the
instrument panel and cockpit tub.
The ejection seat is a little in plain side and does need some attention to
bring up to standards as the canopy of this type of jet allows a good view of
the entire cockpit. If you have
access to an aftermarket seat I would use it.
Also
included with the kit are all of the wing pylons with a full array of external
fuel tanks and weapons. The weapons
included are 2 AIM-9B Sidewinder Missiles, 2 AGM-45 Shrike Missiles and 2 AGM-65
Maverick Missiles. The kits
instructions are very clear in how it needs to go together along with painting
instructions that give Federal Standards numbers.
The decals, which I did not use for this version, are printed very
nicely, crisp and clean with no alignment errors.
The clear parts include the two piece canopy and the HUD reflector.
| CONSTRUCTION |
 I
started with the cockpit tub. Painting the tub and cockpit side walls Testors
Model Master Neutral grey FS 36770.
I used the kits decals and placed them over the raised detail on the side
consoles and instrument panel. I
like the effect this produces at this scale.
For the ejection seat I added details form wire to make the ejection pull
handles and oxygen hook up hose.
Strips of masking tape were painted for the seat belts.
With the cockpit now completed it was time to put the two halves
together. The insides of the
tail cone burnt iron as the instructions show.
I
started with the cockpit tub. Painting the tub and cockpit side walls Testors
Model Master Neutral grey FS 36770.
I used the kits decals and placed them over the raised detail on the side
consoles and instrument panel. I
like the effect this produces at this scale.
For the ejection seat I added details form wire to make the ejection pull
handles and oxygen hook up hose.
Strips of masking tape were painted for the seat belts.
With the cockpit now completed it was time to put the two halves
together. The insides of the
tail cone burnt iron as the instructions show.
Next came
the wings. Before gluing the
underside wing insets you must decided what mission configuration you are
wanting. The holes for the wing
pylons must be drilled out at this time.
With the fuselage halves together and the wings inserts glued in I glued together the two halves of the air intake. These not being molded in to the fuselage halves but separate make sanding and cleaning up of the seams a breeze. Also at this point when I got the seams down the inside of the air intake and the bottom of the fuselage intake area sanded, I painted these areas white so I would not be trying to spray down the intake in final painting. Now I glued on the air intake and the wings and filled and sanded the seams and got the model ready for primer.
| COLORS & MARKINGS |
 With the
major parts assembled I primed all the parts with Testors Model Master primer.
Going with the painting recommendations’ of the Super Scale decals sheet
I painted the A-7 overall Lt. Ghost Gray FS36375.
I then masked off various panels and using Micro Scale liquid mask I
masked off around panels lines and airbrushed on Dark Ghost Gray FS36320 and
painted the sides of the A-7. I
masked off the areas around the wheel wells and painted the wells and landing
gear gloss white. Once completed
and the masking was removed I was happy with the look this had achieved.
With the
major parts assembled I primed all the parts with Testors Model Master primer.
Going with the painting recommendations’ of the Super Scale decals sheet
I painted the A-7 overall Lt. Ghost Gray FS36375.
I then masked off various panels and using Micro Scale liquid mask I
masked off around panels lines and airbrushed on Dark Ghost Gray FS36320 and
painted the sides of the A-7. I
masked off the areas around the wheel wells and painted the wells and landing
gear gloss white. Once completed
and the masking was removed I was happy with the look this had achieved.
Testors
Gloss coat was then applied and one dry I applied the Super Scale decals.
These went on without any problems and set down on the model very well.
Once the decals were set I used a wash of ink and water to accent the
panel lines. A few streaks of
testers rust on the tops of the wings produced and weathered look I was happy
with. I finished off the model with
Testors Model Master Semi-Gloss coat out of the can.
| FINAL CONSTRUCTION |
Now came
the weapons pylons and weapons stores.
I used a full complement of bombs and missiles.
The landing gear and gear bay doors attached tail stabilizers glued on
this A-7E was completed.
| CONCLUSIONS |
November 2009
If you would like your product reviewed fairly and quickly, please contact me or see other details in the Note to Contributors.