| KIT #: | 85-5201 |
| PRICE: | $12.95 MSRP |
| DECALS: | Two options |
| REVIEWER: | Dana Griffith |
| NOTES: |
| HISTORY |
One of
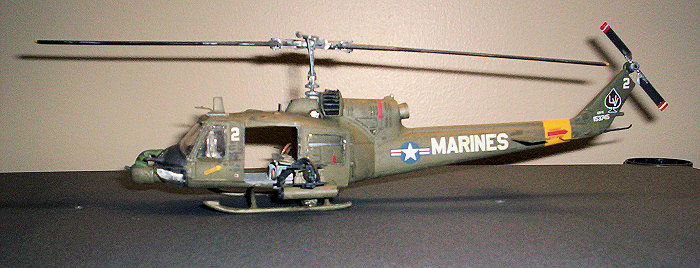
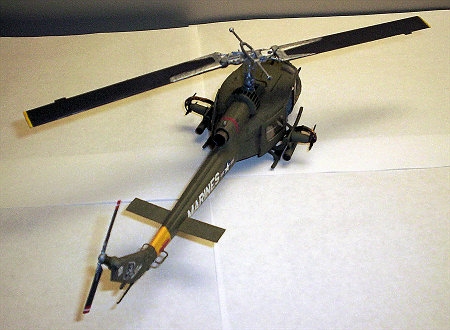
the most well known helicopters in the world is the Bell UH-1 Iroquois. It is
more commonly known as the Huey. The helicopter first flew in 1956, the design
stemmed from lessons learned during the Korean War where helicopters were first
used in quantity mainly as air ambulances evacuating wounded troops from the
battle area. Early in our involvement in the Vietnam War the U.S. Army
developed the operational concept of air mobility. The idea was to move a
fighting force rapidly into an area of the country rapidly by air, so that the
force can exert influence in the field, as well as, shape and control the
fight. The Huey is more 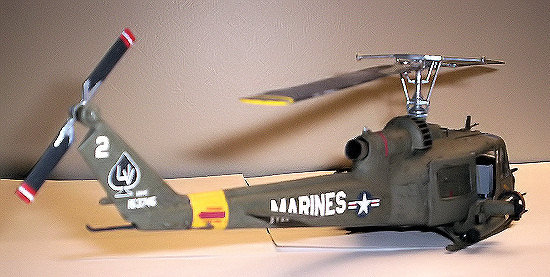 like a street brawler than the deadly sleek predators
of today. However, like the helicopters of today, it was very effective in it's
intended purpose.
like a street brawler than the deadly sleek predators
of today. However, like the helicopters of today, it was very effective in it's
intended purpose.
The Huey earned its fame during Vietnam and has been featured in a number of Vietnam era war movies and other action adventure films. The helicopter has several distinctive characteristics. It has a rounded nose.
It is a particularly noisy craft to be flying in, especially if you're riding in it perpendicular to the ground staring out the open side door as you struggle to hang onto your weapon and rucksack as the law gravity exerts it's influence on you and your gear. Meanwhile the pilot is flying nap of the earth at speed down inside of canyons in the Wichita Mountains in southwestern Oklahoma. The Huey gets that Whomp-Whomp sound because the tips of the two rotor blades break the sound barrier in forward flight.
| THE KIT |
Upon
removing the wrapping and opening the box I found the kit attached to four
sprue's molded in a dark olive drab plastic sealed in a polypropylene bag. A
second smaller bag contained a clear sprue holding the various glass panes. The
instructions and a decal sheet were loose underneath the two bags of sprue and
parts. The decal sheet appeared to be in register and had a
 number of the small
stencils that go on various locations of the Hog. The decals were glossy and
the carrier film seemed substantial. I did a quick read of the instructions and
they seemed to be straight forward and clear.
number of the small
stencils that go on various locations of the Hog. The decals were glossy and
the carrier film seemed substantial. I did a quick read of the instructions and
they seemed to be straight forward and clear.
I thought this was going to be a easy and quick build. Erroneous notion. I'll go into further detail shortly. Anyway upon closer assessment, once the sprue trees came out of the bags, the parts had light raised individual riveting. Some parts had recessed or engraved lines as appropriate. A number of parts had rough edges from the molding process. A majority of the parts had mold seams. Some were remarkably prominent and some were not too bad. A number of the parts had varying degrees of flash from either old molds or improper mold alignment. Prominently cast in raised letters on the underside on one of the horizontal stub wings were the words “Monogram 1977, made in China”. Oh Joy. I gave up counting the number of injector pin marks and pin sinks. A quantity of these were in quite prominent places or were quite large in relation to the kit.
| CONSTRUCTION |
I often work up a kit sometimes out of sequence so as to facilitate the build. As in most aircraft models, Step 1 is to assemble and finish the interior. I usually try to paint smaller parts on the sprue so I don't wind up with multi hued fingers and nails. However part number 11 (the rear bench in the cabin) and part 12 (the bench support legs) had injector pin sink holes that had to be filled and flash removed from some of those marks. I dealt with the blemishes first, which meant taking most of the parts involved off the sprue.
Here
comes the shameless product plug. Years ago, I stumbled upon using Elmer's
Carpenter's Wood Filler. It is a water based filler and comes in tan or white.
I use the white tube. The tubes run a couple of dollars plus change at the most
in almost box chain store or any family hardware store. I've been using the
3.25 Fluid Ounce tube since last September and it still is at least half full.
It can be thinned with water to a slurry or less water leaves it thicker. I dip
an older small brush in the slurry and dab the mixture into the sink mark and
set it aside for 5 to 15 minutes depending on the size of the job. If it is a
small mark or seam to be filled, once the slurry is dabbed into the seam or
mark, you can clean up the area around the and sometimes the seam itself with a
moist brush, damp paper town, or Cotton Swab. The stuff is also handy for
weathering and making surface terrain. By now the
 sink marks in the cabin area
had been attended to and sanded flush, so work on the cabin could resume.
sink marks in the cabin area
had been attended to and sanded flush, so work on the cabin could resume.
The instructions specify to paint most everything in the cockpit silver. Every Huey that I've seen the inside of, was actually light gray with some items and panels in silver. So, the cockpit was painted in Light Ghost Grey. The curtain along the rear wall was painted red as per instructions. The Collective, Joystick, and the Control Pedals were painted Light Ghost Grey as well. The handles of the Joystick and Collective were painted black. The Instrument panel was painted black with the gages picked out in white. Little levers and toggle switches were picked out in black or silver paint.
The only part of the kit where I really deviated from the instructions was Step two. I left off the rotor blades and assembly till close to the last, as the mounted blades would have impeded cleaning up seams. Part 13 (the Rotor Shaft) has a couple of sink marks that needs to be attended to before assembly. Make sure you put the rotor shaft in the two engine halves before gluing them together. I didn't so pried apart the engine and placed the rotor shaft as it should have gone in and then re-glued the engine halves together. The engine assembly will need a lot of clean up at the exhaust nozzle and the front as both are visible. As such you will have to fill and sand curving seams on the interior of the exhaust stack. The front of the engine does not line up terribly well so filling and sanding is required as well. The engine and rotor shaft were painted silver. The instruction specifies that you should pick out lines and cables in black on the engine. I painted the exhaust stack with jet exhaust color.
Step three went pretty much as per the instructions. I had to clamp the cabin floor to the bottom of the airframe. I jiggled the back wall and bench so as to line up properly. Once the fuselage halves have been bonded together, there are some big seam areas on the bottom of the craft to blend and sand.
Steps
4 and 5 are not that painful to contend with. There are a couple of minor
caveats. In Step 4, make sure to affix parts 42 (the frames) into the nose,
part three. You want to accomplish this before bonding part 3 to the fuselage.
I wound up removing the nose twice. The second time was due to the assembled
copter rocking back on the skids like Abe Martin in his chair (An ancient
 local
of some fame in my county). A couple of lead fishing sinkers super glued in
the nose between the frames solved the problem. There are a number of sink marks
and
mold gates that have to be cleaned up in the parts used in these two Steps.
If you glue the doors in the open position, you will need to add red stripes
onto the fuselage as well as some decals. You will soon notice that the
red stripe provided on the decal sheet is too short to cover all the areas
needing it.
local
of some fame in my county). A couple of lead fishing sinkers super glued in
the nose between the frames solved the problem. There are a number of sink marks
and
mold gates that have to be cleaned up in the parts used in these two Steps.
If you glue the doors in the open position, you will need to add red stripes
onto the fuselage as well as some decals. You will soon notice that the
red stripe provided on the decal sheet is too short to cover all the areas
needing it.
The instructions tell you to add (paint) the stripes and the decals. Once they have set and dried, then you glue the doors on and continue with the assembly.
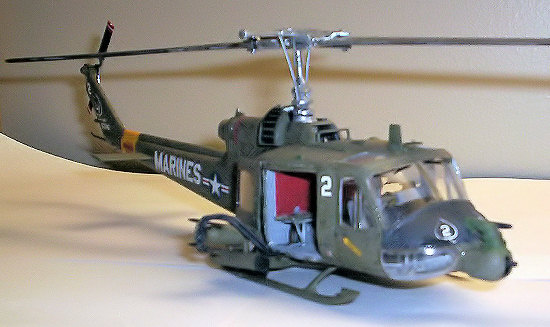
Steps 6 and 7, just had to go with the grenade launcher due to the sheer coolness factor. I drilled out the barrel for added effect. There are sink marks that have to be cleaned up on some of the parts which are visible when assembled. A number of seams that need to be cleaned up as well. The ammunition belts are molded to fit in only one proportional way. The problem with the belts is the the 7.62mm Machine Gun Ammunition was actually fed through ammunition chutes which supplied each Machine Gun. What was provided with the kit looked more like glob-by ammunition belts. Thin strips of tape or carefully applied filler and smoothing will render the belts to a more chute like appearance.
| COLORS & MARKINGS |
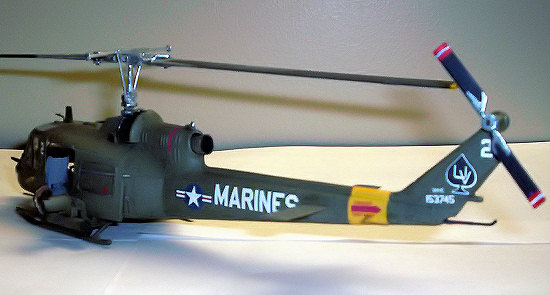
I use mainly Model Master Acryl paints. Olive Drab, Silver, White, Light Ghost Grey, and Flat Black. I used Testor's Flat Enamel yellow and red. I also used a Delta Creamcote Charcoal, Opaque and Americana Forest Green Acrylic Paint. I found out a while ago that the better quality acrylic craft paints are cheap go a long way and are very colorfast. So, that's another unintended product type plug. Onto the decals. I undercoat the areas where the decals go with Future. The decals are affixed after the undercoat has set up. Not all the decals on the sheet get used for this particular model of the Hog. Of note is the yellow band towards the back of the tail. On the right side marking the “Y” on “Keep Away printed out of register and is down and to the right of the text. I only had to use some setting solution on the red stripe located on the engine shroud. I then overcoat with Model Master Flat Clear Acryl.
| CONCLUSIONS |
I had another 1/48th
scale Monogram model of the UH-1 B when I was a youth. This certainly
brought back memories. Is this a quick and easy build? If you want
to do it right, not really. The kit takes a bit of work to make loo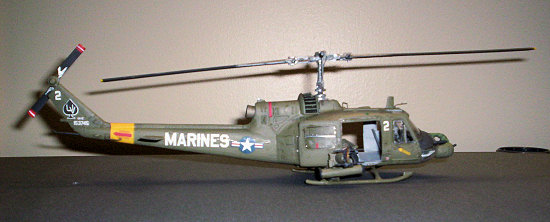 k
good. Then again, if you built this as a kid, your imagination likely took
control and you were just as likely tearing through the house flying nap of the
earth before the glue had completely set up. Or you were out in the garden
loading green plastic army men into it, so you could fly them over by the bushes
where those really bad tan and gray guys were carefully hidden. Once the
green good guys landed, a real John Wayne style thumping would begin on the bad
guys. Then again, you may have been industriously trying to figure out how
many M-80's or Black Cats you could stuff into the cabin of you older brothers
model Huey.
k
good. Then again, if you built this as a kid, your imagination likely took
control and you were just as likely tearing through the house flying nap of the
earth before the glue had completely set up. Or you were out in the garden
loading green plastic army men into it, so you could fly them over by the bushes
where those really bad tan and gray guys were carefully hidden. Once the
green good guys landed, a real John Wayne style thumping would begin on the bad
guys. Then again, you may have been industriously trying to figure out how
many M-80's or Black Cats you could stuff into the cabin of you older brothers
model Huey.
There are newer and better quality 1/48th Scale Huey's on the market today. Would I enter this in a competition? Probably not. It is a keeper though, and will proudly sit in my display when I finally come home. Looking at the brawling but fragile bird, evokes recollections of a time gone past. Faintly, in the distance of time, one can hear that distinctive thudding gut pounding thump of those rotors as that beast clawed for air and roared skyward toward the sun.
May 2007
Copyright ModelingMadness.com. All rights reserved. No reproduction in part or in whole without express permission.
If you would like your product reviewed fairly and fairly quickly, please contact the editor or see other details in the Note to Contributors.
Back to the Review Index Page 2022