Hobbycraft 1/48 U-1A Otter
| KIT #: | HC 1656 |
| PRICE: | €20 “on offer” in 2004 |
| DECALS: | Two options |
| REVIEWER: | Spiros Pendedekas |
| NOTES: | Includes resin parts. |
| HISTORY |
The de Havilland Canada U-1A was a version for the US
Army of the DHC-3 Otter STOL utility transport aircraft. The DHC-3 Otter was
introduced in 1953 as a similar, but larger development of the earlier and
highly successful DHC-2 Beaver. Dubbed the "King Beaver" during design, it would
be the veritable "one-ton truck" to the Beaver's "half-ton" role.
 Using the
same overall configuration as the Beaver, the new, much heavier design
incorporated a longer fuselage, greater-span wing and cruciform tail. Seating in
the main cabin expanded from six to 10 or 11. Power was supplied by a 600 hp PW
R-1340 radial. Capable of being fitted with skis or floats, it was utilized by
many users in a variety of roles, including Search and Rescue.
Using the
same overall configuration as the Beaver, the new, much heavier design
incorporated a longer fuselage, greater-span wing and cruciform tail. Seating in
the main cabin expanded from six to 10 or 11. Power was supplied by a 600 hp PW
R-1340 radial. Capable of being fitted with skis or floats, it was utilized by
many users in a variety of roles, including Search and Rescue.
With 184 delivered (as U-1As), the United States Army became the largest
operator of the aircraft. Other military users included Australia, Canada, and
India. Still, the primary role of the aircraft as a rugged bush plane continues
to this day, not excluding its popularity in the skydiving community.
A total of 466 Otters were manufactured, the type serving as the basis for the
very successful DHC-6 Twin Otter.
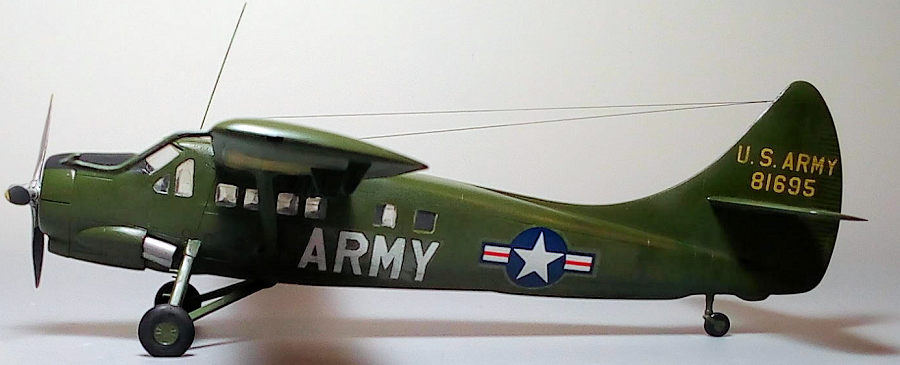
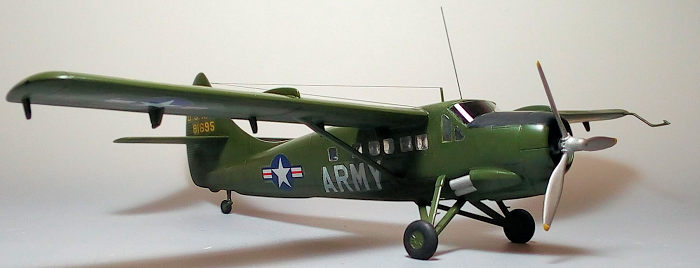
U-1A #58-1695 was delivered to the United States Army at Sharpe Army Depot,
Stockton, CA on the very last day of 1958. It was initially assigned to 17th
Aviation Company, Fort Ord, California. From early 1962 till late 1968 it was
deployed in Vietnam with the 18th Aviation, 339 and 338 Transportation Companies
respectively. It survived the war and returned to the USA, being civilianized in
1977, only to be destroyed in 1980, when the roof of the hangar in which it was
parked at Lac du Bonnet collapsed due to an accumulation of snow.
| THE KIT |
Introduced in two
versions by Hobbycraft in 1988, this kit is the land/ski version (the other
being the floatplane one). It comes in a (too big for the kit contents) sturdy
top opening box, the boxart depicting a U-1A in high visibility green camo. Upon
opening the box, you are greeted with around 60 parts made of somehow hard light
gray styrene arranged in 4 sprues, the three of them being individually sealed,
with the fourth, containing the fuselage halves, unsealed. Molding looks good,
with no flash present. Detail is engraved but at places looks simplistic and
toy-ish.
Internal details range from basic (cockpit) to nonexistent (cargo). The provided
pilot seats protrude too much at the front, the control column is wrong and the
instrument panel very plain. Though I might personally pass over the cargo
compartment emptiness, as I always display those areas closed, I would like a
more detailed cockpit, since quite a bit can be seen through the large
windscreen.
 Engine
representation is also basic: there is a plate with molded-on cylinder-like
protrusions, onto which a simplified looking crankcase with molded-on off-scale
pushrods is to be attached. The cowling has good shape, but the reinforcing
strut at the middle of the air inlet is too thick and rectangular looking. The
prop looks good, as do the distinctive exhaust pairs (but their inner walls are
unrealistically thick). Most of the remaining parts, including support struts,
wheels, moving surfaces' hinges and wing fillets present the same simplified
look.
Engine
representation is also basic: there is a plate with molded-on cylinder-like
protrusions, onto which a simplified looking crankcase with molded-on off-scale
pushrods is to be attached. The cowling has good shape, but the reinforcing
strut at the middle of the air inlet is too thick and rectangular looking. The
prop looks good, as do the distinctive exhaust pairs (but their inner walls are
unrealistically thick). Most of the remaining parts, including support struts,
wheels, moving surfaces' hinges and wing fillets present the same simplified
look.
Clear parts, apart from being thick, are well molded and reasonably clear. They
are sealed together with one main sprue, meaning potential scratches.
Instructions are a two sided pamphlet, containing a short history of the type,
an 8-step construction sequence and the camo suggestion. No internal color
callouts are given, just generic external ones. Two scheme options are provided,
a Canadian late DHC-3 and a U.S. Army U-1A, as it stood in Vietnam in the
mid-60s. This is a “gray” Hobbycraft box, rumoring lesser decals, which seems
the case here, as they do not seem very well registered. At least their material
quality seems good.
All in all, this kit seems to wobble between a serious model and a “detailed
toy”. As was my usual case, upon discovering it forgotten at one of my
hometown’s toy/hobby shops, back in 2004, at “a price I couldn’t refuse”, I
immediately grabbed it, only deciding to give it a go almost two decades later,
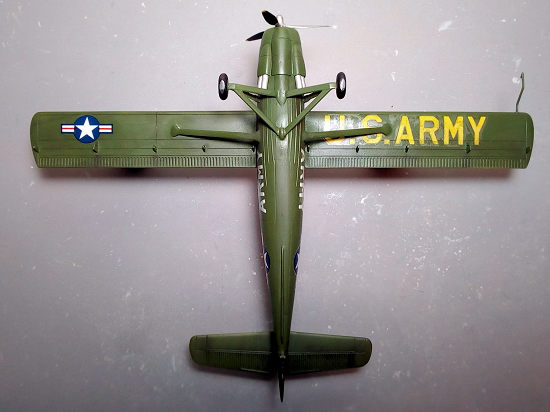
finishing it as an early Vietnam era U.S. Army bird.
| CONSTRUCTION |
I started by attaching
at the fuselage halves the two cockpit doors, cargo door and inner cockpit entry
door in “closed” position, then attached all side windows from the inside. I
then attached the cockpit floor and rear bulkhead at the starboard fuselage
half. Hobbycraft instructs you to glue the instrument panel onto the central
console, but this is clearly incorrect: it must be glued directly under the
dashboard and, for this, a slight reshaping was necessary. The central console
extension with the various control levers found at real Otters was fabricated
from styrene sheet, onto which small pieces of stretched sprue were affixed.
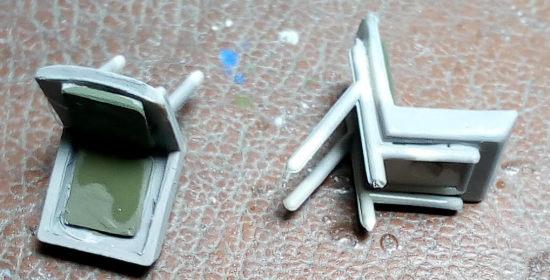 I then
turned my attention to the plain looking cockpit seats: I cut four “cushions”
from sheet styrene, glued them onto the seats, painted them a dark green and
added seat belts made of linen doped masking tape, with the “buckles”
represented by silver touches from my Pilot silver pen. The seat supporting
frames had oversized rears, so I reduced their size, in order for the seats to
rest in a more natural position and not penetrate the instrument panel!
I then
turned my attention to the plain looking cockpit seats: I cut four “cushions”
from sheet styrene, glued them onto the seats, painted them a dark green and
added seat belts made of linen doped masking tape, with the “buckles”
represented by silver touches from my Pilot silver pen. The seat supporting
frames had oversized rears, so I reduced their size, in order for the seats to
rest in a more natural position and not penetrate the instrument panel!
The control column is totally wrong: studying net available pics, I modified it
by adding a symmetrical arm and attaching two leftover yokes from my spares.
After some net search, I decided to paint all cockpit parts Hu140 Gull Gray,
with black instrument panel and yokes and red/yellow/white switches. A fire
extinguisher was fabricated from stretched sprue, painted red and attached to
the rear bulkhead, in order to busy-up to the plain cockpit. Hu140 was also used
to paint the empty passenger/cargo interior.
I then joined the two fuselage halves. Fit was average, the resulting gaps
initially treated with liquefied styrene, followed by putty. Since the side
windows fit was less than perfect, I gave them a coarse sanding progressing up
to 2000 grit, then polished them with Plexiglas polish, followed by an
application of Future, with the side windows becoming flush to the surface and
looking reasonably clean. Finishing with fuselage assembly, the two distinctive
exhaust fairings were bilaterally attached.
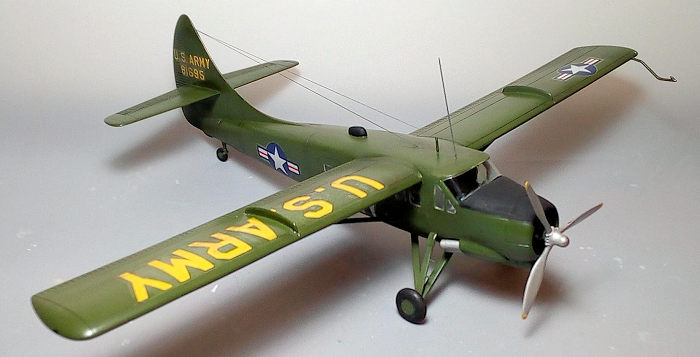
 The wings
were next assembled and, together with their supporting struts, were attached to
the fuselage, with the tail planes and MLG struts following soon after. Fit was
manageable, with some attention needed in aligning the wing and MLG struts.
The wings
were next assembled and, together with their supporting struts, were attached to
the fuselage, with the tail planes and MLG struts following soon after. Fit was
manageable, with some attention needed in aligning the wing and MLG struts.
Of special note is that the main wings have in reality a slight dihedral, not
more than 1-2 degrees, but definitely noticeable from various angles. Kit
instructions do not mention this and, worse, the kit seems to have the wings
designed at zero dihedral. A friend of mine noticed this discrepancy when he saw
the wings attached, hopefully at an early construction stage, with yours truly
bravely detaching them soon after! By using a head-on view, I filed the wings’
mating area at a slight angle, and reattached them to the fuselage at the
correct dihedral, followed by re-attaching the struts, with two bottles
supporting those wings at the correct angle till glue cured.
It was then engine time: I first very carefully cut
away the back plate portions, onto which the “cylinders” are molded. After some
minor gluing repairs (since I damaged a couple of cylinders), I scribed the
bland front of the cylinder bodies, in order to create an illusion of cooling
fins. The crankcase with the molded in pushrods was then attached, followed by
ignition wires made of stretched sprue. Based on net pics, the complete engine,
including the crankcase, was painted black and then heavily dry brushed with
silver, with the final result still looking average, but, at least, non-toy-ish
anymore!
The cowling had its crude reinforcing strut at the middle of the bottom air
inlet removed and replaced with a slimmer one, made of stretched sprue. Cowling
innards were painted Hu226 (for the green zinc), whereas the firewall was
painted black.
Having more or less finished with all basic construction, I treated all gaps
with putty, followed by sanding. After attaching the delicate top wing fairings
and underwing hinges, I masked the side windows with liquid mask, blanked the
cockpit opening with wet tissue, temporarily attached the front cowling and
headed to the paint shop!
| COLORS & MARKINGS |
 Whereas
instructions call for an overall olive drab, by doing some net research, I came
to the conclusion that U-1As in Vietnam during their earlier days, carried high
visibility markings and featured a medium towards dark green gloss overall
color, with the olive drab and lower visibility markings only appearing towards
the end of the decade. I thus grabbed a tin of Hu117 that looked “right to my
eye” and gave the whole plane, including the wheel rims, a good coating,
followed by a coat of Future. I then masked the front anti glare panel and gave
it a coat of Hu33 flat black.
Whereas
instructions call for an overall olive drab, by doing some net research, I came
to the conclusion that U-1As in Vietnam during their earlier days, carried high
visibility markings and featured a medium towards dark green gloss overall
color, with the olive drab and lower visibility markings only appearing towards
the end of the decade. I thus grabbed a tin of Hu117 that looked “right to my
eye” and gave the whole plane, including the wheel rims, a good coating,
followed by a coat of Future. I then masked the front anti glare panel and gave
it a coat of Hu33 flat black.
Kit decals did not present any significant problems during application, but I
did experience some silvering; their opacity could also be better. I used Mr
Mark Softer, in order to help them conform onto the surface contours. A coat of
Future sealed them.
| FINAL CONSTRUCTION |
The distinctive exhaust pairs, after having
their walls thinned to look scale correct, were painted chrome silver with
burned metal innards and attached in position. All three wheels had their
tires filed to look “weighted” and painted black, then attached in position.
The propeller was painted silver with yellow tips and the rear part of the
blades partially flat black (as it was how most Otters were seen in seasonal
pics, before ending up having totally black blades). It was then secured at
the engine, with the cowling trapped in between, then the whole assembly was
attached in position.
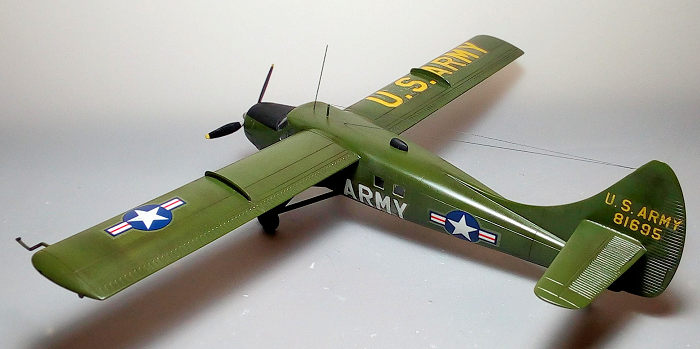
I decided to add some weathering, as to reflect the harsh Vietnam
conditions, and, not least, to make this simplistic model look more
interesting. I thus gave the whole plane a hefty black wash that accentuated
the engraved details, then used various shades of blackish/brownish pastels
to a good extent, in order to simulate engine staining, top surfaces sun
fading and general dirtying (more heavily applied in wheels' area). A final
satin coat sealed everything and gave the U-1A its final shade.
 I
removed the liquid mask from the side windows and performed the inevitable
(for me) touch ups. Yes, I somehow managed to lose the front windscreen!
Hopefully, its shape was simple, so it was not too difficult to fabricate
one out of clear acetate, bending it to shape by applying force with my
fingers. After hand painting its middle frame with a 10/0 brush, I affixed
it in place using white glue, which double acted as a filler. The result was
not bad, with the extra clarity allowing to see the cockpit that I had
beforehand improvised upon!
I
removed the liquid mask from the side windows and performed the inevitable
(for me) touch ups. Yes, I somehow managed to lose the front windscreen!
Hopefully, its shape was simple, so it was not too difficult to fabricate
one out of clear acetate, bending it to shape by applying force with my
fingers. After hand painting its middle frame with a 10/0 brush, I affixed
it in place using white glue, which double acted as a filler. The result was
not bad, with the extra clarity allowing to see the cockpit that I had
beforehand improvised upon!
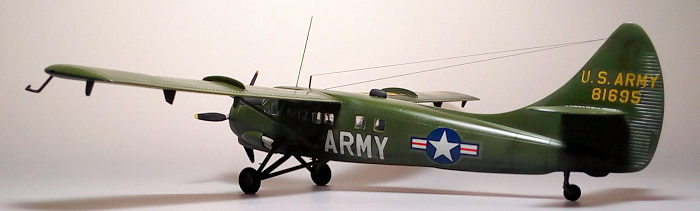
No aerials are depicted at the instructions whatsoever, though,
interestingly, a DF loop antenna is provided. By netting, I concluded that
U-1As of that era did use the DF loop. Also, two aerial wires emerged from a
single point of the fin, with one of them entering the top-fuselage
directly, and the other one ending onto a small mast at the front. Finally,
a long “rod type” antenna, slightly angled backwards, was found right on top
of the cockpit roof. I thus painted the DF loop flat black and attached it,
then attached a small mast at the front, using a suitable sized stretched
sprue piece, followed by replicating the aerial wires with fine stretched
sprue, accordingly run and tightened with hot air from a hairdryer.
Finishing the antennas, a longer piece of stretched sprue was attached on
top of the cockpit roof, angled a few degrees backwards, as observed in
reference pics.
The wing mounted distinctive pitot was wrongly molded: I had to cut its
final part and re-glue it at 180 degrees swift. I then attached the pitot in
position and painted it camo color with gunmetal tip, before calling this
beautiful One-Ton Truck done!
| CONCLUSIONS |
The Hobbycraft 1/48 DHC-3/U-1A is
a basic kit. Apart from the (easily fixable) incorrect wings dihedral, general
shape is acceptable. Engine looks simplistic towards toy-ish, cockpit detailing
is plain and no cargo interior is provided whatsoever. Rest of the “details”
range from fair to nonexistent.
Since construction is simple and fit is more or less acceptable, with little
effort, a basic representation of the Otter might result. No aftermarket is
available, so, if you want to make improvements, you have to go scratch
building, or modifying suitable parts from other kits.
With 466 built, it is interesting that, as of 2021, no other kit manufacturer
has offered us a detailed, modern “one-ton-truck”. If you want an Otter kit,
your only options are the 1/48 and 1/72 Hobbycraft simplistic kits, let alone
the fact that even these kits haven’t been reissued since the millennium, being
really difficult to find, with their production assumingly stopped.
Having said all that, I had a good time putting together this kit, performing
some modifications and a bit of scratch building, in order to address some of
the kit’s discrepancies. The end result is unmistakably an Otter: maybe not a
detailed or accurate one, but still a fair looking U-1A, keeping company to my
other Vietnam era planes in my showcase.
Happy modeling!
24 May 2022 Copyright
ModelingMadness.com. All rights reserved. No reproduction in part or in whole
without express permission. If you would like your product reviewed fairly and fairly quickly, please
contact
the editor
or see other details in the
Note to
Contributors.