Part 2 – Running into real trouble
|
THE KIT |
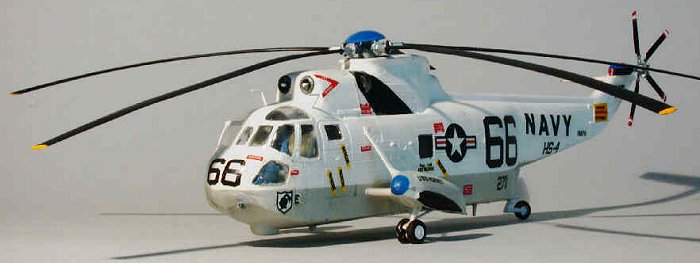
Parallel to the LEM, I built the Sea King helicopter. The kit offers options for an armed ASW helo from USS Essex and the memorable Apollo recovery helo with the number 66 – which I chose to build.
It was built straight from what was in the box, with the only exception that I closed the opening in the helo´s bottom from which the dipping sonar is lowered. I wasn´t sure whether this was faired over in #66, but assumed it. The torpedo rack mounts were filled, too.
|
CONSTRUCTION |
 In
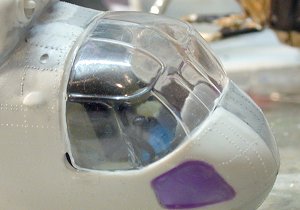
building, I soon encountered serious fit problems, most notably with the
clear parts. Those happened in various dimensions and planes, and as I´m
not so firm in filing and sanding and polishing clear parts, I tried to
get away below that level. Some clear parts were covered with future in
multiple layers, other were sanded and filled at the joints, but on the
whole I didn´t like the result that much. Especially the lower part of
the bow was a lousy fit and I somehow didn´t get things right. I closed
the cabin door to avoid displaying the void inside. My personal favorite
item in the kit was the printout that was to be glued on the instrument
panel – in BLUE, as all the instructions are done in that color... I used
it nonetheless as a little personal joke and didn´t assume it would be
seen anyway.
In
building, I soon encountered serious fit problems, most notably with the
clear parts. Those happened in various dimensions and planes, and as I´m
not so firm in filing and sanding and polishing clear parts, I tried to
get away below that level. Some clear parts were covered with future in
multiple layers, other were sanded and filled at the joints, but on the
whole I didn´t like the result that much. Especially the lower part of
the bow was a lousy fit and I somehow didn´t get things right. I closed
the cabin door to avoid displaying the void inside. My personal favorite
item in the kit was the printout that was to be glued on the instrument
panel – in BLUE, as all the instructions are done in that color... I used
it nonetheless as a little personal joke and didn´t assume it would be
seen anyway.
What I like best about this model are the drooped main rotor blades. They look rather convincing to me. Having completed that assembly, it was time for painting.
|
CAMOUFLAGE & MARKINGS |
After
masking with Parafilm M and Maskol, I used several coats of gloss white,
and with the usual flaw detection and correction, I finally could mask
and spray the gull grey and black areas. This went
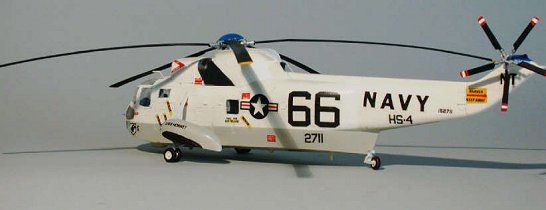 straight. The blue
embellishments were painted and sprayed where appropriate, and now it was
time for the decals.
straight. The blue
embellishments were painted and sprayed where appropriate, and now it was
time for the decals.
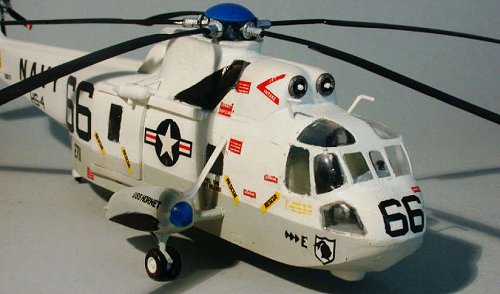
Well... I´ve often read about decals being in or out of register, and have so far assumed that applied to the different colors used during the printing process. Here, it was different: Parts of each decal dissolved like the numbering found on more modern sheets – it must be a difference in register betwen the print and the fixating medium. Some of that wasn´t so conspicuous, some had to be corrected by hand, and finally all decals were placed, the wheels were mounted and the rotors placed. I left the plane at a high glossy finish, removed the masking and took my pics, always reassuring myself that I´ll do much better with the Hasegawa S-61 I´ve got in store.
|
CONCLUSIONS |
What
annoyed me most was the fact that the paint never really cured. It was
sticky after a few days when I started decal work and was still when I
finished it and still when I tried to peel off the masking and still was
right now after a few
 weeks when I endeavoured
to clean up the edges of the windows better than they were on the pics. I
just realized I was still touching a sticky model and was leaving
FINGERPRINTS. ARRRGGHH!!!!!
weeks when I endeavoured
to clean up the edges of the windows better than they were on the pics. I
just realized I was still touching a sticky model and was leaving
FINGERPRINTS. ARRRGGHH!!!!!
No folks, that´s all. Not one more moment of work on this one or I´ll end up playing Godzilla with it.
I can only guess I accidentally used Model Master thinner with Revell clear coat and that there are incompatibilititities (!) between them. I touched my Hase Val´s wing reassuringly and it felt nice and dry and smooth and definitely non-sticky. So it was perhaps a matter of the stars not adjusted in my favor when I started or what the heck else went wrong. Let´s move on to the next project!
Copyright ModelingMadness.com. All rights reserved. No reproduction in part or in whole without express permission.