|
KIT: |
Dynavector 1/48 TSR.2 |
|
KIT # |
? |
|
PRICE: |
? |
|
DECALS: |
See review |
|
REVIEWER: |
|
|
NOTES: |
Vacuformed with white metal |
|
HISTORY |
Great Britain produced splendid aircraft and some rather curious stuff. Before WW II, it was generally on the bizarre side. Then, during the war, some marvels were designed (Aaaah, the Spitfire Mk IX!), then, after the war, British engineers decided to walk more exotic ways. Strangely enough, in the late fifties, British aircraft industry answered an Air Ministry specification for a low level, high speed strike aircraft intended to replace the Canberra. They didn’t do it half heartedly, and designed a monster. Twenty feet longer than a Lancaster, twice as heavy, it was to be able to fly at Mach 1.2 200 ft AGL, and do tactical missions, nuclear strike and reco. Its name was TSR-2 (Tactical, Strike, Reco), as the TSR-1 was the Canberra.
 The plane
had a terrain following radar, side looking airborne radar, a head-up
display projected inside the windscreen, and was roomy enough to carry
any avionic suite thought fitting for it. For the crew comfort (and thus
for more efficiency), the wings were joined to the fuselage through seven
moving joints, and the wing oscillations absorbed the turbulence induced
shocks. The cockpit was mounted on a nodal point of the fuselage and that
cancelled almost all of the remaining vibrations, allowing for an
exceptionally smooth flight at low level. Then, thanks to blown flaps,
Rolls Royce Olympus engines (which gave birth to the Concorde engines)
and an extensible nose gear, it was supposed to take off from a bulldozed
runway in 700 meters. The landing run was
shortened with the help of a gigantic tail brake chute.
The plane
had a terrain following radar, side looking airborne radar, a head-up
display projected inside the windscreen, and was roomy enough to carry
any avionic suite thought fitting for it. For the crew comfort (and thus
for more efficiency), the wings were joined to the fuselage through seven
moving joints, and the wing oscillations absorbed the turbulence induced
shocks. The cockpit was mounted on a nodal point of the fuselage and that
cancelled almost all of the remaining vibrations, allowing for an
exceptionally smooth flight at low level. Then, thanks to blown flaps,
Rolls Royce Olympus engines (which gave birth to the Concorde engines)
and an extensible nose gear, it was supposed to take off from a bulldozed
runway in 700 meters. The landing run was
shortened with the help of a gigantic tail brake chute.
Strangely enough, everything (or more accurately, everything tested) worked quite well. The plane behaved a bit like a Lightning in flight, had tremendous accelerations (even a Lightning couldn’t follow it), but was born at the wrong time. The British government cancelled the project after some twenty flights, and annihilated almost all evidence of the programme. Only two aircraft survived. One is shown in Duxford, the other is in Cosford. The most amazing fact is that aircraft would have been a better performer than almost any other long range attack aircraft of today...
|
THE KIT |
With such a short resume, it is obvious no mainstream model manufacturer would have released a 1:48 TSR-2. Dynavector be praised, they did it!
They did it, but. It’s a vac. When hearing this word, the average modeler gets his garlic necklace and his wooden stake., and generally runs away at speeds higher than those ever reached by the TSR-2. And he misses a splendid model.
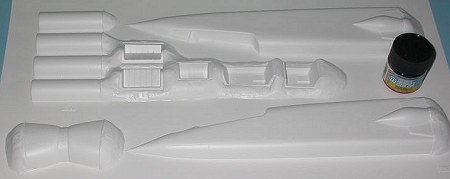 In
Dynavector’s standard sturdy cardboard box, you find five white plastic
sheets, two vacformed canopies and 57 very good white metal parts for
detailing. Panel lines are scribed. I've shown an
example of the vac sheets with a Gunze bottle to give an idea of the size
of the kit.
In
Dynavector’s standard sturdy cardboard box, you find five white plastic
sheets, two vacformed canopies and 57 very good white metal parts for
detailing. Panel lines are scribed. I've shown an
example of the vac sheets with a Gunze bottle to give an idea of the size
of the kit.
The cockpits are detailed enough, but the seats can use some work. Not too much, because you can’t see much under the canopy. The undercarriage will need some piping added.
Decals options are for the first two prototypes. Decals are printed by Fantasy Printshop and are really excellent.
One last word for the instructions. This is excellent work. No lots of beautiful three dimension drawings, I know, but if you take the time to read them, you’ll avoid lots of trouble. All the problem areas are explained, and there are solutions for each of them.
|
CONSTRUCTION |
This is usually the part modelers dislike. It’s not hard, and if you follow my advice, you’ll surprise your modelling friends. The only problem is, it’s long and dirty work.
 First,
you draw the part contour on the sheet with a greasy pencil. It’s good if
the part and the sheet are both marked.
First,
you draw the part contour on the sheet with a greasy pencil. It’s good if
the part and the sheet are both marked.
Then, the sheet is cut 1 or 2 mm from the part. No use cutting through the sheet: score the plastic and break the sheet following the cut line.
Now is the time. Take a wood block, and using double sided adhesive tape, put coarse sandpaper on it. Take the block, and sand away the excess plastic from under the part. Be patient! If you want to check, it’s easy. When you’re almost done, you can see the pencil mark through the styrene. When you’re there, be extra careful and go on sanding. You can use finer sandpaper at that time. When done, the plastic stripe will be translucent and will remove itself from the part.
Some parts need reinforcements. As the instruction writer is a very competent modeler, he explains which parts, what kind of reinforcements and where to put them.
Aft fuselage. Two horizontal reinforcements made in 1mm plastic sheet, and reinforcements cyanoed to the wheel wells. They’ll prevent any future wheel well escape inside the fuselage.
Front fuselage. Plastic strips are glued to the sides to stiffen them. Other are glued under the cockpit tubs and above the front wheel well, again to avoid escapes. Vertical reinforcements are glued too.
Assembly
For once, I decided to start
with the wing. I read the instructions again, and avoided a colossal
mistake! DO NOT ASSEMBLE the wing! First, build the aft fuselage, then
glue the lower wing part on top of it, ast it will give the wing its
shape. Then glue the upper wing part. So, breathe deeply, prepare the
parts, remove the gear doors, install the wheel wells, glue the
reinforcements and build the aft fuselage. Some
putty is needed. 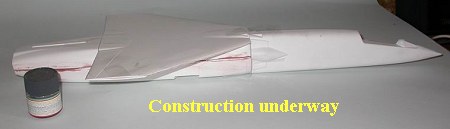
The wing is installed and dry fitting trials are done with the nose.
The cockpit tubs are removed from the backing sheet and installed in the nose, as is the wheel well. The nose is assembled, puttied, and glued to the aft fuselage. Pay attention to the alignement!
As you can see, some putty is needed, but nothing terrible here.
 Now it’s time for the wingtips
and the fin. Parts come inside the wing to give the correct anhedral to
the wingtips.
Now it’s time for the wingtips
and the fin. Parts come inside the wing to give the correct anhedral to
the wingtips.
I shot a grey coat on the joint lines to track the mistakes. There were some. Puttying, sanding, painting again until I had perfect joints. The intakes and tailplanes were then glued.
The cockpit was next. The metal parts and the tubs were painted grey FS16440 (maybe not the right color, but close enough), and details were added using pictures I found on the web and in Wings Of Fame vol 4. The bulkheads were Dremelled, as was the base of the rear seat which would have protruded by 5 millimeters otherwise. The seats got their belts and were painted from pictures I found there (http://su22m4.free.fr/http|//www.ejectionsite.com/seatgalnf.htm).
There’s
no need to overdetail the rear seat. You almost can’t see it, but you
know it’s there…
When seen from the rear, the seat show the curious metallic green shade of the rocket system
The canopy is masked, then cut from its sheet with nail scissors. It’s adjusted thanks to some putty. A primer coat is shot and the errors are relentlessly tracked.
|
CAMOUFLAGE & MARKINGS |
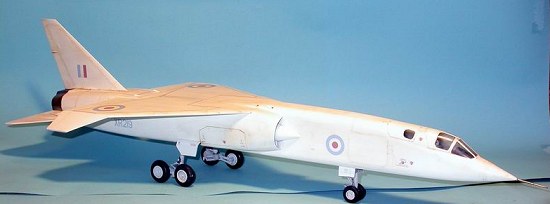
Painting that monster sounds really easy : white all over (except the aft end, which is steel). But white is not exactly a piece of cake. After numerous trials (all failed) using Gunze and Tamiya whites, I went to Humbrol H130, which worked perfectly. A gloss coat later, the TSR-2 was ready for decaling.
|
FINAL CONSTRUCTION |
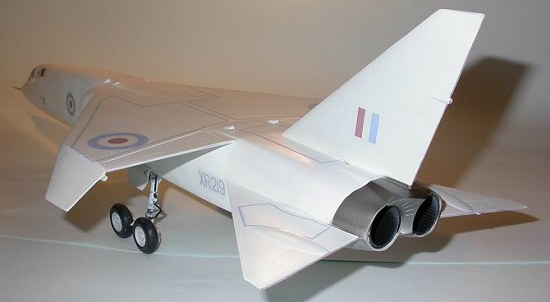
I worked on the landing gear next. Some piping is added with the help of pictures found on Thunder and Lightnings (http//www.thunder-and-lightnings.co.uk/contents.html), I made collars with adhesive aluminium foil, and painted the gear leg light grey with the oleo aluminium. Wheels are cleaned and painted, and everything is glued. Wheel wells are Tamiya Sky Grey.
 Everything
is glued with CA glue, and you have to check whether the legs are
symmetrical and all the wheels touch the ground. Don’t worry, this is not
a tail sitter, there’s about a pound of lead in the nose.
Everything
is glued with CA glue, and you have to check whether the legs are
symmetrical and all the wheels touch the ground. Don’t worry, this is not
a tail sitter, there’s about a pound of lead in the nose.
Decals are put. They react nicely to the softening solutions.
The nozzles are a bit naked, and I didn’t want to build the flame holding rings. However, I made the corrugated interior with Evergreen plastic sheet. Once painted Alclad Jet Exhaust, the result is rather nice. The metal tboat tail is glued, the joint is corrected, and the fuselage is masked before shooting Alclad Steel. The pitot probe is made with micro steel tubing.
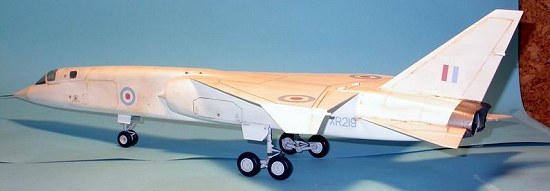
We have now a splendid white bird. All white. Too white… Pictures in Wings Of Fame show a slightly weathered plane. I sprayed another gloss coat before giving it a wash of burned earth artist oil diluted in lighter fluid. I removed the excess with a tissue soaked in lighter fluid.
|
CONCLUSIONS |
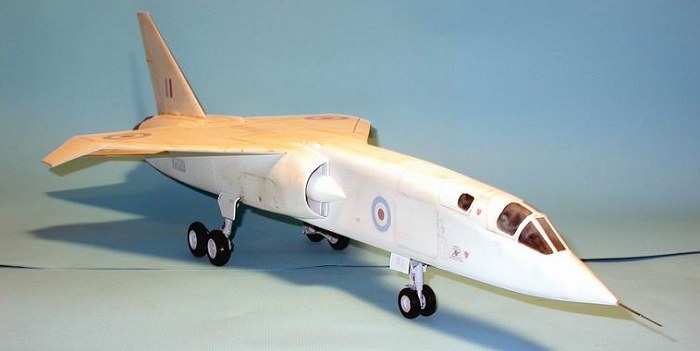
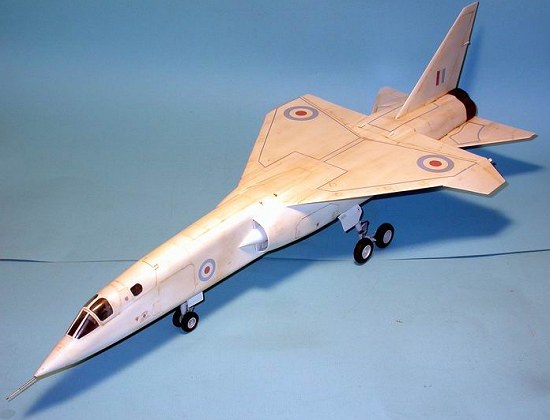
This is a fantastic looking plane ! This is an enormous plane too… Looking at this model, you wish the British government had been less obsessed with bean counting. Looking at the Tornado and at this plane I have the same feeling.
 Another
vac done ! This can make you pass for a modeling god at low expense in
the modelling world (this is said tongue firmly planted in cheek!) I know
I’ve already said that, vacs, at least Dynavector vacs, are not
difficult. With some patience, you’ll get a splendid replica of a
fabulous machine. Go for it!
Another
vac done ! This can make you pass for a modeling god at low expense in
the modelling world (this is said tongue firmly planted in cheek!) I know
I’ve already said that, vacs, at least Dynavector vacs, are not
difficult. With some patience, you’ll get a splendid replica of a
fabulous machine. Go for it!
A thousand thanks to Hobby Link Japan (http://www.hlj.com) for the review sample !
If you would like your product reviewed fairly and quickly by a site that has over 200,000 visitors a month, please contact me or see other details in the Note to Contributors.