Revell 1/72 Sea Vixen FAW.2
| KIT #: | 60792? |
| PRICE: | ~15-20 Euros |
| DECALS: | Three options |
| REVIEWER: | Frank Spahr |
| NOTES: | Reboxed CyberHobby kit. Airwaves set AC72-186. Eduard 73551, Dead Design NM72065 |
| HISTORY |
The De Havilland DH.110 FAW.2 Sea Vixen entered service with the Fleet Air Arm in 1962, a culmination of a protracted development that started soon after the war. Postwar, the Royal Navy soon realized the potential of jet fighters and looked for a new generation. Both Gloster and De Havilland competed, and De Havilland offered their DH.110. This twin-boomed, twin engined aircraft with swept wings showed great potential, but its development was marred by a devastating crash at the 1952 Farnborough airshow. The prototype literally disintegrated in midair, when its wings failed while trying to break the sound barrier in level flight in front of the audience. 29 spectators and the two crew members died in the inferno, with many more casualties. As a result, the whole wing was redesigned and strengthened, which made the aircraft safer, but also slower. Official interest waned and waxed, until in the late 1950s, it reached a level when the Sea Vixen FAW.1 (Fighter All Weather) actually entered production and was introduced to the fleet.
De Havilland had
continuously developed the type, and soon after the definitive version FAW.2 was
introduced, which served the fleeet from 1962 to 1972. It externally differed in
having fairings over the booms extending ahead of the wings, containing more ECM
equipment and fuel tanks. Moreover, the canopies for both pilot and observer /
radar operator were redesigned. The latter´s position was pretty unique, as the
poor guy sat inside the fuselage, with just a measly little window. Moreover, he
was placed under a very tight canopy that was blacked out in order to make
reading the radar displays easier. This position w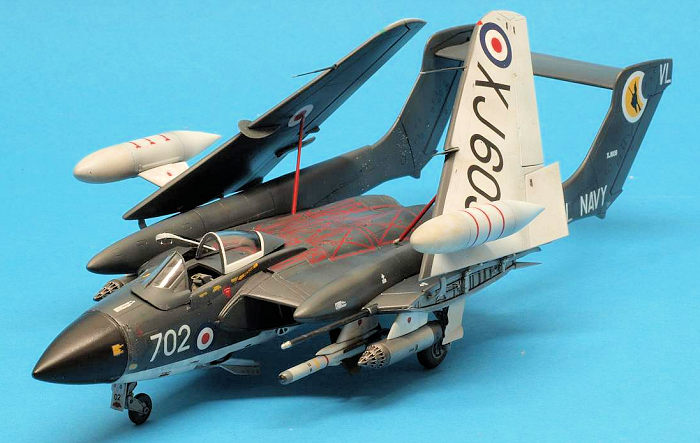 as dubbed the „coal hole“, but
in retrospect, „death trap“ would have been more honest. Only the FAW.2 offered
ejector seats operating without prior jettisoning the canopy, and even then any
malfunction could leave the poor observer trapped below this very narrow
opening. The aircraft´s service record was that it was an effective and
formidable fighter/bomber for its time. Following the time´s fashion, the
originally planned four Aden cannons had been omitted, so that the air-to-air
capability relied upon first the Firestreak and then the more capable Red Top
missile. Up to four pods of unguided rockets could be carried, or up to four 500
lb bombs, or a free fall nuclear weapon.
as dubbed the „coal hole“, but
in retrospect, „death trap“ would have been more honest. Only the FAW.2 offered
ejector seats operating without prior jettisoning the canopy, and even then any
malfunction could leave the poor observer trapped below this very narrow
opening. The aircraft´s service record was that it was an effective and
formidable fighter/bomber for its time. Following the time´s fashion, the
originally planned four Aden cannons had been omitted, so that the air-to-air
capability relied upon first the Firestreak and then the more capable Red Top
missile. Up to four pods of unguided rockets could be carried, or up to four 500
lb bombs, or a free fall nuclear weapon.
The aircraft made an impression upon its adversaries of the 1960s during the long retreat from the British colonial empire, but at a severe price. Out of 145 Sea Vixens built, 55 were lost in accidents, with the loss of 51 aircrew. That is a loss rate of a staggering 38% in airframes, even higher than that of the German Starfighters.
The successor to the Sea Vixen was the more capable F-4 Phantom II. But the British government´s decision to phase out the aircraft carriers meant that only HMSk Royal IV was modified to operate the American aircraft. So the Sea Vixen finally served aboard HMS Eagle until this carrier was decommissioned in 1972.
Today, a number of museums have Sea Vixens on display. Sadly, the last flying example suffered a belly landing at Yeovilton in 2017 and has not been returned to flight.
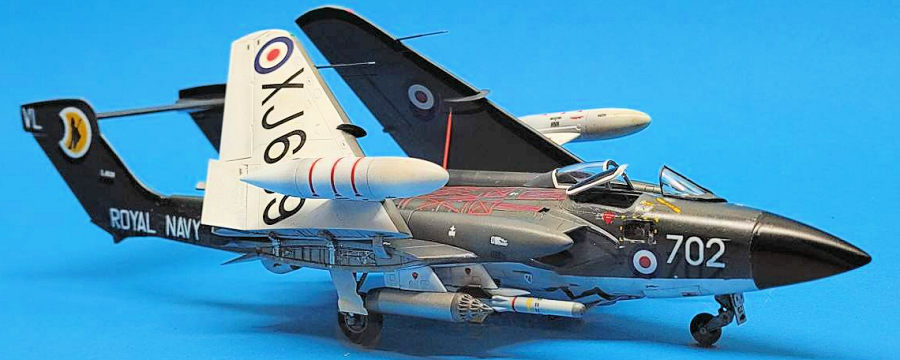
| THE KIT |
 This kit was first produced
by Cyberhobby in 2013, and issued by Revell in 2021. It depicts the final
production variant of the Sea Vixen, with enlarged booms and modified canopies
for both pilot and observer. For external stores, two drop tanks, two Red Top
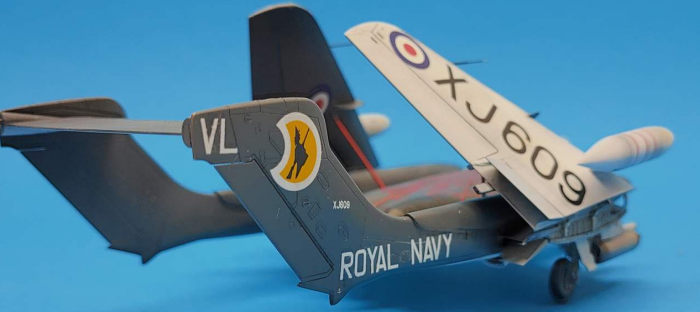
missiles and two rocket pods are included. There are two markings options, one
for a plane from 890 NAS stationed at Yeovilton in 1971, the other a machine
from 899 NAS aboard HMS Eagle in 1970. The parts are well-molded and virtually
free of blemishes. The decal sheet is nicely printed and in register. The clear
parts are neat and clean.
This kit was first produced
by Cyberhobby in 2013, and issued by Revell in 2021. It depicts the final
production variant of the Sea Vixen, with enlarged booms and modified canopies
for both pilot and observer. For external stores, two drop tanks, two Red Top
missiles and two rocket pods are included. There are two markings options, one
for a plane from 890 NAS stationed at Yeovilton in 1971, the other a machine
from 899 NAS aboard HMS Eagle in 1970. The parts are well-molded and virtually
free of blemishes. The decal sheet is nicely printed and in register. The clear
parts are neat and clean.
But if you ask people in the know, they are not happy with the kit. Damien Burke at thunder-and-lightnings.co.uk has a rather scathing verdict on the kit, listing a lot of inaccuracies and deficiencies in shape. I believe and trust him.
But somehow or other, I only read his judgement after buying the kit, and on balance could not be bothered to attempt any corrections. The thing is, I wanted a Sea Vixen. I had cast my eye on the (by all accounts vastly superior) 1:48 scale Airfix offering years ago, but had shied away due to both its size and pricetag. After my UK trip in 2024 with visits to both Yeovilton and Duxford, I was so impressed by this big brute of a fighter that I really needed to build one.
But now the Airfix kit was not available any more, so the Revell kit was my only ticket. Having seen two Sea Vixens in real life, I probably should find it beyond me to build this inferior kit. But on the whole it did look enough like a Sea Vixen to me, so I built it.
| CONSTRUCTION |
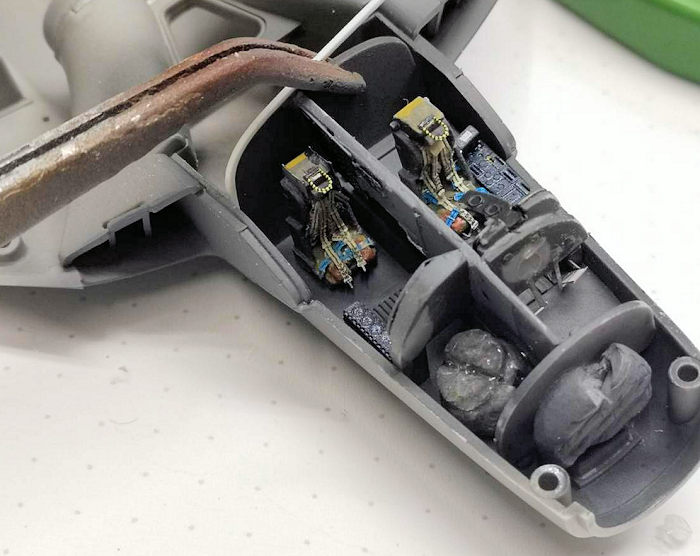
 Unsurprisingly, I started
with the cockpit, but also with as many subassemblies as I could get my grubby
little mitts on. I had bought an Eduard PE set for the interior, and an Airwaves
set for the exterior. Sadly, the latter catered to the FROG kit, so nothing
really fit, and I ended up using only the interior of the airbrake compartment
and part of the airbrake ribbing. The Eduard PE was designed for this kit, and
worked well, even though I left the most microscopic parts on the fret without
even trying to use them. But the PE surely made what could be viewed of the
cockpits more busy and lively.
Unsurprisingly, I started
with the cockpit, but also with as many subassemblies as I could get my grubby
little mitts on. I had bought an Eduard PE set for the interior, and an Airwaves
set for the exterior. Sadly, the latter catered to the FROG kit, so nothing
really fit, and I ended up using only the interior of the airbrake compartment
and part of the airbrake ribbing. The Eduard PE was designed for this kit, and
worked well, even though I left the most microscopic parts on the fret without
even trying to use them. But the PE surely made what could be viewed of the
cockpits more busy and lively.
Parts fit in general was good, and I will mention below mainly what I consider useful for any other people building this kit.
In step 11, please make really sure everything fits when mating the fuselage halves.
In step 12, you have to decide whether to show the Ram Air Turbine (RAT) deployed or not. The museum aircraft in Yeovilton has it deployed, maybe this is why it was included in the kit at all. This device will only be deployed in case of a loss of power, to maintain some emergency power for instruments, so it will never be visible under normal conditions.
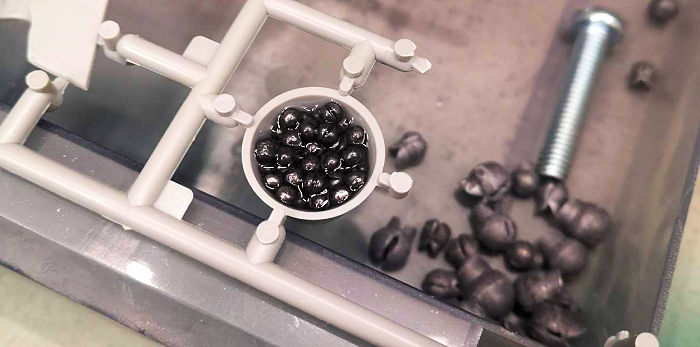
 Step 13 has you add 25
grams of weight to the nose cone. I filled it with small lead weights, but also
packed weight into and around the cockpits. Better err on the side of caution,
those big booms cry „I´m a tailsitter given the least encouragement!“ to me.
Step 13 has you add 25
grams of weight to the nose cone. I filled it with small lead weights, but also
packed weight into and around the cockpits. Better err on the side of caution,
those big booms cry „I´m a tailsitter given the least encouragement!“ to me.
I overlooked adding the auxiliary air intakes in step 15, and had to do some repainting on an already weathered underside when I installed them much too late. Simply following the instructions might have been the best bet here, so this will probably not be an issue for you.
Step 24 has two options for a partially and fully extended airbrake. For me, even the partially extended airbrake was so low that the front wheel wouldn´t have touched the ground. So I shortened it mercilessly. It might have been some mistake of my own making, or it actually is too long for the purpose. From what I know, the airbrake seems to open on the ground for loss of hydraulic pressure.
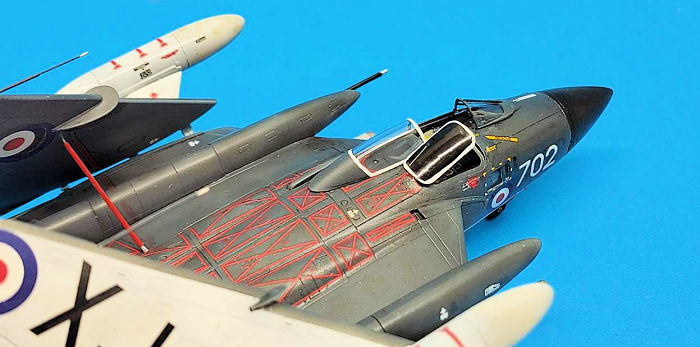
Basically, I built the interior bits and painted as much of the area directly surrounding the cockpits prior to closing the fuselage. As I wanted to pose the cockpits open, I only attached them at the end of the build, and masked over the cockpit accesses.
I left off the actual exhaust part B7 until near the end, and masked the exhausts with masking tape punched to the desired diameter. I had some work on the fuselage seam around the cockpits, possibly due to a mistake in positioning the cockpits. Yet the front cone fit well. I prepared as many subassemblies as possible prior to painting.
| COLORS & MARKINGS |
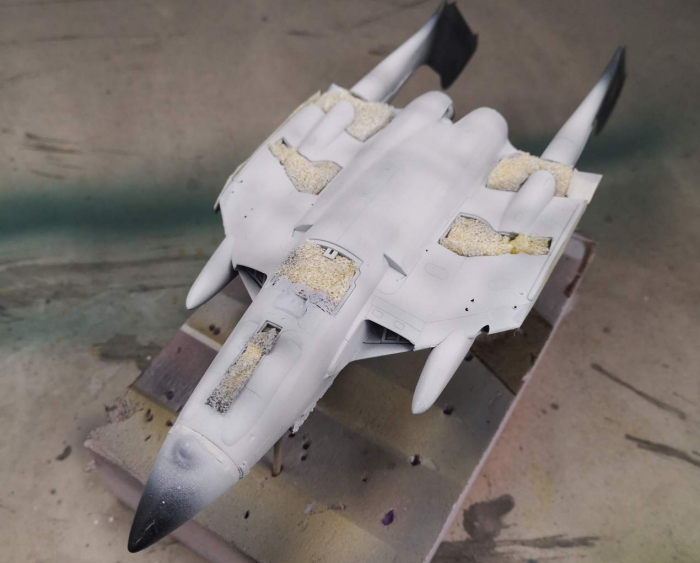
This kit needed quite some masking. Having primed it wherever possible using Stynylrez, it was painted using mostly Vallejo acrylics, including their now excellent metalizers. The wheelwells, painted in a light grey, were masked using pieces of sponge. I made use of preshading to add some variation to the model´s surface, but trying not to overdo it. Applied in moderation, it makes the model more credible to me, even though it is not correct, strictly speaking.
The white undersides were then masked off and the uppersides sprayed, in not too dark a grey, and also with some variations.
 The canopies and wheels
were masked with a set by manufacturer DEAD design, they worked virtually as
well as Eduard´s.
The canopies and wheels
were masked with a set by manufacturer DEAD design, they worked virtually as
well as Eduard´s.
Having all the major paint on, I gloss coated the model using Humbrol´s acrylic clear gloss. I needed several applications this time, and still found areas not quite glossy enough, and it was good I tried to give my best here.
Because the decals, well printed and stable as they were, had an annoying tendency to silver upon the slightest provocation. Especially the large collection of red warning markings on the dorsal side of the fuselage needed copious amounts of setting solution, plus repeated slicing open of the affected areas with a sharp blade and repeat applications of MicroSol. Even then, I found areas where I needed to apply paint over the decals after all my previous efforts to get them look right had failed. That happened on parts of the dorsal fuselage and on the lettering on the booms. The many (not as many as on a Phantom, but enough) stencils went on reasonably well, though.
Having put all the decals on, I recoated them with clear gloss again and turned into the home stretch. I next added a flat coat and then weathered the model using thinned artist´s oils in brown and black. Most of it ended up on the undersides, but some on the uppersides, too.
| FINAL CONSTRUCTION |
 I had attached the landing
gear and wheels prior to decaling, to ease placement of the model. Now I added
all the missing parts to the undersides as long as I could still place the model
onto its back. That was when I realized the missing auxiliary air intakes,
causing more work to blend them in both shapewise and paintwise. I then also
attached the flaps, gear doors, and the armament. Caution, those pylons are
handed! The tailhook was a bit iffy to install, and as mentioned above, I found
out that the airbrake actuator would extend it too far, so I shortened it.
I had attached the landing
gear and wheels prior to decaling, to ease placement of the model. Now I added
all the missing parts to the undersides as long as I could still place the model
onto its back. That was when I realized the missing auxiliary air intakes,
causing more work to blend them in both shapewise and paintwise. I then also
attached the flaps, gear doors, and the armament. Caution, those pylons are
handed! The tailhook was a bit iffy to install, and as mentioned above, I found
out that the airbrake actuator would extend it too far, so I shortened it.
Having added everything to the undersides, I placed the model on its wheels and very carefully added the canopies using white glue. The last task was to add the folded wings, one at a time, with ample curing time for the glue. I had added the drop tanks, the flaps and the pitot tubes prior to that, as the attachment points of the wingfold are small and iffy. In the end, it all held up somehow, but the wings ended up in different angles. But I was afraid of the damage I might do if I tried to correct the angles at that point, so I left them as they were. As I do not participate in competitions, I can live with that.
| CONCLUSIONS |
Even though it is not the best of kits, it builds fairly well and you end up with a unique model of an impressive aircraft. The FAA scheme makes it look quite attractive, and the interesting configuration of the crew positions adds interest. So I am quite happy with it and like to have it in my FAA collection.
| REFERENCES |
https://www.thunder-and-lightnings.co.uk/seavixen/index.php
https://en.wikipedia.org/wiki/De_Havilland_Sea_Vixen
Frank Spahr
31 March 2025
Copyright ModelingMadness.com. All rights reserved. No reproduction in part or in whole without express permssion from the editor.
If you would like your product reviewed fairly and fairly quickly, please contact the editor or see other details in the Note to Contributors.