Unicraft 1/72 Martin-Baker Tankbuster
| KIT #: | |
| PRICE: | $27.00 |
| DECALS: | One option |
| REVIEWER: | Peter Burstow |
| NOTES: | Short run resin kit |
| HISTORY |
 Conceived by Sir James Martin, the
Tankbuster was a paper design. Powered by a Rolls-Royce Griffon and
armed with an anti-tank gun, it would have been a formidable ground
attack aircraft. The gun proposed was the Ordnance QF-6 6 pound
anti-tank gun, 57mm bore, also produced in the U.S. as the M1. A later
modification of the GF-6 was the Mollins gun as used in the Tse-Tse
Mosquito.
Conceived by Sir James Martin, the
Tankbuster was a paper design. Powered by a Rolls-Royce Griffon and
armed with an anti-tank gun, it would have been a formidable ground
attack aircraft. The gun proposed was the Ordnance QF-6 6 pound
anti-tank gun, 57mm bore, also produced in the U.S. as the M1. A later
modification of the GF-6 was the Mollins gun as used in the Tse-Tse
Mosquito.
It was intended to include 4900 lbs
of ½ inch armour plate. The aircraft was a conceptual forerunner of the
A-10.
| THE KIT |
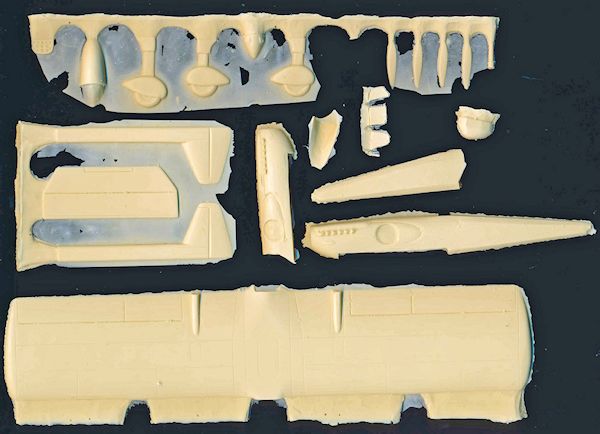 Coming in a very small top opening box,
there are 23 cream coloured resin parts and a single vac-formed canopy. The
decal sheet had markings for one RAF aircraft. An interesting additional
part is a resin mould of the canopy, so another could be smash or vacuum
moulded.
Coming in a very small top opening box,
there are 23 cream coloured resin parts and a single vac-formed canopy. The
decal sheet had markings for one RAF aircraft. An interesting additional
part is a resin mould of the canopy, so another could be smash or vacuum
moulded.
The parts are full of bubbles, there are
plenty that will need attention. I counted 41 in an 8mm diameter circle on
the fuselage. There is a warning about brittle resin and they are not
kidding.
| CONSTRUCTION |

I then added the port front fuselage
half, fit was not to bad, but it will need quite a bit of filling. I found a
review on another site which confirmed my thought that this would be a
tail-sitter, so I filled the forward fuselage with lead shot (No.8
Winchester) and superglue.
I then added the one piece wing, a lot of
preparation needed, as it had a pouring lug down most of the leading edge,
As I removed this more and more bubbles appeared. It was also covered in
little resin lumps, especially in the panel lines and the aileron hinge
lines, most of these revealed another bubble as I cut them off. The wing
fitted, sort off. Good fit at the trailing edge, about 2mm gaps at the
roots, and a canyon at the leading edge.
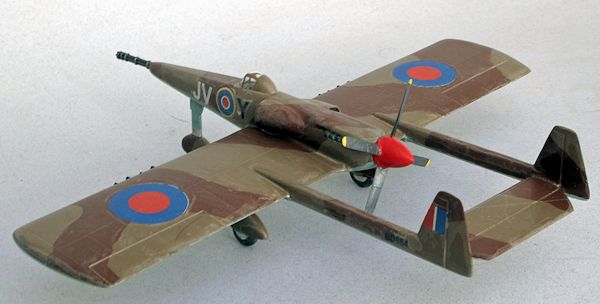
Added the tail booms and the tailplane,
always a tricky operation on twin boom aircraft. The booms were a good deal
smaller than the stubs mounted on the wing as a result of the step removal,
I lined them up with the upper surface and left a step underneath. It ended
up a little out of square, but so was everything else on this model! From
most angles it looks OK.
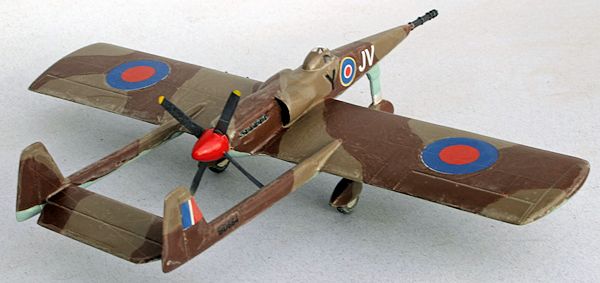
 position
it. It's a firm tail sitter, despite the nose forward of the cockpit being
filled with lead, I filled the cockpit with more lead, but still not enough.
I detached the main undercarriage legs and moved them 2mm towards the tail,
that was just enough for it to become balanced. See what happens when I add
the prop.
position
it. It's a firm tail sitter, despite the nose forward of the cockpit being
filled with lead, I filled the cockpit with more lead, but still not enough.
I detached the main undercarriage legs and moved them 2mm towards the tail,
that was just enough for it to become balanced. See what happens when I add
the prop.
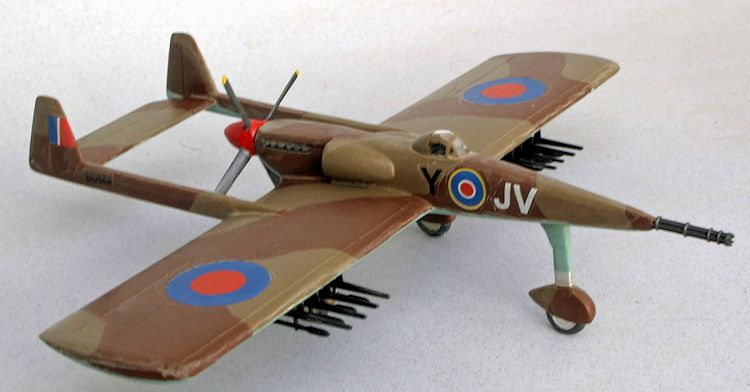
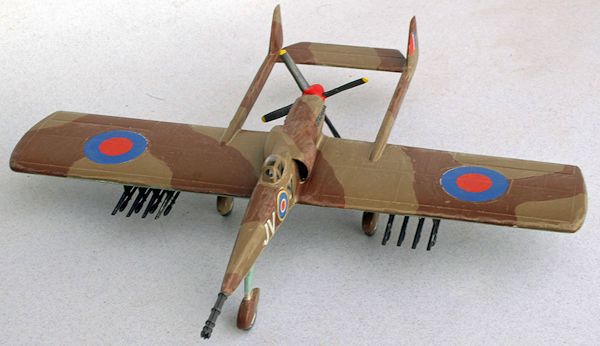
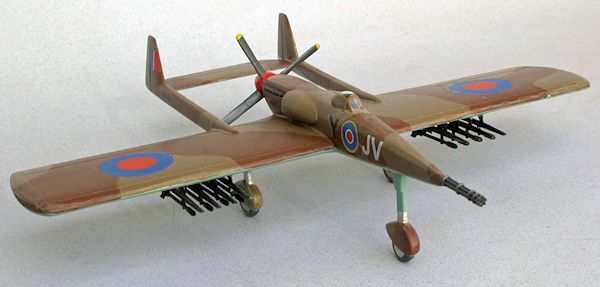
I decided to go with the box art desert
air force scheme. First another coat of all-surfaces automotive primer,
whoops, more bubbles and other glitches to fix. I
painted the underside light blue, and did the topside light and dark brown.
| FINAL CONSTRUCTION |
Like the gun, the supplied resin blades
were not too good. The spinner was OK, so I used a cuffed
 Hamilton Standard
propeller, left over from a recent Mustang build. These blades where much
nicer looking and close to the right diameter. I joined the spinner to the
prop, and added a disc of plasticard to the front, then filled the void
around the hub.
Hamilton Standard
propeller, left over from a recent Mustang build. These blades where much
nicer looking and close to the right diameter. I joined the spinner to the
prop, and added a disc of plasticard to the front, then filled the void
around the hub.
A Hobbyboss Tempest kit donated 8 rockets and rails, which I installed under the wings.
I had to touch up a few spots, then I
then gave it a coat of floor polish to help the decals.
I used
the supplied kit decals which were ALPS style with a continuous carrier
film. The colours were a little bright and shiny, and registration was not
the best, with a white line along the edges of the roundels and fin flashes.
They worked OK with a little Mr Mark Setter.
Another small touch up paint here and
there, including going over the edges of the roundels and flashes to hide
the white line and shiny carrier. Then a I gave it a coat of floor polish
with some added Tamiya buff to seal and dull the decals. A final spray of
dull coat and call it done.
| CONCLUSIONS |
A rather difficult build of a concept ground
attack aircraft. Only a few parts, but fit issues and those bubbles meant a lot
of work and not much fun. I had a real struggle to remain motivated enough to
finish it, but resisted temptation to abandon it.
It looks much better finished than I expected.
| REFERENCE |
November 2013
Copyright ModelingMadness.com. All rights reserved. No reproduction in part or in whole without express permission from the editor.
If you would like your product reviewed fairly and fairly quickly, please contact the editor or see other details in the Note to Contributors.