| KIT #: | 257 |
| PRICE: | $10.00 in 1990 |
| DECALS: | Two options |
| REVIEWER: | George Schembri |
| NOTES: |
| HISTORY |
Origins of the Alpha Jet
date back to 1969 when France and Germany agreed to a common specification and
aircraft type that would be produced jointly by the two national industries. The
new jet trainer was designated to replace the existing T-33, Mystere-IV and G-91
aircraft. The Alpha Jet was selected in 1970,
 after being
evaluated against the Aerospatiale (NORD)/MBB (Messerschmitt-Bölkow-Blohm) E650
Eurotrainer. The Alpha Jet would be designed with high wing design allowing
maximum clearance for underwing store, being capable to serve as a trainer and
also to meet Germany’s need for a light ground attack aircraft.
after being
evaluated against the Aerospatiale (NORD)/MBB (Messerschmitt-Bölkow-Blohm) E650
Eurotrainer. The Alpha Jet would be designed with high wing design allowing
maximum clearance for underwing store, being capable to serve as a trainer and
also to meet Germany’s need for a light ground attack aircraft.
First flight of the Alpha Jet occurred in October 1973 with first production delivery occurring in late 1978. The two-seater trainer and light strike/recon aircraft would be powered by two 2976lb thrust SNECMA/Turbomeca Larzac C5 Turbofan engines. The pointed nose Luftwaffe version would utilize a belly mounted 27mm Mauser cannon with wing pylons capable of providing an external maximum weapons load of 5500lbs.
| THE KIT |
 I have had
the pleasure of building several aircraft from this Heller line of kits which
all had French Instructions with English/German insert page. The Kit No 257 has
the typical basic cockpit area made up of plain seats and instrument panel
pieces without detail and with separate joysticks. There are four separate
clusters of dark green plastic with 59 pieces and a transparent cluster with a
canopy and a couple of wing mounted leading-edge landing lights (62 pieces
total). The kit has raised panel lines with recessed lines for the control
surfaces. The only external stores options are to mount the under-body pod and
two bare inner wing pylons and two fuel tanks mounted on the outer wing pylons.
I have had
the pleasure of building several aircraft from this Heller line of kits which
all had French Instructions with English/German insert page. The Kit No 257 has
the typical basic cockpit area made up of plain seats and instrument panel
pieces without detail and with separate joysticks. There are four separate
clusters of dark green plastic with 59 pieces and a transparent cluster with a
canopy and a couple of wing mounted leading-edge landing lights (62 pieces
total). The kit has raised panel lines with recessed lines for the control
surfaces. The only external stores options are to mount the under-body pod and
two bare inner wing pylons and two fuel tanks mounted on the outer wing pylons.
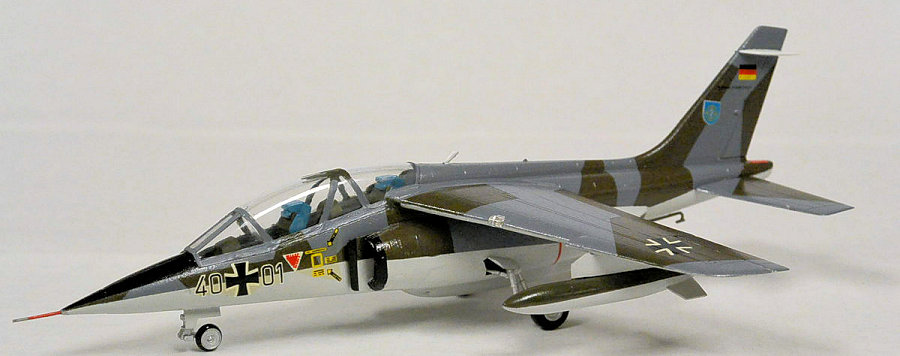
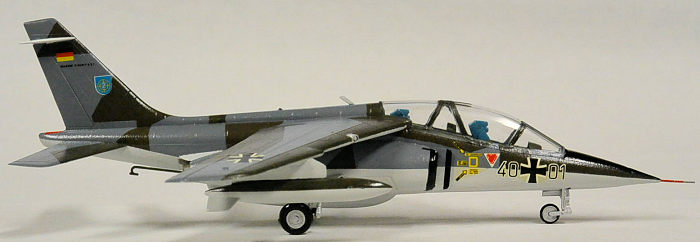
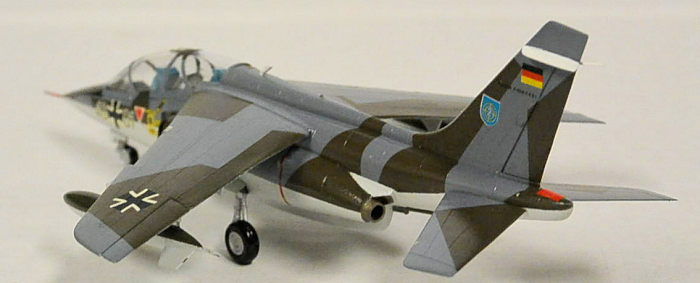
With the wing mounted landing lights and tail fin antenna fairings, the model depicts an early production/prototype model. Decals allow the choice of a fighter bomber prototype from the Luftwaffe JaboG 49 which flew at Furstenfeldbruck or a colourful French Air Force Prototype with call No F-ZWRX. I found an actual picture of the German version of this kit in one of my Salamander Publications ‘An Illustrated Guide to Modern Fighters and attack Aircraft’ published in 1980! I also found the French version of this kit on the web when I search the call letters – COOL!!
There are aftermarket suppliers which provide detailed interior and inlet components and replacement canopies if one is willing to spend the extra cash and wishes to dress up the kit – I did not choose to go that route.
| CONSTRUCTION |
I started assembly with the
landing gear housing and initial landing gear pieces then gluing it to the into
the bottom fuselage section. The fuselage was assembled with the cockpit tub in
place but leaving out the ejection seats instrument panels and joysticks until
final assembly. Some nose weight was added to ensure a properly sitting model.
The bottom fuselage section did not fit that that great, needing filler pretty
much all ar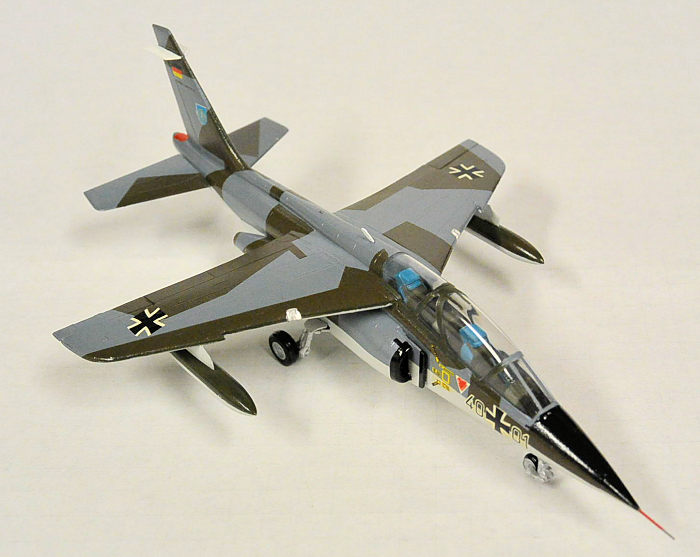 ound
the joints. Choosing to build the German aircraft, the pointed nose piece also
was a bit of a mismatch and required some filler (and that’s when I broke off
the front pitot tube for the first time). The inlets are shallow and lack any
detail and also required some filler, as did the underbody cannon fairing and
rear jet exhaust nozzles. You will need to be careful with the landing gear
pieces as they need to be in place for the entire build and I kept breaking off
one of them was assembly continued on.
ound
the joints. Choosing to build the German aircraft, the pointed nose piece also
was a bit of a mismatch and required some filler (and that’s when I broke off
the front pitot tube for the first time). The inlets are shallow and lack any
detail and also required some filler, as did the underbody cannon fairing and
rear jet exhaust nozzles. You will need to be careful with the landing gear
pieces as they need to be in place for the entire build and I kept breaking off
one of them was assembly continued on.
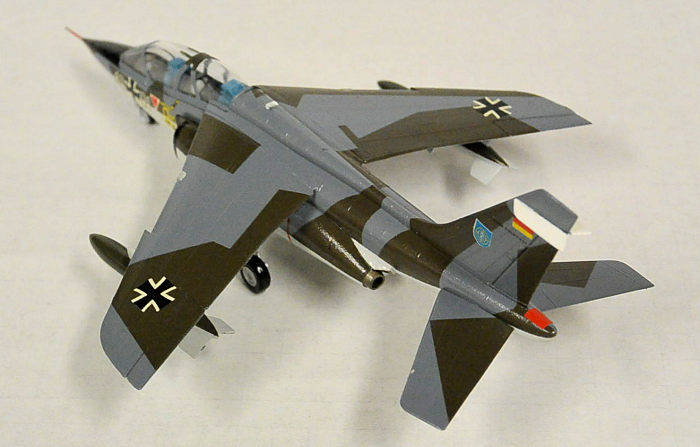
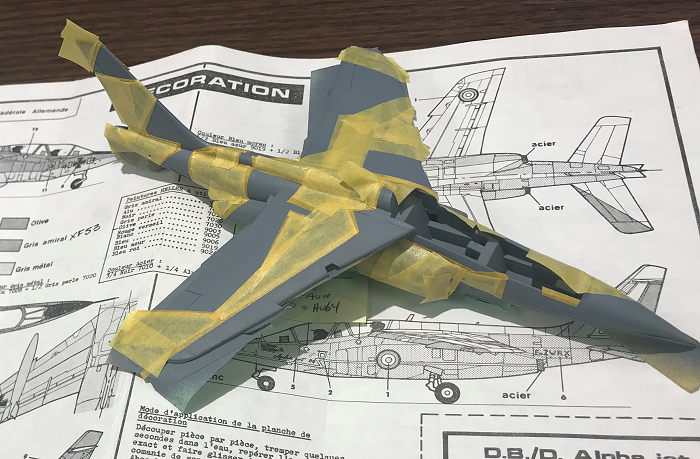
The French instructions have a sectional diagram showing proper wing anhedral and underwing pylon alignment. Under wing flap control and pylon/tanks were left until final assembly. For some reason, one wing had a bigger gap on the upper surface than the other, needing more filler. Care is required to remove the raised panel line detail at the wing roots joint.
If you choose to try to build a later production model, the leading edge landing lights will need to be glued in pace and fill them and sand them smooth to cover them up. I decided to keep with the prototype build and left the lights for the final stages. Another noticeable item is the fin mounted antenna fairings which are not seen on later production models. I wanted to keep these also but left them for final assembly as the were to be painted white and gluing them in before painting the camo scheme would only make things difficult. I also left the stabiliser pieces until final assembly.
Looking at the assembled plane and all the filling and raised panel lines, I have to admit that I was a little apprehensive about how the final product would look but decided to trudge on with the kit knowing the real fun was about to begin with painting.
| COLORS & MARKINGS |
 Since the
model was going to be masked with no blended paint lines, I decided to use my ol’
Paasche H-1 external mix airbrush as I am not yet that comfortable with my new
internal mix dual-action NEO airbrush just yet (I know, I know – gotta jump off
the deep end on the next build).
Since the
model was going to be masked with no blended paint lines, I decided to use my ol’
Paasche H-1 external mix airbrush as I am not yet that comfortable with my new
internal mix dual-action NEO airbrush just yet (I know, I know – gotta jump off
the deep end on the next build).
Looking at the instructions, the undersurfaces were to be painted with a 50/50 mix of Aluminum 7008 and Pearl Grey 7020 – looking at all the joint lines, I decided to play it safe and chose a little gray colour and hope to hide some of my poor joint lines. I choose Vallejo Model Air 71.276 USAF Light Grey with no thinning and was happy with the look and shade. Division lines shown in the instructions matched up with the photo I following the instruction sheet for division lines. The next shade was Admiral Grey 7001 – I had a few choices in deciphering the paint codes and decided that Tamiya XF-53 Neutral Grey was a proper match. Additional masking was required before the next shade Olive 7030 – again, a few ways to go but deciding on Tamiya XF-58 Olive Green would be a proper match. The Tamiya Acrylics were thinned down using X-20A thinner in a smaller container for each colour. Tamiya Masking Tape was used once again, I really like this taping product as it does provide a nice sharp paint line with minimal bleed noticed and no paint pulling off during removal. With the unit painted, the cockpit tub was then painted using Tamiya XF-66 Light Grey.
 As the
camouflage was basically completed all previous apprehension was gone as the
painted unit really made the whole thing come together and the questionable
assembly joints were no longer an issue. The complete plane was sprayed with
Future/Pledge Floor Gloss in prep for the decals. I used a few black strip
decals for a nice crisp line on the anti-glare panel. Deciding to add black
edging at the inlets, again black trim decals were used for a crisp sharp line,
brushing on Tamiya X-18 Semi-Gloss Black to complete the black surfaces. The kit
decals were very stiff and had some yellowing but were still very usable, using
the Micro Set/Sol system gave me great adhesion and the decals softened up
pretty good. The German flag had to be trimmed with an Exacto since the colour
keying was noticeably off just a touch. Photos showed a red patch at the rear
base of the tail and this was added using a red trip decal. Looking at the final
item, I am slightly off target on the wing insignia, but I didn’t really notice
until the decals were set – no biggie. The rear ‘danger’ triangles were to be
added after the canopy placement. The rear red engine warning lines were added
from my spare decal pile.
As the
camouflage was basically completed all previous apprehension was gone as the
painted unit really made the whole thing come together and the questionable
assembly joints were no longer an issue. The complete plane was sprayed with
Future/Pledge Floor Gloss in prep for the decals. I used a few black strip
decals for a nice crisp line on the anti-glare panel. Deciding to add black
edging at the inlets, again black trim decals were used for a crisp sharp line,
brushing on Tamiya X-18 Semi-Gloss Black to complete the black surfaces. The kit
decals were very stiff and had some yellowing but were still very usable, using
the Micro Set/Sol system gave me great adhesion and the decals softened up
pretty good. The German flag had to be trimmed with an Exacto since the colour
keying was noticeably off just a touch. Photos showed a red patch at the rear
base of the tail and this was added using a red trip decal. Looking at the final
item, I am slightly off target on the wing insignia, but I didn’t really notice
until the decals were set – no biggie. The rear ‘danger’ triangles were to be
added after the canopy placement. The rear red engine warning lines were added
from my spare decal pile.
| CONSTRUCTION CONTINUES |
The port side landing gear broke off during painting, so it was repaired and the final rocker arms and tires were glued in place and were painted with Tamiya XF-16 Aluminum and gear hatch covers were then added as was the painted rear stabilizers and arrestor hook. The underwing flap controls and pylons/tanks were glued in place after a little paint was scrapped off to ensure I was gluing plastic to plastic and checking the alignment diagram once again. Care is required as there are no alignment holes for the tanks and pylon, just a light footprint of where they need to go.
I figured not much was going to be seemed in the cockpit with the canopy in place so I used some spare inaccurate instrument decals were used just so there was something to break up the gray colour. Seats, panels and joysticks were paint and glued in place.
 The cockpit
was masked separately and brushed to match the camo scheme. The canopy fit well
enough but I did not notice until it was placed that there was going to be a
thin seam line just below the actual scribed canopy lines. If I noticed sooner,
I would have glued the canopy in place and masked it for spraying making sure
the seam line was minimalized before painting, but again – no biggie.
The cockpit
was masked separately and brushed to match the camo scheme. The canopy fit well
enough but I did not notice until it was placed that there was going to be a
thin seam line just below the actual scribed canopy lines. If I noticed sooner,
I would have glued the canopy in place and masked it for spraying making sure
the seam line was minimalized before painting, but again – no biggie.
Rear antennae fairing were added, again care is required as there are no alignment holes and proper equalized placement is essential as the pieces are up high in the open and so close together and are painted a nice bright white.
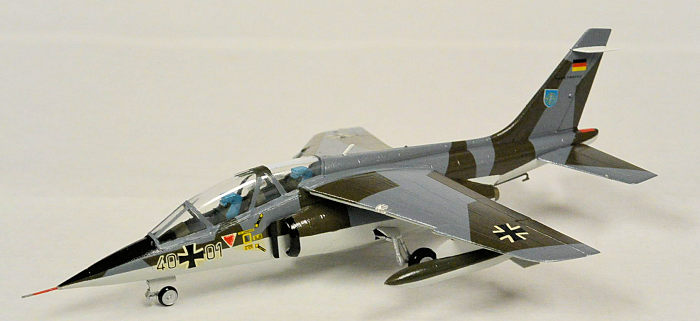
FINALLY – a replacement pitot tube was added on the front as the one from the kit must have broken off about 10 times and somehow disappeared, the newly placed tube was painted as in the photo using Testors 2719 Italian Red and Tamiya XF-11 Silver.
Keeping the rear ‘danger’ triangles for las was a mistake as they are nowhere to be found and since the front ones were set in place any substitution would be noticeable. I am sure they will turn up sometime and when they do they will be added.
As a final sign of defiance – I added the tail squadron badge from MFG2 Marineflieger and the tail stenciling from a recent F-104G kit just to see if anyone notices.
| CONCLUSIONS |
This was a nice build for me. I’ve always favoured the sharp Luftwaffe camouflage scheme and it is easy enough using a good quality tape. The Alpha Jet has some very sharp lines making it look like a pint size contender with some noticeable punch. I wanted an updated kit for a future build and hastily went out and bought the Revell 03995 Alpha Jet E kit with ‘Alpha 1000000H’ markings which commemorate the French logging one million flying hours – only to find that the Revell kit uses the exact same moldings as this old Heller kit – but not problem, because I enjoy this finish product very much and will gladly build it again.
The poor fits on the fuselage, wings and pylons might make this a tough build for beginners but it is a slight challenge worth taking as it is a nice looking final product
| REFERENCES |
Military Aircraft of the World, Editor: Chris Chant. Presidio Press, California. 1981
An Illustrated Guide to Modern Fighters and Attack Aircraft, Bill Gunston, Salamander Publications, 1980
Various websites.
16 October 2020
Copyright ModelingMadness.com
If you would like your product reviewed fairly and fairly quickly, please
contact the editor or see other details in the
Note to
Contributors. Back to the Main Page
Back to the Review Index Page
Back to the Previews Index Page