| KIT #: | 72063 |
| PRICE: | $35.00 |
| DECALS: | Six options |
| REVIEWER: | Fernando Rolandelli |
| NOTES: |

| HISTORY |
 The
role of Mirage IIIEAs in the 1982 war is very well known and I shall not expand
or polemize on it. Suffice to say that, if gaining air superiority was their
role, the results leave a bit to be desired.
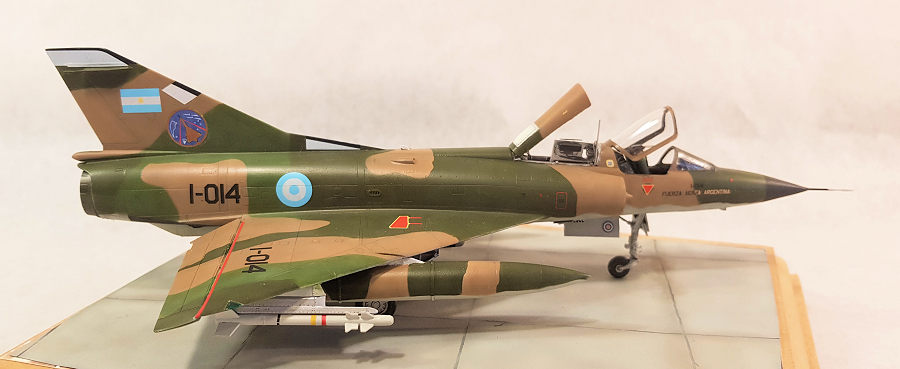
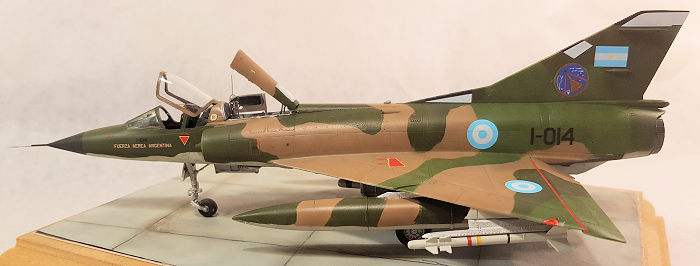
I chose to represent I-014 in the immediate pre-war times, during an exercise involving a deployment to the Río Gallegos air base in the South of the county during August- September, 1981, during an exercise called “Alerta V”. That would ease the problem of the changing insignia and ID panel addition (and erasure) during the conflict, as well as skipping any weathering whose excess is today a fashion, while allowing at the same time to avoid representing an aircraft while taking part of that tragic mistake that was the 1982 war. It should be said that I-014 made several escort and decoy missions.
| THE KIT |
Modelsvit Mirage IIIE family remains relatively new (showing 2018) and probably the best in the scale. Detail is exquisite, at the price of some complexity in the parts layout; it looks as if the molding tech used could not capture all the detail unless a lot of parts are used. Really it looks like a 1/48 kit. Includes a small PE set, masks and good, very complete decals. More on this later.
| CONSTRUCTION |
 I
began with the cockpit, as always. The aforementioned fact that there are an
inordinate amount of parts shows here; to make things worse, the assembly is
interdependent, and pieces should be put together at the same time, but besides
you need to let subassemblies dry, so you are on a bit of a dilemma, while
trying to keep them at least square. Any small deviation adds up to the final
result. Putting extra care, everything goes well in the end. Windscreen fit was
not great, and any minimal deviation will compose the problem.
The way intakes are intended to be assembles is strange, but once you understand it, they go without problem. Also, the whell wells, involving some parts bending. Exhaust is also complex, and the way Modelsvit wants you to use the PE doesn´t help. Discarding the PE actuators in no great loss anyway.
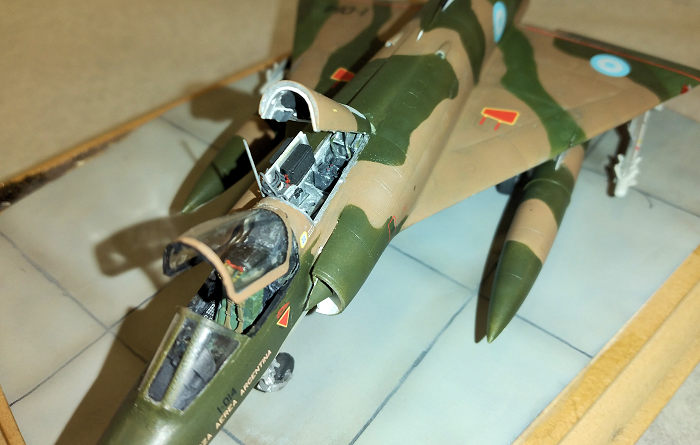
General assembly was made more complex on my own fault, as I got tempted to profit of the separate dorsal spine and scratch build the electronics bay. A friend of mine did a wonderful job on a 1/48 kit and I said “Fine”. Well, it was not so fine; the very small space and the plethora of electronic boxes gave me the fits, but in the end it looked the part, and certainly the bay and the open hatch became the attention center of gravity of the model.
| COLORS & MARKINGS |
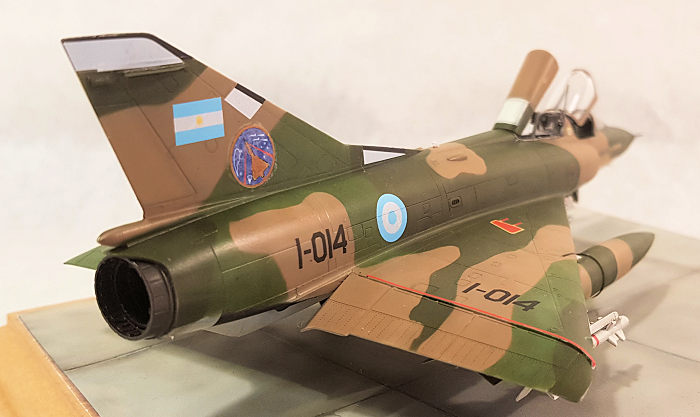
Argentinian Mirages and Daggers were painted in a mimic of USAF SEA scheme, the former in French and the later in RAL paints. I used standard Modelmaster paints, FS34079, 34102 and 30219 for the upper surfaces, and FS36622 for the undersurfaces. Many modellers consider these are painted in “Dirty White”, but I think it is a misnomer, probably originated in some technician working on the planes but lacking the knowledge (and interest) about the colours. I adapted the colour boundaries according to photos of the real machine in Padin’s booklet.
 Decals
are very good, though a bit on the light side in the case of the Light Blue in
the roundels: they look as if permanently under direct sunlight. The G8C emblem
is a bit of a mess: it changed some of its features when transitioning pre- and
post-war. In this scale, only a true expert will notice. Worse is the colour of
the outer ring and the Mirage silouhette, which are depicted in a light Yellow,
while they should be in a color called “Old Gold”, in fact, a dark Bronze. I
tried an aftermarket decal, but they were depicted in a bright Gold which was
not correct either. Something had to be done. I resorted to some masks for RAF
WW2 roundels (plenty of circle masks of every size) and could scrap a ring which
was painted in Revell Bronze, then superimposed to the insignia, neatly covering
the outer Yellow ring. The inner silouhette was just painted over the existing
Yellow design with a fine brush.
Pylons, tanks and missiles have a very light adhesion to the airframe, and in fact some fell during transport to a convention. Undercarriage however felt very strong. The open canopy and the bay covering are also thinly glued and look as if will fall on the weight of the dust accumulating on it.
| CONCLUSIONS |
Argentine jets are not my piece of cake, but I felt that this one deserved to be built. It is an extremely good kit, very well and finely detailed, its assembly very precise though a bit frustrating. Certainly it does not leave you wanting to build a whole family, but you are left with a very good replica of a worthy aircraft.
| REFERENCES |
“Dassault Mirage IIICJ & IIIEA”, Serie Fuerza Aérea # 15, Jorge F. Núñez Padín. Gráfica Latina, 2008
“Air War in the Falklands, 1982”, Christopher Chant, Osprey, 2001
“Mirage V Lock-On # 11 Aircraft Photo File”, Willy Peeters, Verlinden Publications.
Fernando
Rolandelli
17 December 2024
Copyright ModelingMadness.com. All rights reserved. No reproduction in
part or in whole without express permission from the editor.
If you would like your product reviewed fairly and fairly quickly, please
contact
the editor or see other details in the
Note to
Contributors. Back to the Main Page
Back to the Review
Index Page
Back to the Previews Index Page