Wingman 1/48 Kfir C2/C7
| KIT #: | 48002 |
| PRICE: | $99.95 SRP |
| DECALS: | Twenty one options |
| REVIEWER: | Dan Lee |
| NOTES: | Includes PE, Resin and Brass parts |
| HISTORY |
The Israel Aircraft Industries (IAI) Kfir was
developed from the earlier French/Israeli Mirage 5 project which was was to
replace Mirage IIIs lost in combat and accidents and was cancelled after
DeGaulle imposed an arms embargo in 1968. Israeli intelligence bought parts from
3rd party suppliers and allegedly stole the plans for the Mirage from
sympathetic Dassault employees. Several variations of the Mirage 5 were
developed in the late 60s and early 70 by IAI. The first version was the Nesher
which served in the Yom Kippur War, but was found lacking in terms of avionics
and engine thrust. The Kfir was also developed from the Mirage 5 airframe, but
 was powered by the GE J-79 turbojet engine rather than the Atar. The airframe
had to be modified (shortened and widened) for the J-79, the engine was placed
in a Titanium heatshield and the additional air intake at the base of the rudder
for extra cooling. Larger canards were added as well as the intakes were
enlarged to allow more airflow to the J-79. Finally the landing gear was
strengthened due to the increased weight plus payload.
was powered by the GE J-79 turbojet engine rather than the Atar. The airframe
had to be modified (shortened and widened) for the J-79, the engine was placed
in a Titanium heatshield and the additional air intake at the base of the rudder
for extra cooling. Larger canards were added as well as the intakes were
enlarged to allow more airflow to the J-79. Finally the landing gear was
strengthened due to the increased weight plus payload.
The Kfir began to replace the Nesher starting in 1975 when they were first issued to the 101st Fighter Squadron. They were used as air superiority fighters till 1976 when the more modern F-15 and later F-16As arrived. Instead the Kfir became the primary fighter bomber of the IAF and served in the Lebanon invasion as well as various shooting matches with Syria till the late 90s when they were phased out of service.
Foreign sales were limited because the US had final say on where the J-79 equipped fighters would go. However, various refurbished planes were sold to Ecuador, Colombia and Sri Lanka.
25 modified C1 versions were later loaned to the USN as aggressor planes for TopGun and known as the F-21A Lion. The C7 version (this model) was equipped with two extra hard points for laser guided bombs as well as more advanced electronics and cockpit layout.
| THE KIT |
 Kinetic released their Kfir kit in early 2013. At the
end of 2013 Wingman Models (a joint venture between AIRDOC and IsraDecal) took
the sprues of the kit minus some of the weapons, added various resin, brass and
PE bits and decals to provide what they called the ultimate kit minus some of
the weapons sprues provided in the original Kinetic plastic kit.
Kinetic released their Kfir kit in early 2013. At the
end of 2013 Wingman Models (a joint venture between AIRDOC and IsraDecal) took
the sprues of the kit minus some of the weapons, added various resin, brass and
PE bits and decals to provide what they called the ultimate kit minus some of
the weapons sprues provided in the original Kinetic plastic kit.
The Kinetic sprues look good in the box with no flash, nice detail and fine panel lines on the parts. The resin parts are quite nice, but have some usual surface texture from the 3D printed originals that needs to be sanded down. The castings are well done with no short shot pieces or pinholes.
The decals are from Cartograf and the brass parts are from Master so they are of quite excellent quality.
| CONSTRUCTION |
It all began with the cockpit. I followed the instructions, removed the C7 specific resin parts from their casting blocks, cleaned them up and stuck them into the fuselage with CA glue instead of using the original plastic ones. I did not have to fight to get the resin cockpit in place which is what usually happens for me. I did leave out the control stick, ejection seat and instrument panel till have as I have a habit of knocking these parts out during somewhat rough handling during sanding.
 The various interior parts were added such as the
exhaust tube before sealing up the fuselage using my now standard process of
using gap filling CA glue on the visible seams and Tamiya extra thin cement
everywhere else. The seams were sanded down and polished using various grade of
sandpaper. This was repeated a couple of times till I was satisfied that any
visible seams were gone. I replaced what ever panel lines and details using a
small saw blade for the panel lines and a metal shape template with a pin jammed
into a pin vise for the hatches and ports.
The various interior parts were added such as the
exhaust tube before sealing up the fuselage using my now standard process of
using gap filling CA glue on the visible seams and Tamiya extra thin cement
everywhere else. The seams were sanded down and polished using various grade of
sandpaper. This was repeated a couple of times till I was satisfied that any
visible seams were gone. I replaced what ever panel lines and details using a
small saw blade for the panel lines and a metal shape template with a pin jammed
into a pin vise for the hatches and ports.
When I attached the nose and intakes I was dismayed to
find rather large steps and gaps where the joins are. Like my earlier Kinetic
kit builds, I masked off the detail I had to protect using thicker 3M Blue
painter's tape, put a thick bead of gap filling CA glue onto those seams and
then sand/fill several times to get it smooth enough for my liking. This was
rather frustrating because I had expected more from a newer Kinetic kit. Fool
 me
once, shame on you. Fool me twice shame on me. Fool me three times and it's a
damn trend. At this point, I won't expect a Tamiya slammer from any Kinetic kit
unless proven otherwise. Despite the really nice detail, expect a lot of work.
me
once, shame on you. Fool me twice shame on me. Fool me three times and it's a
damn trend. At this point, I won't expect a Tamiya slammer from any Kinetic kit
unless proven otherwise. Despite the really nice detail, expect a lot of work.
The wings and cannon inserts went on without too much fuss although I did need some Vallejo plastic putty around the seams of the cannon inserts. I did predrill the holes for the pylons.
At this point is where I stopped for a while. The reason was I found out that the two piece small intakes were a pain to glue together and sand. I was surprised and dismayed to find out that I had sanded three of the four small intakes lopsided which I could not correct. Instead of yelling at the ceiling in rage, I decided to purchase some replacement resin intakes and antennas from Quickboost.
| COLORS & MARKINGS |
I sprayed the cockpit Xtracrylix Dark Gull Grey and the remaining details were brush painted using toothpicks, 01 and 00 tipped brushes. Next the exhaust tube interior was painted using Tamiya XF-56 Metallic Grey.
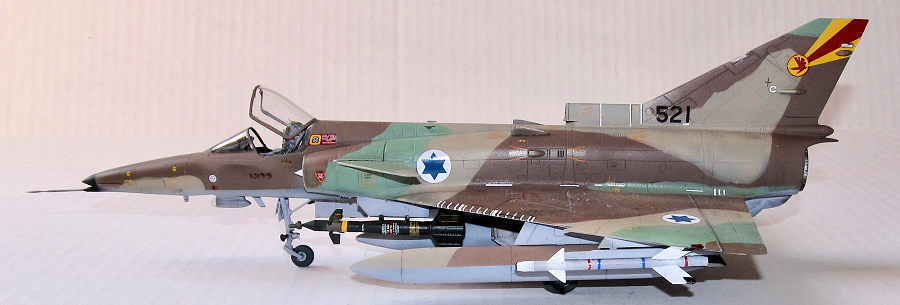
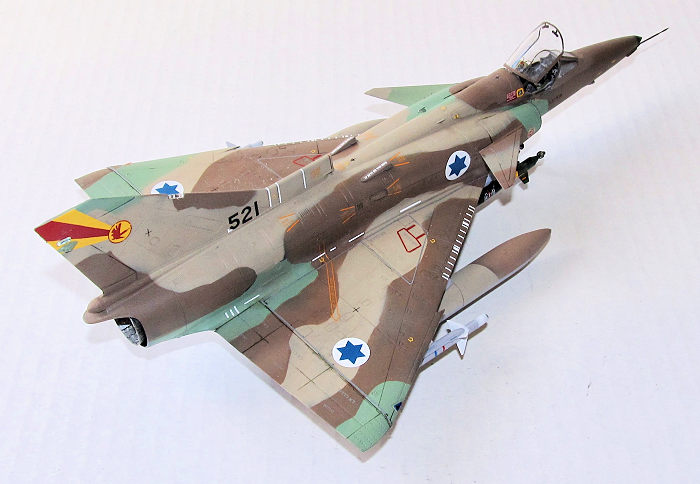
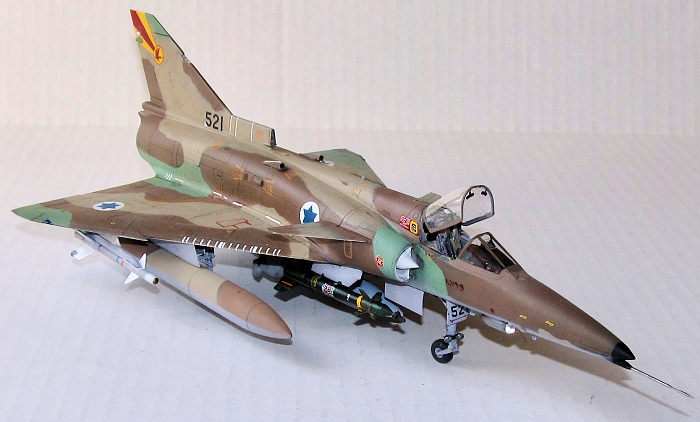
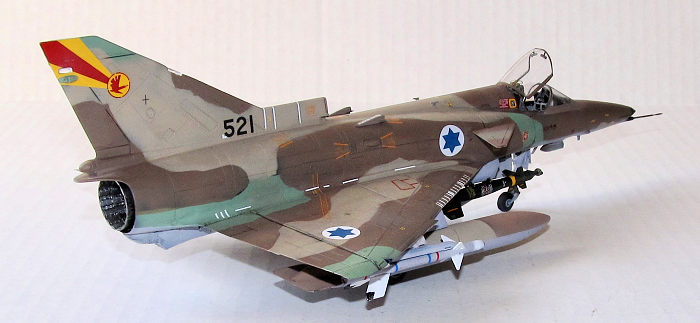
I really wanted to paint the sand/brown/light green Netz scheme which is quite striking so I selected the 9th scheme which was a C7 model assigned to the now disbanded No. 144 Squadron (Tayset) from 1994.
 I masked off the cockpit and engine area before I
primed the model with Stynylrez Primer (thanks again to the late RexinTN for
putting me onto this great product.) Once the primer coat was dry to the touch I
sprayed on Mission Models Light Ghost Grey on the underside and half way up the
fuselage of the Kfir. I let both coats dry at least 24 hours before masking off
the lower side of the fuselage before spraying on Tamiya XF-57 Buff on the
topside.
I masked off the cockpit and engine area before I
primed the model with Stynylrez Primer (thanks again to the late RexinTN for
putting me onto this great product.) Once the primer coat was dry to the touch I
sprayed on Mission Models Light Ghost Grey on the underside and half way up the
fuselage of the Kfir. I let both coats dry at least 24 hours before masking off
the lower side of the fuselage before spraying on Tamiya XF-57 Buff on the
topside.
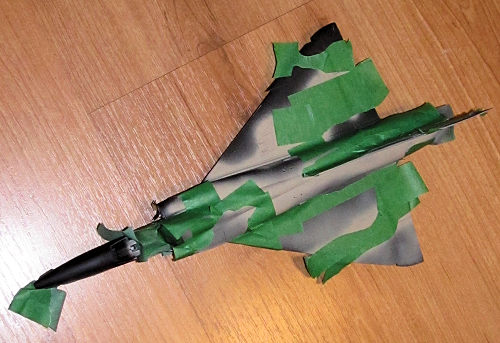
After the paint dried, I masked off the Buff areas using Kabuki craft tape and then sprayed on Model Master Acrlyic Israeli Light Green. Once that dried, I masked off the light green areas and sprayed on the final color of Tamiya XF-52 Earth Brown. I usually have to deal with overspray or mistakes and this model was no exception. I touched up some areas and corrected others before spraying down two thin coats of Future as the gloss coat.
 Unlike the rest of the kit, I didn't have any problems
with the decals. The Cartograf decals were easy to use and went on without too
many problems. There were a lot of stencils (the printing was so good that I
could still make out the Hebrew characters on the smallest ones.) I did use
Micro Sol and Set to get the decals to snuggle into the panel lines and had no
issues with silvering.
Unlike the rest of the kit, I didn't have any problems
with the decals. The Cartograf decals were easy to use and went on without too
many problems. There were a lot of stencils (the printing was so good that I
could still make out the Hebrew characters on the smallest ones.) I did use
Micro Sol and Set to get the decals to snuggle into the panel lines and had no
issues with silvering.
I used my usual watercolor wash (a mix of burnt umber and black with a drop of dish soap with some water) to get the details to pop out and blend the colors in. Most of the pictures of Kfirs in service showed that they were kept fairly clean so I kept the stains down to a minimum. Excess wash was removed with damp Q-tips. The Kfir was sprayed down with three thin coats of Tamiya flat.
Just to note the canopy was painted, had wash added and sprayed with a final coat at the same time as the plane. I used to do the painting steps for the plane and canopy separately, but then I discovered that the canopy paint was noticeably different than the plane. Now I do them together to keep the paints similar.
| FINAL CONSTRUCTION |
 The Quickboost parts showed up a couple of weeks after
I finished painting the Kfir so I cleaned the parts up, painted and decaled
them, added a wash to the parts and sprayed on the final coat before adding them
to the fuselage with a thin smear of CA glue.
The Quickboost parts showed up a couple of weeks after
I finished painting the Kfir so I cleaned the parts up, painted and decaled
them, added a wash to the parts and sprayed on the final coat before adding them
to the fuselage with a thin smear of CA glue.
The Kfir's landing gear was quite fiddly I found. The diagrams in the instructions were not as clear as i hoped which didn't help. I had to adjust the main landing gear to get a passable angle instead of making the Kfir look bow legged like it had Rickets. The nose gear was not as much of an issue, but I found that the nose wheel well doors attached to the nose gear fell off because they held on with a butt join. The resin wheels were okay.
The fit of the windscreen left a lot to be desired. I had to trim the rear portion that it would fit on the canopy ledge, but it left big obvious gaps. I used Vallejo Plastic Putty to seal the gaps and had to repaint it using Chinese knock-off Kabuki tape (the stick is so bad that it won't even take off decals) to mask off the unaffected areas. The result is not great as touchup stands out from the earlier paint job.
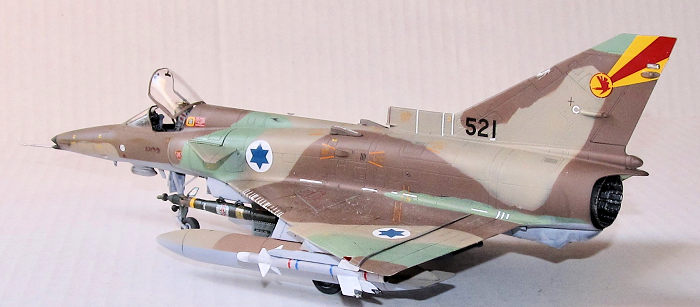
I worked on the weapons and fuel tanks. The kit does
not supply any AAMs so I used some Python3s from a Skunkworks weapons set. These
were ea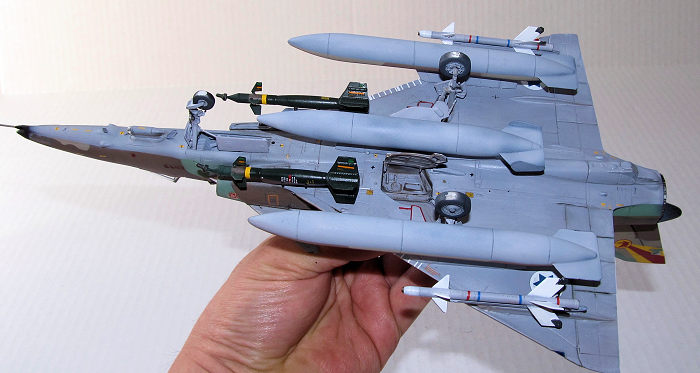 sy to build. The only thing I noticed was the prominent mold marks that
required a fair amount of cleaning up. The fuel tanks were easy to assemble, but
I didn't know what to paint them as Wingman didn't provide any color guide for
the tanks. I spent an hour on the internet pouring over pictures of Kfir wing
tanks. There were some tanks that were painted Buff and Dark Earth while others
had an additional bright red nose cone. I opted for a simple alternating pattern
of Buff and Dark Earth on the top with the underside and pylon painted Light
Ghost Grey. I completed the 500 lb LGBs. They were a touch more fiddly than I
expected due to the small fins, paint scheme and decals. I had sand them smooth
as they had a corduroy like texture because of what I think is due to 3D printed
originals. Next I primed, sprayed on the base color then brush painted the
details. Lastly I had to add about 15 decals to each bomb. They were glued in
using CA glue (I had the model placed upside down till the glue set and the bond
was strong enough to keep the bomb in the plyon.)
sy to build. The only thing I noticed was the prominent mold marks that
required a fair amount of cleaning up. The fuel tanks were easy to assemble, but
I didn't know what to paint them as Wingman didn't provide any color guide for
the tanks. I spent an hour on the internet pouring over pictures of Kfir wing
tanks. There were some tanks that were painted Buff and Dark Earth while others
had an additional bright red nose cone. I opted for a simple alternating pattern
of Buff and Dark Earth on the top with the underside and pylon painted Light
Ghost Grey. I completed the 500 lb LGBs. They were a touch more fiddly than I
expected due to the small fins, paint scheme and decals. I had sand them smooth
as they had a corduroy like texture because of what I think is due to 3D printed
originals. Next I primed, sprayed on the base color then brush painted the
details. Lastly I had to add about 15 decals to each bomb. They were glued in
using CA glue (I had the model placed upside down till the glue set and the bond
was strong enough to keep the bomb in the plyon.)
Finally, I added the brass AOA sensor and painted pitot tube with CA glue and I had finished a Kfir.
| CONCLUSIONS |
I am not a big fan of Kinetic's Kfir kit as it had some seriously questionable fit around the intakes and the nose which required a lot of care to finish which might have been acceptable for a late 90s kit or earlier, but this one was produced in 2013. The Wingman add-ons (decals, resin and PE) were nice and helped improve the kit, but it wasn't the “ultimate” Kfir that had everything I needed as I had to source Python 3 AAMs from a Skunkworks set plus the instructions are seriously lacking in certain areas like the landing gear (the Kfir landing gear is based on the quite complex to assemble Mirage landing gear) and a paint guide for the fuel tanks.
I have read that the AMK Kfir is much better with fewer headaches. If I consider building another Kfir that is probably the kit I'll go with instead of the Kinetic as this kit fought me at almost every step. This is not one of my better results, but it looks okay and it was fun to paint the Israeli “Netz” scheme.
14 October 2019
Copyright ModelingMadness.com
If you would like your product reviewed fairly and fairly quickly, please contact the editor or see other details in the Note to Contributors.
Back to the Main Page Back to the Review Index Page Back to the Previews Index Page