| KIT #: | 7575 |
| PRICE: | $20.00 when I bought it |
| DECALS: | Three options |
| REVIEWER: | John Summerford |
| NOTES: | Decals from Techmod set 48810A and Yellow Wings set 48003 |
| HISTORY |
Courtesy of Wikipedia
 The Douglas TBD Devastator was an
American torpedo bomber of the United States Navy. Ordered in 1934, it first
flew in 1935 and entered service in 1937. At that point, it was the most
advanced aircraft flying for the Navy, being the first metal monoplane in the
United States Navy however, by the time of the US entry into World War 2, the
TBD was already outdated.
The Douglas TBD Devastator was an
American torpedo bomber of the United States Navy. Ordered in 1934, it first
flew in 1935 and entered service in 1937. At that point, it was the most
advanced aircraft flying for the Navy, being the first metal monoplane in the
United States Navy however, by the time of the US entry into World War 2, the
TBD was already outdated.
The Devastator performed well early in the war, most notably in the Battle of the Coral Sea, but earned infamy for a catastrophic performance during the Battle of Midway in which 41 Devastators recorded zero torpedo hits with only six surviving to return to their carriers. [To be fair to the crews, the torpedoes were ineffective weapons.]
| THE KIT |
 1974 was the year the kit was first
released. This version was released under the Monogram Classics label in the 1990s and
appears to be faithful to the original boxing with sprues unbagged, old style
decals, and tri-fold instruction sheet. Panel lines are raised and the
corrugations that are essentially a series of raise lines.
1974 was the year the kit was first
released. This version was released under the Monogram Classics label in the 1990s and
appears to be faithful to the original boxing with sprues unbagged, old style
decals, and tri-fold instruction sheet. Panel lines are raised and the
corrugations that are essentially a series of raise lines.
Options are for the bomber or torpedo version of the aircraft, posable flaps, foldable wings, open or closed greenhouse canopy, and a standing pilot figure plus two flight deck crew, one of whom can be posed turning the starter crank for the engine.
The total parts count, including the clear parts is 81. Color call-outs refer to Federal Standard numbers.
| CONSTRUCTION |
As usual, the cockpit is the starting point and it has reasonable detail molded in the major parts. Most of the parts were assembled and then given a spray coat of zinc chromate green, along with interior sides, and details picked out by brush and colored pens. Flory washes were used for lowlights.
Before installing the cockpit into the left fuselage half, view windows were added to the lower portion of both halves and the bomber doors installed in the closed position. The windows fit nicely, but the doors had numerous gaps that needed filling. Reproducing lost detail was a challenge.
After the fuselage was closed-up,
the tail hook was installed, along with the instrument panel, auxili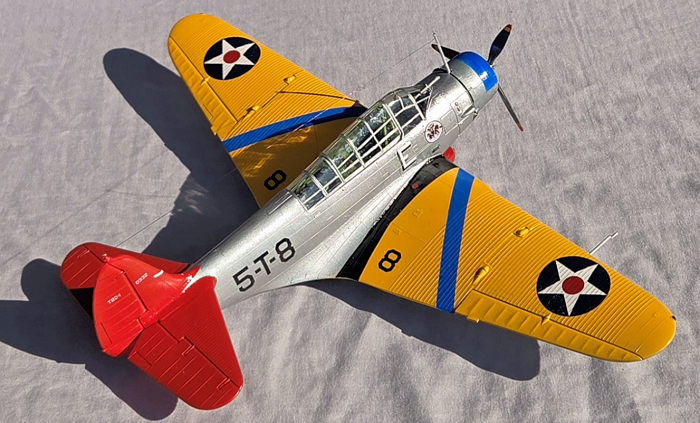 ary control
stick, and the gun ring mount. The cockpit top completed the subassembly.
ary control
stick, and the gun ring mount. The cockpit top completed the subassembly.
Access panels were in glued shut and the horizontal tails also glued on and their seams addressed.
Moving to the wings, the lower center section was maneuvered into place. The fit in this area was poor and a lot filler and work followed. The outer wing panels were assembled, minus the pitot tube, which was left for later. The kit is engineered so that one can switch the wings from folded to extended and back again. The hinges are molded for styrene of questionable strength, and the detail is not accurate. Taking the path of least resistance, the wings were glued extended with the upper panels trapping the hinge pins. However, that created other gap issues. Thinned Perfect Plastic Putty proved indispensable in achieving a good result at the fold.
There was also a large step between the upper panel and the fuselage. The gap in that area was filled, but the step was left alone, relying on the wing walk decal to hide it.
I got over my fear of cleaning-up the corrugations (since I had already done a lot work on the wings at this point) on the leading edge of the wings and used a combination of files and sandpaper. Unfortunately, they don not align perfectly, but are close.
Due to the thickness of canopy pieces, posing them open looks awkward, so they were glued closed. It wasn’t until I had masked the clear pieces that I discovered the vinyl masks in the Techmod set. I’m sure they would have been helpful for the flat panels, but I have doubts about their effectiveness on the compound curves. Wheel wells and the engine firewall were masked also
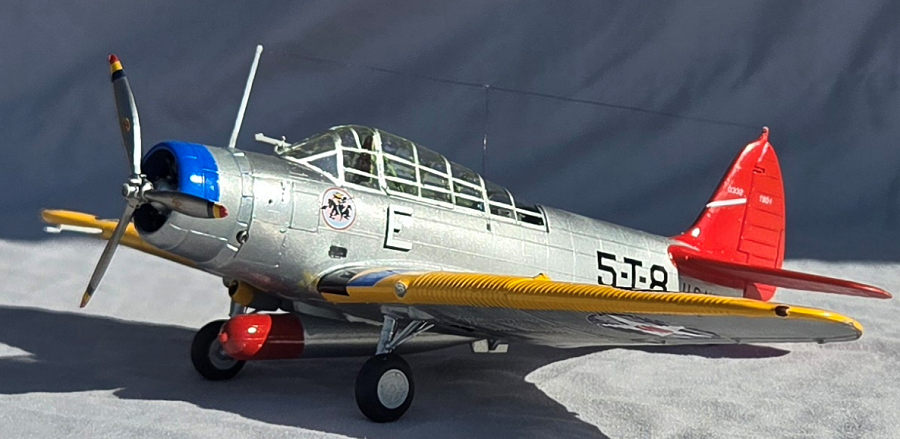
| COLORS & MARKINGS |
In an effort to save some time cleaning the airbrush and also have decreased cure time, a rattle can of Krylon Fusion paint-primer Metallic Aluminum was sprayed over the entire model and the separate cowl. The primer part worked well, but the metallic was too grainy, so the time gained was lost to a coat of Alclad II Aluminum.
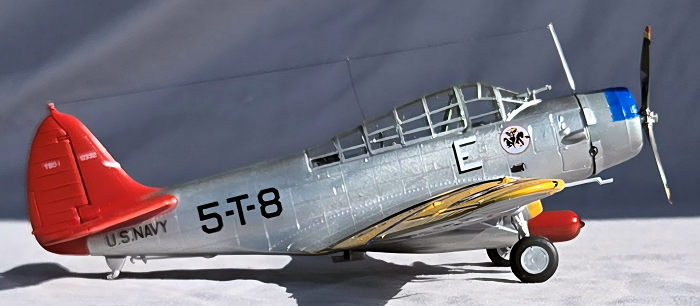
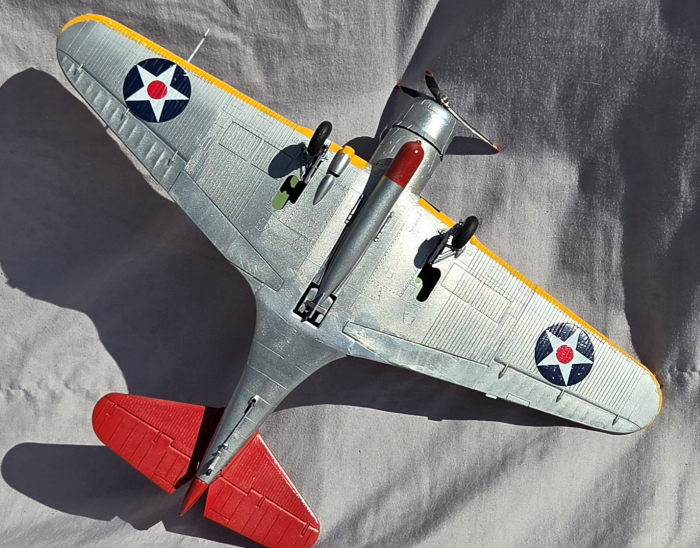 Moving to the tail, it was masked
by the Techmod vinyl piece and sprayed Krylon Red. A zip-lock bag enclosed the
tail while tape covered the fuselage and undersurface of the wing. Two coats of
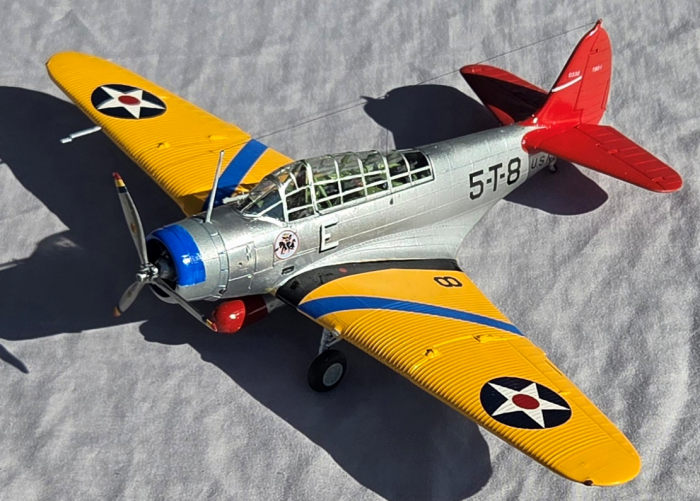
Rust-Oleum Marigold handled the corrugations fairly well. The cowl was masked,
re-primed, and airbrushed blue acrylic.
Moving to the tail, it was masked
by the Techmod vinyl piece and sprayed Krylon Red. A zip-lock bag enclosed the
tail while tape covered the fuselage and undersurface of the wing. Two coats of
Rust-Oleum Marigold handled the corrugations fairly well. The cowl was masked,
re-primed, and airbrushed blue acrylic.
Some touch-ups were needed around the fillet before the model was ready for decals. The first session used the star from Techmod and it was difficult to maneuverer over the corrugations. Other decals would not maneuverer at all and some curled upon themselves. Perhaps that was due to their over two-decade age. Switching to the younger Yellow Wings decals provided better results. The strategy of using the wing walk decals to hide the step with the fillet was successful.
Only one small touch-up was needed on canopy after unmasking. The gunsight was slid into place and glued. After painting, the engine was assembled and inserted into the cowl. In turn, that was glued to the fuselage. On the underside, the torpedo was installed, followed by the landing gear. The radio mast was next and the aerial rigged. The pitot was almost forgotten before adding the prop.
| CONCLUSIONS |
Some aspects of this kit still hold up to today’s standards, particularly the main fuselage, (excluding the raised panel lines) cockpit, and tail. The wings and their fit to the fuselage are another matter. The landing gear and torpedo detail are soft, but presentable. I have not seen the Hobby Boss kit, nor a completed model, but I have to believe it is superior to this kit.
The TBD-1 airframe was not improved upon into a -2 or later variants. If one wishes to model Devestator with yellow wings, all one needs to do is employ aftermarket decals. The Techmod decal set also provides masks for the canopy, tail, and wings, the tail being excellent. Yellow Wings includes an excellent explanation of the Navy’s marking and numbering system and their decals performed better.
This was an above average time spent build, somewhere around 30 hours and it is not a contest winner. There is something quaint about the crew figures, useful in a diorama and worth keeping.
22 April 2025 Copyright
ModelingMadness.com. All rights reserved. No reproduction in part or in whole
without express permission. If you would like your product reviewed fairly and fairly quickly, please
contact
the editor or see other details in the
Note to
Contributors.