| KIT #: | 2122 |
| PRICE: | NZ$45.00 |
| DECALS: | One option |
| REVIEWER: | Michael Rohde |
| NOTES: |
| HISTORY |
In October 1933 the US Navy contracted Consolidated and Douglas to build prototypes of new generation flying boats to replace the Consolidated P2Y or Martin P3M which were in service in the early 1930's. Consolidated 's XP3Y-1 was chosen to be developed into what was to become the most extensively built flying boat in aviation history.
Consolidated designed the prototype to meet US Navy's requirements as the Model 28 and the new prototype had the same parasol mounted wing like its predecessor, the P2Y. The new design,however,introduced internal bracing which resulted in a cantilever wing which was supported by two streamlined struts between hull and wing centre section on either side. Thus the Model 28 was free of multiple drag producing struts and bracing wires which had reduced the performance of earlier designs. Another innovative improvement was the introduction of retractable stabilizer floats which -in flight - formed streamlined wingtips. The hull was very similar to that of the P2Y but had a clean cruciform tail unit which was a cantilever design.
The prototype was powered by two Pratt & Whitney R -1830-54 Twin Wasp engines delivering 825 hp each. Armament consisted of four .30 cal (7.62 mm) machine guns and up to 2000lb ( 904 kg) of bombs.
The XP3Y-1 made its first flight on the 28th March 1935 and was soon thereafter transferred to the US Navy for service trials. These tests confirmed a significant improvement in performance over all the other flying boats in service.
 Extended range and improved load- carrying capability
caused the US Navy to request further development to turn this aircraft into a
patrol bomber and in October 1935 Consolidated carried out the work necessary to
achieve this. On the 29th June 1936 60 PBY-1's ( patrol bomber designation)
equipped with more powerful 900 hp R 1830-64 engines had been ordered. At that
time the tail plane surfaces had been redesigned as well.
Extended range and improved load- carrying capability
caused the US Navy to request further development to turn this aircraft into a
patrol bomber and in October 1935 Consolidated carried out the work necessary to
achieve this. On the 29th June 1936 60 PBY-1's ( patrol bomber designation)
equipped with more powerful 900 hp R 1830-64 engines had been ordered. At that
time the tail plane surfaces had been redesigned as well.
During the trials of the upgraded model a record non stop distance of 3443 miles ( 5541 km) flight was achieved and this particular aircraft was the first to be delivered to US Navy Squadron VP-11 F during October 1936 with others to follow soon thereafter. In early 1937 the second Squadron ,VP-12, received the first of its PBY's. Minor equipment changes resulted in the PBY-2 , and a second production batch was ordered on the 25th July 1936.
PBY-3,s were ordered on 27th November 1936 and PBY-4,s on the 18th December and equipped with 1000 hp R 1830-66 and 1050 hp R 1830-72 Twin Wasp engines respectively. All of these , except early production aircraft, had large transparent blisters over the waist gunner position instead of sliding hatches and these became a characteristic feature of all subsequent production aircraft. In April 1939 the first example of the PBY -4 production aircraft was returned to Consolidated for the installation of wheeled landing gear of tricycle-type configuration so that these could operate as amphibians and hence making them more versatile.
This aircraft was completed in November 1939 and carried the designation of XPBY-5 A. Testing of this upgraded variant was very successful. By the end of 1941 this new variant equipped VP-83 and VP -91.
At this time extensive service use of the PBY,s suggested that the hull would benefit from further hydrodynamic improvement and after the research and development work was complete , an order of 156 of these modified aircraft was introduced under the designation of PBN-1 Nomad.
By the time of the USA's involvement in WW II some 21 squadrons were equipped: 16 with PBY-5's, two with PBY-4's and three with PBY-3's. The PBY's good reputation aroused the Soviet Union's interest in the type which resulted in an order of three aircraft and subsequent negotiation of a licence to built the PBY in the USSR. When these three aircraft were delivered ,they were accompanied by a team of Consolidated engineers to assist in the establishment of the Russian production facilities.
 The first Russian PBY's ( designated GST) appeared in
1939 and were powered by Russian Mikulin M 62 radial engines ( which was in fact
a licence built and further developed Wright Cyclone M 25 radial with a power
rating of 900- 1000 hp ). No exact numbers of these licence built PBY's are
available but must have certainly run into several hundreds of machines built
during the war. Despite this , Russia also received ( under Lend Lease) 137
PBN-1 Nomads and 48 PBY-6 A's.
The first Russian PBY's ( designated GST) appeared in
1939 and were powered by Russian Mikulin M 62 radial engines ( which was in fact
a licence built and further developed Wright Cyclone M 25 radial with a power
rating of 900- 1000 hp ). No exact numbers of these licence built PBY's are
available but must have certainly run into several hundreds of machines built
during the war. Despite this , Russia also received ( under Lend Lease) 137
PBN-1 Nomads and 48 PBY-6 A's.
The British Air Ministry purchased a single aircraft for evaluation. This machine was flown across the Atlantic and allocated to the Marine Aircraft Experimental Establishment at Felixstowe, Suffolk in July 1939. Convinced of the excellence of the design, a first order of 50 aircraft ( designation Catalina I and similar to the US Navy's PBY -5) was made. Initial deliveries took place in early 1941, entering service with No 209 and 240 squadrons on Coastal Command. Subsequently nine C C squadrons were equipped with an additional 12 squadrons serving overseas. About 700 PBY's were aquisitioned overall.
France sent a purchasing commission to Consolidated early in 1940 to buy 30 PBY's but this undertaking came to nothing due to the military collapse of France. The Royal Australian Air Force received 18 aircraft around that time and the Dutch Government ordered 48, of which 36 were delivered before the Japanese invasion. Only nine of these were flown out before capture and used to establish No 321 squadron in Ceylon.
Canada was both a manufacturer and customer.Under an agreement between the US and Canadian Governments, production lines were set up in Canada by Boeing Aircraft of Canada in Vancouver and by Canadian Vickers at Carterville. Boeing production totalled 363 aircraft and Vickers made 379.
An estimate of the final construction number incl Russian GST's ( of which there are no exact numbers recorded) is about 4000 PBY's built. With the end of the war, flying boat versions were quickly retired , but amphibians remained in service for some more years,especially with smaller armed forces which kept these in service right into the late 1960's.
| THE KIT |
This is an older Academy issue dating back to 1993 and is currently not in production. The kit contains 103 parts molded in grey plastic on 5 frames and 1 frame holding 14 clear parts. A set of 4 PVC tyres for the main beaching gear is inclided.
Surface detail is rather crisp , although the fabric on the control surfaces is a bit too coarse. Cockpit details ar e very basic but that does not matter too much since very little can be seen through the heavily framed canopy after assembly. The decal sheet provides for one option only. Instructions are straight forward with seven simple steps to assemble the model.
| CONSTRUCTION |
 As per plan , I began with the cockpit and waist
gunner compartment followd by inserting the waist gunner hatches and the windows
into the fuselage shells. The clear parts were masked off and the interior was
painted withTamiya interior green.
As per plan , I began with the cockpit and waist
gunner compartment followd by inserting the waist gunner hatches and the windows
into the fuselage shells. The clear parts were masked off and the interior was
painted withTamiya interior green.
Small details like pilot seat cushions, waste guns controls and the instrument panel were done after the interior gree paint had dried thoroughly.The seat harnesses were made of Tamiya masking tape and the buckles were painted with chrome silver. At this stage the bow turret frame was painted and left to dry.
In the meantime I moved on to assemble the main wing outer and center sections stabilizer floats and the horizontal tail plane. I intended to install the stabilizer floats in the retracted position .Test fitting the landing lights was done at that stage to ensure the best possible fit before glueing these into place. Overall fit was good and very little work ( no putty)was needed to clean up the seams. That is something that does not happen too often in my experience.
The cowls provided have no panel lines or rivets and I did engrave these details before I painting these parts. The engines got black cylinders and blue grey crank cases., which were weathered with Black and brown panel liner an a dry brush with flat aluminium paint. The propeller blades needed some tidying up around the edges before attaching the propeller hubs and pitch controls.
I returned to stage two of the build by glueing the cockpit and waste gunner compartment into place , removing the masking tape from the windows, inserting the bow turret and then put the fuselage shells together to see how everything fits. There was a bit of interference with the rear bulkheads ( slightly oversized) and I reduced these a bit and tried again until the fuselage halfes mated properly. There was need of a bit of putty along the seams but nothing too serious. That was done in no time. Sanding and finishing did require rescribing small areas of panel and rivet lines though.
 I test fitted the canopy to see if there were any
gaps. Removing small amounts of plastic on the canopy rim and the fuselage was
necessary before glueing the canopy into place. A hole had to be drilled into
the roof for the DF loop as well. The canopy frame was painted freehand with a
fine brush.
I test fitted the canopy to see if there were any
gaps. Removing small amounts of plastic on the canopy rim and the fuselage was
necessary before glueing the canopy into place. A hole had to be drilled into
the roof for the DF loop as well. The canopy frame was painted freehand with a
fine brush.
The next step was to fit the complete wing ( sans engines) and the horizontal tailplane. I checked both beforehand and found no issues with the fit, so I went ahead and glued the bits into place and left to set. The oil cooler intakes exhaust panels and supporting struts were added at this point.
Before I moved on to prepare for the airbrushing stages I assembled and test fitted the beaching gear before painting. The main wheels are made of a softer PVC material and slip easily onto the rims. The aft beaching gear had to be test fitted into pre drilled holes. The Academy guys were smart enough to mark the position on the fuselage bottom to make that job easy. Naturally I left the beaching gear off until all the airbrushing was done.
| COLORS & MARKINGS |
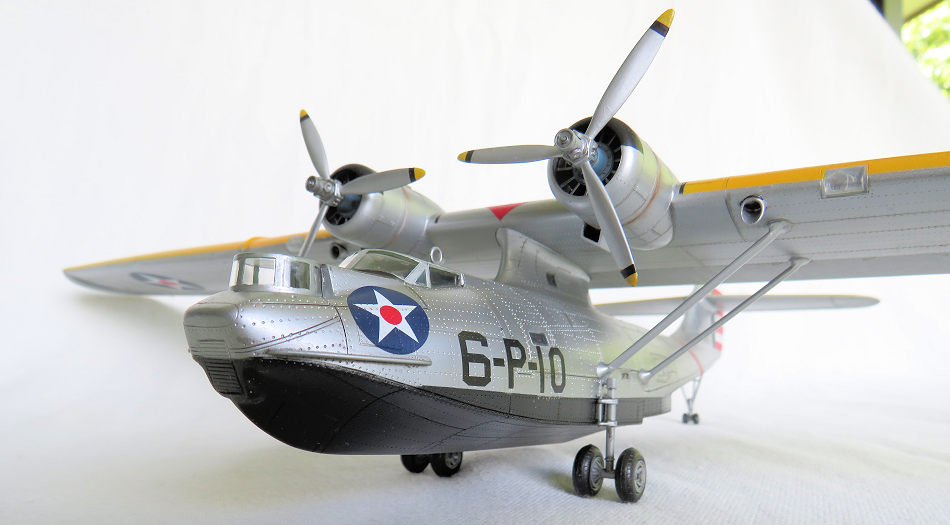
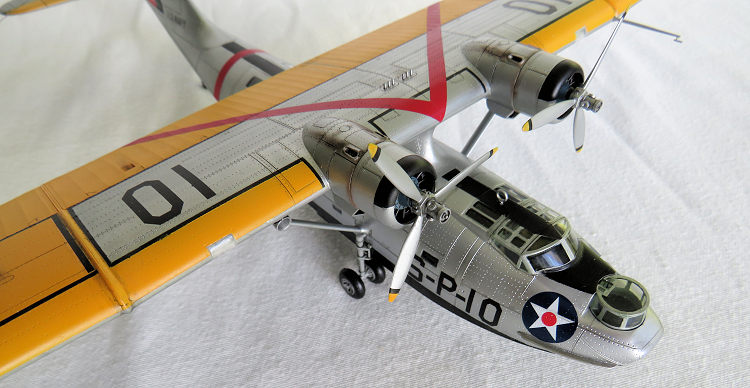
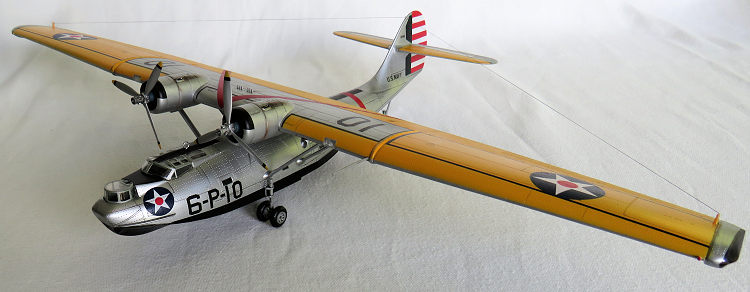
For starters : Be prepared to having to use A LOT of masking tape. I began with masking of the area on the fuselage and floats which had to be painted black ( on service aircraft this was a marine anti fouling paint). A narrow strip of black on top of the fuselage aft and forward to and in front of the the canopy ( anti glare) was also masked off and painted black as well.
Once the paint had dried , these areas were masked off for the next stage , this being an area in the center section of the wing including the engine gondolas which has to be painted in bare metal finish. The bare metal area is outlined by a narrow black strip indicating the area which can be stepped on safely. That in return had to be masked off and airbrushed. The decal sheet provides for that but the old Academy decals were not good quality ,so painting was a better option.
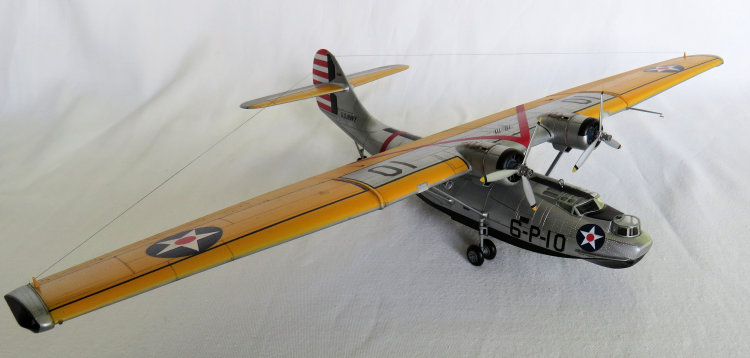
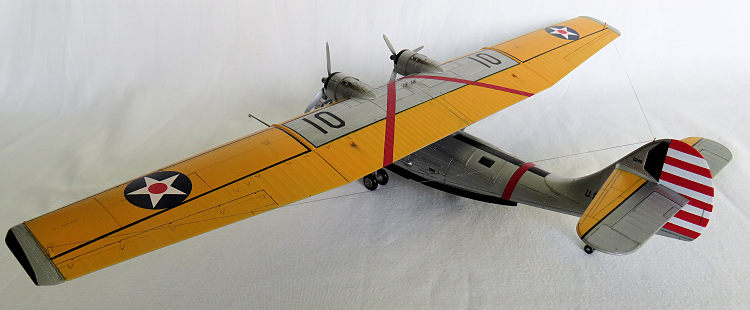
 Then I moved on to paint the rest of the upper wing
and upper tail planes in chrome yellow. I covered the fuselage to prevent
overspraying everything. The tailplanes are partially painted in chrome yellow.
The fabric covered elevators and a narrow strip in front are not. These are
painted in flat aluminium and Tamiya chrome silver respectively. Again, a narrow
strip of black had to be airbrushed as well requiring more elaborate masking off
in the process.
Then I moved on to paint the rest of the upper wing
and upper tail planes in chrome yellow. I covered the fuselage to prevent
overspraying everything. The tailplanes are partially painted in chrome yellow.
The fabric covered elevators and a narrow strip in front are not. These are
painted in flat aluminium and Tamiya chrome silver respectively. Again, a narrow
strip of black had to be airbrushed as well requiring more elaborate masking off
in the process.
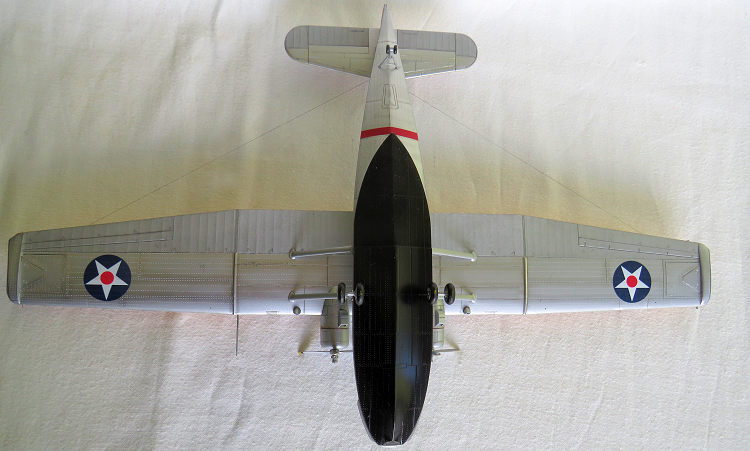
The outer main wings have also a narrow strip in black indicating the walk on area which had to be masked off and airbrushed. I did airbrush the upper portion of the cowl rings in black at the same time. The next step was to paint the red and white stripes and bar on the rudder. This was done in three steps starting with a white base, then masking off the portions to be painted red and finally , after the paints had dried , the midnight blue vertical bar.
More masking had to be done for the final stage. This covered the chrome yellow portions of the upper wing , tail plane and the rudder and I made sure that the clear parts were all properly covered before I went ahead. The rest of the fuselage ,main wing and tail plane undersides were painted with Tamiya chrome silver and I used AK natural aluminium to offset panel lines.
I let sit the model overnight and removed all the masking tape ( except the clear parts) on the next day. Minute areas of overspray (where the tape had lifted a bit )was easily touched up and I gave all the surfaces a thin coat of Tamiya gloss clear as a base for the decals. Again I left the model sit overnight to return to the final stage of the build on the following day: adding the engines, propellers and cowlings.
The decals provided in the kit were no good. When I used the decal for the instrument panel I found that the decal was quite stiff and did not want to settle properly.That was a bit of a warning sign that there might be more trouble afoot . I decided to cobble together a set of decals from my stash and in the process gave the aircraft a ficticious unit number . Last but not least I glued the beaching gear into place. The decals and all other surfaces were sealed with a coat of Humbrol satin . This paint has a longer drying time and I waited for three days before I did the weathering.
| CONCLUSIONS |
I can recommend this kit. Despite its age it still provides the modeller with a nice model of an early PBY flying boat. This kit is easy to build and is suitable for novice modellers. As I mentioned before ,the old Academy decals leave something to be desired and need to be replaced.
6 January 2019
Copyright ModelingMadness.com. All rights reserved. No reproduction in
part or in whole without express permission. If you would like your product reviewed fairly and fairly quickly, please
contact
the editor or see other details in the
Note to
Contributors. Back to the Main Page
Back to the Review
Index Page
Back to the Previews Index Page