Valom 1/72 Northrop BT-1
| KIT #: | 72016 |
| PRICE: | $30.00 or so |
| DECALS: | Two options |
| REVIEWER: | Joel Hamm |
| NOTES: | AInjected plastic, PEB & resin details, Injected + Vacu-Formed Canopies |
| HISTORY |
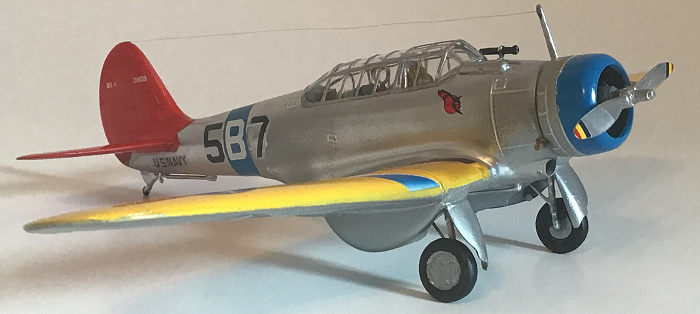
 The first
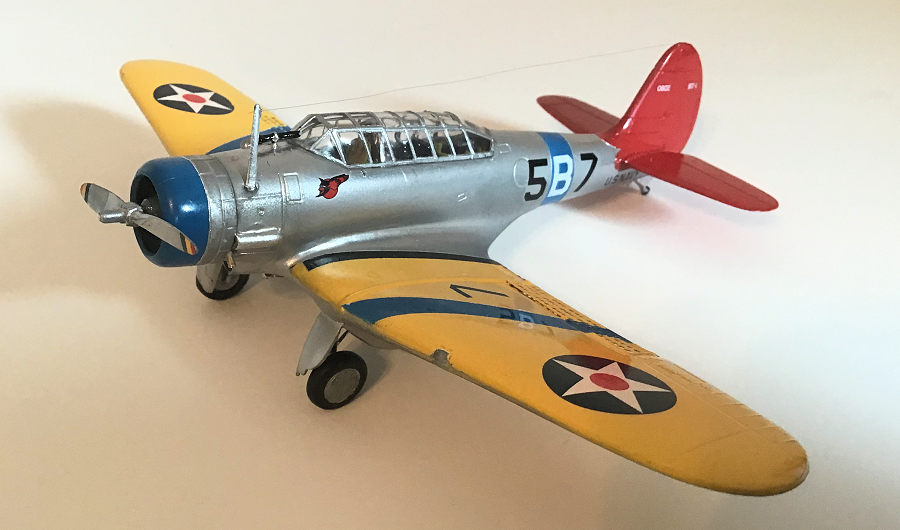
thing anyone wants to know when encountering the BT-1 is why the window panes
are crooked. The only answer I ever found (I asked Siri) was that the designers
decided it would make climbing in and out easier when the tail-dragger was
sitting on the ground. Sounds bogus, but who knows? All else of interest
concerning the plane’s history is that the design matured into the obsolescent,
outclassed, but outstanding SBD Dauntless. Oh yes – according to the thumb nail
history on the instruction sheet, an experimental tricycle gear variant was the
first such airplane to land on a carrier. Or, perhaps, SUCCESSFULLY land on a
carrier. Hey –wait a minute! Wasn’t Eugene Ely’s Curtiss pusher a nose-sitter?
As I said – who know?
The first
thing anyone wants to know when encountering the BT-1 is why the window panes
are crooked. The only answer I ever found (I asked Siri) was that the designers
decided it would make climbing in and out easier when the tail-dragger was
sitting on the ground. Sounds bogus, but who knows? All else of interest
concerning the plane’s history is that the design matured into the obsolescent,
outclassed, but outstanding SBD Dauntless. Oh yes – according to the thumb nail
history on the instruction sheet, an experimental tricycle gear variant was the
first such airplane to land on a carrier. Or, perhaps, SUCCESSFULLY land on a
carrier. Hey –wait a minute! Wasn’t Eugene Ely’s Curtiss pusher a nose-sitter?
As I said – who know?
| THE KIT |
Unsealing the cardboard crate, which makes a sturdy parts tray for this and succeeding projects, begs the question of why Valom suffers such a poor reputation among modelers. The contents appear first class. Plastic parts are flawlessly injected to a high gloss finish with no flash, sinks, protrusions, or misalign. One minor fixable: while the lower wing surface is delicately engraved with panel lines and access plates, the rest of the airframe, especially the upper wing, is, as mentioned, glass – gloss smooth, with just a pinch of panel-ism fuzzily hinted at. No, the real plane wasn’t fashioned of sanded plywood; or Bondo-ed to supersonic slickness. Maybe they just forgot. If you’re into re-scribing, break out the templates and stylus.
This kit carries multimedia modeling to new heights.
Major chunks are styrene, while details are rendered in resin, etched brass, and
acetate in the form of a micro-filmed set of instrument faces and a vacu-formed
trans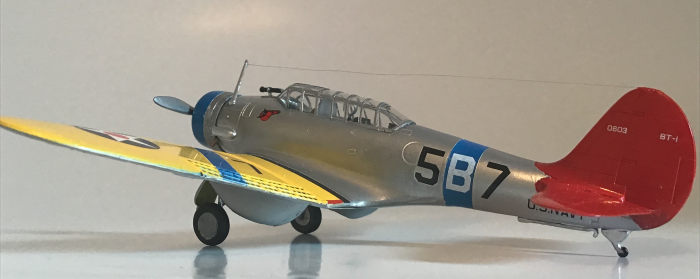 parency
for those partial to cut-open canopies and self-inflicted pain.
parency
for those partial to cut-open canopies and self-inflicted pain.
The injected greenhouse is sharply framed but a tad on the hazy side, easily fixed by a dunk in Future acrylic floor glop. One sorely missed medium is a paint mask for all those sharp but slanted frame lines. Such inclusions had not been envisioned several years ago when the kit was released, but have since become standard with East European companies. Unhappily, no aftermarket masks are available (I checked with Siri on that subject too).
PolyU resin is used to cast interior furnishings and a double row Wright Cyclone complete down to the spark plugs, wires, and nosecone bolts. Etched metal is the substance of choice for the drilled-through flaps / dive brakes. Two perforated strips on the fret are not identified in the 12-page instruction book; but likely are meant to form the wing hinge line if those surfaces are displayed open. The carpet gremlins will feed well during this build because the brass fret also includes sub microscopic levers to be inserted in the quadrants beside the pilot’s seat, and appendages for the gunner’s 30-cal that can barely be seen, let alone gripped in a forceps. Perhaps Valom stands for Very Accurate Level Of Minutia.
This devotion to accuracy earns them an A+ for effort but gets demerits for causing problems when the advantages of one material, e.g. brass’s thinness, run up against the limitations of another, e.g. styrene’s thickness, as becomes evident during…
The dozen pages of instructions includes 4 full color
painting guides for the 2 versions; a page of paint call-outs keyed to 5 paint
brands and fe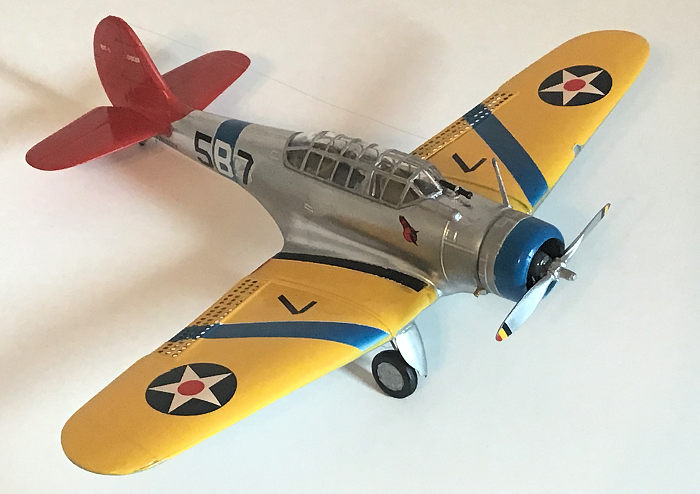 deral
standards, and a 1 ½ page parts map; but deciphering the labeling system can
consume an entire workbench session and bottle of single malt.
deral
standards, and a 1 ½ page parts map; but deciphering the labeling system can
consume an entire workbench session and bottle of single malt.
It appears that circled numbers denote plastic parts; circled digits prefixed by an R means look on the resin fret, by an F means microfilm (there’s only 2, the instrument dial faces tucked in a bag with the obtisky – pardon me – with the decals). Circled numbers superscripted by MP identify metal parts. Circled superscripted numbers subscripted by the notation 1x, 2x, 4x, etc. means stick on that many of the invisible little boogers.
Letters in squares direct you to paint the part IAW the color guide. Boxed numbers are the subassembly products of the titular construction step. An X in a balloon means Lord knows what. An encircled sum 1+2 appears occasionally and is also anyone’s guess.
Triangle-trapped numerals match those on the decal sheet. The instructions are further enhanced by a symbology of morphemes including crosses, arrows, arcs, underlines, sawblades, and question marks whose meaning is, if not self evident, then insignificant because the part can generally be discarded as un-viewable.
The usual Rosetta stone legend with informational infinitives such as “to make new” or “to cut” was nowhere evident, so figuring it all out was on par with cracking the Enigma Code. Such are the wages of East European multimedia indulgences.
| CONSTRUCTION |
Builders who like to jump right into the meat of a
model can defer the assembly of interior furnishings depicted in steps 1, 2, 4,
and 5. The instrument sandwich in stage 3 should go in before clamshell closure,
as well as the resin floorboard, which needs sanding to match the sidewall
curve. Part 9, the rear bulkhead, can be omitted, as it s
only purpose is preventing the fuselage halves from meeting. The oil cooler
grill and its backing plate should also be left till later, because the scoop
needs reaming, rounding, and smoothing.
s
only purpose is preventing the fuselage halves from meeting. The oil cooler
grill and its backing plate should also be left till later, because the scoop
needs reaming, rounding, and smoothing.
Nothing particularly noteworthy about affixing the wings and tailplanes, but leaving the engine and cowl off will facilitate painting. Adding the etched brass flaps / diving brakes is where the serious trouble starts. Not really, if they are to be positioned deployed; though adding actuating rods and cam levers of wire and plasti-bits will improve the effect.
Displaying these surfaces closed demonstrates the difficulties of fitting together non-homogenous materials. To begin with, the stepped depressions in which they lay must be deepened or they will remain proud of the wing surfaces. The real problem is the incongruous gap left where they fail to meet at the trailing edge. Because the root and ailerons are split and divided between the upper and lower wing halves they cannot join together in a thin and sharp enough edge . Sanding the inner surfaces will only change the wing chord and make more of a mess. If any kit makers are listening, howsabout reviving the technique popular in the old Revell and Monogram forty nine centers of molding the leading and trailing edges, wing tips, and control surfaces integral with the top wing half.
The flap gap could be fixed by noodling in a strip of plasticard and fairing with filler; but the easier solution is to scrunch the metal pieces together with super glue and fair in the joints to the ailerons and wing root with more CA stuff and sanding.
| COLORS & MARKINGS |
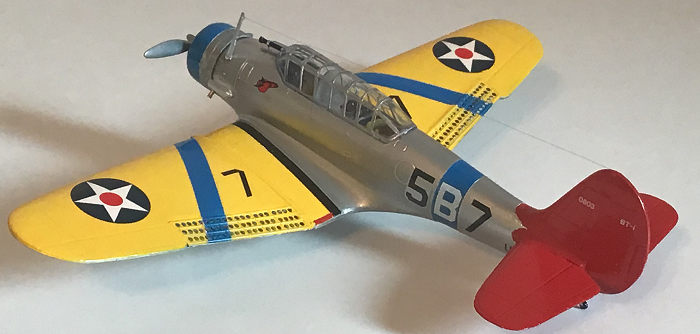
The BT-1 is one of the gaudiest painted ladies of the
inter-war era. The web abounds with garish paint schemes but there’s nothing
wrong with the 2 kit options. Wing, cowl, and fuselage bands are not included as
decals so must be painted on. I started with a primer / disclosure coat of
Testors gloss white. Blue, red, and black areas were sprayed on, masked, and
followed with another shot of white. Wings got several coats of
 Testors
yellow to which a few drops of tangerine orange had been added for cadmium
intensity. Many modelers chain themselves to precise FS and RLM color
formulations; but the opposing TLAR philosophy – That Looks About Right –
recognizes that what looks proper on a real airplane in real outdoor light can
look entirely wrong on 6 square inches of plastic sitting on an unlighted shelf.
Testors
yellow to which a few drops of tangerine orange had been added for cadmium
intensity. Many modelers chain themselves to precise FS and RLM color
formulations; but the opposing TLAR philosophy – That Looks About Right –
recognizes that what looks proper on a real airplane in real outdoor light can
look entirely wrong on 6 square inches of plastic sitting on an unlighted shelf.
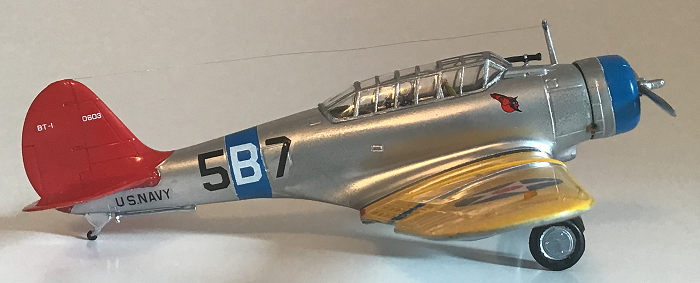
The remainder of the airframe was treated to Testors chrome enamel, which gives a fair impression of the pristine state in which peacetime airplanes were kept.
Decals are a bit thick but well behaved, settling down without fluids if helped by pressure applied with a Q-Tip or foam applicator. Microsol, Mr. Mark ,and even Solvaset have minimal effect. Three tries at a gloss Future overcoat had to be washed off with window cleaner due to orange peeling and other orneriness. Perhaps the ambient humidity was too high or the planets were in improper alignment. Since the model would sit in an enclosed display case, I gave up and left it uncovered, an unfortunate omission as the chrome gleam has dulled where violated by sticky, oily fingers.
| FINAL CONSTRUCTION |
Praises have sufficiently been sung to the virtues of the resin radial, but these are tempered by the vice of being too large, fore and aft, to fit without the gear case protruding 2 scale feet ahead of the airplane. Half the depth of the rear cylinder bank must be cut or ground away for the nosecone to properly protrude just barely beyond the plane of the cowl lip.
 The pilot’s
and gunner’s furniture can be assembled and inserted at this time. Even with an
open canopy, details like levers and pedals are invisible, but build to your own
liking.
The pilot’s
and gunner’s furniture can be assembled and inserted at this time. Even with an
open canopy, details like levers and pedals are invisible, but build to your own
liking.
The vacu-formed transparency offers no advantage over the injected version, other than allowing the sections to be cut and displayed slid open. Masking the hard greenhouse proved to be only slightly less arduous than anticipated. After several tries with metallic tapes that left a glue residue, I achieved moderate success with Tamiya tape. The canopy was stuck on with a clear gel unearthed in the craft section of Dollar Tree. Strong initial tack. Firm bond but removable if boo-boos are discovered. No danger of fogging or excess ooze.
I build my toys devoid of any external loads; so after sticking on the landing legs only a few fiddlies were needed to complete the project. Many happy hours, however, can be occupied assembling bombs and racks with etched brass fins and stretched sprue braces.
| CONCLUSIONS |
Can’t come up with anything snappy or smart-ass to end with. Nice kit.
18 November 2019
Copyright ModelingMadness.com
If you would like your product reviewed fairly and fairly quickly, please contact the editor or see other details in the Note to Contributors.
Back to the Main Page Back to the Review Index Page Back to the Previews Index Page