Kora 1/72 Seversky BT-8
| KIT #: | |
| PRICE: | @$30.00 |
| DECALS: | Three options |
| REVIEWER: | Joel Hamm |
| NOTES: | Resin with vac transparencies |
| HISTORY |
 Alexander
Nikolaievich Prokofiev de Seversky is a guy definitely worth GOOGLEing. Born in
the 19th century into Czarist
nobility; WWI combat ace; refugee from the revolutionary chaos; US immigrant;
inventor; aviation innovator; record setting test pilot; socialite but financial
failure industrial leader; assistant to General Billy Mitchell air power
spokesman; founder of what would become Republic Aircraft; best-selling author;
and survivor into the 1970’s as flag waiver and champion of American
exceptionalism and international leadership (what is now known as a Deplorable).
Oh, yes – with the help of other Russian escapee engineers, developer of the
precursors at least to some of America’s most significant airraft – think P-47
Thunderjug.
Alexander
Nikolaievich Prokofiev de Seversky is a guy definitely worth GOOGLEing. Born in
the 19th century into Czarist
nobility; WWI combat ace; refugee from the revolutionary chaos; US immigrant;
inventor; aviation innovator; record setting test pilot; socialite but financial
failure industrial leader; assistant to General Billy Mitchell air power
spokesman; founder of what would become Republic Aircraft; best-selling author;
and survivor into the 1970’s as flag waiver and champion of American
exceptionalism and international leadership (what is now known as a Deplorable).
Oh, yes – with the help of other Russian escapee engineers, developer of the
precursors at least to some of America’s most significant airraft – think P-47
Thunderjug.
With a reported production run of only 30 airplanes the BT-8 could was hardly significant; but as the Army’s first all metal, enclosed cockpit, cantilever wing monoplane it set the design for the BT-9, BT-13, and other basic and advanced trainers which culminated in the AT-6 Texan / Harvard.
| THE KIT |
Resin scares many modelers. It shouldn’t. Other than requiring non-solvent adhesives, and less than normal ham-fistedness in handing brittle parts, poured poly-urethane demands no special skills or resources. On most counts it is easier to work with and produces superior results to styrene. Likely because it does not rely on high temperature high pressure injection it allows thinner, truer to scale parts with a finer level of detail. Mating seamlessly, to use the literal and correct definition of that cliché, with epoxy and cyano-acrylate, it is more amenable to modification and repair of boogers.
Its greatest advantage,
and here I’m guessing again, is that because it needs no expensively tooled
metal molds or costly injection machines, the medium allows limited resource
companies to cater to a similarly limited market for models of aircraft beside
the usual Messerschmitts, Mustangs, and other thread-worn Fokkers. The Czech
Kora and LF companies, which appear to be linked, if not one and the same, have,
since the liberation of that country from The Evil Empire, been meeting that
demand with 1/72 and 1/48 kits of out-of-the-ordinary subjects, most from the
inter-war period. That’s between World War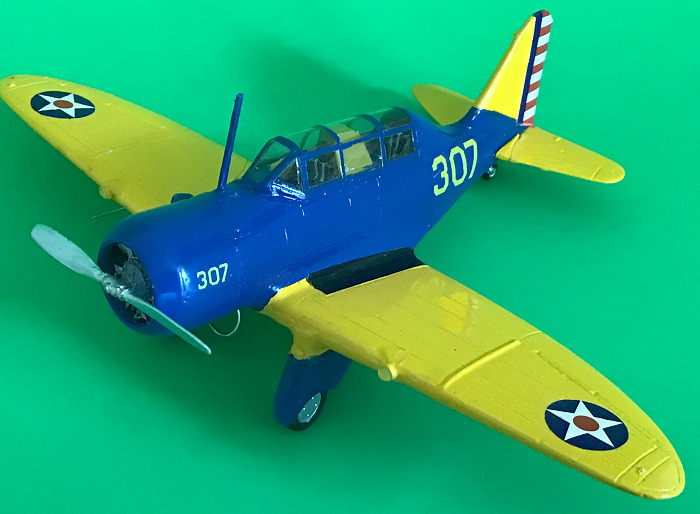 s
I and II. There have been so many wars, since Hiram Maxim, the Wrights, and
other inventors bequeathed humanity devices that would make war impossible, that
the term “Inter-war” is confusing.
s
I and II. There have been so many wars, since Hiram Maxim, the Wrights, and
other inventors bequeathed humanity devices that would make war impossible, that
the term “Inter-war” is confusing.
Many of these reviews begin: “The kit comes in a sturdy cardboard box…” Like – who cares? Except of Kora and LF productions it must be said that they all come in an undersized 4” X 4” soft paper, barely glued together, not much more than an envelope. The instruction sheet is no better, being a roughly hand drawn approximation of what goes where, showing alternative engine intakes, exhausts, and prop bosses with no indication of which part goes to which version. There is a full color paint and marking guide, but that and the box art may be in error. On that – more anon.
The meat and potatoes of the kit are high quality; though not as high as other kits issued under the LF label. Castings are a tad rougher with a bit more flash and a few cyano-acrylatable bubbles. . Nevertheless, surface detail is defined more sharply than even Hasemiya injections can manage. Particularly noteworthy is the zig-zag rivet indents on the rudder. Pity that all has to be ground away, because the vertical tail piece, molded in two halves attached to the fuselage sides, goes together looking like a tomb stone slab. Unless the spare parts trove yields up a suitable replacement, the vertical stab must be sanded to scale thickness without altering its profile. Other LF’s have the fin molded as a separate plane, or as a two sided surface attached to only one fuselage half; both treatments creating a thin fin blessed with properly sharp leading and trailing edges. The loss of rivet detail is a mox nix affair anyway, as it would disappear under coats of primer, paint, and thick decals. More later too on those troubles on the Old Chisholm Trail.
There is no brass fret. Metal seat belts and instrument panels would be nice, but the former are molded into the resin seats, and the latter are invisible once the cockpit is sealed. Two vacanopies – vacuformed canopies- are provided to dull the fear of an Xacto inexactitude. Vauformed lenses for the wing mounted landing lights are included, but these are more appropriately formed from droplets of clear epoxy. The only builder-supplied material called for is wire for the antennas, but it’s easier to scratch build some niceties, such as control sticks and radio masts than to clean up the poly-u pourings.
| CONSTRUCTION |
The usual sequence of
starting with the interior can be changed. The large opening in the lower
fuselage where the wing attaches allows the instrument panels and floor boards
to be trimmed and inserted from below with the seats, sticks, and other tidbits
added from above before the front office is closed. As with other resins,
vacu-formeds, and short runners, the mating surfaces need smoothing against a
sheet of 400 grit, with caution applied to avoid changing the fin or body sha pe.
The op-cited fuselage opening also allows most of the gluing to be done from
within. Once super-glue sticks it’s stuck, so quick-set epoxy, or one of the new
UV activated wonder glops may be a better choice for aligning and assembling
large parts.
pe.
The op-cited fuselage opening also allows most of the gluing to be done from
within. Once super-glue sticks it’s stuck, so quick-set epoxy, or one of the new
UV activated wonder glops may be a better choice for aligning and assembling
large parts.
Of course there are no alignment pins, tabs, or slots, so horizontal stabs must be eyeballed and butt joined after assuring that the elevator hinge line will be perpendicular to the longitudinal axis. The center section of the wing needs trimming after which it fits fairly well to the fuselage. The bilateral millimeter plus wing root gaps are another candidate for the term “Deplorable”, but are easily filled with alternate flowings of CA liquid and accelerator. Done patiently no sanding is needed.
Patience in the extreme is called for when freeing the engine cowl from its leading edge pour plug. Razor sawing it away will leave too large an opening. The plug must be gradually ablated to the correct curvature. My art-major wife informs me that this process is termed “subtractive sculpture”, as opposed to kit build-up which is called additive, or more properly “wasting time.”
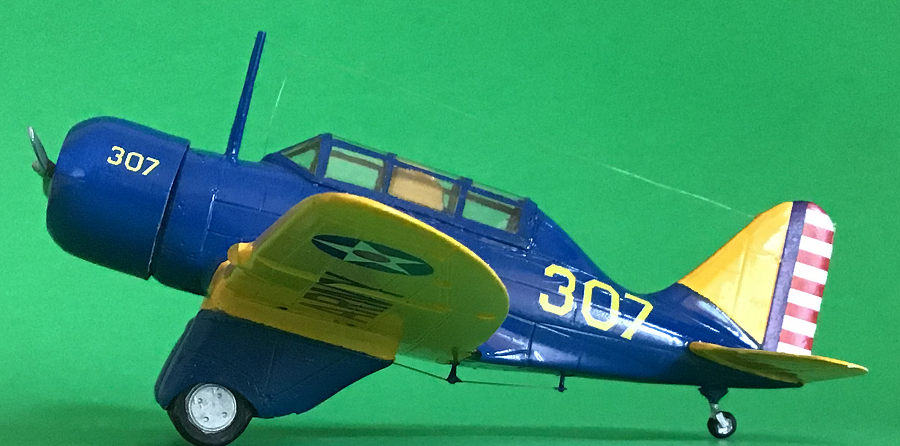
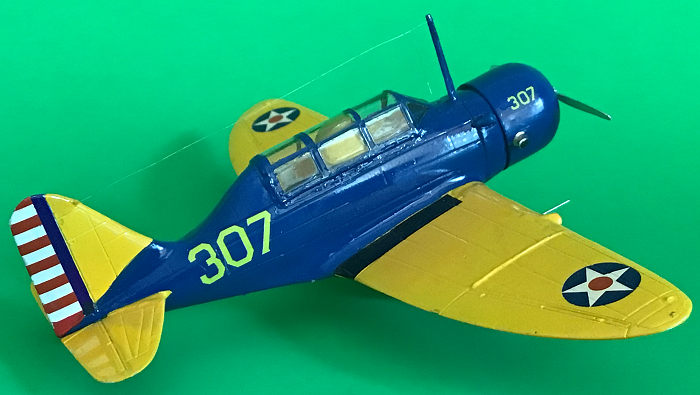
| COLORS & MARKINGS |
The main attraction of
modeling 1930’s subjects is the chance to wallow in garish paint. US Navy fleet
aircraft take first prize with their flashy splashy recognition schemes, but the
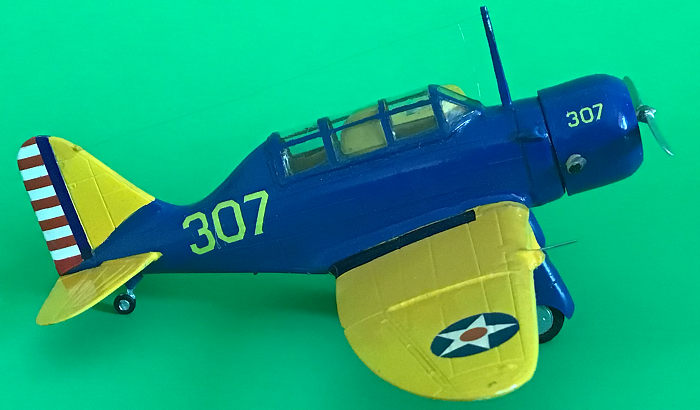
Army’s blue and yellow livery runs a close second, particularly garnished with
their tri-color rudder stripes and dot-in-star-in-circle insignia. Yellow must
have a white undercoat, so everything got primed with Testors Custom Automotive
flat white, which in all ways beats and bests Ta miya
primer. For some reason they do not offer this in gloss. For some reason they do
not offer this lacquer line in all the colors of their enamel range, which could
then be discontinued. The hardness and instant dry of lacquer is a consummation
devoutly to be wished; especially when the yellow slathered on wings and tail
takes forever to lose all tackiness.
miya
primer. For some reason they do not offer this in gloss. For some reason they do
not offer this lacquer line in all the colors of their enamel range, which could
then be discontinued. The hardness and instant dry of lacquer is a consummation
devoutly to be wished; especially when the yellow slathered on wings and tail
takes forever to lose all tackiness.
The box art and painting guide show the fuselage colored a dark blue matching Testors #1111. After spraying on 3 or 4 coats I thought this may be bogus and should be plain blue #1110 or light blue 1108. Finding no color photos I deferred to the Czech artist and left it. If it’s wrong it’s wrong. With scarcely a decade left before climate change first drowns then incinerates us fretting about the wrong color on a plastic toy seems a frivolous waste of worry. BUT….if anyone out there is savvy on the subject of blue shades, please speak up, as my next project is LF’s Consolidated A-11, which presents the same predicament.
Decals are provided for three airplanes that differ only in side markings. Printed on a solid transparent carrier each must be cut away as close as possible to the colored border. Twenty seconds in too-hot-to-touch (distilled) water with a drop of Jet Dri to improve slipperiness is the optimum soak. They come away resembling those thick, intractable 1960’s Airfix and Frog water slides and laugh at setting fluids – even Solvaset. Left untrammeled they will eventually dry and settle down, but conformity can be enhanced and hastened with physical pressure. Q-tip rolling from center outward works well, and placement mistakes can be fixed by re-floating. Once dry and coated with future these look as convincingly painted on as anything that ever slid off a Microscale sheet.
| CONSTRUCTION CONTINUES |
 The overturn
protection pylon between the cockpits must be lowered or it will hit the canopy.
This is a strange structure for a trainer, or any airplane, as it blocks the
rear seater’s forward view and prevents him from seeing what the guy in front is
up to. Keeping a close eye on your student is critical for an instructor’s
teaching effectiveness and self- preservation. I was certain this was a mold
maker’s error, but the few BT-8 photos on GOOGLE images confirmed it sat right
up there in the teacher’s face.
The overturn
protection pylon between the cockpits must be lowered or it will hit the canopy.
This is a strange structure for a trainer, or any airplane, as it blocks the
rear seater’s forward view and prevents him from seeing what the guy in front is
up to. Keeping a close eye on your student is critical for an instructor’s
teaching effectiveness and self- preservation. I was certain this was a mold
maker’s error, but the few BT-8 photos on GOOGLE images confirmed it sat right
up there in the teacher’s face.
The canopy is vacuformed. Resin demands it. LF tried cast epoxy windows in several issues but the results were – well – deplorable. Thick. Rough. Yellow. Opaque. Melt-sucked acetate is no reason to turn up a nose at the opportunities of this medium. The “How To” section of this site holds my discourse on the care, feeding, forming, and fixing of vacanopies. Those in the BT-8 kit are among the clearest and best fitting I’ve run into. I cut, trimmed, masked, painted, and Future-coated them. Masking was done with left over kabuki paper from a sheet of Peewit masks, which is the same stuff of which is made Tamiya Tape. The technique is easier than imagined; as long as no expectation is harbored of covering each window pane with a precisely cut rectangle. Use overlapping sections.
At the
Everything-Costs-a-Dollar Store I blundered upon a nifty glue for fastening
transparencies. It’s a water-clear gel of indeterminate chemical composition
that shrinks and dries to a semi-rubbery but tenacious set. It comes in a 4-pack
of other craft glues which, while useful, appear little different from standard
PVA (Elmer’s white stuff). In addition to sticking canopies in place, it is
useful for caulking gaps and can be coaxed into spanning a window opening of
perhaps a centimeter square, drying to a thin transparent film which can be left
as a finished window pane or serve as a base for clear epoxy. Don’t try coating
it with Future or other acrylic, as these formulas dissolve it. At ¼ of a buck
it beats Testors Clear Pa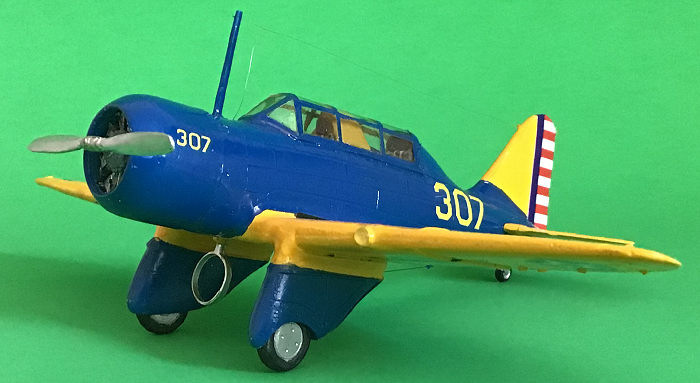 rts
Cement, Micro Crystal Clear, and other exotic window-maker-wannabe’s.
rts
Cement, Micro Crystal Clear, and other exotic window-maker-wannabe’s.
Remaining appurtenances went on without causing particular commotion. Mention must be made of the superb engine casting which clearly shows cylinder fins, crankcase bolts, and free-standing push rod tubes. Try that with melted styrene. I assumed freeing the DF loop antenna from its plug would result in disaster and made one out of Evergreen strip, but the original cut away easily and looked much better.
A search through the spare parts box for a suitable 2-blade prop proved fruitless, but the resin blades and hub cleaned up and assembled sans fuss.
Neither was a scratch built antenna mast necessary, as the kit supplied part sanded easily to shape and withstood the tension of the wire strung from the tail fin. A belly aerial of stainless surgical suture completed the project.
| CONCLUSIONS |
See – nothing at all to be afraid of.
24 May 2019
Copyright ModelingMadness.com
If you would like your product reviewed fairly and fairly quickly, please contact the editor or see other details in the Note to Contributors.
Back to the Main Page Back to the Review Index Page Back to the Previews Index Page