| KIT #: | ? |
| PRICE: | $22.00 MSRP |
| DECALS: | One option per aircraft (two included, the other an F4B-4) |
| REVIEWER: | Michael Stanley "Wildcat" |
| NOTES: | Reboxing of Monogram kit |
| HISTORY |
 While the Boeing P-12 was the F-16 of the
early 1930’s this sleek little bipe was the F-15 Eagle of its time. Not sure how
well these guys would have done in a real shootin’ war, but they served very
well as flying billboards for the USAAC. With their art deco markings and
landing gear legs complete with taloned “spats” they were the Thunderbirds of
their day. Only 46 of the P-6E version were built according to my ancient
Profile Publications which I guess is why they only seem to be in the ferocious
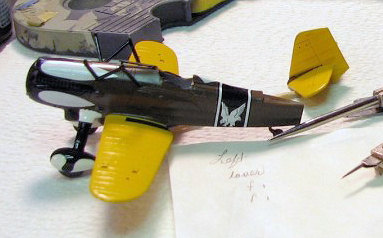
“Snow Owl” markings of the 17th Pursuit Group based at Selfridge
field.
While the Boeing P-12 was the F-16 of the
early 1930’s this sleek little bipe was the F-15 Eagle of its time. Not sure how
well these guys would have done in a real shootin’ war, but they served very
well as flying billboards for the USAAC. With their art deco markings and
landing gear legs complete with taloned “spats” they were the Thunderbirds of
their day. Only 46 of the P-6E version were built according to my ancient
Profile Publications which I guess is why they only seem to be in the ferocious
“Snow Owl” markings of the 17th Pursuit Group based at Selfridge
field.
Powered by the mighty 700 hp Curtiss Conqueror engine they could reach 200 mph and were a worthy successor to the Curtiss R3C flown by Jimmy Doolittle a few years earlier, who won the 1925 Schneider Trophy race for seaplanes before taking a top secret assignment to fight “Porco Rosso” in the Adriatic. (If you don’t believe me, google it)
| THE KIT |
This kit was originally released by
Monogram in the early 1970’s. It has been rereleased by Accurate Miniatures in a
“combo” (no fries or a drink however) with the Boeing F4B-4. As far as I can
tell the molds are unchanged from the original release. The fuselage has a mix
of raised and engraved detail which looks very good in this scale. There is no
cockpit detail which left room for a small firecracker to slide in, a common end
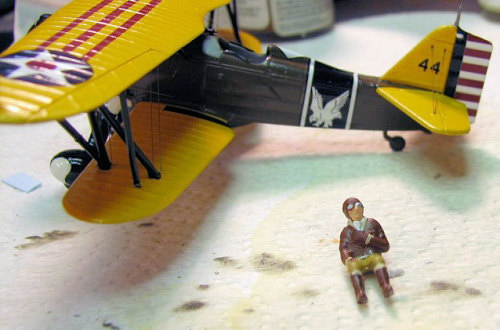
to these kits back then. The pilot figure is pretty well detailed even to the
silk scarf. 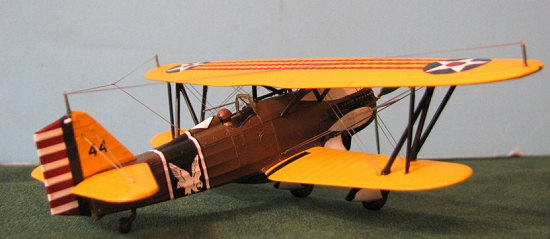 The one in my kit apparently had been overweight at some time
because he had a huge hole in his mid section from a botched gastric bypass! The
fabric effect on the wings is a bit overdone and could probably benefit from
some Mr. Surfacer if you are really after an accurate look. At least there are
no engraved decal placements common in kits from that era.
The one in my kit apparently had been overweight at some time
because he had a huge hole in his mid section from a botched gastric bypass! The
fabric effect on the wings is a bit overdone and could probably benefit from
some Mr. Surfacer if you are really after an accurate look. At least there are
no engraved decal placements common in kits from that era.
As best as I can recall the instructions seems to be a copy of the original with text, 2 or 3 exploded views and some black and white photos for the decal placement. An extra bonus from AM in this kit is a small printed cardboard piece with a chunk of Marston mat and a small aircraft carrier deck piece for the F4B-4. I don’t think that Marston mat was available when the P-6E was flying but it is probably intended for the younger modeler who won’t be so worried about absolute accuracy.
I know that you can pick these kits up on ebay for less than I paid, but I actually build these things and have found that most of the time the decals in these old kits that have been stuck in someone’s attic for 35+ years are not useable. I think reissuing these old classics is probably a good business decision and hope that the new owners of Revell Monogram spit out some more. (Though your editor would probably like to see them separately and not in a two for $22.00 MSRP boxing. Ed)
| CONSTRUCTION |
Opening the bag of parts is like jumping into the Wayback Machine with Mr. Peabody and Sherman to rescue Nell (oops, sorry mixing my cartoons, er, metaphors here). I vaguely recall building this kit and his little USN cousin back in the 1970’s when I knew nothing about airbrushes or filler. This time around I wanted to try for a more accurate representation using 40+ years of modeling experience. (Hope that “40+ years of modeling experience” is not the best they can come up with for my epitaph).
 I started by digging around in my spares
box for something resembling a cockpit, but since I mostly build 1/48th
I really couldn’t come up with much. I also told myself that my rigging and
finish would be so awesome that none of my club members would bother to look in
the cockpit. Therefore I cranked up the AB and squirted on some Floquil Old
Silver.
I started by digging around in my spares
box for something resembling a cockpit, but since I mostly build 1/48th
I really couldn’t come up with much. I also told myself that my rigging and
finish would be so awesome that none of my club members would bother to look in
the cockpit. Therefore I cranked up the AB and squirted on some Floquil Old
Silver.
The fuselage goes together very well requiring filler only on the bottom surface. The top of the fuselage is a separate piece which falls on panel lines so there is no filling required there. I will let you in on one of my modeling building “secret weapons” now. As soon as you can fold a bit of masking tape over the little tail wheel to keep from snapping it off and inadvertently feeding it to the carpet monster. I also use this trick on the little aerials on fin tops and it really cuts down on the swear words at your hobby desk. With this kit you also always need to be careful around the cabane struts. They are pretty sturdy, but knocking one of them off will really complicate later assembly.
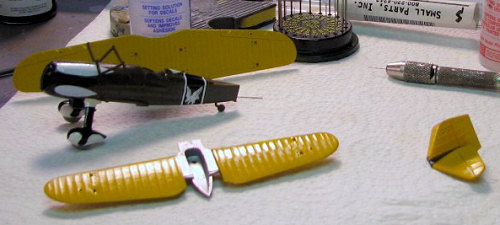
The wings and tail are all one piece and require only a little time with a sanding stick. Back in the day we probably scraped them off with a thumbnail, if at all. Really advanced modelers would sneak their mom’s metal fingernail file, risking the wrath of who was then our SWMBO (“Wait ‘til your father gets home!”)
 When building biplanes, I usually find
that they are best built and painted in sub assemblies. With the fuselage filler
dry and sanded I shot on some of my dwindling supply of Aeromaster OD # 41. The
wings and tail assembly received Floquil “Reefer Yellow” which I find gives very
good coverage. In the days before airbrushes we brushed on gloss yellow which
took forever to dry and always posed a problem of where to put it while drying
so that the ornery little sister wouldn’t come in and touch it.
When building biplanes, I usually find
that they are best built and painted in sub assemblies. With the fuselage filler
dry and sanded I shot on some of my dwindling supply of Aeromaster OD # 41. The
wings and tail assembly received Floquil “Reefer Yellow” which I find gives very
good coverage. In the days before airbrushes we brushed on gloss yellow which
took forever to dry and always posed a problem of where to put it while drying
so that the ornery little sister wouldn’t come in and touch it.
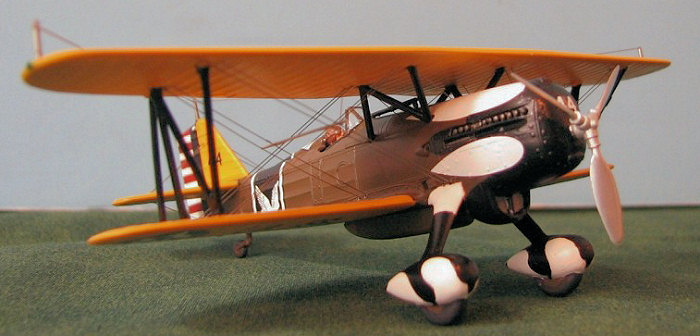
The landing gear legs have faint lines for the talons which I contemplated masking but finally hand brushed white, using Testors white from the little square bottles just for the nostalgia. Once they had dried overnight (we had no concept of “dry overnight” in the 70’s) I then brushed painted the black including the engine cowl areas. It actually turned out very well.
Once this enamel was dry I shot on a coat or two of the “wonder drug” Future to gloss things up for decaling and protect the fairly fragile yellow from getting scratched.
Next came pre-drilling holes for the rigging. I didn’t drill all the way through the wings, but rather just made a small hole to be used later as a locating place for the .005 stainless wire I use when rigging. The holes in the fuselage go all the way through which gives you a good way to cut the wires a little long and then slide into these holes.
 If you continue assembly at this point
there may be problems getting fat fingers into the small gaps available between
the wings so I suggest decaling the fuselage at this point. The decals are by
Cartograf in this AM reissue and go down very well with the standard caveat
about Cartograf decals – try to get them in the right place the first time
‘cause they don’t want to slide. I also had to employ another secret weapon from
the 20th century for some of them, spit. You old guys know what I am
talking about --- spit was all we had before Micro Set and Sol.
If you continue assembly at this point
there may be problems getting fat fingers into the small gaps available between
the wings so I suggest decaling the fuselage at this point. The decals are by
Cartograf in this AM reissue and go down very well with the standard caveat
about Cartograf decals – try to get them in the right place the first time
‘cause they don’t want to slide. I also had to employ another secret weapon from
the 20th century for some of them, spit. You old guys know what I am
talking about --- spit was all we had before Micro Set and Sol.
Another tip from my bag of tricks is the use of coffee filters in modeling. These things are great when it comes to wicking away liquid when you have decals in the correct position. They have no lint like a paper towel. They also work very well as a very fine sanding medium. Try them on MM buffing metalizer sometime.
Next up is attaching the wings and tackling the rigging. With biplanes the level of difficult comes down to are the cabanes attached to the fuselage or separate. These are molded as part of the fuselage so attaching the wings is pretty easy. Before gluing on the top wing I added the little bracing wires which run from the top of the cabanes to the engine deck. I also take as many measurements as I can before attaching the upper wing using dividers. It is a good idea to measure both sides front and back because sometimes one side may be a little off. Once the cabanes were dry I spread the wings slightly and added the interplane struts. These are molded a little funky because they slant at a fairly acute angle but the fairing at the tops are flat. Once everything is in place some gap filling CA will take care of this.
 If I rigged this kit originally I
probably used black thread “filched” from my mother’s sewing box. I would have
just twisted it around the ends of the struts and pulled it taut. That’s what
passed for authenticity in the 1970’s. Now for rigging I use .005” stainless
wire from smallparts.com. This works out to .036” in 1/72nd scale which is about
1/3 of an inch. The original wire was probably flat like RAF wires used in WWI
by the British. No way I know of to replicate this in this small a scale so
round will have to do.
If I rigged this kit originally I
probably used black thread “filched” from my mother’s sewing box. I would have
just twisted it around the ends of the struts and pulled it taut. That’s what
passed for authenticity in the 1970’s. Now for rigging I use .005” stainless
wire from smallparts.com. This works out to .036” in 1/72nd scale which is about
1/3 of an inch. The original wire was probably flat like RAF wires used in WWI
by the British. No way I know of to replicate this in this small a scale so
round will have to do.
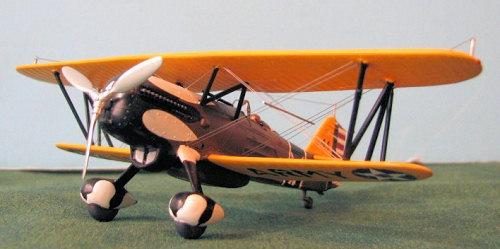
It really isn’t that difficult to rig with this method. The pre-drilled holes and pre-measuring help a lot. I use Testors clear glue for rigging rather than CA, because I have found the CA will “frost” sometimes. Also, the clear stuff is kind of flexible. I put a dab on one end, stick that in a hole and then use gravity to help the other end “fall” into its hole. Work from inside to outside and do it in 3 or 4 sessions. I have done this a few times before, so this kit took me about an hour over 4 sessions to rig. To me, the rigging on a biplane is what really defines them, so the extra work is worth it.
At this point I realized that the cockpit was really pretty vacant so I painted up the little pilot dood after some surgery to repair the gaping wound in his stomach.
All that’s left is the odds and ends. I sprayed the whole thing with some MM semi-gloss to make it look a little less like a toy. Then the windscreen was glues on with Testors clear glue. Airbrushed the prop with MM buffing aluminum and then buffed it out with the above mentioned coffee filter and a q-tip. Added the antenna masts with straight pins cut to length. The antenna is EZ Line to give a slightly different look from the rigging. The navigation lights are Testors clear glue (once again) dabbed on in two or three layers and then painted with Gunze clear red and green. The spreader bars on the wing rigging are .015 diameter Evergreen rod.
| COLORS & MARKINGS |
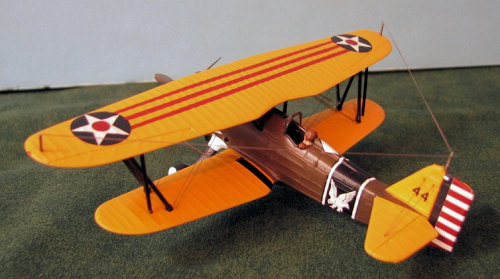
Wings: Floquil “Reefer yellow”
Fuselage: Aeromaster OD #41 (A browner shade than WWII OD)
Markings: Kit decals with “aftermarket” red stripes on the top wing cut from spare decals in my decal dungeon.
| CONCLUSIONS |
About 15 hours over a week on a kit that I probably spent 2 hours building with tube glue 40 years ago. Back then I was always a little dissatisfied with how they turned out because I didn’t have the tools and the skills that the builders who made them for the box covers did. This one looks like a real P-6E shrunk down 72 times to me so I am very happy with it. I don’t build for contests but I always strive to do my next kit just a little better than the last.
Now it is time to do a few loops and rolls to impress the crowds. Some things never change.
| REFERENCES |
Profile Publications Curtiss Army Hawks.
July 2007
Copyright ModelingMadness.com. All rights reserved. No reproduction in part or in whole without express permission from the editor.
If you would like your product reviewed fairly and fairly quickly, please contact the editor or see other details in the Note to Contributors.