Aurora 1/48 P-12E
| KIT #: | 033121 |
| PRICE: | $0.79 SRP when new |
| DECALS: | One option |
| REVIEWER: | Dave Cummings |
| NOTES: | One of the “Famous Fighters” series copyright 1958 |
| HISTORY |
The Boeing Model 218 was the prototype demonstrator of an improved P-12 with an all metal fuselage and more powerful engine. The Air Corps accepted these improvements and placed an order for the type designated as the P-12E and the Navy as the F4B-3. Their original purpose fulfilled, the two Model 218 demonstrators were sold to China in hopes of generating sales there. Japan’s occupation of Manchuria in 1931 and increasing confrontations with Chinese forces had prompted the Kuomintang government to begin the creation of a Chinese Air Force.
 First Blood: Robert Short of
Tacoma, Wash, was an ex-Air Corps pilot seeking work during these depression
years described as a stunt pilot and soldier of fortune. He was hired to
demonstrate and sell Boeing fighters in China. Short had no official Chinese
mandate to engage in air combat but Chinese skies were full of danger and he
flew his Boeing Model 218 with loaded guns. It is believed Short was disturbed
by the carnage he witnessed in the indiscriminate bombing of Shanghai by the
Japanese, and was infuriated the Chinese Air Force did nothing to stop it. In
February 1932 over Shanghai he attacked three Nakajima A1N2 fighters from the
carrier Hosho. In a swirling dogfight Short damaged one of the fighters wounding
its pilot and forcing them to withdraw. To the beleaguered Chinese onlookers
this display of resistance was a rare sight and he was hailed a hero by the
Shanghai press. On 22 Feb, 1932 Short was ferrying his Boeing from Shanghai to
Nanking when he encountered a group of three Mitsubishi B1M bombers escorted by
three fighters from the carrier Kaga. Undaunted by the odds, Short attacked the
Japanese formation shooting up the lead bomber wounding the gunner and killing
the navigator. But in forcing the bombers to withdraw he was trapped by the
escorting A1N2 fighters and shot down in flames by Lt. Nakiji Ikuta. After his
death, Short was so venerated by the Chinese people that they erected a monument
to him in Shanghai where it stands today. Robert Short was the first American
killed in combat with Japanese forces. He was also the very first aerial victory
to be recorded by the Imperial Japanese Navy.
First Blood: Robert Short of
Tacoma, Wash, was an ex-Air Corps pilot seeking work during these depression
years described as a stunt pilot and soldier of fortune. He was hired to
demonstrate and sell Boeing fighters in China. Short had no official Chinese
mandate to engage in air combat but Chinese skies were full of danger and he
flew his Boeing Model 218 with loaded guns. It is believed Short was disturbed
by the carnage he witnessed in the indiscriminate bombing of Shanghai by the
Japanese, and was infuriated the Chinese Air Force did nothing to stop it. In
February 1932 over Shanghai he attacked three Nakajima A1N2 fighters from the
carrier Hosho. In a swirling dogfight Short damaged one of the fighters wounding
its pilot and forcing them to withdraw. To the beleaguered Chinese onlookers
this display of resistance was a rare sight and he was hailed a hero by the
Shanghai press. On 22 Feb, 1932 Short was ferrying his Boeing from Shanghai to
Nanking when he encountered a group of three Mitsubishi B1M bombers escorted by
three fighters from the carrier Kaga. Undaunted by the odds, Short attacked the
Japanese formation shooting up the lead bomber wounding the gunner and killing
the navigator. But in forcing the bombers to withdraw he was trapped by the
escorting A1N2 fighters and shot down in flames by Lt. Nakiji Ikuta. After his
death, Short was so venerated by the Chinese people that they erected a monument
to him in Shanghai where it stands today. Robert Short was the first American
killed in combat with Japanese forces. He was also the very first aerial victory
to be recorded by the Imperial Japanese Navy.
| THE KIT |
This stirring bit of combat history has been
brought to light again recently by the offering of a die cast replica of Short’s
Boeing. This is the kind of thing that gets me inspired to build a model.
Something to represent historical events and combat exploits, not so much the
desire to build any particular model kit or aircraft type. I had no P-12E in my
little stash, except for that old Aurora kit which I pulled out to look over
again. I bought it on eBay some years ago for the bit of nostalgia in perusing
an old kit I had experienced in my youth. That and the certain knowledge I would
one day get rich with a valuable collector item. But apparently my kno wledge of
collector kit values is not very astute such as box condition and such. I
started to put it back but, well, I do need a P-12E. But these old kits are so
inaccurate, to prove my point (to myself) I retrieved my Classic Airframes F4B-4
for comparison. I matched the Aurora top wing against the F4B. To my surprise it
proved very close in outline and dimension. Same with the tail planes. Fuselage
is shaped a little odd but dimensions are good. Ok then, you are a model kit and
I am a modeler, let’s do this thing.
wledge of
collector kit values is not very astute such as box condition and such. I
started to put it back but, well, I do need a P-12E. But these old kits are so
inaccurate, to prove my point (to myself) I retrieved my Classic Airframes F4B-4
for comparison. I matched the Aurora top wing against the F4B. To my surprise it
proved very close in outline and dimension. Same with the tail planes. Fuselage
is shaped a little odd but dimensions are good. Ok then, you are a model kit and
I am a modeler, let’s do this thing.
First the bad news. The yellowed and curled up
decals were way past usable, but I didn’t need those anyway. The tops of the one
piece wings have those pronounced hills and valleys popular in the era to
simulate fabric covered wings, (Jeez, I’m from an “era”). The wing bottoms have
no engraved detail at all, except for the ailerons which have a quite well done
corrugated metal skinning effect correct for this aircraft. The top of the
ailerons however are just an extension of the hill and valley fabric effect. The
rear half of the fuselage scales a little fat and the cockpit opening may be a
tad oversize. The fuselage is covered with that golf ball sized riveting popular
in the day to simulate metal covered structures. As far as the accuracy of panel
lines and other surface detail, we won’t go there. The one piece engine is…well…
it’s some kind of 9 cylinder radial. The nose fairing covers up much of it but
the kit’s fairing is wrong. There are no exhausts and the propeller looks like a
tail rotor from some helicopter. The landing gear is missing the center V brace
and is a tad short but the wheels are OK. The fuselage gun troughs are only
vaguely hinted at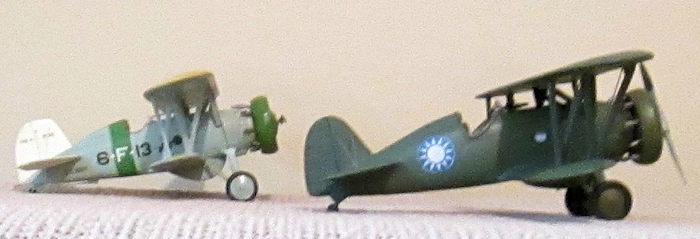 . Interesting in that the kit’s telescope sight has a long rod
molded to it labeled in the instructions as a “machinegun.” The stabilizers have
a well done corrugated surface, but the rudder is engraved with the rudder
stripe decal design. The cockpit is rudimentary at best.
. Interesting in that the kit’s telescope sight has a long rod
molded to it labeled in the instructions as a “machinegun.” The stabilizers have
a well done corrugated surface, but the rudder is engraved with the rudder
stripe decal design. The cockpit is rudimentary at best.
The good news. As mentioned the kit’s dimensions and shape while not totally accurate, at least make it look like a P-12. Handling the parts you feel how hefty and solid the thick hard plastic is compared to today’s kits. It’s the difference between modern automobiles built lightly for fuel mileage of beer can thick sheet metal and plastic, and the heavy gauge steel of a 57 Buick built like a tank. These kits were designed to be built by the typical modeler of the day, twelve year old boys. So parts count is low and assembly is relatively easy. I gazed over at the Classic Airframes F4B and shuddered at the memories of that build. Except for the rudder engraving there are no other engraved decal placement guides to eliminate. This bit of luck is unusual in that they were so prevalent on this series of kits. Instructions are adequate for so simple a kit.
| CONSTRUCTION |
I accepted the kit for what it was and decided to just have fun with it. Isn’t that why most of us build models, as a fun hobby? But I would apply some basic modeling skills obtained over the decades to correct some of the obvious flaws, or at least tone them down some to be less obvious. So, where to start? I know, the cockpit.
The cockpit consists of a floor board with molded on rudder pedals, a kind of seat, and an instrument panel. None of which replicate the actual items. The original idea is to have you fill the space with the provided pilot figure. I glued the seat to the floor and painted all the inside stuff aluminum. I painted the crude instrument panel, hinting at some dials, and glued it in place. I added a seat belt decal and some scrap for a control stick, called it good, and glued the assembly to a fuselage half. Then the fuselage halves were glued together. Good fit, no gaps, fuselage done. It’s the 50’s man, are you hep to it.
Now time to start sanding (not fun). I sanded down
those rivets then got out the scribing tool to repair sanded out bits of panel
lines. The insignia relief on the rudde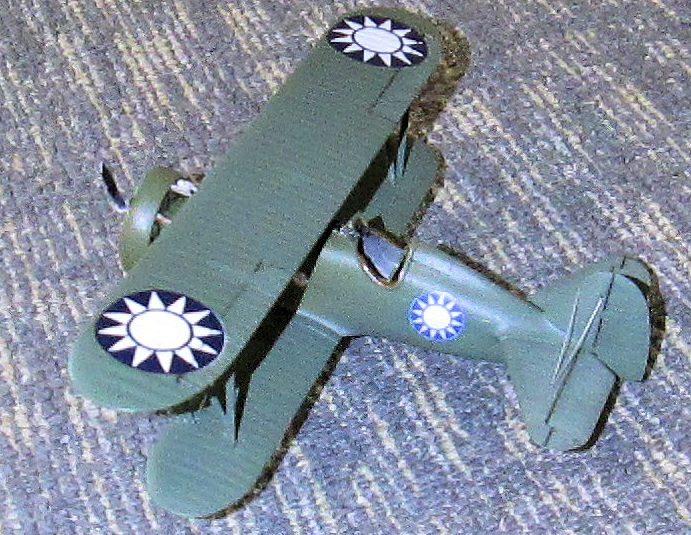 r was sanded off and using the scribing
tool and a straight edge I scratched in some corrugation. For the gun troughs I
matched a drill bit to the F4B’s troughs. With a hand drill set on a slower
speed I drilled a hole to represent the MG housing opening then lay the bit
parallel along the trough and began routing out the trenches. This worked due to
the thick tough plastic. When satisfied I sanded them smooth. A large slot in
the belly for the display stand has to be filled (unless you want to use the
stand, that’s cool). The hole to mount the telescope sight has to be filled and
moved back some. Scrap plastic and thick gap filling super glue was used for
filler. After seam clean up and fine sanding I packed the cockpit with tissue
and gave it a coat of primer to highlight any rough areas needing more work.
r was sanded off and using the scribing
tool and a straight edge I scratched in some corrugation. For the gun troughs I
matched a drill bit to the F4B’s troughs. With a hand drill set on a slower
speed I drilled a hole to represent the MG housing opening then lay the bit
parallel along the trough and began routing out the trenches. This worked due to
the thick tough plastic. When satisfied I sanded them smooth. A large slot in
the belly for the display stand has to be filled (unless you want to use the
stand, that’s cool). The hole to mount the telescope sight has to be filled and
moved back some. Scrap plastic and thick gap filling super glue was used for
filler. After seam clean up and fine sanding I packed the cockpit with tissue
and gave it a coat of primer to highlight any rough areas needing more work.
The wings were tackled next. I ground those hills with a course emery board then smoothed it up with progressively finer sanding films. Grinding it down to completely eliminate the valleys would have made the wing too thin so I left that. It’s a compromise, not an accurate depiction but under paint it toned down the excess a bit and looks much better. Like the rudder I sanded the tops of the ailerons and scribed in some corrugation. Then final sanding, priming, and touch up. At the root of the lower left wing is a nicely molded little tank with filler cap for something, shouldn’t be there cut it off. I added a venturi tube to the right side. The cowl ring is too thick, the engine is not great, and the nose fairing is far from accurate. I trimmed the fairing up some and drilled some cooling holes in the piece to make it look more the part. This is the weakest part of the kit and I wished I had a spare F4B or P-26 engine and cowl to replace the whole thing with, but I didn’t. After painting and assembling it was set aside.
After drilling holes for rigging with a pin vise I glued the lower wings and tail planes on. Big positive locating tabs and slots and the parts clunk into place with no gaps, like shifting gears in a 53 GMC. The landing gear struts were attached and the missing center V brace fabricated from scrap. The gear mounts solidly but required filler around the attachment point and more Mr Primer-Surfacer and sanding. The horizontal stabilizer braces are not provided so had to fabricate those. The cabane struts were attached and the interplane struts glued to their slots in the lower wings. I placed the plane upside down on the top wing to line all the struts up. Again big positive locating holes makes this one of the easiest N-strutted airplane kits I have assembled. With the glue dried I removed the top wing. This is the point in biplane construction that is optimal to paint.
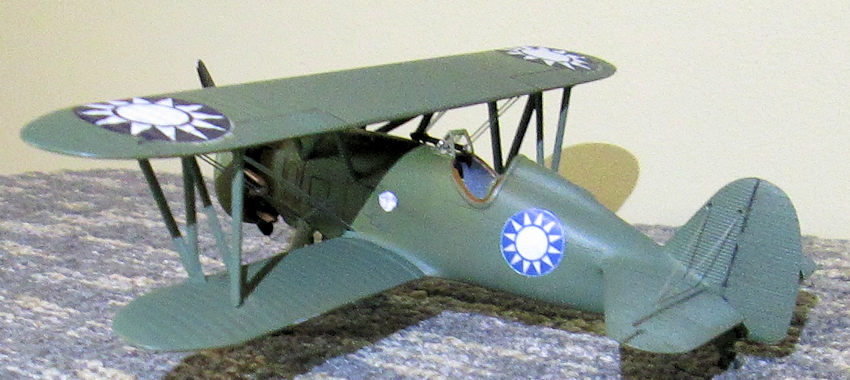
| COLORS & MARKINGS |
The aforementioned
die-cast replica and
most other depictions of Short’s Boeing found on the internet show it as OD
fuselage with yellow wings and stabilizers and yellow struts and landing gear.
This is because the only known photographs of this aircraft are while it was
still stateside as serial X66W. It is unlikely that after buying the plane the
Chinese flew it with the American serial. In LT Ikeda’s combat report he
described shooting down a single seat biplane, overall dark green with large
Chinese stars on wings and fuselage. There is no photographic evidence, but this
seems the more likely scheme to me of Chinese Air For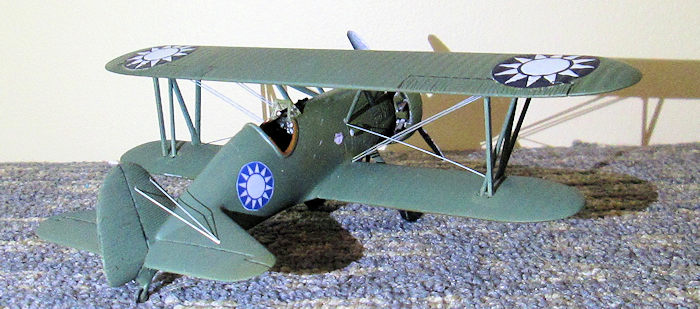 ce property. I further
speculated that since the forward half of the fuselage was O.D. they probably
did not bother with all the masking required in this area and left as is. So I
painted the fuselage US Olive Drab. As the hump behind the headrest was
originally yellow I painted the rear half of the fuselage and everything else
dark green to depict Chinese Forest Green (whatever that is?). For this I used
Model Master Khaki Green enamel because…. that is what was on hand. The heavy
flat green is a plus for hiding many of the old girl’s wrinkles. Next I applied
a black acrylic wash to pop the details, such as they are. I kept weathering to
a minimum. I surmise that as a demonstrator the airplane was probably kept in
spiffy condition and it didn’t survive very long in China anyway. Then a gloss
clear coat for decaling.
ce property. I further
speculated that since the forward half of the fuselage was O.D. they probably
did not bother with all the masking required in this area and left as is. So I
painted the fuselage US Olive Drab. As the hump behind the headrest was
originally yellow I painted the rear half of the fuselage and everything else
dark green to depict Chinese Forest Green (whatever that is?). For this I used
Model Master Khaki Green enamel because…. that is what was on hand. The heavy
flat green is a plus for hiding many of the old girl’s wrinkles. Next I applied
a black acrylic wash to pop the details, such as they are. I kept weathering to
a minimum. I surmise that as a demonstrator the airplane was probably kept in
spiffy condition and it didn’t survive very long in China anyway. Then a gloss
clear coat for decaling.
I fished in my decal spares box and came up with some old Revell P-40B sheets which fit the bill for the “large Chinese stars” reported by Ikeda. Of interest, the newest releases of the old Revell P-40 have “updated” the decals by changing the dark blue of the Chinese stars to the sun faded light blue color so popular now as the “correct” color…WRONG! I used the older dark colored ones for the wings. I had to print the smaller ones for the fuselage using the Testor’s Decal System and ink jet photo printer. The photos of W66A show a small Boeing logo each side of the forward fuselage. If my assumption about not painting over this area is correct those logos would have remained. I sized some images and printed these (believe me decal makers I am no threat to you). The old Revell decals needed much Micro-Sol to settle down into those wing valleys, then a final coat of Testor’s Clear Flat Acrylic.
| FINAL CONSTRUCTION |
The mysterious
long rod molded to the telescopic sight has to be cut off. The windshield does
not fit properly and the picture of the completed model on the instructions show
it positioned too far forward. T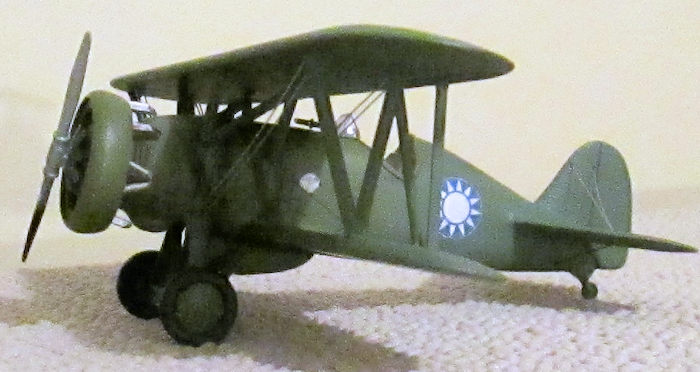 here is coaming detail around the front of the
cockpit opening that has to be ground off so the windshield fits flush with the
front of the cockpit opening. I used 012 guitar string for wing rigging and 008
music wire to rig the stabilizers. Guitar string is very stiff. Cut it to size
with wire cutters, dip each end in fast setting super glue, start one end in the
deepest hole then secure the other end in its hole, easy.
here is coaming detail around the front of the
cockpit opening that has to be ground off so the windshield fits flush with the
front of the cockpit opening. I used 012 guitar string for wing rigging and 008
music wire to rig the stabilizers. Guitar string is very stiff. Cut it to size
with wire cutters, dip each end in fast setting super glue, start one end in the
deepest hole then secure the other end in its hole, easy.
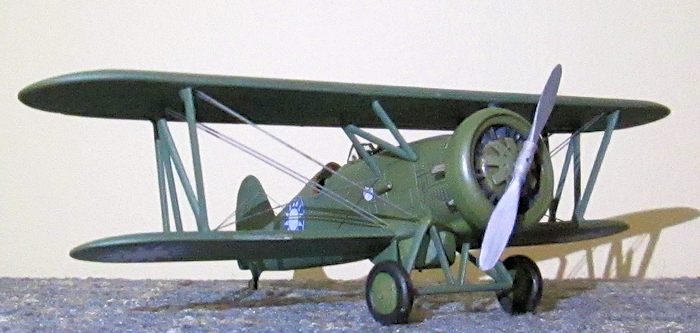
The propeller came from the big box of stuff. Not sure what it came off of originally but it looks the part. The 218 still used the individual exhaust ejectors so I fabricated some from scrap plastic and glued inside the cowl for each cylinder. I painted these steel and touched up with some thinned rust. I recommend adding exhausts because the shape of the kit’s nose behind the cowl ring is a bit suspect and these shade that area a bit. Lastly I attached the completed engine / cowl ring assembly.
| CONCLUSIONS |
I have admittedly speculated about the paint and markings on Short’s Boeing as to what I surmise it might look like. There are no photographs of the aircraft in China that I am aware of to prove it right or wrong. Despite all the sanding and scribing this was still an easy and enjoyable build for a biplane kit. If you want to introduce a novice to biplane models this old Aurora kit would be a good bet. Last I looked you can still find one on ebay for about the same price as the Classic Airframes kit. If your goal is a dead on accurate P-12 of course this would not be the kit to do that. But at display case range, the old girl looks quite respectable next to the Classic Airframes F4B. Of course, I had to give up any prospect of getting rich in the collector kit market.
| REFERENCES |
internet: Wikipedia, Aviation of Japan, Historic Wings, Hobby Master Die Cast Models.
If you would like your product reviewed fairly and fairly quickly, please contact the editor or see other details in the Note to Contributors.