| KIT #: | 72005 |
| PRICE: | ~$21.00 |
| DECALS: | Two options |
| REVIEWER: | Brian Baker |
| NOTES: | Resin kit of an obscure aircraft |
| HISTORY |
The
Breda 27 was not a particularly successful airplane, and after being rejected by
the Reggia Aeronautica, 18 were ordered by the Chinese, of which 11 were
delivered. Obviously influenced by the Am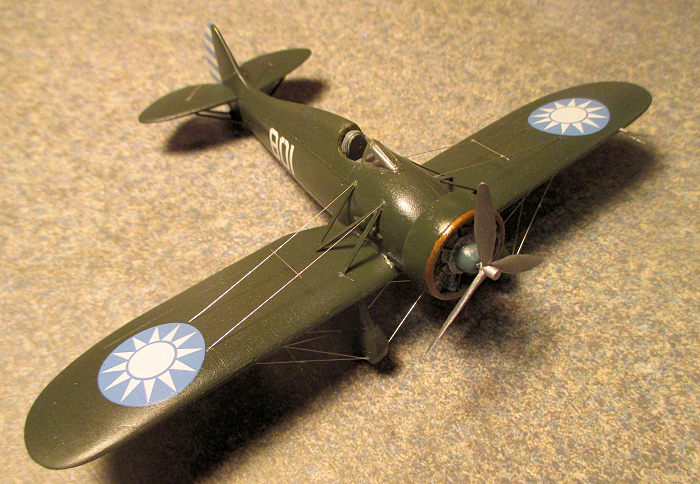 erican
Boeing P-26, the aircraft entered service in 1936, and served in Canton with the
29th
Pursuit Squadron. Some were used against the Japanese after their 1937 invasion,
and at least one victory over a Navy Mitsubishi A5M2 was recorded. The first
prototype was acquired by the Reggia Aeronautica, and it served with the 86th
Squadriglia, 5th
Stormo Assalto, until December, 1937.
erican
Boeing P-26, the aircraft entered service in 1936, and served in Canton with the
29th
Pursuit Squadron. Some were used against the Japanese after their 1937 invasion,
and at least one victory over a Navy Mitsubishi A5M2 was recorded. The first
prototype was acquired by the Reggia Aeronautica, and it served with the 86th
Squadriglia, 5th
Stormo Assalto, until December, 1937.
The kit instructions are very basic, consisting of four half-pages, which include a very brief history in English and Czech, a very useful parts diagram, two pages of assembly instruction drawings, and one page showing the two different aircraft for which decals are provided. Other than the reference to the overall color scheme of “olive green”, no color information is provided.
| THE KIT |
 Assembly
of this resin kit is rather straightforward, and the kit is a very basic one.
The resin casting is well done, with good detail, and although there are some
cockpit parts provided ( floor, seat, control stick, instrument panel and rear
cockpit bulkhead) some additional trimming and sanding will be needed to achieve
acceptable standards. The fuselage halves go together without mounting tabs, and
all wing and tail units butt fit onto the fuselage. Some struts are provided for
the wings and tail unit, and the landing gear units are cast in one piece. The
prop consists of a hub and three individual blades. The engine is in one piece,
and the cowling fits over it. A vacuform windshield is also included. The
directions call for a wing with no dihedral, although other references show a
slight dihedral angle.
Assembly
of this resin kit is rather straightforward, and the kit is a very basic one.
The resin casting is well done, with good detail, and although there are some
cockpit parts provided ( floor, seat, control stick, instrument panel and rear
cockpit bulkhead) some additional trimming and sanding will be needed to achieve
acceptable standards. The fuselage halves go together without mounting tabs, and
all wing and tail units butt fit onto the fuselage. Some struts are provided for
the wings and tail unit, and the landing gear units are cast in one piece. The
prop consists of a hub and three individual blades. The engine is in one piece,
and the cowling fits over it. A vacuform windshield is also included. The
directions call for a wing with no dihedral, although other references show a
slight dihedral angle.
| CONSTRUCTION |
 After
trimming the excess resin, the model should be superglued together. I would
advise drilling small holes for mounting pegs, especially for the wings. I had
to use quite a bit of filler for the fuselage assembly, and the wings went on
easily. I decided against trying to trim the very delicate strut assemblies,
using scratchbuilt units instead. I used a prop from the spares box, similar to
one I had from a Frog Fokker D.XXI. Remember that the prop rotates British
style. After basic assembly, I added the wing struts, tail braces, and the
landing gear, which required a bit of trimming and smoothing out.
After
trimming the excess resin, the model should be superglued together. I would
advise drilling small holes for mounting pegs, especially for the wings. I had
to use quite a bit of filler for the fuselage assembly, and the wings went on
easily. I decided against trying to trim the very delicate strut assemblies,
using scratchbuilt units instead. I used a prop from the spares box, similar to
one I had from a Frog Fokker D.XXI. Remember that the prop rotates British
style. After basic assembly, I added the wing struts, tail braces, and the
landing gear, which required a bit of trimming and smoothing out.
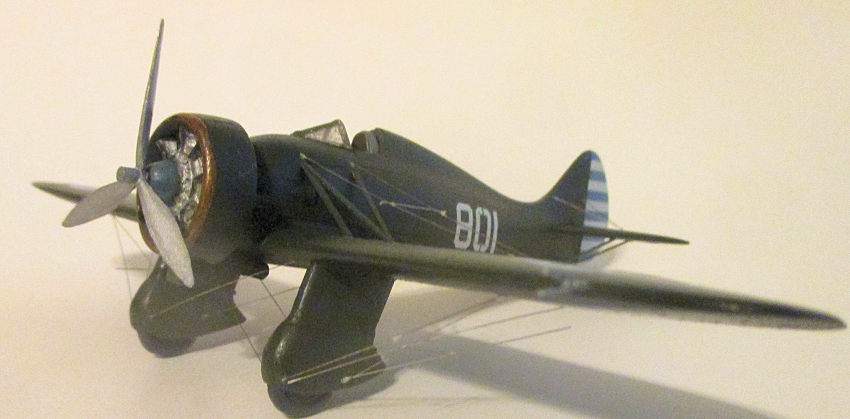
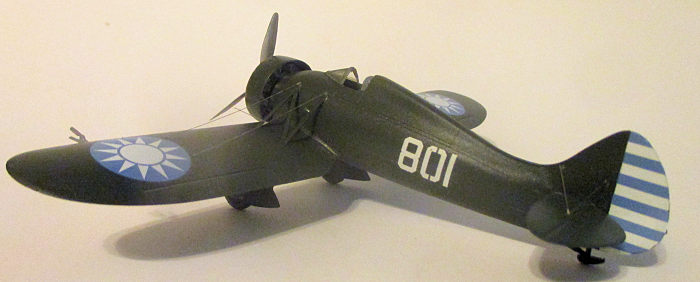
The plane was painted in one basic color, with only the engine crankcase colored medium grey, the cylinders and prop silver, and the cowl front in a bronze color. After a coat of glosscote, I applied the decals, and then gave it another coat of gloss. The airplane has wire rigging, and I used electronic wire for this. The decals went on smoothly, and a very nice little model resulted.
| CONCLUSIONS |
For a resin
kit, this was a fairly easy model to build, and its rarity means that there will
probably not be an injection molded kit of this aircraft in our lifetimes, so
this appears to be the only show in town. It is c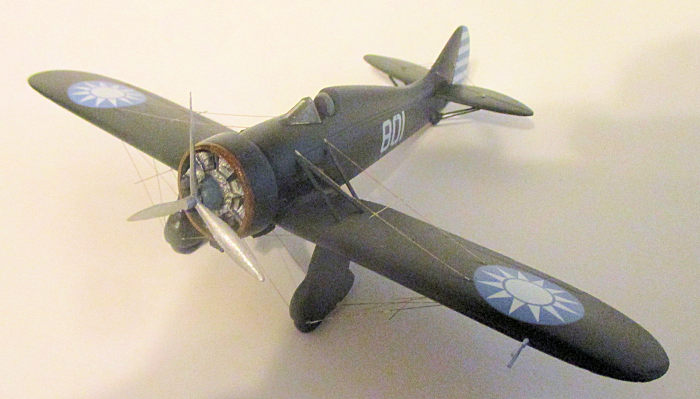 ertainly
worth getting one, as it fills a gap in the 1/72 scale fighter display. I
suspect that this kit is long out of production, but it was listed in Burns’
Model Guide, 2004 Issue, and it is probably still available at swap meets. I
don’t know how long I’ve had the kit in my stash. It was produced by Modelmex,
in the Czech Republic. Highly recommended. Get one if you can find one.
ertainly
worth getting one, as it fills a gap in the 1/72 scale fighter display. I
suspect that this kit is long out of production, but it was listed in Burns’
Model Guide, 2004 Issue, and it is probably still available at swap meets. I
don’t know how long I’ve had the kit in my stash. It was produced by Modelmex,
in the Czech Republic. Highly recommended. Get one if you can find one.
Brian Baker
16 March 2017 Copyright ModelingMadness.com If you would like your product reviewed fairly and fairly quickly, please
contact
the editor
or see other details in the
Note to
Contributors. Back to the Main Page
Back to the Review Index Page
Back to the Previews Index Page